Table of Contents
Advertisement
Quick Links
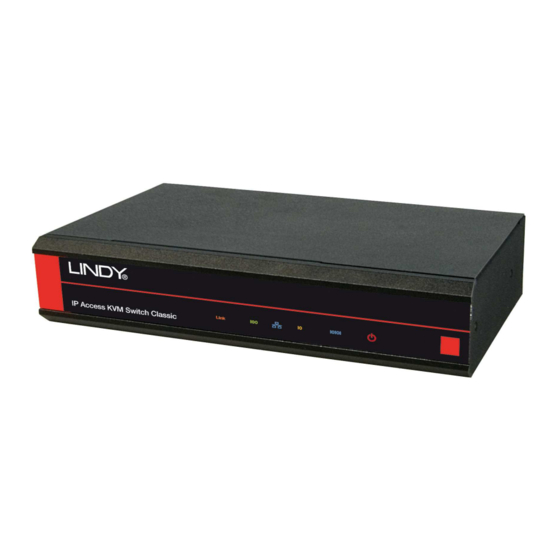
IP Access KVM Switch Classic
User Manual
LINDY No. 39415
www.lindy.com
© LINDY ELECTRONICS LIMITED & LINDY-ELEKTRONIK GMBH - FIRST EDITION (June 2008)
PREFACE
The LINDY IP Access KVM SWITCH CLASSIC features the latest and most technologically
advanced SoC (System on Chip) IP KVM solution, based on Peppercon's latest IP-KVM engine
technology.
Retaining the familiar management utilities, GUI and related software tools of its predecessor,
the CPU IP Access Switch LITE, the IP Access KVM SWITCH CLASSIC delivers an
advanced IP KVM solution whilst retaining compatibility with older models.
This manual is based on the CPU IP Access Switch LITE manual and therefore shows many
screenshots referring to this model, however, please note that although they may display a
slightly different design they fully apply to the IP Access KVM SWITCH CLASSIC too. The IP
English
Access KVM SWITCH CLASSIC may also be referred to as IP-KVM or IP Access Switch in
this manual.
Due to constant technological advances and further development, changes to this product may
be introduced without further notice.
LINDY Elektronik-GmbH, June 2008
Advertisement
Table of Contents

Related Manuals for Lindy 39415


Summary of Contents for Lindy 39415
- Page 1 PREFACE The LINDY IP Access KVM SWITCH CLASSIC features the latest and most technologically advanced SoC (System on Chip) IP KVM solution, based on Peppercon’s latest IP-KVM engine technology. Retaining the familiar management utilities, GUI and related software tools of its predecessor,...
-
Page 2: Table Of Contents
Contents 5. MENU OPTIONS ........................19 5.1 Remote Control ........................19 5.1.1 KVM Console......................... 19 1. INTRODUCTION ........................1 5.1.2 Telnet Console ......................19 1.1 Features ..........................1 5.2 Virtual Media........................21 5.2.1 Floppy Disk........................21 1.2 Package Contents ........................ 1 5.2.2 Create a CD-ROM/ISO Image .................. -
Page 3: Package Contents
1.3 System Requirements Item Description Thank you for purchasing the LINDY IP ACCESS KVM SWITCH CLASSIC. This device allows operators to monitor and access their computers from remote locations. The IP ACCESS KVM Local console side One PS/2 Keyboard, one PS/2 Mouse, one VGA monitor SWITCH CLASSIC connects to the internet, intranet, LAN or WAN using standard CAT5 or higher cable, then uses a KVM cable to connect a local KVM switch or server. -
Page 4: Connections
2.2 Connections 2.2.4 Dial up Line / Modem Connection The RS232 port of the IP ACCESS KVM SWITCH CLASSIC can either be used to connect to an external Modem i.e. to set up a dial up line connection or can be used to connect to an external RS232 managed power switch. -
Page 5: Initial Configuration Via Serial Console
3. Configuration 3.3 IP ACCESS KVM SWITCH CLASSIC Setup Tool 3.3.1 MAC Address Detection The IP ACCESS KVM SWITCH CLASSIC’s Parameter Value communication interfaces are all based on IP auto configuration none Connect the IP ACCESS KVM SWITCH CLASSIC to your computer either via a local network, TCP/IP. -
Page 6: Authentication
3.3.2 Authentication 3.4 Keyboard, Mouse and Video configuration To adjust the authentication settings, enter your login as a super user and change your Between the IP ACCESS KVM SWITCH CLASSIC and the host, there are two interfaces password. available for transmitting keyboard and mouse data: USB and PS/2. The correct operation of the remote mouse depends on several settings which will be discussed in the following Super user login subsections. -
Page 7: Host System Mouse Settings
3.4.3 Host System Mouse Settings 4. Usage The host' s operating system obtains various settings from the mouse driver. 4.1 Prerequisites Note: The following limitations do not apply when using USB mice and Windows 2000 and higher! The IP ACCESS KVM SWITCH CLASSIC features an embedded operating system offering a variety of standardized interfaces. -
Page 8: Logging In
4.2 Logging In 4.3 Navigation 4.2.1 Login to the IP ACCESS KVM SWITCH CLASSIC Once logged into the IP ACCESS KVM SWITCH CLASSIC successfully, the main page appears. This page consists of three parts; each of them contains specific information. The buttons in the upper area allow you to navigate within the front end. -
Page 9: Remote Console Main Window
The Remote Console window is a Java Applet that establishes its own TCP connection to the IP 4.3.2 Remote Console Control Bar ACCESS KVM SWITCH CLASSIC. The protocol that runs over this connection is neither HTTP nor HTTPS, but RFB (Remote Frame Buffer Protocol). RFB needs to establish a connection to The upper part of the Remote Console window contains a control bar. - Page 10 faster video display, but small changes in some display regions may not be recognized Options immediately. A small filter displays all changes instantly but may lead to a constant amount of Opens the Options menu. A short description of each of the options network traffic even if display content is not really changing (depending on the quality of the follows: video input signal).
-
Page 11: Remote Console Status Line
Save Changes transferred, and on the number of changes Save changes permanently between two single video pictures. We recommend that you use a higher compression level if the Undo Changes network bandwidth low. The higher Restore last settings compression level the more time is needed to pack and unpack the video data on either side of the Soft Keyboard connection. -
Page 12: Menu Options
5. Menu Options The IP ACCESS KVM SWITCH CLASSIC firmware features a Telnet server that enables a user to connect via a standard Telnet client. If the Telnet program is using a VT 100, VT 102 or VT 220 terminal or appropriate emulation, it is even possible to perform a console redirection, as 5.1 Remote Control long as the IP ACCESS KVM SWITCH CLASSIC host is using a text mode screen resolution. -
Page 13: Virtual Media
5.2 Virtual Media Windows Windows users should use the tool RawWrite for Windows which is included on the supplied CD. 5.2.1 Floppy Disk Launch RawWrite, you will see the window opposite: Insert your floppy disk into your floppy drive. Click the Read tab and then click on Select a name and destination for the floppy image file and click the Read button. -
Page 14: Create A Cd-Rom/Iso Image
5.2.2 Create a CD-ROM/ISO Image Windows To create the image file, use your favourite CD imaging tool. Copy the whole contents of the disc into one single image file on your hard disk. For example, with ‘Nero’ you choose ‘Copy and Backup’. -
Page 15: Drive Redirection
5.2.3 Drive Redirection 7. You will see the dialog below detailing the active image: The Drive Redirection feature allows the host system to access the CD-Rom drives, hard drives, floppy drives etc. on your client PC. With Drive Redirection you do not have to use an image file but may work with a drive from your local computer on the remote machine. -
Page 16: Options
The method of Drive Redirection: 3. Click Connect Drive or Connect ISO Built-in Java Drive Redirection function in Remote Console 1. Run Remote Control > KVM Console. 2. Click “Floppy” icon 4. Select a drive to redirect (if Connect Drive) 5. -
Page 17: User Management
5.3 User Management 5.3.1 Change Password To change your password, enter the new password in the upper entry field. Retype the password in the lower field. Click Apply to submit your changes. While the user account never sees the following options, the super account can change the name and password for both accounts. -
Page 18: Kvm Settings
5.4 KVM Settings compression rates are very time consuming, they should not be used when several users are accessing the IP ACCESS KVM SWITCH CLASSIC simultaneously. 5.4.1 User Console The standard colour depth is 16 bit (65536 colours). The other colour depths are intended for slower network connections in order to allow a faster transmission of data. -
Page 19: Keyboard/Mouse
Miscellaneous Remote Console Settings 5.4.2 Keyboard/Mouse Start in Monitor Mode Sets the initial value for the monitor mode. By default the monitor mode is off. In case you switch it on, the Remote Console window will be started in a read only mode. Start in Exclusive Access Mode Enables the exclusive access mode immediately at Remote Console start-up. -
Page 20: Video
Mouse Speed 5.5 Device Settings Auto mouse speed Use this option if the mouse settings on the host use an additional 5.5.1 Network acceleration setting. The IP ACCESS KVM SWITCH CLASSIC tries to detect the acceleration and speed of the mouse during the mouse sync process. The Network Settings panel allows network related parameters to be changed. -
Page 21: Dynamic Dns
Primary DNS Server IP Address 5.5.2 Dynamic DNS IP address of the primary Domain Name Server in dot notation. This option may be left empty; however, the IP ACCESS KVM SWITCH CLASSIC will not be able to perform name resolution. A freely available Dynamic DNS service (dyndns.org) can be used in the following scenario (see illustration below) Secondary DNS Server IP Address... -
Page 22: Security
5.5.3 Security Enable Dynamic DNS Enables the Dynamic DNS service. This requires a configured DNS server IP address. Force HTTPS If this option is enabled, access to the web front-end is only possible using an HTTPS Dynamic DNS server connection. The IP ACCESS KVM SWITCH CLASSIC will not listen on the HTTP port for This is the server name where the IP ACCESS KVM SWITCH CLASSIC registers itself in incoming connections. -
Page 23: Certificate
Chain rule 5.5.4 Certificate The Chain rule determines whether the access from the hosts is allowed or not. It can be one of these two values: ACCEPT : access allowed DROP : access not allowed The rule can be configured to apply to a particular Group level (All, User, Super, Administrator). When the IP-KVM receives a TCP packet, it will process the packet with the chain rule depicted below. -
Page 24: Serial Port
3. Upload the certificate to the IP ACCESS KVM SWITCH CLASSIC switch using the Confirm Challenge Password Upload button. Confirmation of the Challenge Password Email The email address of a contact person that is responsible for the IP ACCESS KVM SWITCH CLASSIC and its security. -
Page 25: Date And Time
make sure you configure your console computer accordingly. For instance, on Windows based 5.5.6 Date And Time operating systems you can configure a dial-up network connection, which defaults to the right settings like PPP. The Modem Settings panel allows you to configure remote access to the IP ACCESS KVM SWITCH CLASSIC using a modem. -
Page 26: Event Log
5.5.7 Event Log SMTP Logging enabled With this option, the IP ACCESS KVM SWITCH CLASSIC is able to send Emails to an address given by the Email address text field in the Event Log Settings. These mails contain the same description strings as the internal log file and the mail subject is filled with the event group of the occurred log event. -
Page 27: Device Information
Allows you to download the IP ACCESS KVM SWITCH CLASSIC data file with specific support information. This is an XML file with certain customized support information like the serial number etc. You can send this information if you contact LINDY technical support. It may help us solve any problems. -
Page 28: Update Firmware
A new firmware update is a binary file which can be sent to you by email from the Technical Support team of LINDY. 5.6.4 Unit Reset Updating the firmware is a three-stage process: This section allows you to reset specific parts of the device. This involves the keyboard and mouse, the video engine and the IP ACCESS KVM SWITCH CLASSIC itself. -
Page 29: Troubleshooting
6. Troubleshooting Q 009: Using MacOS X an HTTPS connection fails Q 001: The remote mouse doesn’t work or is not synchronized A 009: You have to install the IP ACCESS KVM SWITCH CLASSIC certificate using our A 001: Make sure the mouse settings in IP ACCESS KVM SWITCH CLASSIC match the mouse certificate installer, available on the utility CD. -
Page 30: Key Codes
7. Key Codes The layout for this keyboard is also shown. However, most modifier keys and other alphanumeric keys used for hotkey purposes in application programs are in an identical position, no matter what language mapping you are using. Some of the keys have aliases also; Key (and aliases) This table shows the key codes used to they can be named by 2 key codes (separated by a comma in the previous table). -
Page 31: Technical Specifications
8. Video Modes & User Permissions 9. Technical Specifications Model No. IP Access KVM Switch Classic Video Modes supported Target Device Connection 1 x Keyboard PS/2 Mini Din 6 Pin 1 x Mouse PS/2 Mini Din 6 Pin 1 x VGA HDDB 15 Pin The table below lists the video modes that the IP ACCESS KVM SWITCH CLASSIC supports. -
Page 32: Radio Frequency Energy, Certifications
Dies ist ein B2B Produkt. Entsprechend dem deutschen ElektroG hat der gewerbliche Endverwender dieses Gerät zum Zweck Port Protocol Purpose der Verschrottung entweder der LINDY-Elektronik GmbH zum Recycling zurück zu geben (kostenlose Rücknahme) oder es auf Telnet over TCP Web & Telnet client eigene Kosten einem geordneten Recycling zuzuführen.
Need help?
Do you have a question about the 39415 and is the answer not in the manual?
Questions and answers