
Related Manuals for Lindy 39401


Summary of Contents for Lindy 39401
-
Page 1: User Manual
CPU IP Access Switch User Manual LINDY No. 39401 www.LINDY.com © LINDY ELECTRONICS LIMITED & LINDY-ELEKTRONIK GMBH - SECOND EDITION (OCT 2004) -
Page 3: Table Of Contents
LINDY CPU IP Access Switch User Manual Contents PACKING LIST... 1 ABOUT THIS MANUAL... 2 CONVENTIONS... 3 1. INTRODUCTION ... 4 1.1 Overview ...4 1.2 Features...5 1.3 System Requirements ...5 2. HARDWARE SETUP... 6 2.1 Front View...6 2.2 Rear View ...7 2.3 Installation...8... - Page 4 LINDY CPU IP Access Switch User Manual 4. THE WINDOWS CLIENT... 26 4.1 Installation...26 4.2 Starting Up ...27 4.3 The File Menu ...29 4.4 The Tools Menu...29 4.5 Connecting...33 4.6 Operation ...34 5. THE JAVA CLIENT ... 39 5.1 Starting Up ...39 5.2 Operation ...41...
-
Page 5: Packing List
LINDY CPU IP Access Switch Packing List The complete CPU IP ACCESS SWITCH package consists of: • 1 CPU IP ACCESS SWITCH KVM Control Unit • 1 CS Custom KVM Cable Set • 1 Power Adapter • 1 Rack Mount Kit •... -
Page 6: About This Manual
About This Manual This User Manual is provided to help you get the most from your CPU IP ACCESS SWITCH system. It covers all aspects of installation, configuration and operation. An overview of the information found in the manual is provided below. -
Page 7: Conventions
LINDY CPU IP Access Switch Conventions This manual uses the following conventions: Indicates text that you should key in. Courier Indicates keys you should press. For example, [Enter] means to press the Enter key. If keys need to be chorded, they appear together in the same bracket with a plus sign between them: [Ctrl+Alt]. -
Page 8: Introduction
(or servers on a KVM switch installation), just as if they were present locally and working on the equipment directly. -
Page 9: Features
1.3 System Requirements • For best results we recommend that the computers used to access the CPU IP ACCESS SWITCH control unit have at least a PIII 1 GHz processor, and that the screen resolution is set to 1024 x 768. -
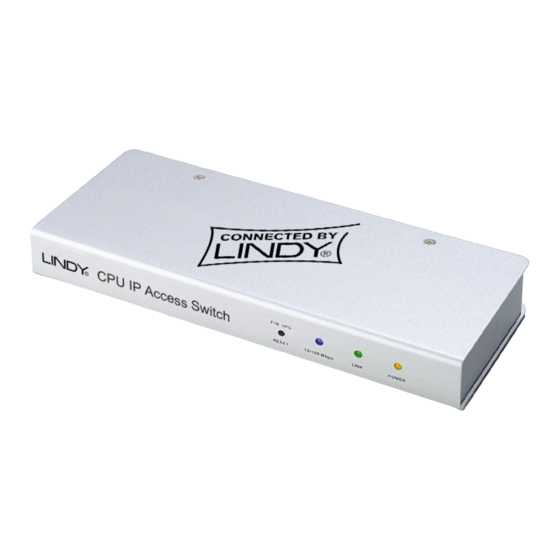
Page 10: Hardware Setup
After the CPU IP ACCESS SWITCH has been powered ON, pressing and holding this switch in for more that two seconds performs a system reset Note: This switch is recessed and must be pushed with a thin object – such as the end of a paperclip, or a ballpoint pen. -
Page 11: Rear View
2. Local Console Section The CPU IP ACCESS SWITCH can be accessed via a local console as well as over the Net. The cables for the local console (keyboard, monitor, and mouse) plug in here. Each port is colour coded and marked with an appropriate icon to indicate itself. -
Page 12: Installation
1. Plug the local administrator’s keyboard, mouse, and monitor into the unit’s Console Ports. 2. Use the KVM cable provided with this package to connect the CPU IP ACCESS SWITCH’s KVM Port, to the Keyboard, Video and Mouse ports of the server or KVM switch that you are installing. -
Page 13: Quick Setup Guide
6. If you wish to use the CPU IP ACCESS SWITCH to control your servers over a LAN only, then you need to either specify a static IP address which is within the range of your LAN/WAN or select ‘Obtain an IP address automatically’... -
Page 14: The Administration Utility
LINDY CPU IP Access Switch 3. The Administration Utility 3.1 Installation 1. Insert the software CD into your CD-ROM drive. 2. Open the drive and folder where the Administrator Setup icon (CN6kAdminTool_x_x_xxxLindy.exe) is located and double click the icon. The Administration Utility installation screen appears: 3. -
Page 15: Starting Up
If the unit you wish to configure appears in the listbox, double click it. • If the unit you want doesn’t appear in the listbox, key in its IP address in the CPU IP ACCESS SWITCH address field, and its Port number in the Port box, then Click Login. -
Page 16: Logging In
Username and Password. If you see this message, try logging in again being careful with the Username and Password. If you successfully log in to the CPU IP ACCESS SWITCH with the default username and password, the following message appears: For security purposes, be sure to change the default Username and Password to something unique (see User Management, p. -
Page 17: The Settings Notebook
LINDY CPU IP Access Switch 3.4 The Settings Notebook Overview After successfully logging in, the Settings notebook appears: There are five tabs, each representing a different administrative activity. A description of each of the five activities and how to configure their settings is provided in the sections that follow. - Page 18 Device Name Main Firmware Version New versions of the CPU IP ACCESS SWITCH’s firmware can be downloaded from our web site (www.lindy.com) as they become available (see p. 23 for installation details). The CPU IP ACCESS SWITCH’s MAC address displays here To make it easier to manage installations with more than one CPU IP ACCESS SWITCH, each one can be given a name.
- Page 19 As a security measure, the Administrator can set the Port numbers that the user must specify when he attempts to connect to a CPU IP ACCESS SWITCH’s IP address. Unless the correct Port number is given, the CPU IP ACCESS SWITCH device will not be found. An explanation of the fields is given in the table below:...
- Page 20 -s <ip address> <CPU IP ACCESS SWITCH’s MAC address> For example, arp -s 10.0.0.10 00-48-54-65-00-01 assigns an IP address of 10.0.0.10 to a CPU IP ACCESS SWITCH with a MAC address of 00-48- 54-65-00-01 Log Server: Important transactions that occur on the CPU IP ACCESS SWITCH, such as logins, internal status messages, etc., are kept in an automatically generated log file.
- Page 21 The Java Access Page lets the Administrator specify the page that the user connects to when he uses the Java Client to access the CPU IP ACCESS SWITCH. Users must include the name of this page in the IP address that they specify, or they will not be granted access. If no name is specified here, no one will be able to access the CPU IP ACCESS SWITCH with the Java Client.
- Page 22 LINDY CPU IP Access Switch Filtering: • There are a maximum of 100 filters allowed for each category (User IPs, User MACs, and Administrator MACs). • To enable filtering for User Stations, Click to put a check mark in the IP and/or MAC Filter enable checkbox.
- Page 23 LINDY CPU IP Access Switch User Manual An example of the Security page with filters configured is shown below:...
-
Page 24: User Management
This page is used to set up and manage user profiles. It defines the access rights of each user. Up to 64 user profiles can be established. Note: Only one user can connect to the CPU IP ACCESS SWITCH at a time •... - Page 25 CPU IP ACCESS SWITCH via the Java Client software. 2. Checking Java access defines a User who is allowed to access the CPU IP ACCESS SWITCH via the Java Client software, but does not have permission to configure the system.
- Page 26 If Stealth Mode is enabled, the CPU IP ACCESS SWITCH cannot be pinged. Working Modes If Echo Mode is disabled, the CPU IP ACCESS SWITCH will not show up in the list of local CPU IP ACCESS SWITCH units (see p. 11 and p. 27)
-
Page 27: Upgrading The Firmware
LINDY CPU IP Access Switch 3.5 Upgrading the Firmware New versions of the firmware files can be downloaded from our website at http://www.lindy.com After downloading the file, to upgrade the firmware do the following: 1. Go to the Customization page of the Administration configuration notebook (see p. 22). In the Uploads panel, click the Browse button. - Page 28 LINDY CPU IP Access Switch User Manual You return to the Customization page with the path to file, and the Upload version number displayed. 3. Check Reset on exit, then Click OK to exit the Administrator Utility and complete the firmware upgrade...
-
Page 29: Java Authentification Page
3.6 Java Authentification Page As an important security feature, users who connect to the CPU IP ACCESS SWITCH via the Java Client must first log in before being allowed access. A Java Authentication Page that implements a Login (Username and Password) feature is provided on the distribution disk for this purpose. -
Page 30: The Windows Client
LINDY CPU IP Access Switch 4. The Windows Client 4.1 Installation 1. Insert the CPU IP ACCESS SWITCH software CD into your CD-ROM drive 2. Open the drive and folder where the Windows Client Setup icon (CN6kClient_x_x_xxxLindy.exe) is located and double click the icon. -
Page 31: Starting Up
If this is the first time that you are running the program, a dialog box appears requesting you to input your serial number. If you don’t know what it is, contact the CPU IP ACCESS SWITCH administrator. Key in the serial number - 5 characters per box - then Click OK. - Page 32 CPU IP ACCESS SWITCH to be executed on the attached unit. If the CPU IP ACCESS SWITCH is connected to a KVM switch, you can control the switch and the computers connected to it just as if you were connected locally.
-
Page 33: The File Menu
The File Menu allows the operator to Create, Save, and Open user created Work files. A Work File consists of all the information specified in a Client session. This includes the CPU IP ACCESS SWITCH and CPU IP ACCESS SWITCH IP list items, as well as the Hotkey settings. -
Page 34: Configuring The Hotkeys
LINDY CPU IP Access Switch Configuring the Hotkeys: If you find the default Hotkey combinations inconvenient, you can configure them to whatever suits your taste, as follows: 1. With the Hotkey Setup screen open, highlight the Action, then Click Start 2. - Page 35 To invoke an action, you must press and release the keys one key at a time - do not chord the keys. Explanation Break the connection to the CPU IP ACCESS SWITCH and return to local operation. Brings up the video adjustment utility.
- Page 36 LINDY CPU IP Access Switch Config When you select Config, a screen similar to the one below appears: If Keep screen size is not enabled (there is no checkmark in the box), the remote screen is resized to fit the resolution of your local monitor.
-
Page 37: Connecting
To connect to a CPU IP ACCESS SWITCH unit: 1. If it is in the CPU IP ACCESS SWITCH List, Click it; if you are using the CPU IP ACCESS SWITCH IP input box, specify the IP address and Port number, then Click Open. A Login dialog box appears: 2. -
Page 38: Operation
4.6 Operation Screen Information Once the connection to the CPU IP ACCESS SWITCH has been accomplished, a window opens on the Client’s monitor that exactly replicates the remote system’s video output display captured by the CPU IP ACCESS SWITCH. Local keystroke and mouse input is captured and sent to the remote system. -
Page 39: Mouse Synchronization
Mouse Synchronization Until you close the CPU IP ACCESS SWITCH connection, mouse movements have no effect on your local system, but are captured and sent to the remote system, instead. From time to time, especially if you change video resolution, the local mouse movement may no longer be synchronized with the remote system’s mouse pointer. - Page 40 LINDY CPU IP Access Switch User Manual Windows 2000: Set the mouse speed to the middle position; set the mouse acceleration to None (Control Panel > Mouse > Mouse Properties > Motion): Windows XP/Server 2003: Set the mouse speed to the middle position; disable Enhance Pointer Precision (Control Panel > Printers and Other...
-
Page 41: Video Adjustment
LINDY CPU IP Access Switch User Manual Windows ME/95: Set the mouse speed to the middle position; disable mouse acceleration (click Advanced to get the dialog box for this). Windows NT/98: Set the mouse speed to the slowest position. Video Adjustment You can adjust the placement and the picture quality of the remote screen (as displayed on your local monitor) with the Video Options function. - Page 42 LINDY CPU IP Access Switch The meanings of the adjustment options are given in the table below: Option Adjust the horizontal and vertical position of the remote computer window by Screen Position Clicking the Arrow buttons. Click Auto-Sync to have the function detect the vertical and horizontal offset values of the remote screen and automatically synchronize it with the local screen.
-
Page 43: The Java Client
5. The Java Client The Java Client is provided to make the CPU IP ACCESS SWITCH accessible to all platforms. Systems that have Java installed can connect. If you don’t already have Java, it is available for free download from Sun’s Java web site (http://java.sun.com). - Page 44 LINDY CPU IP Access Switch User Manual After you key in the IP address and Click OK, a Connection Progress window appears: After you establish a connection, a Login dialog box appears: 6. Provide a valid Username and Password and Click OK. After a second or two, an Authentication progress...
-
Page 45: Operation
Note: 1. You can switch between your local and remote programs with [Alt + Tab]. 2. Due to net lag, there might be a slight delay before your keystrokes show up. You may also have to wait a bit for the remote mouse to catch up to your local mouse before you click. -
Page 46: The Toolbar
Keypad: Clicking the second button brings up the Keypad. Since some locally input keyboard combinations can not be captured and sent to the CPU IP ACCESS SWITCH, the Keypad provides a one-click implementation of their actions on the remote system. - Page 47 LINDY CPU IP Access Switch Mouse: At times the local mouse movement may lose sync with the remote mouse movement. If performing an Autosync doesn’t resolve the problem the Mouse Synchronization function gets them back into sync. This is similar to the Mouse Synchronization feature of the Windows Client (see p.
-
Page 48: The Log Server
CPU IP ACCESS SWITCH units. 6.1 Installation 1. Insert the CPU IP ACCESS SWITCH software CD into your CD-ROM drive 2. Open the drive and folder where the Log Server Setup icon (CN6kLogServer_x_x_xxxLindy.exe) is located and double click the icon. -
Page 49: Starting Up
• A Menu Bar at the top • A panel to display a list of CPU IP ACCESS SWITCH units below it (see p. 50 for details) • A panel to display an Events List at the bottom Each of the components is explained in the sections that follow. -
Page 50: The Menu Bar
• Help These are discussed in the sections that follow. Note: If the Menu Bar appears to be disabled, click in the CPU IP ACCESS SWITCH List panel below it to enable the bar. Configure The Configure menu contains three items: Add; Edit; and Delete. They are used to add new CPU IP ACCESS SWITCH units to the CPU IP ACCESS SWITCH List;... - Page 51 Explanation This can either be the IP address of the CPU IP ACCESS SWITCH or its DNS name (if the network administrator has assigned it a DNS name). The Log Server port number assigned to the CPU IP ACCESS SWITCH (see p.
- Page 52 CPU IP ACCESS SWITCH excluding the events that resulted from the last search. CPU IP ACCESS SWITCH units are listed according to their IP address. Select the unit that you want to perform the search on from this list.
- Page 53 LINDY CPU IP Access Switch User Manual Options This menu has a single item: Retry. Retry allows you to set the number of seconds that the Log Server should wait before attempting to connect if its previous attempt to connect failed. When you click this item, a dialog box, similar to the one below, appears:...
-
Page 54: The Cpu Ip Access Switch List Panel
6.4 The CPU IP ACCESS SWITCH List Panel The CPU IP ACCESS SWITCH List panel displays a list of all the CPU IP ACCESS SWITCH units that have been selected for the Log Server to track (see Configure, p. 46). - Page 55 This is the Port number assigned to the CPU IP ACCESS SWITCH (see Port Configure, p. 46). If the Log Server is connected to the CPU IP ACCESS SWITCH, this field displays Connected. Connection If it is not connected, this field displays Waiting. This means that the Log Server’s MAC address has not been set properly.
-
Page 56: The Event List Window
User Manual 6.5 The Event List Window This window displays tick information for the currently selected CPU IP ACCESS SWITCH. Note that even though any other CPU IP ACCESS SWITCHES aren’t currently selected, if their Recording checkbox is checked, the Log... -
Page 57: Appendix
LINDY CPU IP Access Switch 7. Appendix 7.1 Specifications Function Connectors LEDs Video Protocols Environment Housing Weight Dimensions (L x W x H) 1 x 6 pin mini-DIN F - Keyboard Console Ports 1 x 6 pin mini-DIN F - Mouse... -
Page 58: Rack Mounting
LINDY CPU IP Access Switch 7.2 Rack Mounting For convenience and flexibility, the CPU IP ACCESS SWITCH can be mounted on a system rack. To rack mount the unit do the following: 1. Screw the mounting bracket into the top or bottom of the unit as shown in the example diagram below. -
Page 59: Troubleshooting
(e.g., Sun Blade 1000 servers) Video display problems with 13W3 interface systems (e.g., Sun Ultra servers). If the CPU IP ACCESS SWITCH is connected to a KVM switch, make sure to power on the switch before powering on the CPU IP ACCESS SWITCH. Solution... -
Page 60: The Administrator Utility
Windows Client is running. Solution 1. When the CPU IP ACCESS SWITCH starts, if it doesn’t find a DHCP environment after 30 seconds, it automatically sets its IP address to 192.168.0.60. Connect to it at that address, and change its Network settings to a fixed IP address. - Page 61 LINDY CPU IP Access Switch The Java Client For mouse synchronization problems, refer to the discussion on page 35. For connection and operation problems, see the table below: Symptom Java Client won’t connect to the CPU IP ACCESS SWITCH Java Client performance deteriorates.
-
Page 62: Fcc Warning
Operation is subject to the following two conditions: 1. This device may not cause harmful interference, and 2. This device must accept any interference received, including interference that may cause undesired operation © LINDY ELECTRONICS LIMITED & LINDY-ELEKTRONIK GMBH - SECOND EDITION (OCT 2004)
Need help?
Do you have a question about the 39401 and is the answer not in the manual?
Questions and answers