Table of Contents
Advertisement
Quick Links
Advertisement
Table of Contents

Related Manuals for Doro IP880 DECT


Summary of Contents for Doro IP880 DECT
- Page 1 English ip880dect Owners Manual...
-
Page 2: Table Of Contents
Index About this User Manual Welcome ����������������������������������������������������������������������������������������������������������� 1 Handset – view Display ��������������������������������������������������������������������������������������������������������������� 2 Gateway – view Gateway – rear view ������������������������������������������������������������������������������������������ 3 Gateway – front view ����������������������������������������������������������������������������������������� 3 Installation Prerequisites ����������������������������������������������������������������������������������������������������� 4 Power ���������������������������������������������������������������������������������������������������������������� 4 Installing the Gateway ��������������������������������������������������������������������������������������� 5 Install and Register the Handset �����������������������������������������������������������������������... - Page 3 Settings Audio Settings Telephony Settings VoIP settings Internet Settings System Settings Firmware update ��������������������������������������������������������������������������������������������� 25 Restore configuration settings������������������������������������������������������������������������� 25 Configuring via web-interface Configure using a web browser ����������������������������������������������������������������������� 26 Home ��������������������������������������������������������������������������������������������������������������� 27 VoIP Server 1 (or 2) ����������������������������������������������������������������������������������������� 27 VoIP Accounts ������������������������������������������������������������������������������������������������� 27 Management Settings �������������������������������������������������������������������������������������...
-
Page 4: Index
About this User Manual Welcome Thank you for purchasing the Doro ip880dect. This user manual describes how to install, configure, and use the phone, enabling you to make Internet calls, landline calls, and receive on-screen information services. This user manual consists of a number of sections to guide you through the process of installing, configuring, and setting up your phone for first use. -
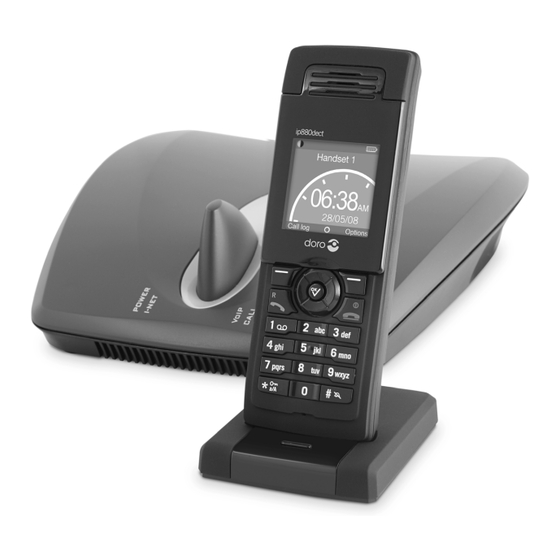
Page 5: Handset - View
CONTACTS MESSAGES Black/black - out of range of the gateway Yellow/black - within range of the gateway, but not ready for Internet calls Yellow/yellow – within range of the gateway, and ready for Internet calls on primary line. Index www.doro.com... -
Page 6: Gateway - View
It indicates that the gateway has received an IP address CALL indicator Call indicator is flashing during firmware update. Constant light indicates landline or Internet call in progress VOIP INDICATOR indicates that the gateway is connected to the Internet Telephony Service Provider Index www.doro.com... -
Page 7: Installation
KTEC KSLFB0500035W1UV-1 100~240V 5.0V, 350mA Handset 50/60Hz 0.15A charger DORO ip880dect Lithium ion 3.9V nominal Handset battery 3.7V 650mAH battery CAUTION: risk of explosion if battery is replaced by an incorrect type. Dispose of used batteries according to the instructions... -
Page 8: Installing The Gateway
To attach the belt clip, insert the removal tool into the slot on the top of the phone. 2� Gently press the cover lid upwards. 3� Remove the cover lid and gently fit the belt clip into place and press it downwards. Index www.doro.com... -
Page 9: First Setup Via The Handset
You can also change the case of letters on the fly, or type a number in the middle of a text. ● Press the -key once to change the case, or press the -key twice to type numbers. Index www.doro.com... -
Page 10: Country Selection
If not, you must use landline settings for emergency calls. This requires a functioning landline connection. Index www.doro.com... -
Page 11: Configure Voip Servers And Accounts
Press the Yes key when prompted to save the PIN code. 6� For future reference, write your new PIN code here: Note! The handset PIN code and the online configuration password are independent of each other. Changing the handset PIN code will not affect the online configuration password. Index www.doro.com... -
Page 12: First Setup Via Web-Interface
If more than one VoIP Server or VoIP Accounts has been configured you may select which account should ring on your handset and also set what account (or line) to use for outgoing calls in the menu Telephony Settings. 8� Click SAVE CHANGES. 9� Click Reboot to activate your settings. Index www.doro.com... -
Page 13: Making And Answering Calls
Enter the emergency number for your country, and then press When you make emergency calls, always press regardless of whether your emergency calls are routed through the Internet or via landline. You cannot make emergency calls in the following situations: Index www.doro.com... -
Page 14: Landline Calls
Make a landline call using redial 1� Press the Options key, choose Redial, and then press . The most recently dialled number is displayed. 2� Press the Options key, choose Call on landline, and then press Make a landline call using speeddials Index www.doro.com... -
Page 15: Caller Id
View numbers in the call log In Idle mode, press the Call log key, or choose Call log from the Main menu, and • then press . Use the navigation keys to page through the tabs and scroll through the names and numbers. Index www.doro.com... -
Page 16: During Calls
Call waiting works for both Internet and landline calls, but it works in different ways as described in the following. When you receive an incoming call during an ongoing call, you can also choose to start a conference between all three parties. Index www.doro.com... -
Page 17: Transfer A Call
Alternatively, you can type the number to which you want to transfer the call. 1� During a call, press Hold and then the Options key, and then choose Transfer call. 2� Enter the number to which you want to transfer the call, and then press Index www.doro.com... -
Page 18: Intercom
In the Main menu, choose Settings, and then press 2� Choose System settings, press , and then choose Handset settings. Press 3� Choose Handsets, and a list of all handsets is displayed. 4� Here you choose to deregister another handset. Choose required handset and press Deregister. Index www.doro.com... -
Page 19: Call Another Handset
Press the Options key, choose Intercom, and then press 3� Choose the handset to which you want to transfer the call, and then press 4� Press either after the other handset answers the call or before the other handset answers the call. Index www.doro.com... -
Page 20: Making Conference Calls
3� Press to leave the call. An advisory tone is emitted informing the caller on the other handset that you are leaving the call. Index www.doro.com... -
Page 21: Contacts
Press the Options key, choose Edit contact, and choose the field you want to edit. 3� Press the Edit key, and make your edits. 4� Press , press the Save key, and then press the Yes key when prompted to save. Change the default number for a contact Index www.doro.com... - Page 22 Choose the contact to which you want to add the number, and then press the Append key. The contact opens, and the number is added automatically. 4� Press the Save key, and then the Yes key, when prompted to save. Index www.doro.com...
-
Page 23: Groups
Press the Options key, scroll down and choose Groups, and then press 3� Choose the group you want to delete, press the Options key, and then choose Delete group. Press 4� Press the Yes key when prompted to delete the group. Index www.doro.com... -
Page 24: Voice Mail
Note: Your Internet Telephony Service Provider can send notifications such as e-mail notifications and billing information to your phone. The notification may contain both text and graphics. When you receive a message, the message indicator is lit up, and if enabled you’ll hear a message tone. Index www.doro.com... -
Page 25: Settings
It is not possible to activate/deactivate Call Forward before the operator codes has been set via the web interface. Please consult the Owners manual at www.doro.com. 2� Voicemail: Select Landline or preferred account and enter the voicemail number. For VoIP accounts choose Subscription, and then enter the SIP address of the subscription service. -
Page 26: Voip Settings
IP Mode: Selects Dynamic or static IP. Settings below are only available in Static mode. Default mode is Dynamic. 3� IP address: Sets the Internet address. 4� Subnet mask: Sets the Subnet mask. 5� DNS server: Sets the IP address of the DNS server. 6� Default gateway: Sets the Gateway (router) address. Index www.doro.com... -
Page 27: System Settings
EU. 5� Access Code: The following settings are available here: Gateway: Set the gateway PIN code Handset: Set the handset PIN code Index www.doro.com... -
Page 28: Firmware Update
Reset button on the gateway. Note: If you have not configured your phone using a provisioning server, you cannot restore the settings. To restore the phones Default settings, press and hold the Reset button on the gateway for 10 seconds. Index www.doro.com... -
Page 29: Configuring Via Web-Interface
Telephony Settings - Configuration for Incoming call destinations and Outgoing call account/PSTN for each registered handset Time Settings - Configuration Automatic Time via NTP Debug - Event log SIP Trace - SIP event log Example of Home page displaying system and status information Index www.doro.com... -
Page 30: Home
Start page displaying system and status information. Phone Type: Hardware type MAC-Address: Unique hardware address IP-Address: IP address Firmware-Version: Doro-ip880-DECT-SIP/01.03//09-May-08 11:32 Firmware-URL: Firmware update location SIP Identity Status: Displays status information of each account VoIP Server 1 (or 2) In the menu, select and configure VoIP Server 1 (and VoIP Server 2 if required): •... -
Page 31: Management Settings
UDP port number from which the message was received, rather than the port number specified in the Via header. • Enable STUN: Enable or Disable STUN Click SAVE CHANGES and thereafter REBOOT if no further settings are to be made. Index www.doro.com... -
Page 32: Ip Settings
HTTP Server Password: Local HTTP server password (default: admin) Note! If you gateway has a public IP address or is otherwise exposed to the Internet it's highly recommended to change the password. Click SAVE CHANGES and thereafter REBOOT if no further settings are to be made. Index www.doro.com... -
Page 33: Telephony Services
Handset name: This field will be showed in the handset display- • Phonebook: Choose Common or Private. This parameter is required to access missed caller information. Click SAVE CHANGES and thereafter REBOOT if no further settings are to be made. Index www.doro.com... -
Page 34: Time Settings
Click Reload. • View the output for troubleshooting or select and copy the content of the page and paste it into a plain text document. • Save the text file and name it in order to be identified easily. Index www.doro.com... -
Page 35: Provisioning
This section describes how to provision the phone using hosted configuration server and hosted firmware update server. The servers can either be a TFTP server or a HTTP server. From the production the phones are configured to retrieve firmware from an Doro hosted server (http://www.doro.com/downloads/ip880dect/upgrade/). The Doro server should normally be kept as Firmware server unless you network topology requires differently. -
Page 36: Creating Configuration Files
If some of the parameters are unknown to the phone they will be disregarded. Configuration File template Copy the following template into the /Config subfolder you have created. Edit as necessary. Comments are marked with "//" at the beginning. Index www.doro.com... -
Page 37: Network Settings
//--------Provisioning Server------------ %MANAGEMENT_TRANSFER_PROTOCOL%:1 //0-TFTP, 1-HTTP %NETWORK_TFTP_SERVER%:”config.server.com” // Configuration Server IP or FQDN %NETWORK_FWU_SERVER%: “www.doro.com” // Firmware update server IP or FQDN %FWU_TFTP_SERVER_PATH%:”downloads/ip880dect/upgrade/” //subdir to find firmware upgrades //------------SIP Server 0 = SIP server 1 in handset--------------- %SRV_0_SIP_UA_DATA_SERVER_PORT%:5060 //listening port of the proxy-server/registration-server port %SRV_0_SIP_UA_DATA_DOMAIN%:”proxy.SIPserver1.com”... -
Page 38: Changing The Configuration File Location
DHCP Custom Option 160 first. If none is found, it will try Option 66. If none is found, it will use the location typed in the configuration address field in the management settings section of the web user interface. Index www.doro.com... -
Page 39: Provisioning
YES underneath the display. After the gateway has been reset, it will pick up the new configuration file from the boot server. Check the boot server or the web administrator debug log to make sure that the file is being sent. Index www.doro.com... -
Page 40: Troubleshooting
Country selection, and then choose the country that you are in. There is no audio when The router blocks audio. Use port forwarding. Check your I make Internet calls. router’s user manual to see how to configure port forwarding. Index www.doro.com... - Page 41 Order a connection with higher Telephony Service speed from your broadband Provider’s Quality of provider. Service is based on a “best efforts” rather Contact your Internet Telephony than a guaranteed Service Provider regarding voice priority ensured voice prioritization method. across the network. Index www.doro.com...
-
Page 42: Other
Batteries are consumables and are not included in any guarantee. This guarantee does not apply if batteries other than DORO original batteries have been used. If you cannot resolve the fault using the faultfinder section, technical support is available by email on tech@doro-uk.com... - Page 43 Index www.doro.com...
- Page 44 English Version 1.0...
Need help?
Do you have a question about the IP880 DECT and is the answer not in the manual?
Questions and answers