Table of Contents
Advertisement
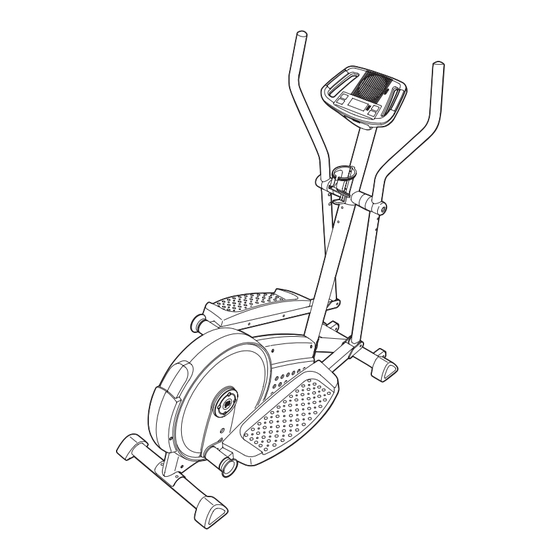
Model No. GGEL62707.1
Serial No.
Write the serial number in the
space above for reference.
QUESTIONS?
As a manufacturer, we are commit-
ted to providing complete customer
satisfaction. If you have questions,
or if parts are damaged or missing,
PLEASE DO NOT CONTACT THE
STORE; please contact Customer
Care.
IMPORTANT: You must note the
product model number and serial
number (see the drawing above)
before contacting us:
CALL TOLL-FREE:
1-877-776-4777
Mon.–Fri. 6 a.m.–6 p.m. MST
Sat. 8 a.m.–4 p.m. MST
ON THE WEB:
www.iconservice.com
CAUTION
Read all precautions and instruc-
tions in this manual before using
this equipment. Keep this manual
for future reference.
_
Serial
Number
Decal
USER'S MANUAL
Advertisement
Table of Contents

Subscribe to Our Youtube Channel
Related Manuals for Gold's Gym GGEL62707.1


Summary of Contents for Gold's Gym GGEL62707.1
- Page 1 Model No. GGEL62707.1 Serial No. Write the serial number in the space above for reference. Serial Number Decal QUESTIONS? As a manufacturer, we are commit- ted to providing complete customer satisfaction. If you have questions, or if parts are damaged or missing, PLEASE DO NOT CONTACT THE STORE;...
-
Page 2: Table Of Contents
Apply the decal in the location shown. Note: The decal may not be shown at actual size. GOLD'S GYM is a registered trademark of Gold's Gym International, Inc. This product is manufactured and distributed under license from Gold's Gym International, Inc. -
Page 3: Important Precautions
IMPORTANT PRECAUTIONS WARNING: To reduce the risk of serious injury, read all important precautions and instructions in this manual and all warnings on your elliptical exerciser before using your elliptical exerciser. ICON assumes no responsibility for personal injury or property damage sustained by or through the use of this product. -
Page 4: Before You Begin
BEFORE YOU BEGIN Congratulations for selecting the versatile new GOLD’S GYM ® ADJUSTABLE STRIDETRAINER 320 elliptical exerciser. The ADJUSTABLE STRIDETRAIN- ER 320 is an incredibly smooth exerciser that moves your feet in a natural elliptical path, minimizing the impact on your knees and ankles. And the unique ADJUSTABLE STRIDETRAINER 320 offers an impressive array of features to help you achieve your fitness goals in the convenience of your home. -
Page 5: Assembly
ASSEMBLY To hire an authorized service technician to assemble the elliptical exerciser, call 1-800-445-2480. Assembly requires two persons. Place all parts of the elliptical exerciser in a cleared area and remove the packing materials. Do not dispose of the packing materials until assembly is completed. In addition to the included hex keys, assembly requires a Phillips screwdriver wrench , and a rubber mallet... - Page 6 To make assembly easier, read the information on page 5 before you begin assembling the elliptical exerciser. Identify the Rear Stabilizer (4). While another person lifts the rear of the Frame (1), attach the Rear Stabilizer to the Frame with two M10 x 75mm Carriage Bolts (34) and two M10 Nylon Locknuts (29).
- Page 7 4. While another person holds the Upright (2) in the posi- tion shown, connect the Upper Wire Harness (86) to the Extension Wire Harness (95). Next, insert the Upright (2) into the Mast (15); make sure that the Upright is oriented as shown. Attach the Upright with two M8 x 72mm Button Bolts (67), two M8 Split Washers (83), and two M8 Nylon Locknuts (46).
- Page 8 7. Slide the Right Crank Arm (38) onto the four indicated welded bolts; make sure that the Right Crank Arm is in the indicated cutout in the Left Pedal Disc (8). Next, finger tighten four M8 Jamnuts (101) onto the welded bolts.
- Page 9 10. Identify the Left Handlebar (9), which is marked with a sticker. Insert the Left Handlebar into one of the Handlebar Legs (79); make sure that the Handlebar Leg is turned so the hexagonal holes are on the indicated side. Attach the Left Handlebar with two M8 x 45mm Button Bolts (50) and two M8 Nylon Locknuts (46).
-
Page 10: How To Use The Elliptical Exerciser
HOW TO USE THE ELLIPTICAL EXERCISER HOW TO EXERCISE ON THE ELLIPTICAL EXERCISER To mount the elliptical exerciser, hold the handgrip pulse sensor and step onto the pedal that is in the lowest position. Next, step onto the other pedal. Push the pedals until they begin to move with a continuous motion. -
Page 11: Features Of The Console
DIAGRAM OF THE CONSOLE Program Button Profiles Program Button FEATURES OF THE CONSOLE The advanced console offers a selection of features designed to make your workouts more effective. When the manual mode of the console is selected, the resis- tance of the pedals can be changed with the touch of a button. - Page 12 Monitor your progress with the display. The upper half of the display will show the elapsed time, the distance (total revolutions) you have pedaled, and the resistance level of the pedals. The display will change from one mode to the next every few seconds. Note: When a program is selected (except for pulse pro- gram 2), the display will show the time remaining in the program instead of the elapsed time.
- Page 13 HOW TO USE A PULSE PROGRAM Pulse program 1 is designed to keep your heart rate within a set range during your workout. Pulse program 2 is designed to keep your heart rate near a target heart rate setting that you select. Follow the steps below to use a pulse program.
- Page 14 Turn on the fan if desired. See step 6 on page 12. When you are finished exercising, the console will automatically turn off. See step 7 on page 12. HOW TO USE A PRESET PROGRAM Preset programs 3, 4, 5, and 6 automatically change the resistance of the pedals and prompt you to increase or decrease your pedaling pace as they guide you through effective workouts.
-
Page 15: Maintenance And Troubleshooting
MAINTENANCE AND TROUBLESHOOTING Inspect and tighten all parts of the elliptical exerciser regularly. Replace any worn parts immediately. To clean the elliptical exerciser, use a damp cloth and a small amount of mild soap. Important: To avoid damage to the console, keep liquids away from the console and keep the console out of direct sunlight. -
Page 16: Exercise Guidelines
EXERCISE GUIDELINES WARNING: Before beginning this or any exercise program, consult your physician. This is especially important for persons over the age of 35 or persons with pre-existing health problems. The pulse sensor is not a medical device. Various factors may affect the accuracy of heart rate readings. -
Page 17: Part List
PART LIST—Model No. GGEL62707.1 Key No. Qty. Description Frame Upright Front Stabilizer Rear Stabilizer Console Left Side Shield Right Side Shield Left Pedal Disc Left Handlebar Right Handlebar Foam Grip Pedal Upright Endcap Left Pedal Arm Mast Pedal Post Adjustment Pin... -
Page 18: Exploded Drawing
EXPLODED DRAWING A—Model No. GGEL62707.1 R0108A... - Page 19 EXPLODED DRAWING B—Model No. GGEL62707.1 R0108A...
-
Page 20: Ordering Replacement Parts
ORDERING REPLACEMENT PARTS To order replacement parts, please see the front cover of this manual. To help us assist you, be prepared to provide the following information when contacting us: • the model number and serial number of the product (see the front cover of this manual) •...
Need help?
Do you have a question about the GGEL62707.1 and is the answer not in the manual?
Questions and answers