Table of Contents
Advertisement
Quick Links
Advertisement
Table of Contents

Related Manuals for BenQ DC C740


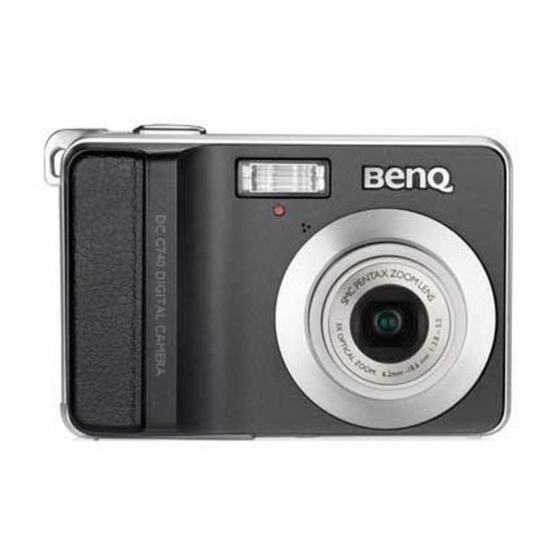
Summary of Contents for BenQ DC C740
- Page 1 DC C540/C740 Digital Camera User Manual Welcome...
-
Page 2: Taking Care Of Your Camera
Copyright Copyright 2006 by BenQ Corporation. All rights reserved. No part of this publication may be reproduced, transmitted, transcribed, stored in a retrieval system or translated into any language or computer language, in any form or by any means, electronic, mechanical, magnetic, optical, chemical, manual or otherwise, without the prior written permission of this company. -
Page 3: Table Of Contents
Table of Contents .............. 1 1. Touring Your Camera ..........1 1.1 Checking the package contents ............1 1.2 Camera components ............1 1.2.1 Front view ............. 2 1.2.2 Rear view ............. 2 1.2.3 LED indicators ..........3 2. Preparing Your Camera for Use ............ - Page 4 ............12 3.6 Recording audio clips ..........12 3.7 Other recording functions ..........12 3.7.1 Setting the quality ..........12 3.7.2 Setting the metering ........13 3.7.3 Setting the white balance ........... 13 3.7.4 Setting the ISO ..........13 3.7.5 Setting the Exposure ..........
-
Page 5: Touring Your Camera
Touring Your Camera Checking the package contents Carefully unpack your kit box and ensure that you have the following items. User Manual Digital camera USB cable AA batteries Hand strap Software CD-ROM Pouch AV cable If any of the items are missing or appear to be damaged, contact your dealer. Save the packaging in case you need to ship your camera for service. -
Page 6: Rear View
1.2.2 Rear view LCD monitor Zoom-out or thumbnail Zoom-in Strap eyelet REC or PLAY mode Menu Status LED Navigator -- four-way control and OK Scene mode 10. ASM (Aperture priority, Shutter priority, or Manual) in the REC mode, or Delete image/video in the PLAY mode 1.2.3 LED indicators... -
Page 7: Preparing Your Camera For Use
Preparing Your Camera for Use Installing the batteries You can use two AA batteries to power up the camera. Make sure that the power of the digital camera is off before inserting or removing the batteries. To insert the batteries: 1. -
Page 8: Using The Camera
Using the Camera Navigator You can use the Navigator with four-way control and one button to access numerous controls of your camera. or Play (video playback only) Focus mode or left Down Flash mode or right LCD monitor information (REC mode) 1. -
Page 9: Getting Started
Getting started 3.3.1 Turning the power on / off • Press the [ ] button until the digital camera turns on. • To turn the power off, press the [ ] button again. 3.3.2 Choosing the screen language 1. Press , and then press [ ] / [ ] to move to the Setup menu. -
Page 10: Using The Flash
• When the focus or exposure is not suitable, the frame of the focus area turns red. • To review the last captured image, press the button. Press the button to return to Snapshot mode. • The LCD monitor darkens in strong sunlight or bright light. This is not a malfunction. •... -
Page 11: Using The Zoom Function
Icon Flash mode Description Record a single image. 2 sec. The shutter release will be delayed for 2 seconds. 10 sec. The shutter release will be delayed for 10 seconds. Double Record two images in a shot after pressing the shutter release button 10 and 12 seconds. -
Page 12: Selecting The Scene Mode
3.4.1.2 Selecting the Scene mode 1. Set the camera to the REC mode. 2. Press the button to show the scene mode palette. MODE 3. Use the four-way control to select a desired mode and press to confirm the setting. Icon Mode Description... -
Page 13: Rec Menu List (Still Image)
1. Turn the power on, and set the camera to the REC mode. 2. Press the button to display the menu. MENU 3. Press [ ] / [ ] to select a menu item. 4. Press [ ] / [ ] to change the setting. -
Page 14: Setup Menu
3.4.3 Setup menu 1. Turn the power on, and set the camera to the REC or PLAY mode. 2. Press the button to open the REC or PLAY menu. The menu displays depend on MENU whether you are in the REC mode or the PLAY mode. 3. -
Page 15: Recording Movie Clips
Menu item Functions TV Out You can review images on a television with a supplied AV cable. TV Out should be set to either NTSC or PAL depending on your region. [NTSC] America, Japan, Taiwan and others [PAL] Europe, Oceania and others [Computer] Sets the USB mode to connect the camera with a printer or computer. -
Page 16: Recording Audio Clips
• Press the shutter again to end recording. • The camera will stop recording automatically when the memory capacity has been reached. Recording audio clips 1. Turn the power on, and set the camera to the Voice REC mode. 2. Press the shutter button to start recording. •... -
Page 17: Setting The White Balance
3.7.3 Setting the white balance Adjust the white balance to match different light sources such as sunlight, incandescent (tungsten) lighting or, fluorescent lighting. Icon Mode Description Auto Automatically corrects white balance. Ideal for general photography. Daylight Adjusts for bright sun conditions, or natural light conditions. Cloudy Adjusts for cloudy days or twilight conditions. -
Page 18: Setting The Highlight
3.7.7 Setting the highlight Make the subject stand out from its surroundings. The subject will be in focus in three different ranges: 3.7.8 Setting the sharpness You can select whether you want the image to have sharp or soft outlines. Icon Mode Description... -
Page 19: Setting Asm
3.7.11 Setting ASM Pressing the ASM button toggles among Aperture priority, Shutter priority, and Manual when determining the exposure value. • Aperture priority: You can choose an aperture value, while the shutter speed is automatically determined by the lighting condition of the subject. Aperture priority is often used when shooting static subjects or emphasizing the depth of field. -
Page 20: Magnifying & Trimming Still Images
3.8.3 Magnifying & trimming still images 1. Turn the power on, and set the camera to the PLAY mode. 2. Select an image. • Press [ ] or [ ] to select the image that you want to magnify or trimming. •... -
Page 21: Deleting A Single File Or All Files
3.8.6 Deleting a single file or all files 1. Turn the power on, and set the camera to the PLAY mode. 2. Open the menu. • Press the button, then use the four-way control to select and press MENU Delete button. -
Page 22: Setting The Dpof For Printing
3.8.8 Setting the DPOF for printing The Digital Print Order Format (DPOF) setting allows you to select images on the memory card for printing and specify the number of print copies in advance using the camera. This is extremely convenient for sending the images to a photo developing service or for printing on a direct print function compatible printer. -
Page 23: Pc Dependent Features
PC Dependent Features Bundled software The camera is supplied with the following software. To install the software, refer to the information supplied with respective CDs. Ulead Photo Ulead® Photo Express™ 5.0 SE is a complete photo project software Express for digital images. Acquire photos effortlessly from digital cameras or scanners. -
Page 24: Step 1: Connect The Digital Camera To Your Computer
4.2.1 Step 1: Connect the digital camera to your computer 1. Connect the supplied USB cable to the computer USB port and turn on the camera. 2. The LCD screen turns off when the connection to the computer has been successfully completed. -
Page 25: Troubleshooting
Troubleshooting Refer to the symptoms and solutions listed below before shipping your camera for service. If the problem persists, contact your local reseller or service center. Symptom Cause Solution The camera cannot be There is no battery or the battery is Insert the battery correctly. - Page 26 Symptom Cause Solution I cannot download The free space on the hard disk of Ensure that the hard disk has enough images. your computer is insufficient. space for running Windows and that the drive for loading image files has free space equal to or greater than the memory card in the camera.
-
Page 27: Specifications
Specifications C540 C740 Item Description Description Image sensor Effective pixels 5.0 mega pixels 7.0 mega pixels File formats Still image (JPEG): Still image (JPEG): 2592 x 1936 (5M) / 2592 x 1728 3072 x 2304 (7M) / 3072 x 2048 (3:2) / 2592 x 1458 (16:9) / 2048 x (3:2) / 3072 x 1728 (16:9) / 2560 x 1536 (3M) / 1024 x 768 (1M) / 640... -
Page 28: Service Information
Technical Support If you have any problem or question regarding the camera, you can visit the following web site for further assistance: http://support.BenQ.com For free driver updates, product information and news releases, visit the following web site: http://www.BenQ.com Service Information...
Need help?
Do you have a question about the DC C740 and is the answer not in the manual?
Questions and answers