Table of Contents
Advertisement
Advertisement
Table of Contents
Troubleshooting

Related Manuals for BenQ DC C510


Summary of Contents for BenQ DC C510
- Page 1 DC C510 Digital Camera User Manual Welcome...
-
Page 2: Taking Care Of Your Camera
Copyright Copyright 2006 by BenQ Corporation. All rights reserved. No part of this publication may be reproduced, transmitted, transcribed, stored in a retrieval system or translated into any language or computer language, in any form or by any means, electronic, mechanical, magnetic, optical, chem- ical, manual or otherwise, without the prior written permission of this company. -
Page 3: Table Of Contents
Table of Contents 1. T ........... 1 OURING AMERA 1.1 Checking the package contents ........1 1.2 Camera components........... 1 ............1 1.2.1 Front view ............. 2 1.2.2 Rear view ............. 2 1.2.3 LED indicators 2. P ........ 3 REPARING AMERA FOR 2.1 Installing the battery ........... - Page 4 ..........10 3.1.10.1.2 Quality ..........10 3.1.10.1.3 Scene ..........10 3.1.10.1.4 EV ........11 3.1.10.1.5 White Balance ..........11 3.1.10.1.6 ISO ..........11 3.1.10.1.7 Color ........11 3.1.10.1.8 Saturation .........12 3.1.10.1.9 Sharpness ..........12 3.1.10.1.10 Preview ........12 3.1.10.1.11 Date Print ..........12 3.1.10.1.12 Exit 3.2 Video mode............... 12 ....12 3.2.1 Video mode LCD monitor information ...........
- Page 5 .........17 3.3.4.1.3 Slide Show ..........17 3.3.4.1.4 DPOF ..........17 3.3.4.1.5 Protect .........17 3.3.4.1.6 Thumbnail ...........17 3.3.4.1.7 Exit 3.4 Setup mode ............... 18 ............18 3.4.1 Date/Time .............. 18 3.4.2 Format ............... 18 3.4.3 Beeper ............18 3.4.4 Language ............18 3.4.5 Auto Off ............
- Page 6 6. S ..............26 PECIFICATIONS 7. S ............ 27 ERVICE NFORMATION Table of Contents...
-
Page 7: Touring Your Camera
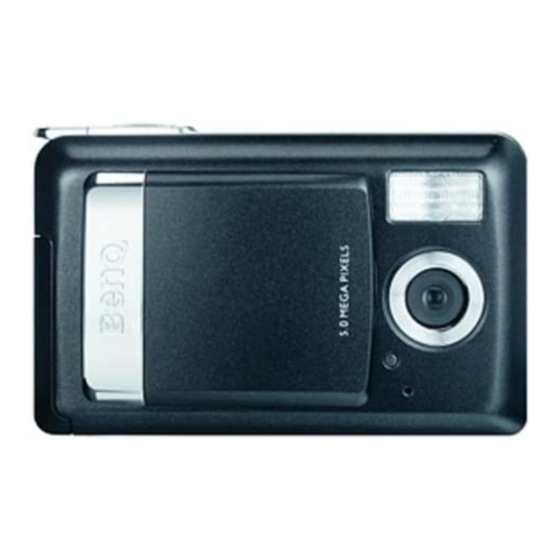
OURING AMERA Checking the package contents Carefully unpack your kit box and ensure that you have the following items. User Manual Digital camera USB cable AA batteries Hand strap Software CD-ROM Pouch If any of the items are missing or appear to be damaged, contact your dealer. Save the packaging in case you need to ship your camera for service. -
Page 8: Rear View
1.2.2 Rear view Focus switch ] Normal mode ] Macro mode USB terminal Tripod socket Battery / SD memory card cover OK button ] Zoom button ] Arrow button (Down) MODE button ] Arrow button (Right) ] Flash button ] Arrow button (Left) ] Self-timer button ] Arrow button (Up) MENU button... -
Page 9: Preparing Your Camera For Use
REPARING AMERA FOR Installing the battery Make sure that the power of the camera is off before inserting or removing the battery. To insert the battery: 1. Slide the battery / SD memory card cover. 2. Insert the battery in the correct orientation shown. •... - Page 10 • SD memory card in the following sizes are supported: 8 MB, 16 MB, 32 MB, 64 MB, 128 MB, 256 MB, 512 MB, and 1 GB. The camera is compatible with SD memory cards manu- factured by Panasonic, Toshiba, and Sandisk. Please contact your local dealer for pur- chase information.
-
Page 11: Using The Camera
SING THE AMERA Capture mode 3.1.1 Getting started with capturing images 1. Slide the lens cover to turn on the camera. The camera sounds one beep when it is initiated. 2. Compose your image in the LCD monitor. 3. Press the shutter button. •... -
Page 12: Capture Mode Lcd Monitor Information
3.1.2 Capture mode LCD monitor information 02/05/2006 08:03 Internal memory/SD Quality ] Night memory card indicator ]Fine ] Portrait ] Status of internal ]Standard ] Landscape memory ] Economy ] Backlight ] Status of SD Date and time Self-timer mode memory card Battery level 10s ]10 sec. -
Page 13: Choosing The Screen Language
3.1.3 Choosing the screen language Follow the steps below to set the OSD (On-Screen Display) language. 1. Press the MENU button. 2. Press the [ ] button to select [Setup] menu. 3. Press the [ ] / [ ] button to select [Language], and then press the OK button. -
Page 14: Using The Flash
• To disable Macro photography, slide the focus switch back to the Normal mode • When using the Macro mode, the icon [ ] will be displayed on the LCD monitor. • In the Macro mode, EV compensation, Scene mode and ISO speed cannot be adjusted. •... -
Page 15: Using The Self-Timer
3.1.8 Using the self-timer The self-timer can be used in situations such as group shots. When using this option, you should either mount the camera on a tripod (recommended) or rest it on a flat surface. The self-timer duration can be set as 2, 10, or 10+2 seconds. After the self-timer is set, the shutter automatically releases after 2, 10, or 10+2 seconds. -
Page 16: Capture Mode Menu Settings
3.1.10 Capture mode menu settings 3.1.10.1 Capture menu This menu is for the basic settings to be used when taking still images. 1. Press the MENU button and then scroll through the options by using the [ ] / [ ] button. -
Page 17: White Balance
To adjust EV, press the [ ] / [ ] button and press the OK button to confirm. Effective Subjects and Set Values Positive (+) Compensation • Copying of printed text (black characters on white paper) • Backlight portraits • Very bright scenes (such as snowfields) and highly reflective subjects •... -
Page 18: Sharpness
3.1.10.1.9 Sharpness Your camera will automatically emphasize the borders between light and dark areas of the image. This will make the image’s edges look sharper. [Hard]: Hard touch [Normal]: Normal touch [Soft]: Soft touch 3.1.10.1.10 Preview Set to display a photographed image on the LCD monitor immediately after you have taken the shot. -
Page 19: Recording Video Clips
3.2.2 Recording video clips This mode allows you to record video clips with sound via built-in microphone. 1. Press the MODE button to enter the Video mode [ 2. To start recording, press the shutter button. 3. To stop recording, press the shutter button again. 3.2.3 Video mode menu settings 3.2.3.1 Video Output menu... -
Page 20: Playback Mode Lcd Monitor Information (Video)
3.3.2 Playback mode LCD monitor information (video) 00:00:26 100-0002 320X240 Size 10:34 2006.02.10 0002 3.3.3 Playback mode - the basics 3.3.3.1 Viewing images or videos To play back still images or videos one at a time: 1. Press [ ] to enter Playback mode. The last recorded image appears on the LCD monitor. -
Page 21: Thumbnail Display
3.3.3.3 Thumbnail display This function allows you to view nine thumbnail images on the LCD monitor simultaneously so that you can quickly scan for a particular image. 1. Press [ ] to enter Playback mode. 2. Press the MENU button. 3. -
Page 22: Protecting Files
3.3.3.5 Protecting files This feature allows you to prevent captured images from being accidentally erased. 1. Press [ ] to enter Playback mode. Then press the MENU button to enter [Playback] menu. 2. Select [Protect] by using the [ ] / [ ] button, and press the OK button. -
Page 23: Playback Mode Menu Settings
3.3.4 Playback mode menu settings 3.3.4.1 Playback menu By using the [Playback] menu you can create an on-camera slideshow or configure DPOF settings. You may also delete or protect one or all stored images. 1. Press [ ] to enter Playback mode. Then press the MENU button to enter [Playback] menu. -
Page 24: Setup Mode
Setup mode You can select according to your preference for the camera settings in [Setup] of [Capture] / [Video Output] / [Play] menu. Navigate the options you wish to configure by using the [ ] button. 3.4.1 Date/Time This sets the date and the time. For details, refer to 3.1.4 “Setting the date and time”... -
Page 25: Pc Dependent Features
PC D EPENDENT EATURES Bundled software The camera is supplied with the following software. To install the software, refer to the information supplied with respective CDs. Ulead Photo Ulead® Photo Express™ 5.0 SE is a complete photo project software Express for digital images. -
Page 26: Step 1: Connecting The Camera To Your Computer
4.2.1 Step 1: Connecting the camera to your computer 1. Turn on the camera. 2. Connect one end of the USB cable to an available USB port on your computer. 3. Connect the other end of the USB cable to the USB terminal on the camera. -
Page 27: Step 1: Installing The Pc Camera Driver
4.3.1 Step 1: Installing the PC camera driver The PC-camera driver included in the CD-ROM is exclusively for Windows. 1. Insert the enclosed CD-ROM into your CD-ROM drive. 2. When the welcome screen appears, click “Install USB Driver”. Follow the on-screen instructions to complete the installation. -
Page 28: Connecting To A Pictbridge Compliant Printer (Optional Feature)
Connecting to a PictBridge compliant printer (optional feature) 4.4.1 Setting the DPOF DPOF (Digital Print Order Format) allows you to embed printing information on your SD memory card. By using DPOF, you can select an image to be printed and then specify how many prints or which image you would like. -
Page 29: Pc Dependent Features
Connecting the camera to the printer Connect one end of the USB cable to a PictBridge compliant printer. Connect the other end of the USB cable to the USB terminal on the camera. Then turn on the printer and your camera. -
Page 30: Troubleshooting
ROUBLESHOOTING Refer to the symptoms and solutions listed below before shipping your camera for service. If the problem persists, contact your local reseller or service center. Symptom Cause Solution The camera cannot be There is no battery or the battery is Insert the battery correctly. -
Page 31: Troubleshooting
Symptom Cause Solution I cannot download The free space on the hard disk of Ensure that the hard disk has enough images. your computer is insufficient. space for running Windows and that the drive for loading image files has free space equal to or greater than the memory card in the camera. -
Page 32: Specifications
PECIFICATIONS Item Description Image Sensor 5 Mega Pixels CCD Image Resolu- 2560 x 1920, 2048 x 1536, 1280 x 960, 640 x 480 tion Lens Fixed Focus: Focus Length: F=6.95 mm (Equivalent to 42 mm) Aperture: F3.3 Zoom Digital: 4X 2”... -
Page 33: Technical Support
Technical Support If you have any problem or question regarding the camera, you can visit the following web site for further assistance: http://support.BenQ.com For free driver updates, product information and news releases, visit the following web site: http://www.BenQ.com Service Information... - Page 34 <Memo> Service Information...
Need help?
Do you have a question about the DC C510 and is the answer not in the manual?
Questions and answers