Table of Contents
Advertisement
Advertisement
Table of Contents

Summary of Contents for Delta BB 1350
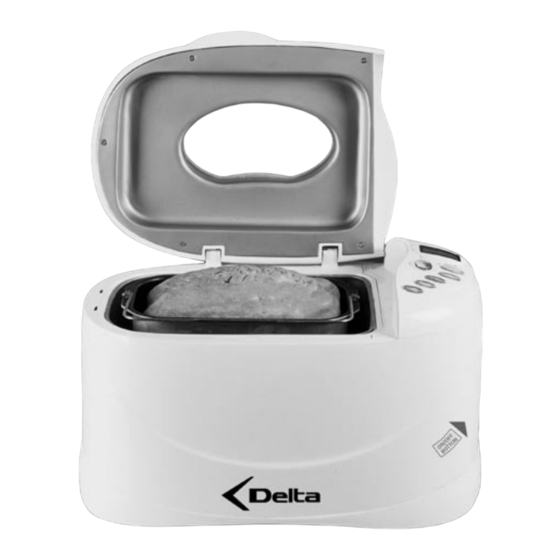
- Page 1 FULLY AUTOMATIC BREADMAKER FOR ALL KINDS OF BREAD DOUGHS, BB 1350 Please read the instructions carefully before using the machine. You will find a range of important and useful hints. Please keep the operating manual in a safe place and pass it on...
- Page 2 For technical reasons this page is empty...
-
Page 3: Table Of Contents
TABLE OF CONTENTS Page CE Declaration of Conformity....................4 General notes on safety ......................5 Special notes on safety ......................6 Areas of use...........................7 Technical data ........................7 Items supplied ........................8 List of possible program variations ..................9 Preparation times (including preheating times where available) .........10 Description of equipment .................... -
Page 4: Ce Declaration Of Conformity
CE DECLARATION OF CONFORMITY Hans-Ulrich Petermann GmbH & Co. KG hereby declares that this pro- duct complies with the following EU Directives: 73/23/EC, 89/336/EC and 89/109/EC and that this is confirmed by the CE marking. The equipment meets the requirements of German Law on equipment safety. -
Page 5: General Notes On Safety
GENERAL SAFETY ADVICE This appliance may only be connected to a properly installed and protected power outlet with supply voltage in accordance with the identification label. Always unplug the appliance in case of malfunction, before cleaning and when the appliance is not in use! Never pull by the power cable! Never submerge the appliance in water and do not expose to rain or other- moisture! If the appliance should fall into water, only remove it from the water when the-... -
Page 6: Special Notes On Safety
SPECIAL NOTES ON SAFETY WHEN USING BREADMAKERS Do not stand the equipment on hot surfaces or near sources of heat. It should not be placed beneath wall cupboards or too near the wall, to avoid a build-up of heat. Bread can burn! Never stand your breadmaker near highly flammable materials, such as near or beneath net curtains! Only stand the breadmaker on a heat resistant, level, non-slip area of your kitchen worktop. -
Page 7: Areas Of Use
The surface of the equipment lid may become hot to the touch. Proceed with care. To remove the dough container always use an oven cloth or glove. Do not relocate the equipment when the dough container is full of hot liquid (jam). -
Page 8: Items Supplied
ITEMS SUPPLIED 1 Breadmaker 2 Kneading hooks and 1 baking pan 1 Measuring beaker 1 Measuring scoop (teaspoon/tab- lespoon) 1 Tool to remove baked-in kneading hooks 1 Operating manual without illustra- tions... -
Page 11: Description Of Equipment
DESCRIPTION OF EQUIPMENT Breadmaker: A) Casing lid B) Control panel C) ON/OFF switch D) “COOL TOUCH” casing E) Baking pan, non-stick coated F) Baking chamber G) Handle for removing baking pan H) Kneading hook, non-stick coated I) Viewing window... - Page 12 Operating buttons: J) LCD display K) Select button [“Bread size”] 1 = Basic L) Select button for degree of browning [“Colour”] 2 = Quick 3 = French 4 = Rapid M) Select button [“Time +”] 5 = Whole wheat 6 = Sweet 7 = Dough 8 = Bake 9 = Jam...
-
Page 13: Description Of The Display And Operational Controls
DESCRIPTION OF THE DISPLAY AND OPERATIONAL CONTROLS Select button You may start or interrupt the selected program using this button. To start, press the button once. You will hear a short bleep, both dots on the digital display will start to flash and the program will begin. - Page 14 3 = French*: This program is used to process doughs with longer standing phases. For light, crustier breads made of white, heavily ground flour (mostly Type 405). 4 = Rapid*: This program is used for making breads quickly. This program has no facility for baking the bread later;...
- Page 15 Select button Color Farbe for degree of browning light medium dark 0.75 kg 1.00 kg 1.35 kg This button is used to select the desired crust colour: light, medium or dark. Every time the button is pressed the arrow in the LCD display moves up one browning level.
-
Page 16: Heat Retention Function
Example: It is now 20:30 and you would like the bread to be ready for the next morning at 7:00, i.e. in 10 hours and 30 minutes’ time. First of all select the desired program, the de- gree of browning and the desired loaf size. Then press the “Time +” button or “Time –”... -
Page 17: Ambient Conditions
AMBIENT CONDITIONS The breadmaker will function WITHOUT any problems within a wide range of tem- peratures but there may be differences in the size of the loaf if the room is very hot or very cold. The best results will be obtained at room temperatures between 15 and 34oC. -
Page 18: Before Using For The First Time
BEFORE USING FOR THE FIRST TIME Carefully remove the breadmaker from its packaging and clean the baking pan, the kneading hooks, the measuring beaker, the measuring scoop and the removal tool in hot water using washing-up liquid or alternatively in a dishwasher (see also notes in the CLEANING section). - Page 19 3) Now place the chosen ingredients into the dough container. Take the greatest possible care when using the baking pan. When adding the ingredients always take the baking pan out of the machine, to avoid spilling onto the baking chamber. Risk of fire from burning dough! Keep to the order given in the relevant recipe: a) First of all the liquid ingredients are placed in the baking pan, e.g.
- Page 20 13) At the end of the program you will hear about 8 – 10 bleeps. This signals the end of the program and the machine has now switched to heat retention mode. If you would like to take the bread out immediately press the “Start/Stop” button for about 2-3 seconds to end the program manually.
-
Page 21: Helpful Hints
HELPFUL HINTS ➤ Ensure that all ingredients are at about the same temperature. Room temperature to lukewarm (18oC to 23oC) is best. ➤ When using very soft water the fermenting process of the yeast is heightened, i.e. the dough rises further. To prevent the dough from rising too much we recommend reducing the yeast quantity given by about 25%. - Page 22 ➤ Under no circumstances use too much yeast or baking powder. The dough might overflow. Also the bread could push against the lid if it rises too much. ➤ The use of fresh yeast may have a negative effect on the desired baking result. Therefore use only dried yeast to produce the dough.
-
Page 23: Tips Regarding Recipes
TIPS REGARDING RECIPES Pleas use the measuring scoops included in the following way: The small measuring scoop (teaspoon) is equivalent to a level teaspoon The large measuring scoop (tablespoon) is equivalent to a level tablespoon Even slight deviations when adding ingredients may have a considerable effect on baking results. -
Page 24: Recipes
Recipes: Here are some recipe suggestions for your breadmaker. Please always add the ingredients in the order given. Ensure that the dried yeast does not come into contact with liquid. The recipes in this instruction manual assume that the content of a sachet of dried yeast is 7 g. - Page 25 White bread (Program 3: “French”) Potato bread (Program 4 “Rapid”)
- Page 26 French herb bread (Program 4: “Rapid”) Pizza dough (Program 4: “Rapid”)
- Page 27 Wholegrain bread (Program 5: “Whole wheat”) Cinnamon raisin nut bread (Program 6: “Sweet”)
- Page 28 Christmas bread (Program 6: “Sweet”) Sandwich bread (Program 10: “Sandwich”)
- Page 29 Jam (Program 9: “Jam”) Gluten free bread (Program 11: “Gluten free”) Good luck!
-
Page 30: Own Recipes
Own recipes... - Page 31 Own recipes...
-
Page 32: Cleaning
CLEANING Before cleaning always pull out the plug and allow the machine to cool down! Wipe the outside of the machine with a damp well-wrung cloth and then rub dry. Do not use sharp or chafing cleaning agents. Never put water in the machine! Do not use metallic objects or sharp or chafing cleaning agents to clean the baking chamber, the baking pan, the kneading hooks or the heating element. -
Page 33: Undesirable Baking Results - Causes And Solutions
Table of faults... -
Page 34: Troubleshooting
TROUBLESHOOTING Fault: Cause: Correction: - The equipment is not > Equipment not connected >> Insert plug into socket. working. to socket. > The ON/OFF switch has >> Move ON/OFF switch to not been activated. position “I”. > Fault in the socket. >>... - Page 35 Fault: Cause: Correction: - The ingredients were not > The program was interrup- >> Stir the ingredients and stirred evenly. ted inadvertently. start the program once again. > The lid was raised several >> Do not open the lid while times during the last rising the last rising phase is phase.
- Page 36 Fault: Cause: Correction: > The dough is so heavy >> Follow the recipe in- that the drive mechanism structions closely and cannot function. measure out the ingredi- ents accurately. - The bread has risen so > Fresh yeast used. >> Use only dried yeast. much that the dough is touching the lid.
- Page 37 Fault: Cause: Correcting: - The crust is too thick and > Different recipes or ingre- >> If the degree of browning the degree of browning dients have a major effect is too dark for the recipe is too dark when making on results.
-
Page 38: Warranty Conditions
GUARANTEE CONDITIONS Your appliance is covered by guarantee for a period of 3 years. This guarantee does not cover defects caused by incorrect connection, the use of attachments supplied by other manufactures, normal wear and tear, the use of force, your own attempts at repairs, or damage caused by improper use. -
Page 39: Disposal
DISPOSAL When the machine is no longer serviceable unplug it and take all parts and packaging materials to be disposed of in an environmentally friendly way – according to the currently valid regulations. The pertinent local administration authority will provide more information on this. - Page 40 BB 1350.06-E 07/06 © HUP GmbH & Co. KG...
Need help?
Do you have a question about the BB 1350 and is the answer not in the manual?
Questions and answers