Table of Contents
Advertisement
Advertisement
Table of Contents

Related Manuals for LDG YT-100


Summary of Contents for LDG YT-100
- Page 1 YT-100 OPERATIONS MANUAL MANUAL REV A LDG YT-100 Automatic Tuner for Yaesu FT-857/897 and FT-100 Transceivers LDG Electronics 1445 Parran Road St. Leonard MD 20685-2903 USA Phone: 410-586-2177 Fax: 410-586-8475 ldg@ldgelectronics.com www.ldgelectronics.com PAGE 1...
-
Page 2: Table Of Contents
Table Of Contents Introduction Jumpstart, or “Real hams don’t read manuals!” Specifications An Important Word About Power Levels Important Safety Warning Getting to know your YT-100 Front Panel Rear Panel Installation Compatible Transceivers FT-100, FT-100D Installation: FT-857(D) and FT-897(D) Installation... -
Page 3: Introduction
Yaesu FT-100/857/897 HF radio. The YT-100 connects to the CAT (Computer Automated Transceiver) port on the back of the radio. The CAT interface allows an external device such as a PC or the YT-100 to control the FT-100/857/897 by sending it serial commands. The YT-100 takes advantage of this... -
Page 4: Specifications
The transceiver automatically switches to AM mode, reduces power, and keys up, and the YT-100 begins a tuning cycle. At the end of the tuning cycle, the original mode and power level is restored. Wait for the tuning cycle to end; you’re now ready to operate! SPECIFICATIONS 0.1 to 125 watts SSB and CW peak power, 100W on digital modes and 6 meters. -
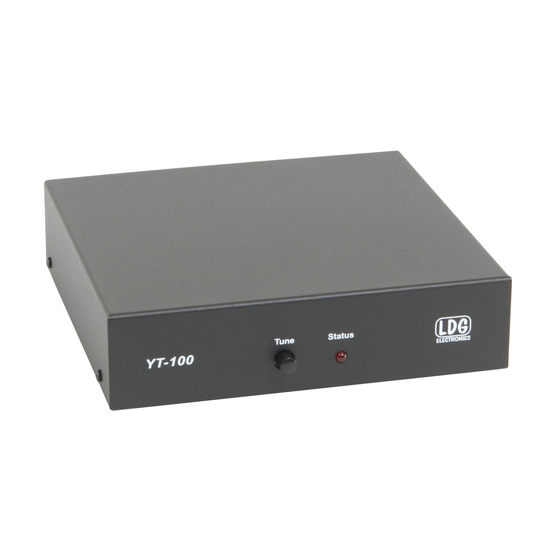
Page 5: Getting To Know Your Yt-100
The YT-100 is designed specifically for use with the FT-100/857/897. Tuning is performed when the Tune button is pushed on the front of the YT-100. The tuner can be placed in bypass mode by pressing the Tune button momentarily. -
Page 6: Rear Panel
RADIO port, and is switched under software control by the YT-100’s microprocessor. The firmware of the YT-100 has been written such that this will seem transparent to the user -- if using CAT to control your FT-100/857/897, just plug the PC’s CAT cable into this port instead of the CAT jack on the back of the transceiver. -
Page 7: Installation
WARNING: Do not attempt to use the YT-100 with any other transceivers, even if the CAT plug fits. At best, the YT-100 simply won’t work with these radios. At worst, it could cause damage to the YT-100, the radio, or both. -
Page 8: Ft-100, Ft-100D Installation
FT-100, FT-100D Installation: Connect the HF/50 MHz antenna jack on the FT-100 to the TX jack on the back of the YT-100, using a 50 ohm coax cable rated 125 watts or greater. Connect the supplied radio interface cable to the mini-DIN 8-pin jack on the rear of the YT-100, marked “Radio”. -
Page 9: Ft-857(D) And Ft-897(D) Installation
FT-857 and FT-897 Installation Connect the HF/50 MHz antenna jack on the FT-857/897 to the TX jack on the back of the YT-100, using a 50 ohm coax cable rated 125 watts or greater. Connect the supplied radio interface cable to the mini-DIN 8-pin jack on the rear of the YT-100, marked “Radio”. -
Page 10: Operation
In this manner, the YT-100 “learns”; the longer you use it, the more closely it adapts itself to the bands and frequencies used. Most users will probably use memory tuning most of the time; it takes advantage of any saved tuning settings, but automatically defaults to a full tuning cycle if no stored data is available. -
Page 11: Some Notes About Tuning
Although the FT-100, FT-857, and FT-897 are all designed to transmit and receive on all HF bands plus 6 meters, 2 meters and 70 centimeters, the YT-100 is designed only to work on HF and 6 meters. In addition, the FT-100/857/897 transceivers all transmit UHF and VHF on a different antenna jack than the jack used for HF and 6 meters. -
Page 12: Toggle Bypass Mode
Toggle Bypass Mode: To toggle between bypassed and active mode, press the front panel Tune button on the YT-100 momentarily. The Status LED will flash three times to indicate that the tuner is in bypass mode. Press the front panel Tune button momentarily again to recall the previous tuner settings. The Status LED will flash once to indicate that the tuner is no longer bypassed. -
Page 13: Initiate A Memory Tune Cycle
Initiate a Memory Tune Cycle: To initiate a memory tuning cycle, press and hold the Tune button on the front of the YT-100 until the Status LED lights up. A memory tuning cycle will begin. The YT-100 will force the transceiver into AM mode, change the power level to one that is appropriate for tuning, and key the radio. -
Page 14: Force A Full Tune Cycle
To force a full tuning cycle, press and hold the Tune button on the front panel of the YT-100 until the Status LED lights up, and keep holding until the Status LED goes out again. Release the Tune button once the Status LED goes out. -
Page 15: Status Led
The only requirement is that the tuner remains dry. The supplied radio interface cable is 14 inches long. If it is desired that the YT-100 is positioned farther from the transceiver than this cable length allows, a custom cable will need to be constructed. -
Page 16: Remote Operation
To operate the tuner remotely, press the momentary contact switch on the remote cable in the same manner as the front panel Tune switch on the YT-100. A short press will toggle bypass, a medium- length press will initiate a memory tune, and a long press will force a full tuning cycle. - Page 17 The YT-100 monitors the Computer port for activity before beginning any tuning cycle. Only when the CAT line is idle for a period of time will the YT-100 take over control of the CAT line in order to PAGE 17...
-
Page 18: Theory Of Operation
PC. This procedure is completely automatic, and is transparent to the user. Simply hook up a PC, and use the rig control software as normal. Press the TUNE button on the YT-100 when tuning is desired. THEORY OF OPERATION... - Page 19 SWR meter until a minimum SWR is reached. The LDG Electronics YT-100 automates this process. No tuner will fix a bad antenna. If the antenna is far from resonance, the inefficiencies inherent in such operation are inescapable;...
-
Page 20: The Ldg Yt-100
The high/low impedance relay switches the capacitor bank either to the transmitter side of the inductor bank, or to the antenna side. This allows the YT-100 to handle loads that are either greater than or less than 50 ohms. All relays are sized to carry 125 watts continuously. -
Page 21: A Word About Tuning Etiquette
The LDG Customer Support Center staff is ready to answer your product question by telephone and over the Internet. We know that you will enjoy your product even more knowing LDG is ready to answer your questions as the need arises. -
Page 22: Out Of Warranty Service
OUT OF WARRANTY SERVICE Any time a product fails after the warranty, LDG wants to help you get it fixed. Send the product to us for repair. We will determine what needs to be done, and, based on your prior instruction, either contact you with an estimate or fix it and contact you with a request to pay any repair charges.
Need help?
Do you have a question about the YT-100 and is the answer not in the manual?
Questions and answers