
Related Manuals for Caple C813C


Summary of Contents for Caple C813C
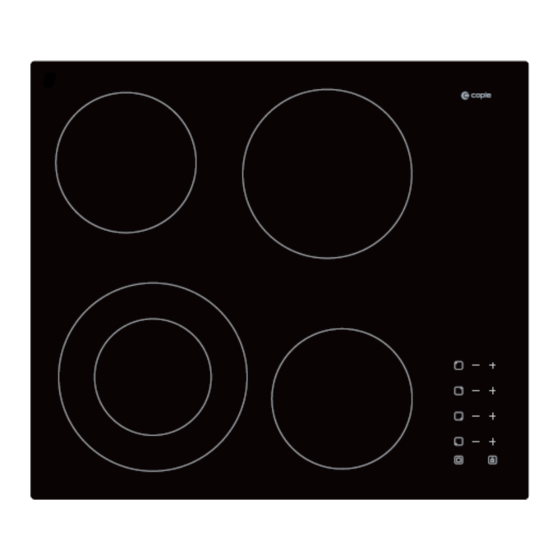
- Page 1 Instruction manual for ceramic hob Contact Caple on 0844 800 3830 or for spare parts www.4caple.co.uk...
-
Page 2: Product Overview
Congratulations on the purchase of your new Ceramic Hob. We recommend that you spend some time reading this Instruction / Installation Manual in order to fully understand how to install and operate it correctly For installation, please read the installation section. Read all the safety instructions carefully before use and keep this Instruction / Installation Manual for future reference. -
Page 3: Product Information
Product Information The microcomputer ceramic cooker hob can meet different kinds of cuisine demands because of resistance wire heating, micro-computerized control and multi-power selection, really the optimal choice for modern families. The ceramic cooker hob centers on customers and adopts personalized design. The hob has safe and reliable performances, making your life comfortable and enabling to fully enjoy the pleasure from life. -
Page 4: Choosing The Right Cookware
Choosing the right Cookware Do not use cookware with jagged edges or a curved base. Make sure that the base of your pan is smooth, sits flat against the glass, and is the same size as the cooking zone. Always centre your pan on the cooking zone. Always lift pans off the ceramic hob –... -
Page 5: Using Your Ceramic Hob
Using your Ceramic Hob To start cooking 1. Touch the ON/OFF control. • After power on, the buzzer beeps once, all the indicators light up for 1 second then go out, indicating that the ceramic hob has entered the state of standby mode. 2. -
Page 6: When You Have Finished Cooking
When you have finished cooking 1a. Turn the cooking zone off by scrolling down to “-“ or touching "+" "-" control together. 1b. Turn the whole hob off by touching the ON/OFF control. 2. Beware of hot surfaces will show which cooking zone is hot to touch. It will disappear when the surface has cooled down to a safe temperature. - Page 7 Using the Dual zone function • The function only work in 4# cooking zone • The dual cooking zone has two cooking areas that you can use a central section and an outer section. You can use the central section (A) independently or both sections (B) at once.
- Page 8 4. Touching the dual zone control “ “, you can activate the outer section as well. 5. A neon next the dual cooking zone control will light. 6. The cooking zone indicator show “ P “ and “ 6 ” alternately Deactive the Dual zone 1.
-
Page 9: Locking The Controls
Locking the Controls • You can lock the controls to prevent unintended use (for example children accidentally turning the cooking zones on). • When the controls are locked, all the controls except the ON/OFF control are disabled. To lock the controls Touch the keylock control. -
Page 10: Cooking Guidelines
Cooking Guidelines Take care when frying as the oil and fat heat up very quickly, particularly if you’re using Power Boost. At extremely high temperatures oil and fat will ignite spontaneously and this presents a serious fire risk. Cooking Tips •... -
Page 11: Heat Settings
cooking large quantities, cook the food in several smaller batches. 3. Preheat the pan briefly and add two tablespoons of oil. 4. Cook any meat first, put it aside and keep warm. 5. Stir-fry the vegetables. When they are hot but still crisp, turn the cooking zone to a lower setting, return the meat to the pan and add your sauce. - Page 12 What? How? Important! Everyday soiling on 1. Switch the power to the • When the power to the hob is glass (fingerprints, hob off. switched off, there will be no ‘hot marks, stains left by 2. Apply a hob cleaner while surface’...
-
Page 13: Hints And Tips
(layers of different metals vibrating differently). Technical Specification Cooking Hob C813C Cooking Zones 4 Zones Supply Voltage 220-240V~ 50/60Hz Installed Electric Power 6000-7000W Product Size L×W×H(mm) 590X520X50 Building-in Dimensions A×B (mm) -
Page 14: Selection Of Installation Equipment
Installation Selection of installation equipment Cut out the work surface according to the sizes shown in the drawing. For the purpose of installation and use, a minimum of 5 cm space shall be preserved around the hole. Be sure the thickness of the work surface is at least 30mm. Please select heat-resistant work surface material to avoid larger deformation caused by the heat radiation from the hotplate. -
Page 15: Before Locating The Fixing Brackets
A(mm) B(mm) C(mm) 50 mini 20 mini Air intake Air exit 5mm Before locating the fixing brackets The unit should be placed on a stable, smooth surface (use the packaging). Do not apply force onto the controls protruding from the hob. Fix the hob on the work surface by screw four brackets on the bottom of hob (see picture) after installation. -
Page 16: Connecting The Hob To The Mains Power Supply
5. To avoid any damage, the sandwich layer and adhesive must be resistant to heat. 6. A steam cleaner is not to be used. Connecting the hob to the mains power supply The power supply should be connected in compliance with the relevant standard,or a single-pole circuit breaker.the method of connection is shown below. -
Page 17: Safety Warnings
person. Safety Warnings Your safety is important to us. Please read this information before using your hob. Installation Electrical Shock Hazard • Disconnect the appliance from the mains electricity supply before carrying • out any work or maintenance on it. •... -
Page 18: Health Hazard
Health Hazard • This appliance complies with electromagnetic safety standards. • However, persons with cardiac pacemakers or other electrical implants (such as insulin pumps) must consult with their doctor or implant manufacturer before using this appliance to make sure that their implants will not be affected by the electromagnetic field. •... - Page 19 • Do not use pans with jagged edges or drag pans across the ceramic glass surface as this can scratch the glass. • Do not use scourers or any other harsh abrasive cl eaning agents to clean your hob , as these can scratch the ceramic glass.
Need help?
Do you have a question about the C813C and is the answer not in the manual?
Questions and answers