Table of Contents
Advertisement
Advertisement
Table of Contents

Related Manuals for Qomo Hite Vision


Summary of Contents for Qomo Hite Vision
- Page 1 QOMO Hite Vision Interactive Whiteboard User Manual Interactive Whiteboard User Manual Please keep this manual for future reference. This is the general manual for the Interactive Whiteboard and there might be slight differences © Copyright 2012 QOMO HiteVision, LLC. All Rights Reserved...
- Page 2 QOMO Hite Vision Interactive Whiteboard User Manual between the actual product and these descriptions. Table of Contents ATTENTION SYSTEM REQUIREMENTS ................3 ..................6 OW TO NSTALL ARDWARE ..................13 OW TO NSTALL OFTWARE SPECIFICATIONS ................... 25 © Copyright 2012 QOMO HiteVision, LLC. All Rights Reserved...
- Page 3 Do not touch, cut, or scratch the panel and frame with sharp or hard objects. Do not drill holes or nail in any place of the product since it will damage the device. © Copyright 2012 QOMO HiteVision, LLC. All Rights Reserved...
-
Page 4: System Requirements
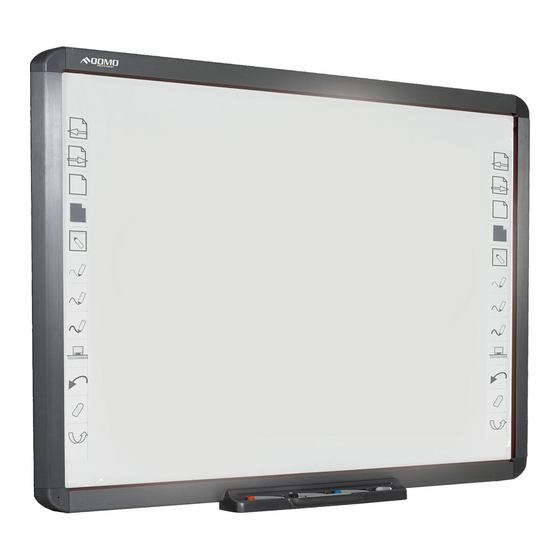
Display Card: Support 256 or higher Hard Disk: 2 GB Screen Display Resolution:1024×768, 1280×1024 USB 2.0 Port : Microsoft Windows XP/2003/Vista/7 32-bit Software Running Environment or 64-bit © Copyright 2012 QOMO HiteVision, LLC. All Rights Reserved... - Page 5 Hot Keys: Hot keys on one side or both sides of the board are used to do functions within the annotation software. Smart Pen tray:The user can change pen writing stroke colors when using the smart pen tray. © Copyright 2012 QOMO HiteVision, LLC. All Rights Reserved...
- Page 6 Note: On the upper left and bottom right corner on the board, there are projection area lines (such as " "). When images are projected to the interactive whiteboard, the projection area should be limited within these lines for better results when you are using the board. © Copyright 2012 QOMO HiteVision, LLC. All Rights Reserved...
- Page 7 Screw in two M3 screws from the bottom of the pen tray. See the following diagram: © Copyright 2012 QOMO HiteVision, LLC. All Rights Reserved...
- Page 8 (Figure A). Install the wall-mount brackets and tighten the bolts into each hole. Hang up the whiteboard with the calibration hole D in four corners in the wall-mounting bolts (Figure B). Figure A © Copyright 2012 QOMO HiteVision, LLC. All Rights Reserved...
- Page 9 QOMO Hite Vision Interactive Whiteboard User Manual Figure B © Copyright 2012 QOMO HiteVision, LLC. All Rights Reserved...
- Page 10 M5 bolts. See the following diagram. 2.There are wall-mount brackets A and B on the back of the whiteboard. The wall-mount brackets B should be screwed in. See the following diagram. © Copyright 2012 QOMO HiteVision, LLC. All Rights Reserved...
- Page 11 Install the fixing plate according to the space between wall-mounts brackets A: After hanging up the whiteboard, drill 2 holes for expansion bolts according to actual positions, and fix the wall-mount brackets B into the wall. See the following diagram. © Copyright 2012 QOMO HiteVision, LLC. All Rights Reserved...
- Page 12 QOMO Hite Vision Interactive Whiteboard User Manual © Copyright 2012 QOMO HiteVision, LLC. All Rights Reserved...
- Page 13 Note: A normal USB cable might not be compatible to this whiteboard. Connect the USB cable to the USB port in the computer. Connect the computer and the projector (refer to the projector’s User Manual for more details). © Copyright 2012 QOMO HiteVision, LLC. All Rights Reserved...
- Page 14 Follow the instructions and complete the installation of the whiteboard software. For complete functions, click the Full Installation button and complete the installation as instructed. The computer needs to restart to activate the software after the installation has completed. © Copyright 2012 QOMO HiteVision, LLC. All Rights Reserved...
- Page 15 Step 1: Connect all necessary devices and make sure the whiteboard service program has been automatically launched once the computer’s power is on. If not, click "Start-All Programs-QOMO-Flow!Works server" and run the whiteboard service program. It will take a few seconds for the program to load.
- Page 16 Click "Calibrate" and the calibration screen will be displayed: Step 5:Follow the directions that are given on the board. Touch the center of the flashing "十" with the interactive whiteboard pen tip or your finger. A © Copyright 2012 QOMO HiteVision, LLC. All Rights Reserved...
- Page 17 Hold your contact there until the bar is completely filled. Move to the next calibration point as directed and continue with this process until the calibration is finished. © Copyright 2012 QOMO HiteVision, LLC. All Rights Reserved...
- Page 18 However, the calibration process is very much the same. For products with shortcut keys on the board, there are shortcut-key calibration steps at end of the calibration session. © Copyright 2012 QOMO HiteVision, LLC. All Rights Reserved...
- Page 19 Double click the Flow! Works annotation software icon on the desktop to run the software. You can do the following with the annotation software: © Copyright 2012 QOMO HiteVision, LLC. All Rights Reserved...
- Page 20 For the best writing results, use the pen in the accessory box to operate. To avoid scratching the surface, do not use other objects to write on the board. © Copyright 2012 QOMO HiteVision, LLC. All Rights Reserved...
- Page 21 When pens are picked up from the pen tray, you can choose the stroke color from the software tools bar. Put the pens into corresponding slot in the pen tray when you are not going to use them. © Copyright 2012 QOMO HiteVision, LLC. All Rights Reserved...
- Page 22 Clean the dust in the pen tray slot with a dry cloth regularly. The pen tray might work abnormally if it is not cleaned for a long time. © Copyright 2012 QOMO HiteVision, LLC. All Rights Reserved...
- Page 23 Flow!Work by tapping one of the hot keys. Different models have different hot key functions. Refer to the above hot key explanations according to the actual models that you purchased. © Copyright 2012 QOMO HiteVision, LLC. All Rights Reserved...
-
Page 24: Trouble Shooting
Remove them, if any. Uninstall the driver and Driver malfunction reinstall it. Refer to instructions Drive icon is green Inaccurate calibration. above and recalibrate. © Copyright 2012 QOMO HiteVision, LLC. All Rights Reserved... - Page 25 Remove other objects There are other objects or is not working stroke color when or clean the dust from dust in the pen tray slots. normally. picking up or the pen tray slots. © Copyright 2012 QOMO HiteVision, LLC. All Rights Reserved...
-
Page 26: Specifications
10 - 95% We commit ourselves to keeping our products up to date and are always striving to improve our technology. The contents in this manual are subject change without prior notice. © Copyright 2012 QOMO HiteVision, LLC. All Rights Reserved... - Page 27 QOMO Hite Vision Interactive Whiteboard User Manual Contact Us: QOMO Hite Vision 46950 Magellan Drive Wixom, MI 48393, USA www.qomo.com 1-866-990-QOMO support@qomo.com © Copyright 2012 QOMO HiteVision, LLC. All Rights Reserved...
Need help?
Do you have a question about the Hite Vision and is the answer not in the manual?
Questions and answers