Jura IMPRESSA C5 Manual
Hide thumbs
Also See for IMPRESSA C5:
- Owner's manual (88 pages) ,
- Manual (84 pages) ,
- Operating instructions and warranty (26 pages)
Table of Contents

Related Manuals for Jura IMPRESSA C5


Summary of Contents for Jura IMPRESSA C5
-
Page 1: The Impressa C5 Manual
The IMPRESSA C5 Manual The ‘IMPRESSA C5 Manual’ has been awarded the seal of approval by the independent German Tech nical Inspection Agency, TÜV SÜD, due to its easy-to-understand style, its thoroughness and coverage of safety aspects. -
Page 2: Table Of Contents
Control elements and accessories Proper use For your safety The IMPRESSA C5 Manual Symbol description ............................8 IMPRESSA C5 – Click & Drink Coffee that fulfils your wildest dreams ....................9 Click & Drink ..............................9 JURA on the Internet ..........................10 Knowledge Builder ............................. 10 Preparing and using your IMPRESSA for the first time Setting up .............................. - Page 3 Cleaning the Easy Cappuccino Frother ....................34 Descaling the water tank ..........................35 Messages in the maintenance field and symbol display Troubleshooting Transport and environmentally neutral disposal Empty system ............................39 Transport ..............................39 Disposal ............................... 39 10 Technical data Index JURA contact details / Legal information...
-
Page 4: Control Elements And Accessories
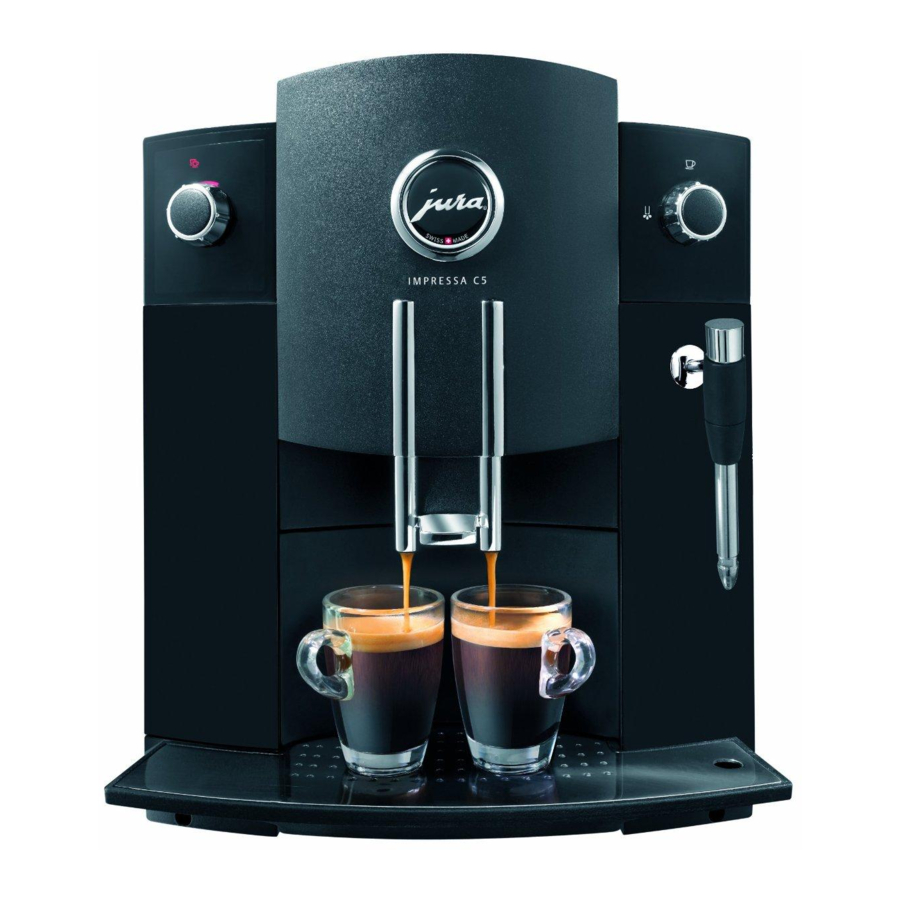
Control elements and accessories Mains cable (see rear side) On/Off button Switch for setting fineness of grind Figure: IMPRESSA C5 platinum Filler funnel for pre-ground coffee Drip tray Cup tray Cup platform Water tank with level indicator JURA Cappuccino Cleaner... - Page 5 Control elements and accessories Symbol display Maintenance field Symbol display Maintenance indicator Rotary Switch Access door Light segments Maintenance field Symbols Indicators 1 Espresso Water tank 2 Espressos Coffee grounds container 1 coffee Bean container 2 coffees Cleaning button P (Programming) Descaling button Maintenance Filter button...
-
Page 6: Proper Use
JURA service centre. If the power cable for this machine is damaged, it must be repaired either directly by JURA or by a JURA approved service centre. Make sure that the IMPRESSA and the power cable are not located close to hot surfaces. - Page 7 The rating plate is located on the underside of your IMPRESSA. Further technical data is given in Chapter 10 ‘Technical Data’. Use only original JURA care products. Use of accessories that are not explicitly recommended by JURA could damage the IMPRESSA.
-
Page 8: The Impressa C5 Manual
The IMPRESSA C5 Manual The IMPRESSA C5 Manual You are holding the manual for your IMPRESSA C5 in your hand. The information contained in this manual will help you to familiarise yourself with your IMPRESSA safely and quickly and teach you the full range of facilities it offers. -
Page 9: Impressa C5 - Click & Drink
Click & Drink The IMPRESSA C5 demonstrates just how wonderful a perfect cup of coffee can taste and how easy it is to prepare one. Thus, the fur- ther development of the IMPRESSA compact series is setting new standards in coffee quality while at the same time maintaining a visually pleasing appearance from every angle. -
Page 10: Jura On The Internet
IMPRESSA and on every aspect of the subject of coffee. Knowledge Builder You can familiarise yourself with your IMPRESSA C5 in a fun way on the PC. The Knowledge Builder awaits you at www.jura.com. The interactive assistant, LEO, will support you and explain the... -
Page 11: Preparing And Using Your Impressa For The First Time
2 Preparing and using your IMPRESSA for the first time 2 Preparing and using your IMPRESSA for the first time This chapter provides you with the information you need to use your IMPRESSA without any problems. You will prepare your IMPRESSA step-by-step for your first coffee experience using it. -
Page 12: First-Time Use
2 Preparing and using your IMPRESSA for the first time Fill the bean container with coffee beans, then close the aroma preservation cover and the bean container cover. First-time use If the machine is operated with a defective power cable, there is a danger of electric shock. -
Page 13: Using And Activating Filter
Perform the ‘Using filter’ operation without a break. This will ensure that your IMPRESSA always produces its best. You can also try out the ‘Using filter’ operation online. Visit the Knowledge Builder on www.jura.com. Remove the packaging on the CLARIS filter cartridge. Remove the water tank and empty it. - Page 14 2 Preparing and using your IMPRESSA for the first time Place a receptacle (containing at least 500 ml) under the Easy Cappuccino Frother. If the milk pipe is connected, remove it. Turn the switch in the anticlockwise direction. Rinsing of the filter will now begin. The light segment by the switch will light up.
-
Page 15: Assessing And Setting Water Hardness
2 Preparing and using your IMPRESSA for the first time Assessing and setting The harder the water is, the more frequently the IMPRESSA needs to water hardness be descaled. It is therefore important to set the water hardness. However, if you are using the CLARIS filter cartridge and have activated the filter, you will not be able to adjust the water hardness. -
Page 16: Adjusting Grinder
2 Preparing and using your IMPRESSA for the first time Hold down the Descaling button until the Descaling indi- cator lights up. The Descaling indicator and the symbols will A S D now light up. Turn the Rotary Switch until the four symbols ä... -
Page 17: Switching On
2 Preparing and using your IMPRESSA for the first time Switching on When the IMPRESSA is switched on, a prompt to perform a rinse operation automatically appears. Press the On/Off button to switch the IMPRESSA on. As long as the machine is heating up, the Maintenance sym bol will flash. -
Page 18: Familiarising Yourself With The Control Options
If you prefer to familiarise yourself with your IMPRESSA in a fun way on the PC, the interactive Knowledge Builder tutorial pro- gram can be found on the Internet at www.jura.com. Preparing drinks at the Prepare your favourite coffee speciality at the touch of a button. -
Page 19: One-Off Setting During Drink Preparation
3 Familiarising yourself with the control options Example: this is how to prepare an Espresso. Place an Espresso cup under the coffee spout. Turn the Rotary Switch to the 1 Espresso setting ä l Press the Rotary Switch to initiate preparation of the Espresso. -
Page 20: Adjusting The Permanent Cup Size Settings
3 Familiarising yourself with the control options While the grinder is running, turn the Rotary Switch in a ä l clockwise direction until three light segments have lit up. The grinding operation stops, brewing begins and the pre- defined quantity of water flows into the cup. Drink preparation stops automatically. -
Page 21: Preparing Drinks At The Touch Of A Button
You can stop the machine at any time while a coffee speciality is being prepared. To do this press the Rotary Switch. You can also try out the preparation of coffee specialities online. Visit the Knowledge Builder on www.jura.com. Espresso and coffee All speciality coffees (espresso... -
Page 22: Pre-Ground Coffee
4 Preparing drinks at the touch of a button Place a cup under the Easy Cappuccino Frother. Turn the Rotary Switch so that it points to the Steam ä l symbol Press the Rotary Switch to confirm your choice. The Steam symbol will continue flashing until the IMPRESSA has warmed up. - Page 23 4 Preparing drinks at the touch of a button If you have added too little pre-ground coffee, the IMPRESSA will come to a halt ready for further use. Example: proceed as follows to prepare a cup of coffee using pre- ground coffee.
-
Page 24: Milk Foam
4 Preparing drinks at the touch of a button Milk foam Precondition: your IMPRESSA is ready to use, the Easy Cappuccino Frother is mounted. Take the milk pipe out of the Welcome Pack. Take the protective cap off the Easy Cappuccino Frother. Attach the milk pipe to the frother. - Page 25 4 Preparing drinks at the touch of a button Take the hot water nozzle out of the Welcome Pack. Insert this into the Connector System with a light turning © motion. Place a cup under the hot water nozzle. Precondition: your IMPRESSA is ready for use. Turn the switch in the anticlockwise direction.
-
Page 26: Adjusting The Permanent Settings In Programming Mode
5 Adjusting the permanent settings in programming mode 5 Adjusting the permanent settings in programming mode Automatic switch-off By instructing your IMPRESSA to automatically switch itself off, you can cut down your energy consumption. If this function is activated, your IMPRESSA switches off automatically after the preset time fol- lowing the last action on the machine. -
Page 27: Maintenance
6 Maintenance 6 Maintenance Your IMPRESSA has the following integrated maintenance pro- grams: Rinse the machine Change the filter Clean the machine Descale the machine The illuminated maintenance indicator draws your attention to the maintenance actions that are necessary. Open the access door and note the further indicators in the maintenance field. -
Page 28: Changing The Filter
6 Maintenance Precondition: the IMPRESSA is ready for use. Place a receptacle under the coffee spout. Turn the Rotary Switch so that it points to the Maintenance ä l symbol Press the Rotary Switch to start the rinse operation. The rinse operation now starts and the Maintenance symbol flashes. -
Page 29: Cleaning The Machine
Use only original JURA care products. The cleaning program only lasts about 15 minutes. Do not interrupt the cleaning program, as this will impair the quality of cleaning. Your dealer will stock JURA cleaning tablets. - Page 30 Cleaning indicator lights up. Open the cover of the filler funnel for pre-ground coffee. Insert a JURA cleaning tablet into the filler funnel. Close the cover of the filler funnel. Press the Cleaning button. The Cleaning indicator now flashes.
-
Page 31: Descaling The Machine
Clean up any splashes immediately. The descaling program lasts approx. 40 minutes. Your dealer will stock JURA descaling tablets. Try out the ‘Descaling the machine’ operation online. Visit the Knowledge Builder on www.jura.com. Descaling following... - Page 32 The Water Tank indicator now flashes. Remove the water tank and empty it. Completely dissolve the contents of one blister (3 JURA des- caling tablets) in a container that holds 500 ml of water. This can take a few minutes.
-
Page 33: Rinsing The Easy Cappuccino Frother
6 Maintenance Turn the switch in the anticlockwise direction. This causes water to flow out of the Connector System © The operation stops automatically, and the light segment by the switch flashes. Turn the switch in the clockwise direction. The descaling operation will resume. After a few minutes, the coffee grounds container indicator flashes. -
Page 34: Cleaning The Easy Cappuccino Frother
The IMPRESSA will not prompt you to clean the Easy Cappuc- cino Frother. Your dealer will stock the JURA Cappuccino Cleaner. If the wrong cleaning agent is used, the machine could be damaged CAUTION and/or traces of detergent could be left behind in the water. -
Page 35: Descaling The Water Tank
6 Maintenance Perform the next step as soon as the light segment by the switch is flashing. This means that the IMPRESSA has reached the temperature necessary for steam. If the light segment is no longer flashing, turn the Rotary Switch once again to the Steam symbol and press the Rotary Switch. -
Page 36: Messages In The Maintenance Field And Symbol Display
7 Messages in the maintenance field and symbol display 7 Messages in the maintenance field and symbol display Message Cause/Result Action Maintenance indicator is The IMPRESSA wants to tell you Open the access door and note the other indicators. illuminated or is flashing. something. - Page 37 On/Off button behind If the problem persists when you y x c v b n the access door are flashing turn the machine back on again, synchronously. contact Customer Support in your country (see ‘JURA contact details / Legal information’).
-
Page 38: Troubleshooting
If you have not been able to solve the problem, contact Customer Support in your country (see ‘JURA contact details / Legal information’). -
Page 39: Transport And Environmentally Neutral Disposal
9 Transport and environmentally neutral disposal 9 Transport and environmentally neutral disposal Empty system To protect the IMPRESSA from damage caused by frost during trans- portation, the system needs to be emptied. Precondition: the IMPRESSA is ready for use. Place a receptacle under the frother. Turn the Rotary Switch so that it points to the Steam ä... -
Page 40: Technical Data
10 Technical data 10 Technical data Voltage 220–240 V ~, 50 Hz Power output 1450 W Marks of conformity Pump pressure Static max. 15 bar Holding capacity of water tank 1.9 litres Holding capacity of bean container 200 g Holding capacity of coffee grounds Approx. -
Page 41: Index
Hotline 44 Easy Cappuccino Frother 34 Hot water preparation 24 Machine 29 Coffee powder Pre-ground coffee preparation 22 JURA contact details 44 Coffee preparation 21 Coffee speciality 21 Coffee strength Legal information 44 One-off setting during drink preparation Contact details 44... - Page 42 Index Setting up 11 Swiching off 17 Water hardness 15 Switching on 17 Assessing 15 Milk foam preparation 24 Setting 15 Water tank 4 Descaling 35 One-off setting during drink preparation 19 Filling 11 Pre-ground coffee preparation 22 Preparation Cappuccino 21 Coffee 21 Espresso 21 Hot water 24...
- Page 43 Index...
-
Page 44: Jura Contact Details / Legal Information
2004/108/EC – Electromagnetic Compatibility 2009/125/EC – Ecodesign Technical changes We reserve the right to make technical changes. The illustrations used in the IMPRESSA C5 Manual show the IMPRESSA C5 platinum model. Your IMPRESSA could incorporate minor changes. Feedback Your opinion is important to us! Use the contact link at www.jura.com.
Need help?
Do you have a question about the IMPRESSA C5 and is the answer not in the manual?
Questions and answers