Table of Contents
Advertisement
RESIDENTIAL POWER VENT GAS-FIRED WATER HEATERS
INSTALLATION AND OPERATING INSTRUCTIONS
PV1 Model only
READ THESE INSTRUCTIONS CAREFULLY BEFORE BEGINNING THE INSTALLATION. PROPER
INSTALLATION WILL PROVIDE SAFE AND EFFICIENT SERVICE AND AVOID NEEDLESS EXPENSE NOT
COVERED BY THE WARRANTY. READ THE PRODUCT WARRANTY CONTAINED IN THIS MANUAL AND
REMEMBER TO FILL OUT AND RETURN TO THE MANUFACTURER ALL RELEVANT WARRANTY CARDS
AND CERTIFICATES. SHOULD YOU HAVE ANY QUESTIONS, PLEASE CONTACT YOUR LOCAL DEALER OR
REFER TO THE GETTING SERVICE FOR YOUR WATER HEATER SECTION OF THIS MANUAL.
SAVE THIS MANUAL FOR FUTURE REFERENCES.
For your records, write the model and serial number here:
Model # ________________________________
Serial # ________________________________
54000030
© 2012 Gemco Inc. Printed in Canada
(EQUIPPED WITH FVIR TECHNOLOGY)
OWNER'S MANUAL
IMPORTANT
WARNING
This water heater IS NOT design certified for
DANGER
installation in a manufactured (mobile) home or
for installation outdoors.
AVERTISSEMENT
WARNING
If the information in these instructions is not
DANGER
followed exactly, a fire or explosion may
result causing property damage, personal
AVERTISSEMENT
injury or death.
DO NOT store or use gasoline or other
flammable vapours and liquids in the vicinity of
this or any other appliance.
WHAT TO DO IF YOU SMELL GAS
• DO NOT try to light any appliance.
• DO NOT touch any electrical switch.
• DO NOT use any phone in your building.
• From a neighbour's phone, immediately
call your gas supplier. Follow the gas
supplier's instructions.
• If you cannot reach your gas supplier, call the
fire department.
Installation and service must be performed by
a qualified installer, service agency or the gas
supplier.
ISO 9001
ENREGISTRÉ
ISO 9001
REGISTRED
GE-IM025En-0712
Advertisement
Table of Contents

Related Manuals for Giant PV1


Summary of Contents for Giant PV1
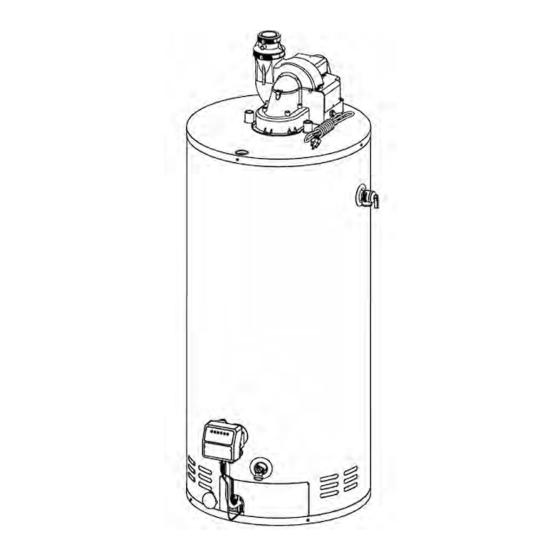
- Page 1 RESIDENTIAL POWER VENT GAS-FIRED WATER HEATERS (EQUIPPED WITH FVIR TECHNOLOGY) OWNER’S MANUAL INSTALLATION AND OPERATING INSTRUCTIONS PV1 Model only WARNING This water heater IS NOT design certified for DANGER installation in a manufactured (mobile) home or for installation outdoors. AVERTISSEMENT...
-
Page 2: Table Of Contents
TABLE OF CONTENTS Safety Information ... . . Wiring ....14 Installation Instructions ..Installation Checklist . -
Page 3: Safety Information
SAFETY INFORMATION Your safety and the safety of others is extremely important during the installation, operation and servicing of this water heater. Many safety-related messages have been provided in this manual and on your water heater. Always read and abide by all safety messages. These messages will point out the potential hazard, tell you how to reduce the risk of injury and tell you what will happen if the instructions are not followed. -
Page 4: Installation Instructions
INSTALLATION INSTRUCTIONS IMPORTANT These instructions have been written as a guide for the proper installation and operation of your water heater and the manufacturer of this water heater will not accept any liability where these instructions have not been fol- lowed. -
Page 5: Requirements For Unconfined Spaces
INSTALLATION INSTRUCTIONS (unconfined) spaces or smaller (confined) spaces, 1 foot above and within 2 feet horizontally from such as closets or small rooms. the burner level of the appliance having the largest input. Requirements for Unconfined Spaces An unconfined space is an area with at least 50 cubic Figure 3 feet for each 1,000 BTUH (4.8 m /kW) of the total... -
Page 6: Louvers And Grilles
INSTALLATION INSTRUCTIONS (6) inches (15.2 cm) of the top and one commencing Figure 5 within six (6) inches (15.2 cm) from the bottom of the enclosure. The openings shall communicate directly or by ducts, with the outdoors or spaces (crawl or attic) that freely communicate with the outdoors. -
Page 7: Venting
(91 cm) and vertical runs of vent pipe must be supported every five (5) feet (1.5 m). Table 1 MAXIMUM EQUIVALENT LENGTH OF VENT PIPE - DO NOT EXCEED PV1 Models only UG40, UG50 and UG60 VENT PIPE DIAMETER 2 inches... -
Page 8: Through-The-Wall Venting Installation
INSTALLATION INSTRUCTIONS Through-the-Wall Venting Installation When the installation is completed, the vent terminal Cut or drill a hole through the exterior wall, slightly must be a minimum of eighteen (18) inches (45.7 cm) larger than the diameter of the vent pipe selected. from the exterior surface of the roof (see Figure 8). -
Page 9: Water Piping
INSTALLATION INSTRUCTIONS Water Piping 5) Apply a thin coat of cement to the fitting, avoiding puddling inside. Refer to Figure 11 for a typical installation. Use of this 6) Apply a liberal coat of cement to the vent pipe, leav- layout should provide a trouble-free installation for the life ing no voids. -
Page 10: Pressure Build-Up In A Water System
INSTALLATION INSTRUCTIONS Figure 11 1) Vent pipe 15) Outer access door Minimum Slope 2) Power vent assembly 16) Inner access door 1/4”/foot (21mm/m) 3) Union 17) Flammable vapour sensor 4) Cold water 18) Cap manual shut-off valve 19) Drip leg (Sediment trap) 5) Cold water inlet 20) Gas supply 6) Expansion tank... - Page 11 INSTALLATION INSTRUCTIONS Figure 12 Canadian Installations U.S.A. Installations) The Vent Termination must have a : Clearance above grade, veranda, porch, deck or balcony. 12 inches (30 cm) 12 inches (30 cm) Clearance to window or door that may be opened. 12 inches (30 cm) * * * Clearance to outside corner.
-
Page 12: Filling The Water Heater
INSTALLATION INSTRUCTIONS supply line has a built-in water meter, check valve or in the United States. Only new piping with cleanly pressure-reducing valve, a suitable expansion tank cut threads may be used, together with a suitable must be installed to prevent pressure build-up or water sealing compound that is approved for natural and hammer effect. -
Page 13: Installation Instructions For Water Heaters Approved For Space Heating And Potable Water Heating
INSTALLATION INSTRUCTIONS Installation Instructions for Water Heaters 5) Where water temperature in excess of 140 C) is required for a space heating application, a Approved for Space Heating and mixing valve must be installed in the potable side of Potable Water Heating (see Figure 13) the system. -
Page 14: Wiring
INSTALLATION INSTRUCTIONS Wiring Before lighting your water heater, check that all of the WARNING wires have been installed correctly (see Figure 14). Make sure that none of the wires are grounded, have split or are broken. Verify that all wiring connections This water heater uses an external electrical source are properly secured, as there is a possibility that they DANGER... -
Page 15: Installation Checklist
INSTALLATION INSTRUCTIONS Installation Checklist Location • Is the water heater located within the venting requirements and close to the main use of hot water? ..• Is the water heater protected from freezing temperatures? ........•... -
Page 16: Operating Instructions
OPERATING INSTRUCTIONS WARNING Lighting the Water Heater Before lighting or re-lighting your DO NOT light this water heater if: DANGER water heater, make sure that you • It is not full of water. have read and understood all of the •... -
Page 17: Water Temperature Regulation
OPERATING INSTRUCTIONS Water Temperature Regulation 2. If this is the first time that the control has been WARNING used, leftmost green indicator will be illuminated, indicating The higher the setting, the greater the risk of the water temperature DANGER setting of approximately scalding. -
Page 18: Out Of Fuel
GENERAL MAINTENANCE The gas control valve pictured in this manual they enter the combustion chamber and ignite. If the FV sensor detects the presence of flammable is equipped with a single-use type automatic high vapours while the water heater is operating, the gas temperature cutoff. -
Page 19: Burner Ignitor Assembly
GENERAL MAINTENANCE Because of the large amounts of water that can can be obtained from the manufacturer. condense, it is very important that a drain pan be The life expectancy of the water heater is reduced installed under the water heater (refer to Figure where a water softener is introduced to fight hard 11). -
Page 20: Vacation
GENERAL MAINTENANCE Vacation 2) If the solution listed in the Troubleshooting Guide If you are planning a vacation or other prolonged does not solve the problem or if your particular prob- absence, it is highly recommended to shut off the lem is not listed in the guide, contact the installer of gas supply and the cold water supply to the water the water heater or the local gas utility. -
Page 21: Replacement Parts
REPLACEMENT PARTS Complete blower assembly for model UG50-65(-59) Complete blower assembly for PV1 model UG40/UG50/UG60 ID No. Description Gas control valve Flammable vapour sensor Protective Cover Ignitor assembly Complete burner assembly Inner access door kit Outer access door Resettable thermal switch... -
Page 22: Troubleshooting Guide
TROUBLESHOOTING GUIDE WARNING Disconnect the electrical power before servicing the water heater. Service should only be performed by a DANGER qualified service technician. Failure to follow these instructions can result in personal injury or death. CONDITION (code#) CAUSE REMEDY An open earth ground circuit to the igni- 1) Check that the earth ground conductor is properly connected at the fuse box or breaker panel AVERTISSEMENT tion. - Page 23 TROUBLESHOOTING GUIDE CONDITION CAUSE REMEDY The burner will not ignite. No gas. Check with gas utility company. Dirt in gas line. Notify utility company. Install drip leg in gas line. Combustion air intake holes blocked. With a vacuum cleaner, remove dirt, dust and lint. Main burner line clogged.
- Page 24 TROUBLESHOOTING GUIDE CONDITION CAUSE REMEDY Leaking water. Poorly sealed, hot or cold water connec- Tighten threaded connections. tions, gas control valve threads, relief valve or drain valve. Leakage from plumbing system or other Inspect plumbing system and other appliances. appliances. Condensation.
- Page 25 NOTES : _________________________________________________________________________________________ __________________________________________________________________________________________________ __________________________________________________________________________________________________ __________________________________________________________________________________________________ __________________________________________________________________________________________________ __________________________________________________________________________________________________ __________________________________________________________________________________________________ __________________________________________________________________________________________________ __________________________________________________________________________________________________ __________________________________________________________________________________________________ __________________________________________________________________________________________________ __________________________________________________________________________________________________ __________________________________________________________________________________________________ __________________________________________________________________________________________________ __________________________________________________________________________________________________ __________________________________________________________________________________________________ __________________________________________________________________________________________________ __________________________________________________________________________________________________ __________________________________________________________________________________________________ __________________________________________________________________________________________________ __________________________________________________________________________________________________ __________________________________________________________________________________________________ __________________________________________________________________________________________________ __________________________________________________________________________________________________ __________________________________________________________________________________________________ __________________________________________________________________________________________________ __________________________________________________________________________________________________ __________________________________________________________________________________________________ __________________________________________________________________________________________________ __________________________________________________________________________________________________ __________________________________________________________________________________________________ __________________________________________________________________________________________________ __________________________________________________________________________________________________ __________________________________________________________________________________________________ __________________________________________________________________________________________________ __________________________________________________________________________________________________ __________________________________________________________________________________________________ __________________________________________________________________________________________________ __________________________________________________________________________________________________ __________________________________________________________________________________________________ __________________________________________________________________________________________________...
Need help?
Do you have a question about the PV1 and is the answer not in the manual?
Questions and answers