Table of Contents
Advertisement
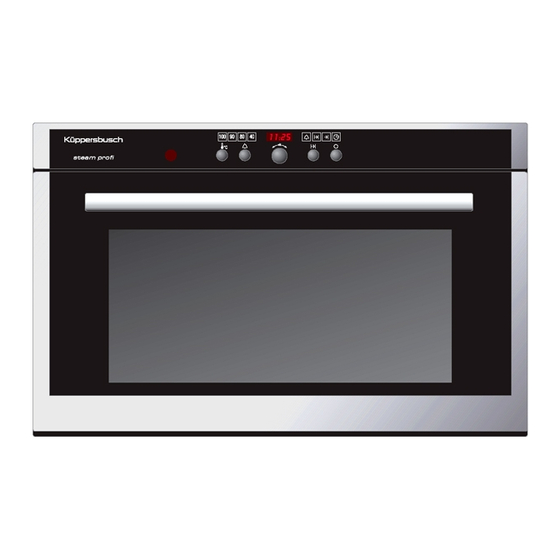
Quick Links
Advertisement
Table of Contents

Related Manuals for Küppersbusch EDG 6600.1M


Summary of Contents for Küppersbusch EDG 6600.1M
-
Page 1: Instructions For Use
Instructions for use and fitting EDG 6600.1M... -
Page 2: Table Of Contents
Safety instructions Before using the first time ....4 Appropriate use ......4 On operation . - Page 3 … Carrying out minor repairs yourself What is to be done if … ....37 After a power cut ..... . 40 Tips and tricks Technical data Disposal...
-
Page 4: Before Using The First Time
Safety instructions This appliance has been designed in accordance with recog- nised statutory technical regulations and the respective safety regulations. However, in order to avoid any damage or accidents, it is essential that the appliance be appropriately handled. Please note the safety instructions contained in these Operating Instructions. -
Page 5: On Operation
… Safety instructions On operation • No alterations, manipulations or attempts at repairs, particularly with the use of tools (screw drivers, etc.) may be carried out on or in the appliance. Any repairs, particularly those required on live parts, are only to be carried out by skilled specialists trained for the respective appliance. -
Page 6: When You Have Children In Your Household
… Safety instructions • Overheated fats and oils are easily inflammable. Refrain from heating oil in the oven interior in order to sear meat, as this is dangerous. Never attempt to extinguish burning oil or fat with water (risk of explosion)! Smother the fire with damp cloths and keep doors and windows closed. - Page 7 … Safety instructions • Children are frequently not able to recognise risks involved on handling the appli- ance. Please ensure that they are supervised accordingly and never allow them to play with the appliance. • Cooking and baking result in the development of heat. The door of the appliance, in particular the glass pane, may become hot.
-
Page 8: Appliance Parts
… Your appliance Your appliance Appliance parts 1 Control elements and display Stainless steel tray elements 10 Perforated cooking pan 2 Oven cavity temperature gauge 11 Water filter (3 units) 3 Door sealing 4 Oven door 5 Ventilator 6 Steam inlet 7 Supporting grid 8 Water tank... -
Page 9: Control And Display Elements
… Your appliance Control and display elements Keys Operating mode Timer Knob Operating time and switch-off time Symbols Operating mode Timer Operating time Switch-off time Time Display Time, cooking temperature. cooking time and timer... -
Page 10: Initial Operation
… Your appliance Initial operation Prior to initial use of a newly-installed appliance, the following steps should be taken. • Remove packaging and transport materials from the oven interior. • If blinks in the display turn knob until it shows the required time. –... - Page 11 … User settings User settings Settings on the appliance can be adapted to suit your requirements. The procedure is equivalent for all user settings. The following diagram provides an overview of possible settings.
-
Page 12: Childproof Lock
… User settings Childproof lock The childproof lock ensures that the appliance cannot be switched on unintentionally. Switching the childproof lock on and off • If the appliance is switched off, press the button for at least 5 seconds. – The display indicates •... -
Page 13: Clock Display
… User settings Clock display Select • (not visible) • (visible) For the "not visible" setting the display will remain dark when the appliance is switched off. This reduces the power consumption. The time-of-day clock dis- play will be visible when the appliance is switched on. Switching the clock on / off •... -
Page 14: Water Hardness
… User settings Water hardness The appliance is equipped with a system to automatically indicate when it is best to decalcify. This system can be optimized by means of setting the appropriate range of water hardness in the user settings for connections to a supply of extremely soft water (also with a water softening device) and extremely hard water. - Page 15 … Cooking and baking Cooking and baking Do not forget: Baking and cooking result in the occurence of heat. Risk of burning! Please read the safety instructions prior to cooking or baking page 4. In the setting tables (see on page 27) you will find details for the optimal utilisation of your appliance.
-
Page 16: The Operating Modes And Their Application
… Cooking and baking The operating modes and their application The appliance has four different operating modes for steaming, each with a predeter- mined temperature setting which cannot be adjusted. Steaming 100 °C The operating mode is suitable for • Cooking all types of vegetables. •... -
Page 17: Sample Setting
… Cooking and baking Sample setting An example is used to show how to operate the appliance: You wish to steam fresh carrots. The table of settings (see chapter "Instructions for applications, tables of settings" from page 27) indicates: Vegetables Cooking time Temperature setting [°C] (fresh) -
Page 18: Switching On The Appliance
… Cooking and baking Switching on the appliance • Press the key once or more often in order to select the required operating mode (in the example given "Steaming 100°C "). – The symbol will light up. – The display indicates •... -
Page 19: Emptying The Water Tank
… Cooking and baking Emptying the water tank The water in the water tank may be hot. The residual water is pumped back into the water tank after the appliance has been switched off. • On completion, remove the water tank and empty it. Should residual water not be pumped off, the reason is as follows: For safety reasons residual water is only pumped off once the temperature has fallen below 80°C. -
Page 20: Instructions For Optimal Use
Instructions for optimal use Low-energy cooking Avoid opening the oven door unnecessarily while the oven is cooking or baking. In the case of steaming in particular, the cooking time may be increased considerably. Using the accessories Using knives or cutting wheels on the stainless steel tray or the perforated cooking pan will always result in visible damage. -
Page 21: Setting And Changing The Clock
… Timer functions Timer functions The following clock functions are available • Clock • Timer (the timer can be user at any time, independently of all of the other functions) • Operating time (time-controlled appliance switch-off) • Start delay (time-controlled appliance switch-on and switch-off) Setting and changing the clock •... -
Page 22: Timer
… Timer functions Timer The timer functions like an egg timer. It can be used at any time, independently of all of the other functions. Setting • Press button – The symbol will light up. – The display indicates • Set the duration by turning knob The setting is carried out In 10-second steps for up to 10 minutes, e.g. -
Page 23: Operating Time
… Timer functions Switching off prematurely • Press button – The symbol will light up. – The remaining time will blink. • Turn knob to set the duration at • Acknowledge by pressing button Operating time Duration is the period of time during which the operating mode is activated. Once the operating time has expired the appliance will automatically switch off the selected mode. - Page 24 … Timer functions Checking and adjusting • Press button • Adjust the duration by turning knob • Acknowledge by pressing button Switching off prematurely • Press button Operating time over – After the operating time has expired the appliance will automatically switch off the selected mode.
-
Page 25: Start Delay
… Timer functions Start delay This function will be of assistance when a dish is to be ready at a certain time and you are not able to switch the oven on and off at the appropriate. Set the cooking time which your dish requires and in addition the switch-off time. - Page 26 … Timer functions Checking and adjusting All of the settings can be checked during the time in which the start has been delayed. Only the switch-off time can be adjusted. • Press button twice. – The symbol will light up. –...
- Page 27 … Practical hints, Settings Practical hints, Settings On the following pages you will find hints for the practical application of your appli- ance and for the preparation of popular dishes. The figures provided for cooking times and temperatures serve as guidelines. Depend- ing on the type of food and its properties, the time required for cooking may deviate from those given.
-
Page 28: Cooking Time
… Practical hints, Settings Cooking time Foodstuffs Quantity Temperature in °C [min.] Rice + liquid 200 g + 250 ml 20–40 Semolina + fluid 200 g + 250 ml 10–20 Lentils + fluid 200 g + 375 ml 20–60 Grain + fluid 200 g + 375 ml 10–15 Cooking time... - Page 29 … Practical hints, Settings Cooking time Fish and seafoods Quantity Temperature in °C [min.] Trout 3 x 250 g 15-20 Trout 1.000 g 25-30 Mussels 1.500 g 15-20 Green-shell mussels 1.000 g 25-35 Lobster deep-frozen 20-25 Yellow mackerel approx. 1000 g 35-40 1.500 g 20-25...
- Page 30 … Practical hints, Settings Heating up/ Cooking time Temperature in °C Regeneration [min.] Heating up food (1–2 plates) 10–20 90–100 Preparing ready-to-eat meals as required Cooking time Defrosting Quantity Temperature in °C [min.] Bread 20-30 Noodles approx. 500 g 20-35 Rice 500-800 g 25-30...
-
Page 31: Cleaning The Outside Of The Oven
… Care and maintenance Care and maintenance Cleaning the outside of the oven Remove dirt, stains or residual cleaning agents as quickly as possible. Only clean the surface with a soft cloth dampened in soapy water in the direction of the metal surface polishing and wipe dry with a soft cloth. - Page 32 … Care and maintenance Remove the tray holders • Pull the locks 1at the front of the tray holders away from the oven walls until they dis- engage. • Pull the tray holders 2 slight- ly sideways and away from the holders and then out to- wards the front.
-
Page 33: Replacing The Water Filter
… Care and maintenance Replacing the water filter The water filter may gradually become clogged. This may be due to fine particles of dirt or limestone which occur naturally in water. If the water filter is clogged, not enough water can be pumped into the evaporator. –... -
Page 34: Descaling
… Care and maintenance Descaling Whenever steam is produced, calcareous deposits will form in the steam generator, irrespective of the degree of hardness of the local water (i.e. the lime content of the water). A system in the appliance automatically recognises when it is necessary to descale. –... - Page 35 … Care and maintenance Descaling For safety reasons, it is not possible to interrupt the descaling process once it has been commenced. Descaling can be carried out with the oven door open or closed. The appliance must be switched off. •...
-
Page 36: Door Sealing
Door sealing A damaged door seal can be replaced as follows. • Remove the oven door first to make it easier to replace the seal. • Pull out the damaged door seal 1 and clean the seal frame 2. • Press the new seal 1 into the four corners 2 of the seal frame. -
Page 37: What Is To Be Done If
… Carrying out minor repairs yourself Carrying out minor repairs yourself What is to be done if … … the display indicates Possible cause Remedy • The water tank has not been • Install a water tank. installed. … the display indicates Possible cause Remedy •... - Page 38 … Carrying out minor repairs yourself … the display indicates Possible cause Remedy • Decalcifying was • Fill the undiluted contents of the decalcifier bottle commenced without having into the water tank and insert the tank in the filled the water tank with the appliance.
- Page 39 … Carrying out minor repairs yourself … the appliance does not work and all of the displays are dark Possible cause Remedy • The safety fuse or the auto- • Replace the fuse. matic cut-out in the house • Switch on the safety cut-out once again. or in the wiring system in the building is defect.
-
Page 40: After A Power Cut
… after completion of cooking, no water is pumped off for some time Possible cause Remedy • For safety reasons, water in • If there is still sufficient cold water in the water the steam generator is only tank, it is automatically pumped into the steam pumped off once its temper- generator, thus cooling it down. - Page 41 … Tips and tricks Tips and tricks Tips and tricks for steaming On steaming at 100 °C, you can cook several types of food at the same time. For example, you can cook rice or pulses at the same time as vegetables with a similar cooking time, thus saving energy and using fewer dishes.
- Page 42 … Technical data Technical data Dimensions Appliance Oven Niche Height 37.8 cm 25.0 cm 38.0 cm Width: 54.8 cm 35.9cm 58.0 cm min. Depth: 55.1 cm 39.0 cm 55.0 cm min. Weight: 35 kg Electrical connection Power supply: 230 V, 50 Hz Power: Connected wattage 2.2 kW Electrical voltage:...
- Page 43 … Disposal Disposal • Ensure that the appliance is functionless prior to disposal. Remove the plug from the socket or have the electrical supply disconnected by an electrician. Then cut off the connection cable on the appliance. • Please ensure that the appliance is properly disposed of.
-
Page 44: Installation Instructions For Fitter
Installation instructions for fitter • Statutory regulations and the connection specifications issued by the local power supply company must be strictly observed. • When installing the appliance, carrying out repair work, or replacing the light bulb, always disconnect the appliance from the mains. Unplug the appliance or disconnect fuse. -
Page 45: Installation Dimensions
… Installation instructions for fitter Installation dimensions in a suitable niche: in a standard niche (with levelling panel ZUB 736):... -
Page 46: Installing In A Fitted Kitchen Unit
… Installation instructions for fitter Installing in a fitted kitchen unit Installing the appliance: • Insert the plug into the wall socket. If "U2" now appears on the display the plug will need to be turned. Should this not be possible, a qualified electrician must exchange the zero conductor and the termi- nal wire in the socket.
Need help?
Do you have a question about the EDG 6600.1M and is the answer not in the manual?
Questions and answers