Table of Contents
Advertisement
Quick Links
Advertisement
Table of Contents

Related Manuals for Küppersbusch EEBP6750.0J


Summary of Contents for Küppersbusch EEBP6750.0J
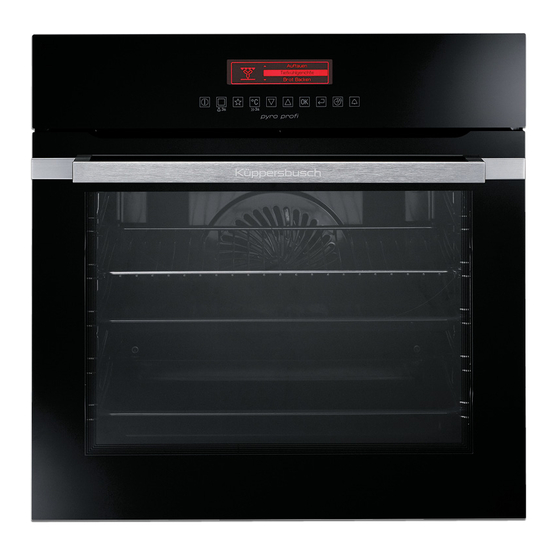
- Page 1 User Manual Oven EEBP6750.0J...
-
Page 2: Table Of Contents
CONTENTS Safety information Using the accessories Safety instructions Additional functions Product description Hints and tips Control panel Care and cleaning Before first use Troubleshooting Daily use Technical information Clock functions Energy efficiency Automatic programmes Subject to change without notice. SAFETY INFORMATION Before the installation and use of the appliance, carefully read the supplied instructions. -
Page 3: Safety Instructions
General Safety Only a qualified person must install this appliance and • replace the cable. Internally the appliance becomes hot when in operation. Do • not touch the heating elements that are in the appliance. Always use oven gloves to remove or put in accessories or ovenware. - Page 4 • The appliance must be earthed. • Make sure that the ventilation openings • Make sure that the electrical information are not blocked. on the rating plate agrees with the • Do not let the appliance stay unattended power supply. If not, contact an during operation.
-
Page 5: Care And Cleaning
• If the appliance is installed behind a the product) particularly any non- furniture panel (e.g. a door) make sure stick pots, pans, trays, utensils etc. the door is never closed when the • Read carefully all the instructions for appliance is in operation. -
Page 6: Product Description
household appliances. Do not use it for • Disconnect the appliance from the mains house lighting. supply. • Cut off the mains cable and discard it. WARNING! Risk of electrical • Remove the door catch to prevent shock. children and pets to get closed in the appliance. -
Page 7: Control Panel
To measure how far the food is cooked. Grill- / Roasting pan Telescopic runners To bake and roast or as a pan to collect fat. For shelves and trays. Core temperature sensor CONTROL PANEL Electronic programmer Use the sensor fields to operate the appliance. Sensor Function Comment... - Page 8 Sensor Function Comment field Heating Func- Touch the sensor field once to choose a heating func- tions or Assisted tion or the menu: Assisted Cooking. Touch the sensor Cooking field again to switch between the menus: Heating Functions, Assisted Cooking. To activate or deacti- vate the light, touch the field for 3 seconds.
-
Page 9: Before First Use
Other indicators of the display: Symbol Function Minute Minder The function operates. Time of day The display shows the current time. Duration The display shows the necessary time for cooking. End Time The display shows when the cooking time is complete. Temperature The display shows the temperature. - Page 10 2. Press to select the menu At each point you can go back option. to the main menu with 3. Press to move to the submenu or accept the setting. The menus in overview Main menu Menu item Application Assisted Cooking Contains a list of automatic programmes.
-
Page 11: Heating Functions
Submenu Description Alarm/Error Tones Activates and deactivates the alarm tones. Cleaning Reminder Reminds you when to clean the appliance. Service Shows the software version and configuration. Factory Settings Resets all settings to factory settings. Heating Functions Heating function Application True Fan Cooking To bake on up to 3 shelf positions at the same time and to dry food. -
Page 12: Residual Heat
Heating function Application Defrost To defrost frozen food. Bottom Heat To bake cakes with crispy bottom and to preserve food. Dough Proving For controlled rising of yeast dough before baking. Bread Baking To bake bread. Au Gratin For dishes such as lasagna or potato gratin. Also to gratinate and brown. -
Page 13: Clock Functions
CLOCK FUNCTIONS Clock functions table Clock function Application Minute Minder To set a countdown (max. 2 h 30 min). This function has no effect on the operation of the appliance. You can also activate it when the appliance is deactivated. to activate the function. -
Page 14: Automatic Programmes
When the function ends, an acoustic signal 1. When the cooking time ends, an sounds. acoustic signal sounds. Press a sensor The function stays on if you change the field. heating functions. The display shows the message. 2. Press to activate or to cancel. -
Page 15: Using The Accessories
USING THE ACCESSORIES different quantities of the food, the set oven WARNING! Refer to Safety temperatures (minimum 120 °C) and the chapters. operating modes. The appliance calculates the end time in approximately 30 minutes. Core temperature sensor 6. To change the core temperature, press There are two temperatures to be set: the oven temperature and the core When the meat is at the set core... -
Page 16: The Accessories
The high rim around the wire shelf is a special device to prevent the cookware from slipping. Wire shelf and the deep pan together: Push the deep pan between the guide bars of the shelf support and the wire shelf on the guide bars above. -
Page 17: Additional Functions
ADDITIONAL FUNCTIONS Favourite Programme Using the Child Lock You can save your favourite settings, such The Child Lock prevents an accidental as duration, temperature or heating operation of the appliance. function. They are available in the menu: If the Pyrolysis function Favourite Programme. -
Page 18: Hints And Tips
Set + Go Temperature (°C) Switch-off time The function lets you set a heating function (or a programme) and use it later with one press of a sensor field. 120 - 195 1. Activate the appliance. 200 - 245 2. Set a heating function. 250 - maximum 3. -
Page 19: Tips On Baking
The temperature regulates itself your usual settings (temperature, automatically to 80 °C. cooking times) and shelf positions to the values in the tables. • The manufacturer recommends that you Plate Warming use the lower temperature the first time. For warming plates and dishes. •... -
Page 20: Baking On One Level
Baking results Possible cause Remedy The cake is too dry. The baking time is too long. The next time you bake, set a shorter baking time. The cake browns unevenly. The oven temperature is too Set a lower oven temperature high and the baking time is and a longer baking time. - Page 21 Food Function Temperature Time (min) Shelf position (°C) Cheesecake Conventional 170 - 190 60 - 90 Cooking 1) Preheat the oven. Cakes / pastries / breads on baking trays Food Function Temperature Time (min) Shelf position (°C) Plaited bread / Conventional 170 - 190 30 - 40...
- Page 22 Food Function Temperature Time (min) Shelf position (°C) Fruit flans made True Fan Cook- 160 - 170 40 - 80 with short pas- Yeast cakes Conventional 40 - 80 160 - 180 with delicate Cooking toppings (e.g. quark, cream, custard) 1) Preheat the oven.
- Page 23 Food Function Temperature Time (min) Shelf position (°C) Small cakes / True Fan Cook- 20 - 35 Small cakes (20 per tray) Small cakes / Conventional 20 - 30 Small cakes (20 Cooking per tray) 1) Preheat the oven. Bakes and gratins Food Function Temperature...
- Page 24 Food Temperature Time (min) Shelf posi- Type of food (°C) tion Ring cake or brioche 160 - 170 50 - 70 Plaited bread / bread crown 170 - 190 40 - 50 Cake with crumble topping 160 - 170 20 - 40 (dry) Biscuits made with yeast 160 - 170...
-
Page 25: Slow Cooking
Food Temperature Time (min) Shelf position (°C) 2 positions 3 positions Puff pastries 30 - 50 1 / 4 170 - 180 Rolls 20 - 30 1 / 4 Small cakes / 23 - 40 1 / 4 Small cakes (20 per tray) 1) Preheat the oven. -
Page 26: Roasting Tables
Food Temperature (°C) Time (min) Shelf position Spinach flan 160 - 180 45 - 60 Quiche Lorraine 170 - 190 45 - 55 Swiss Flan 170 - 190 45 - 55 Apple cake, covered 150 - 170 50 - 60 Vegetable pie 160 - 180 50 - 60... - Page 27 Food Quantity Function Tempera- Time (min) Shelf posi- ture (°C) tion Roast beef or per cm of Turbo Grill- 5 - 6 190 - 200 fillet: rare thickness Roast beef or per cm of Turbo Grill- 6 - 8 180 - 190 fillet: medium thickness Roast beef or...
- Page 28 Game Food Quantity Function Tempera- Time (min) Shelf posi- ture (°C) tion Saddle / up to 1 kg Convention- 30 - 40 Leg of hare al Cooking Saddle of 1.5 - 2 kg Convention- 210 - 220 35 - 40 venison al Cooking Haunch of...
-
Page 29: Frozen Foods
Grilling Food Temperature Time (min) Shelf position (°C) 1st side 2nd side Roast beef 210 - 230 30 - 40 30 - 40 Filet of beef 20 - 30 20 - 30 Back of pork 210 - 230 30 - 40 30 - 40 Back of veal 210 - 230... - Page 30 Food Temperature (°C) Time (min) Shelf position Lasagne / Cannello- 170 - 190 35 - 45 ni, fresh Lasagne / Cannello- 160 - 180 40 - 60 ni, frozen Oven baked cheese 170 - 190 20 - 30 Chicken Wings 190 - 210 20 - 30 Frozen ready meals...
- Page 31 Food Quantity Defrosting Further de- Comments time (min) frosting time (min) Straw- 300 g 30 - 40 10 - 20 berries Butter 250 g 30 - 40 10 - 15 Cream 2 x 200 g 80 - 100 10 - 15 Whip the cream when still slightly frozen in places.
- Page 32 Food Temperature (°C) Cooking time until Continue to cook simmering (min) at 100 °C (min) Kohlrabi / Peas / As- 160 - 170 50 - 60 15 - 20 paragus 1) Leave standing in the oven after it is deactivated. Drying and let it cool down for one night to complete the drying.
-
Page 33: Core Temperature Sensor Table
Food Temperature (°C) Time (min) Shelf position Ciabatta 200 - 220 35 - 45 Rye Bread 190 - 210 50 - 70 Dark Bread 180 - 200 50 - 70 All Grain bread 170 - 190 60 - 90 Core temperature sensor table Beef Food Food core temperature (°C) -
Page 34: Care And Cleaning
Food Food core temperature (°C) Saddle of venison 70 - 75 Leg of venison 70 - 75 Fish Food Food core temperature (°C) Salmon 65 - 70 Trouts 65 - 70 CARE AND CLEANING WARNING! Refer to Safety chapters. Notes on cleaning •... - Page 35 The pyrolytic cleaning After the function is completed, procedure cannot start: the door stays locked for the cool down phase. Some of the • if you did not remove the core appliance functions are not temperature sensor plug from the available during the cool down socket.
-
Page 36: Replacing The Lamp
When the cleaning is completed, install the glass panels and the door. Do the above steps in the opposite sequence. Install the smaller panel first, then the larger. Replacing the lamp Put a cloth on the bottom of the interior of the appliance. -
Page 37: Troubleshooting
3. Clean the glass cover. 4. Replace the lamp with a suitable 300 °C heat-resistant lamp. 5. Install the glass cover. 6. Install the left shelf support. TROUBLESHOOTING WARNING! Refer to Safety chapters. What to do if... Problem Possible cause Remedy The oven does not heat up. -
Page 38: Technical Information
......... Serial number (S.N.) ......... TECHNICAL INFORMATION Technical data Voltage 220 - 240 V Frequency 50 Hz ENERGY EFFICIENCY Product Fiche and information according to EU 65-66/2014 Supplier's name Küppersbusch Model identification EEBP6750.0J Energy Efficiency Index 92.9 Energy efficiency class... -
Page 39: Environment Concerns
Energy consumption with a standard load, conventional 0.99 kWh/cycle mode Energy consumption with a standard load, fan-forced 0.79 kWh/cycle mode Number of cavities Heat source Electricity Volume 71 l Type of oven Built-In Oven Mass 40.0 kg EN 60350-1 - Household electric cooking •... - Page 40 electrical and electronic appliances. Do not product to your local recycling facility or dispose appliances marked with the symbol contact your municipal office. with the household waste. Return the...
- Page 44 Küppersbusch Hausgeräte GmbH Postfach 10 01 32, D-45801 Gelsenkirchen, Küppersbuschstr. 16, D-45883 Gelsenkirchen Telefon: (02 09) 4 01-0, Telefax: (02 09) 4 01-3 03 www.kueppersbusch.de 867316237-C-152015...
Need help?
Do you have a question about the EEBP6750.0J and is the answer not in the manual?
Questions and answers