Table of Contents
Advertisement
Quick Links
Advertisement
Table of Contents

Related Manuals for Ikan MD7


Summary of Contents for Ikan MD7
- Page 1 Multi-Format Field Monitor User’s Guide...
-
Page 2: Table Of Contents
Contents Introduction ....................3 Features ......................3 Safety Instructions ..................4 Front ......................5 Rear ....................... 8 Tally ....................... 9 Audio Level Meters ..................9 OSD Menu ......................10 VIDEO ......................10 DISPLAY 1 ....................13 DISPLAY 2 ....................15 COLOR ...................... -
Page 3: Introduction
I ntroduction MD7 is an 1100 cd/m² super bright on-camera monitor for DSLR and ENG cameras. New features such as auto back light control, H/V level meter, and auto color adjustment on temperature change are included. Also, it converts HDMI to SDI in the original resolution. -
Page 4: Safety Instructions
S afety Instructions To help avoid damaging your monitor, connect only one power (AC or DC) in operation simultaniously. Rough handling of product may cause physical damage or malfunction. Never insert anything metallic into the monitor openings. Doing so may create the danger of electric shock. -
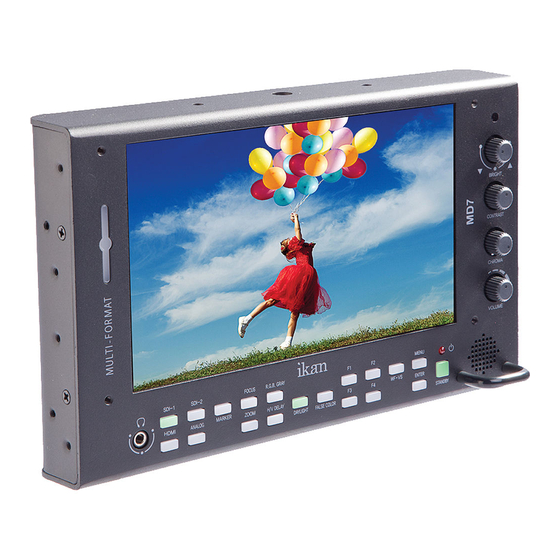
Page 5: Front
F ront 1 ,2) SDI, HDMI Input Selection 2 8 B 3 ) Analog Input Selection 2 9 B Switch input in the order of: YPbPr (Component), CVBS1, CVBS2, CVBS3 (Composites). 4 ) Marker On/Off 3 0 B 5 ) Zoom 3 1 B Switch zoom mode in the order of : Pixel-to-Pixel, User Zoom, DSLR Zoom P ixel to Pixel... - Page 6 from Canon 5D Mark II/7D, 60D, Nikon D800, Sony A77, Panasonic GH2 and Canon 5D Mark III. 6 ) H/V Delay 3 2 B H/V Delay allows you to check the outside signal of active picture area. This mode is for broadcast professionals. By pressing the button, it switches the mode in the order of : H Delay, V Delay, H/V Delay, Off.
- Page 7 didn’t change long on interlace signal. * On SDI 2K input with Psf scanning mode, displaying Circle or Horizontal Line pattern might cause an afterimage effect. However, it will be disappeared after the picture is changed. 1 1) False Color 3 7 B Shows pictures in specific colors as its luminance level other than the original colors.
-
Page 8: Rear
R ear 1 ) DC Power Jack 4 5 B 7V~24V DC power can be used. 2 ) SDI 1, 2 Input Ports 4 6 B HD-SDI or SD-SDI input ports. SDI signal should be fulfill SMPTE standards. 3 ) SDI Loop-Through and HDMI-to-SDI Out Port 4 7 B This port can be used either SDI Loop-through or SDI out of HDMI-to-SDI converter. -
Page 9: Tally
T ally Tally mode displays Red, Green, Amber color by the input from tally (RJ-45 GPI) input port. Audio Level Meters Audio level meters displays max 16 channels. But it depends on the number of channels contained in the signal itself. For example, if the signal contains 2 channels, the audio level should be 2 channels. -
Page 10: Osd Menu
O SD Menu Menu opens up by pressing Menu button. This button also works as Exit button on the Menu. The brightness knob works as up/down arrow. To select something, press either enter button or the knob. * The menu may disappear on no signal or instable signal input. * Menu setting is saved for each input mode. - Page 11 ▶ A_M S2_RG B444_10 : 3G SDI Level-A Mapping Structure 2 – RGB 4:4:4/10 bit ▶ A_M S3_YCbCr 444_12 : 3G SDI Level-A Mapping Structure 3 – YCbCr 4:4:4/12 bit ▶ A_M S3_RG B444_12 : 3G SDI Level-A Mapping Structure 3 – RGB 4:4:4/12 bit ▶...
- Page 12 S DI Output 6 3 B Set how to use SDI Out port. Choose either SDI loop-through or HDMI-to-SDI conversion out. D SLR Camera 6 4 B Set which DSLR camera you use for DSLR Zoom mode. DSLR Zoom mode can be set by pressing Zoom button in the front.
-
Page 13: Display 1
D ISPLAY 1 6 5 B Aspect 6 6 B Set the aspect ratio of the screen. 16:9, 4:3, Native (Original) are selectable. 1 :1 Scan 6 7 B Set this On to display picture in 1:1 pixel mapping. Anarmorphic 6 8 B Set this mode to resize the screen to 3.56:1, 2.74:1, 2.59:1, 2.55:1, 2.40:1, 2.39:1, 2.35:1, 1.85:1, 1.75:1, 1.66:1, or 1.37:1. - Page 14 T imecode Display 7 5 B Set this mode on to display timecode from SDI signal. Select the appropriate timecode that you wish to display among LTC (Longitudinal Time Code), VITC (Vertical Interval Time Code), DVITC (Digital Vertical Interval Time Code). T imecode Position 7 6 B Set Top or Bottom position for timecode.
-
Page 15: Display 2
D ISPLAY 2 1 0 B E xposure Range Check (Video Range Check) 7 7 B Checks Y, C level and displays overexposed or underexposed area on screen. The base value can be Y, Cb or Cr. Y Range Max/Min 7 8 B Set Y range value for range check. -
Page 16: Color
C OLOR 1 1 B D ithering 8 6 B Set this mode on to display gradient more smoothly. Auto Color Temperature 8 7 B Set this mode On to adjust color temperature by temperature change. Its output might be incorrect at extreme temperatures. C olor Temperature 8 8 B VAR, 3200K, 5400K, 6500K, 9300K color temperatures are preset and selectable... -
Page 17: Marker
M ARKER 1 2 B M arker Ratio 9 0 B Select one of preset markers or user marker. To display marker, press Marker button in front of the monitor. C enter Marker 9 1 B Set preference to display center marker or not. S afety Area 16:9 9 2 B Adjust size of the safety area when marker displayed on 16:9 screen. -
Page 18: Osd 1
O SD 1 1 3 B O SD Display Time 9 8 B Set OSD menu display time. Choose 0 for infinite. O SD Blend 9 9 B Set transparency of the menu between 0 to 5. O SD Position 1 0 0 B Set menu position among Left Top, Right Top, Left Bottom, Right Bottom and Center. - Page 19 U MD Display 1 0 6 B Set this mode on to display UMD text on screen. U MD Color 1 0 7 B Select UMD text color among Red, Green, and Amber. U MD Edit 1 0 8 B Set the UMD source ID to display on screen.
-
Page 20: Osd 2
O SD 2 1 4 B 1 0 9 B H /V Level Meters 1 1 0 B Displays the horizontal and vertical angle on screen. F lip/Level Reset 1 1 1 B Resets the flip and angle meters. B attery Check 1 1 2 B Turns on battery checker display. -
Page 21: Audio
AUDIO 1 5 B Audio Level Meter 1 1 3 B Turns On/Off audio level meter. L evel Meter SDI Channel 1 1 4 B Set the audio channels to display. L evel Meter Type 1 1 5 B Select one of two types: pair or group. L evel Meter Direction 1 1 6 B Select one of two orientations: Horizontal or Vertical. - Page 22 Audio Output 1 2 4 B Select audio output among Left, Right, Left/Right.
-
Page 23: Gpi
G PI 1 6 B 1 2 5 B G PI Control 1 2 6 B Turns On/Off external monitor control function. G PI Port 1,2,3,4,5,6 1 2 7 B Assigns each GPI port’s function. (e.g. SDI 1 input, HDMI input, Tally Red) See EXTERNAL REMOTE CONTROLLING section for details. -
Page 24: System
S YSTEM 1 7 B 1 3 0 B F unction 1,2,3,4 1 3 1 B Assigns a function to each function button. See FRONT section for detail. B acklight 1 3 2 B Set the backlight intensity from 0 to 40. An LCD panel requires more than 30 minutes to settle to a new backlight value before final monitor calibration. -
Page 25: External Remote Control
E xternal Remote Control 1 8 B C onnecting GPI Port (RJ-45) 1 4 0 B Turning the monitor off is recommended before cable connection. Assignable functions are listed below. Function Name Description SDI-1 Input Switches the input to SDI-1 SDI-2 Input Switches the input to SDI-2 HDMI Input... -
Page 26: List Of Compatible Video Formats (Hdmi/Composite)
L ist of Compatible Video Formats (HDMI/Composite) 1 9 B INPUT OUTPUT Signal Input HD-YPbPr/HDMI Composite HDMI to SDI Formats SD-YPbPr (Convert) Normal Convert NTSC 720*576/50i 720*480/59.94i 720*480/60i 720*576/50p 720*480/59.94p O (480i) 720*480/60p O (480i) 1280*720/23.98p 1280*720/24p 1280*720/25p 1280*720/29.97p 1280*720/30p 1280*720/50p 1280*720/59.94p 1280*720/60p... -
Page 27: List Of Compatible Video Formats (Sdi)
L ist of Compatible Video Formats (SDI) 2 0 B HD/SD-SDI Input Signal Formats Single YUV4:2:2 YUV4:4:4 RGB444 √ NTSC √ √ 525/60i (SD) √ 625/50i (SD) 720*480/59.94p 720*576/50p 1280*720/23.98p 1280*720/24p √ √ √ 1280*720/50p √ √ √ 1280*720/59.94p √ √... - Page 28 √ √ 2048*1080/23.98p √ √ 2048*1080/23.98psf √ √ 2048*1080/24p √ √ 2048*1080/24psf √ 2048*1080/25p √ 2048*1080/25psf √ 2048*1080/29.97p √ 2048*1080/30p...
-
Page 29: Specifications
S pecifications 2 1 B 2 x BNC HD/SD-SDI, 3G/1.485G/270M 1 x HDMI HDMI, (with HDCP v.1.1), 19pin Female Input 3 x RCA Analog(YPbPr/CVBS) 1 x BNC SDI Loop-through or HDMI-to-SDI Conversion Out Output 1 x HDMI HDMI (with HDCP v.1.1), 19-pin Female 1080p (60,59.94,50), Direct Mapping(MS1,2,3,4) SMPTE 425M AB 2 x HD-SDI(3G), 2 x SMPTE 292M... - Page 30 Humidity 20% ~ 80% RH Weight 1.3kg (2.86 lbs), without stand Appearance Dimensions 210 x 151 x 78 mm (8.3 x 6.0 x 3.1 inches) Accessories Manual (CD), Cleaner, DC Adapter, AC Power Cord Acrylic Protector, Sun Hood, Pouch, DV Battery Mount, V-Mount, Anton Options Bauer Mount, D-Tap Power Cable, Stand This specifications are subject to change without prior notice for...
-
Page 31: Dimensions
D imensions 2 2 B MODEL Unit Remark 210.0 151.0 78.3 FM-072SCH without stand inches... -
Page 32: Troubleshooting
(Call for Service if the Symptom appeared more than 3 times) in startup process Screen is Black on Startup and there's neither ikan Logo nor "No Reconnect the Power and Restart the Monitor. Signal" Display, but Buttons are (Call for Service if the Symptom appeared more than 3 times) - Page 33 Strange Color on ikan Logo on Reconnect the Power and Restart the Monitor. Startup (Call for Service if the Symptom appeared more than 3 times) Make Monitor "Factory Default" and Try again. Select Test Pattern(Internal Pattern) in the menu and See if R,G,B Color is Correct.
-
Page 34: Warranty Information
damage caused by service performed by anyone who is not an authorized service provider. damage to a product that has been modified or altered without the written permission of ikan. S ervice to be Charged 1 4 4 B If the product needs to be repaired after 12 months from the purchase. - Page 35 Corporate Headquarters 3903 Stoney Brook Houston, TX 77063 Telephone +1 713-272-8822 http://www.ikancorp.com Email sales@ikancorp.com...
Need help?
Do you have a question about the MD7 and is the answer not in the manual?
Questions and answers