
Subscribe to Our Youtube Channel
Related Manuals for Küppersbusch EKWE


Summary of Contents for Küppersbusch EKWE
- Page 1 BEDIENUNGSANWEISUNG mit Montageanweisungen Instructions for use and installation instructions Instructions d’utilisation et avis de montage Gebruiksaanwijzing en montagehandleiding EKWE / EKWH...
-
Page 2: Conditions Of Guarantee
Your old appliance still contains useful raw materials. Take your old appliance to a recycling collection point. Please make your old appliances unserviceable before disposing of it, to prevent it from misuse. EKWE / EKWH... -
Page 3: Table Of Contents
What to do if trouble occurs ............... 37 An overview of the honeycomb dimensions ........38 Cooking unit EKWH 320.14 / 320.18 / 320.18 Z Control unit EKWE 320.W / S Installing the honeycombs / honeycomb cooking units ..... 39 Instructions for installing the honeycombs... -
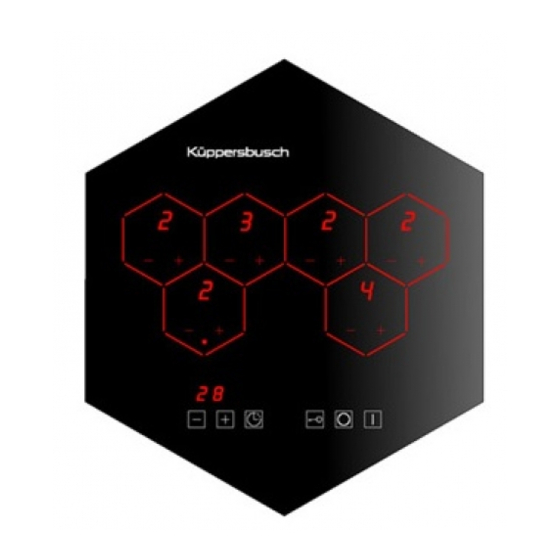
Page 4: An Overview Of Your Honeycomb Hob
A and B Touch controls for the minute minder with plus and minus sensors Minute minder with a control function Touch controls for the cooking zones with plus and minus sensors and, if required, additional sensors for dual-circuit cooking zones Key sensor for the childproof lock Off sensor Stand-by sensor EKWE / EKWH... -
Page 5: Safety Instructions
• In the case of stainless steel worktops: do not place any hot cooking pots and pans onto the stainless steel worktop since high temperatures could discolour it and make it turn blue. This discolouration will be permanent. EKWE / EKWH... -
Page 6: Before Using The Appliance For The First Time
Do not use saucepans made of cast iron or saucepans with electrographic bases. Pans with rough bottoms scratch the glass ceramic cooking surface when they are moved. Do not use plastic containers or aluminium bowls. EKWE / EKWH... -
Page 7: Using The Cooking Zones
The “0” setting remains visible for approx. 2 seconds after switch-off. Cooking level Suitable for heating up, keeping warm swelling, defrosting steaming, soaking, cooking frying, deep-fat frying heating large quantities EKWE / EKWH... -
Page 8: Automatic Boost Function
If the automatic boost function is to be activated when the required setting is selected by means of the plus sensor, the plus sensor must be touched again once power level 9 has been reached. EKWE / EKWH... -
Page 9: Residual Heat Indicators
Switch on the outer circuit for large pans. – Touch the cooking zone symbol under the plus/minus sensors. The cooking zone symbol will stop flashing on activation. Touching the cooking zone symbol again will deactivate the dual-circuit zone. EKWE / EKWH... -
Page 10: The Pan-On Detection
Moving the pan around during the cooking procedure may result in the outer cooking circuit being switched off if it is not fully covered. The outer cooking zone circuit can also be switched on or off manually if the pan-on detection or the pan size detection is activated. EKWE / EKWH... -
Page 11: The Emergency Switch
The bordering around the cooking zone and an LED display in the clock sensor will flash simultaneously. In order to deactivate the switch-off function, touch the plus and minus sensor of the minute minder or switch off the cooking zone. EKWE / EKWH... -
Page 12: Childproof Lock (Sensor Lock)
The timer of the time limit function depends on the setting of the cooking level: The higher the setting of the cooking level the faster it switches off. Cooking level Appliance switches off after 2 hours 3 hours 4 hours 5 hours 10 hours EKWE / EKWH... -
Page 13: Other Functions
Regular care builds up a protective layer. This also eases day to day cleaning. Please observe the cleaning and servicing instructions of the respective manufacturers. Even heavy soiling can be cleaned with a cleanser and enough water. Afterwards always wipe dry with a cloth. EKWE / EKWH... -
Page 14: What To Do If Trouble Occurs
Should you need to contact Customer service or order spare parts, always quote the information printed on the model identification plate. It is located underneath the control honeycomb. You will also find it stuck onto the front page of the operating instructions enclosed. EKWE / EKWH... -
Page 15: An Overview Of The Honeycomb Dimensions
Side view Silicon bonding compound Metal support Metal base panel Cable clamp View from View from top bottom Control unit EKWE 320.W / S Glass ceramic panel Side view Silicon bonding compound Metal support View from Metal base panel bottom... -
Page 16: Installing The Honeycombs / Honeycomb Cooking Units
• The side clearance between the hob and wall units must be at least 300 mm. • The plastic coating or veneer must be applied with a heat-resistant adhesive (100 °C). This adhesive prevents the surfaces from warping or working loose. especially on the narrow sides of the fitted cupboards. EKWE / EKWH... -
Page 17: Measuring And Marking Out The Worktop Cut-Outs
Incorrect: Allow an extra 1-3 mm round each honeycomb The joint may be 1–3 mm wide. The dimensions of the joint are added to the dimensions of the honeycomb. The joint between two honeycomb cooking units must be of the same width! EKWE / EKWH... -
Page 18: Marking Out The Cut-Out
* Only permissible for worktops with a depth of at least 650 mm. For the EKWE 320 control element, no opening, only a round cut-out for the * Only permissible for worktops with a depth of at least bottom pan has been provided for. -
Page 19: Cut-Out In Stone Worktops
Since stone worktops are not sensitive to heat, installation of honeycomb hobs into the worktop can be flush. – Glue the piece cut out and processed as above 6.5 mm deeper into the worktop. The adhesive used to do so must be resistant to temperatures exceeding 80 °C. EKWE / EKWH... - Page 20 On being used the honeycomb units may no longer be clamped since this may result in stress cracking. The clamps are only for adjusting during assembly or for fastening purposes if the whole worktop, with honeycombs installed, is to be transported. EKWE / EKWH...
-
Page 21: Electrical Connection Of The Honeycombs
• Only the EKWH 320.14, EKWH 320.18 and EKWH 320.18Z honeycomb cooking units may be connected to the EKWE 320 control honeycomb. A dangerous situation may otherwise arise. • It is essential that connection be carried out in accordance with the connecting plan enclosed. - Page 22 Total power output: variable, depending on the number and the type of cooking units connected. Maximal 10.8 kW Connection cable: use H 05 RR-F or H 05 RN-F. Cable length: at least 1.5 m EKWE / EKWH...
-
Page 23: Programming The Control Honeycomb In Accordance With The Cooking Zone Layout
– Touch the key sensor to confirm the layout of the cooking zones which has been set. Now one of the honeycomb touch controls on the control honeycomb will start to flash. – Place a metal pan on the respective cooking zone for a short time. EKWE / EKWH... - Page 24 The final step is automatic calibration of the pan-on detection. The LED displays will indicate “ ”. Once this display has switched off the honeycomb can be EKWE / EKWH...
Need help?
Do you have a question about the EKWE and is the answer not in the manual?
Questions and answers