Table of Contents
Advertisement
Advertisement
Table of Contents

Related Manuals for Zenith DVT723


Summary of Contents for Zenith DVT723
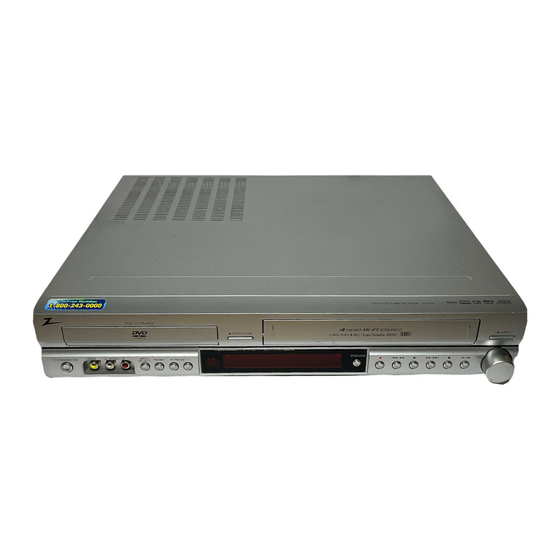
- Page 1 HC302SD-A0.NA1ULIA_124C Installation and Operating Guide | Warranty Model Number | DVT723 (Main Set : DVT723, Speakers: SH32SD-SY, SH32SD-WY) | DVD/VCR Combo receiver For service/ support Call: Toll Free Number 1-800-243-0000 CD - R/R CD - R/RW © Copyright 2007, LG Electronics U.S.A., Inc.
-
Page 2: Safety Precautions
Safety Precautions CAUTION: The apparatus should not be exposed to water CAUTION (dripping or splashing) and no objects filled with liquids, such RISK OF ELECTRIC SHOCK as vases, should be placed on the apparatus. DO NOT OPEN FCC WARNING: This equipment may generate or use radio CAUTION: TO REDUCE THE RISK frequency energy. -
Page 3: Important Safety Instructions
IMPORTANT SAFETY INSTRUCTIONS CAUTION: PLEASE READ AND OBSERVE ALL WARNINGS AND INSTRUCTIONS IN THIS OWNER’S MANUAL. AND THOSE MARKED ON THE PRODUCT. RETAIN THIS MANUAL FOR FUTURE REFERENCE. This product has been designed and manufactured to assure personal safety. Improper use can result in electric shock or fire hazard. -
Page 4: Table Of Contents
Table of Contents Introduction DVD Operation ......26-28 Playing a DVD ......26 Safety Precautions . -
Page 5: Before Use
Before Use Playable Discs Disc-related terms Title (DVD video discs only) The main film content or accompanying feature content DVD video discs or additional feature content, or music album. (8 cm / 12 cm disc) Each title is assigned a title reference number enabling Audio CD you to locate it easily. -
Page 6: Precautions
Before Use (Continued) Precautions Cleaning discs Fingerprints and dust on the disc can cause poor pic- Handling the unit ture quality and sound distortion. Before playing, clean the disc with a clean cloth. Wipe the disc from the cen- Shipping the unit ter outward. -
Page 7: Front Panel Control Buttons
Front Panel Control Buttons EJECT(Z Z ) Ejects the tape in the VCR deck. PAUSE/STEP(X X /C OPEN/CLOSE (Z Z ) Pause playback of a tape or a disc in the Opens or closes the disc tray. DVD or VCR deck temporarily/press repeatedly for frame-by-frame playback. -
Page 8: Display Window Indicators
Display Window Indicators A disc is loaded in the DVD deck. (Lights when a disc is loaded in the DVD deck and flashes when the disc tray is opened.) Indicates current The unit is in VCR timer recording mode or a audio stream. -
Page 9: Remote Control Buttons
Remote Control Buttons POWER EJECT, OPEN/CLOSE(Z Z ) Switches unit ON and OFF. Opens and closes the disc tray. Ejects a tape in the VCR deck. CD/DVD/VCR select Selects the output source (CD/DVD or FM/AM Tuner select VCR) to view on the TV screen. Select FM or AM band as the listening 0-9 Number Keypad choice. -
Page 10: Rear Panel Connections
Rear Panel Connections FM ANTENNA CONNECTORS Connect the FM antenna to this terminal. SPEAKER CONNECTORS Connect the six supplied speakers to these terminals. COMPONENT/PROGRESSIVE SCAN VIDEO OUT (Y Pb Pr) Connect to a TV with Y Pb Pr inputs. AC Power Cord Plug into the power source. -
Page 11: Connections
Connections (Continued) Basic TV Connections Rear of TV Make one of the following connections, depending on • VIDEO COMPONENT/PROGRESSIVE AUDIO INPUT SCAN VIDEO INPUT INPUT the capabilities of your existing equipment. Audio/Video connection Connect the DVD/VCR VIDEO OUT jack on the unit to the video in jack on the TV using the supplied video cable (V). -
Page 12: Accessory Audio/Video (A/V) Connections To The Unit
Connections (Continued) Accessory Audio/Video (A/V) Connections to the unit Connect the LINE 1 or LINE 2 jacks on the unit to the AUDIO/VIDEO OUT jacks on your accessory component, using the optional audio/video cables. Accessory Device Jack Panel AUDIO OUTPUT VIDEO OUTPUT Rear of the unit... -
Page 13: Speaker System Connections
Connections (Continued) Speaker System Connections Connect the speaker wires the speaker terminals. To obtain the best possible surround sound, adjust the speaker parameters; distance, level, etc.. Front speaker Front speaker Center speaker (Left) (Right) Rear speaker (Right surround) Rear speaker (Left surround) Subwoofer otes... -
Page 14: Glossary For Audio Stream & Surround Mode
Glossary for Audio Stream & Surround mode Sound Mode Allows you to enjoy 5.1(or 6) discrete channels of high quality You can enjoy surround sound simply by selecting one digital audio from DTS program sources such as discs, DVD of the pre-programmed sound fields according to the and compact discs, etc. -
Page 15: Vcr Operation Setup
VCR Operation Setup On-Screen Display (OSD) On-Screen Menus Setup Some of these functions appear during VCR operation. The SETUP, clock setting (CLOCK), and timer recordings (PROGRAM) functions are accessed conve- niently with the on-screen menus, that lead you through PLAY HI-FI LINE 1 each step. -
Page 16: Vcr Setup Menu Options
VCR Operation Setup (Continued) VCR Setup Menu Options Press MENU and the MAIN menu will appear. Use v v /V V to select the SETUP menu, then press MEMORY/ENTER. The SETUP menu will appear. Use v v /V V to choose a desired option on the SETUP menu. -
Page 17: Setting The Clock
VCR Operation Setup (Continued) Setting the Clock Things to know before starting • The clock uses the 12-hour system. (Be sure to set AM and PM correctly.) (AM does not appear.) • The initial Clock Setting is JANUARY 1, 2007, 12:00 AM. Manual Clock Set Press MENU and the MAIN menu will appear. -
Page 18: Dvd Operation Setup
DVD Operation Setup General Explanation Temporary Feedback Field Icons This manual gives basic instructions for operating the Repeat Title TITLE unit. Some DVDs require specific operation or allow Repeat Chapter CHAPT only limited operation during playback. When this Repeat A-B occurs, the symbol appears on the TV screen, indi- Repeat Off... -
Page 19: Initial Settings
DVD Operation Setup (Continued) Initial Settings Picture You can set your own Personal Preferences on the unit. TV Aspect 4:3 Letterbox: Select when a standard 4:3 TV is con- General Operation nected. Displays theatrical images with masking bars above and below the picture. Press SET UP. -
Page 20: 5.1 Speaker Setup
DVD Operation Setup (Continued) 5.1 Speaker Setup Return Press MEMORY/ENTER to return to the previous menu. 5.1 Speaker settings Others Select speaker settings, including volume balance and delay time, or test the speaker settings. The DRC, Vocal and Auto Play settings can be Speaker settings are only active on the Analog Multi- changed. -
Page 21: Parental Control
DVD Operation Setup (Continued) Parental Control Country Code Enter the code of a country/area whose standards were Rating used to rate the DVD video disc, referring to the list Movies on DVDs may contain scenes not suitable for (See “Country Code List”, page 36.). children. -
Page 22: Vcr Operation
VCR Operation Normal Playback Special Effect Playbacks Insert a prerecorded video cassette. Special effects playback notes indicator will light and the unit will power-up • Horizontal lines (noise bars) will appear on the TV screen. automatically. This is normal. • Make sure that the indicator in the display •... -
Page 23: Normal Recording
VCR Operation (Continued) Normal Recording Instant Timer Recording With this feature you can record for a preset length Preparation: without using the program timer. • you are recording from another source via audio/video Turn on unit and the TV. input jacks (at the Rear or Front panel). Insert a video cassette with the anti erasure Insert a video cassette with the safety tab intact. -
Page 24: Dubbing And Editing
VCR Operation (Continued) Dubbing and Editing VHS Hi-Fi Stereo System This unit is equipped with the VHS Hi-Fi audio sound If you wish to edit or dub your camcorder (or another system for recording and playback. The information VCR) recordings to this unit, the rear (or Front) panel below gives a brief description of Hi-Fi audio and how to mounted Audio and Video (A/V) input jacks make the record and play a tape in the Hi-Fi audio mode. -
Page 25: Tape Counter Memory Feature
VCR Operation (Continued) Tape Counter Memory Feature Tape Remaining This function shows the remaining time on the tape Real-Time Counter during recording or playback. Press CLK/CNT repeatedly until the REM indicator Shows length of tape run in hours, minutes, and appears on the TV screen during recording or playback. -
Page 26: Dvd Operation
DVD Operation Playing a DVD General Features Playback Setup Unless stated otherwise, all operations described use Turn on the TV and select the video input source con- • the remote control. Some features may also be nected to the unit. available on the Setup menu. -
Page 27: Still Picture And Frame-By-Frame Playback
DVD Operation (Continued) General Features (continued) Time Search 0:20:09 -:--:-- Still Picture and Frame-by-frame playback The Time Search function allows you to start playing at any chosen time on the disc. 1 Press DISPLAY during playback. The on-screen dis- 1 Press PAUSE/STEP during playback. play appears on the screen. -
Page 28: Zoom
DVD Operation (Continued) General Features (continued) Special DVD Features Zoom Checking the contents of DVD Video The Zoom function allows you to enlarge the video discs: Menus image and to move through the enlarged image. DVDs may offer menus that allow you to access special 1 Press ZOOM during playback or still playback to features. -
Page 29: Audio Cd And Mp3/Wma Disc Operation
Audio and MP3/WMA Disc Operation Playing an Audio CD and MP3/WMA Disc Notes on MP3/WMA Recordings About MP3 An MP3 file is audio data compressed by using the • The unit can play MP3/WMA formatted recordings on MPEG1 audio layer-3 file-coding scheme. We call CD-ROM, CD-R or CD-RW discs. -
Page 30: Pause
Audio and MP3/WMA Disc Operation (Continued) Pause Repeat A-B 1 Press PAUSE/STEP during playback. To repeat a sequence. 2 To return to playback, press PLAY or press 1 During disc playback, press REPEAT A-B at your cho- PAUSE/STEP again. sen starting point. The Repeat icon and “... -
Page 31: Jpeg Disc Operation
JPEG Disc Operation Moving to another File Viewing a JPEG disc JPEG Press . or > once during viewing a picture to This unit can play discs with JPEG files. Before playing advance to the next file or to the previous file. JPEG recordings, read the notes on JPEG Recordings Still Picture on right. -
Page 32: Programmed Playback
Programmed Playback Programmed Playback with Audio CD Repeat Programmed Tracks and MP3/WMA Disc To repeat the track currently playing, press REPEAT. • The Program function enables you to store your favorite The Repeat icon and “TRACK” appears on the menu tracks from any disc in the player memory. -
Page 33: Radio Operation
Radio Operation Presetting the Radio Stations Listening to the Radio You can preset 50 stations for FM and AM. Before tun- Preset radio stations in the DVD/VCR Receiver memory ing, make sure that you have turned down the volume. first (see “Presetting Radio Stations” on the left). Press FM/AM on the remote control or front Press FM/AM on the remote control or front panel until the frequency band appears on the... -
Page 34: Tuning Stations Manually
Radio Operation (Continued) Tuning Stations Manually Labeling Stations You can enter a name of up to 5 characters for preset Press FM/AM on the remote control or on the stations. The names (for example, “ABCD”) appears in front panel until the frequency band appears on the system’s Display window when a station is selected. -
Page 35: Troubleshooting
Troubleshooting Check the following guide for the possible cause of a problem before contacting service. Symptom Cause Correction The power cord is disconnected. Plug the power cord into the wall outlet No power. • • securely. No disc is inserted. Insert a disc or tape. -
Page 36: Language Code List
Language Code List Use this list to input your desired language for the following initial settings: Disc Audio, Disc Subtitle, Disc Menu. Language Code Language Code Language Code Language Code Abkhazian 6566 Finnish 7073 Macedonian 7775 Slovenian 8376 Afar 6565 French 7082 Malagasy... -
Page 37: Specifications
Specifications General Power requirements AC 120V, 60 Hz Power consumption Dimensions (approx.) 430 X 90 X 350 mm (16.9 x 3.5 x 13.8 inches) (w x h x d) Weight (approx.) 8 kg (17.6 lbs) Operating temperature 5˚C to 35˚C Operating humidity 5 % to 90 % Signal system... - Page 38 When you receive the label, place it on the box and call the 800 # in the instruction for pick-up. When your unit is received, Zenith will repair or replace your unit in accordance with this Limited Warranty.
Need help?
Do you have a question about the DVT723 and is the answer not in the manual?
Questions and answers