Table of Contents
Advertisement
Quick Links
Advertisement
Table of Contents

Related Manuals for Strong SRT 4304


Summary of Contents for Strong SRT 4304
- Page 1 一 Digital Satellite Receiver USER’S MANUAL...
-
Page 2: Table Of Contents
Table of contents Safety…………………………………………………………………………….……4 General Introduction………………………………………………………….…..…6 Front Panel / Rear Panel…………………………………………………………..8 Remote Control Unit………………………………………………………….……. 10 S.T.B Connection………………………………………………………………..13 User Settings…………………………………………………………………...14 1. User Settings………………………………………………………………...14 1.1 OSD setting……………………………………………………….…...14 1.2 A/V output setting……………………………………………………………14 1.3 Local Time Setting………………………………………………………….14 1.4 Timer Setting………………………………………………………..15 1.5 Parental Control…………………………………………………………...15 2. Installation…………………………………………………………….………16 2.1 Antenna setting……………………………………………………….………17 2.2 Satellite list………………………………………………….………...17 2.3 Transponder list…………………………………………….……..….18... - Page 3 Table of contents 4. System……………………………………………………………………………..24 4 . 1 S y s t e m I n f o r m a t i o n … … … … … … … … … … … … … … … … … ..2 4 4.2 Factory Default………………………………………………………..…...….…24 5.
-
Page 4: Safety
Safety Instructions This STB has been manufactured to satisfy the international safety standards. Please read the following safety precautions carefully. MAIN SUPPLY :AC 100/240V, 50/60Hz, 30W. OVERLOADING :Do not overload a wall outlet, extension cord or adapter as this may result in fire or electric shock. -
Page 5: Safety Instructions
Safety Instructions CONNECTION TO THE SATELLITE DISH LNB :Disconnect the STB from the main supply before connecting or disconnecting the cable from the satellite dish. FAILURE TO DO SO CAN DAMAGE THE LNB. CONNECTION TO THE TV :Disconnect the STB from the main supply before connecting or disconnecting the cable from TV. -
Page 6: General Introduction
General Introduction INTRODUCTION This manual will help you learn basic functions such as installation, selecting channels and many other functions of the STB. All functions can be operated by the remote control. You can easily install it by selecting ”Installation” function and upgrade its software through communication cable. - Page 7 General Introduction UNPACKING Unpack the unit and check to make sure that all of the following items are included in the packaging. 1 x Remote Control Unit (RCU) 1 x User Manual 2 x AAA batteries 1 x Digital Satellite Receiver 1 x A/V Cable 1 XYUV Cable 1 XAC Power Adapter...
-
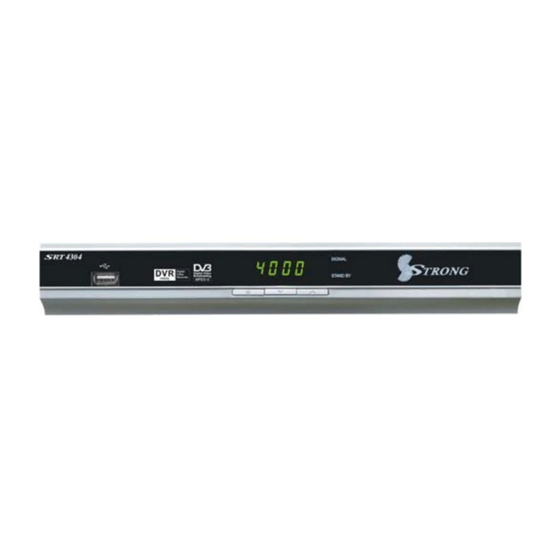
Page 8: Front Panel/ Rear Panel
Front Panel/ Rear Panel Front Panel USB port, for connecting a USB storage device. To switch the receiver between stand-by mode and power-on mode. To select the next channel, or next option in a menu. To select the previous channel, or previous option in a menu. - Page 9 Front Panel/ Rear Panel Rear Panel Symbol Function LNB INPUT Use to connect a satellite dish. Y/Pb/Pr RCA Component connection (Y/Pb/Pr) Component Video RCA Composite video connection ANT IN Connect to Terrestrial Antenna through Modulator. A/V RCA To connect the Audio/Video RCA output to TV. Loop-through output to VCR, etc.
-
Page 10: Remote Control Unit
Remote Control Unit... - Page 11 Remote Control Unit To switch between power-on and stand-by modes. 0–9 To choose a channel directly, or to select numeric formation in a menu MULTI MULTI –PICTURE PICTURES To show the TV and radio program guide MENU To display the main menu, or return to a previous menu. VOL(◄/►) To change the volume in viewing mode, or to change an ption or setting in a menu.
- Page 12 Remote Control Unit BOOK Set bookmark for recorded channels MARK MUTE To turn sound on or off. TV/SAT Switch between TV and SAT mode. ( This function only valid to Terrestrial TV program that is connected and deliver by Modulator of this STB ) INFO To show information about the current program.
-
Page 13: Connection
Step 1: Connect to the antenna Connect the satellite dish lead coming from the wall plate to the LNB INPUT socket on the SRT 4304(socket1). Step 2: Choose your Connection There are a number of methods for connecting the SRT4304, depending on your preference and the connection types on your TV. -
Page 14: User Settings
User Settings Plug in the STB. Then press the “power” button on the remote control or the “Standby” button on the STB Front Panel. The Main Menu screen, the beginning of the OSD screen, will appear as shown in the following picture. The Main Menu displays various functions of the STB or you can select with “CH”... -
Page 15: Timer Setting
User Settings 1.4.Timer Setting Timer Number From 1 to 8, you can set total 8 different Timers Timer Set To open or close each Timer, if the Timer Set is off, then you can not continue to set Timer. Timer Control There are total 3 types of Timer type: Start time only;... - Page 16 User Settings System Setting Lock: To lock the System Setting menu to prevent unauthorized adjusting of System Setting. Channel Lock: To lock channels that are not suitable for Children. Receiver Lock: To lock the receiver to prevent unauthorized viewing. Factory Default Lock: To lock the Factory Default menu to prevent unauthorized operation.
-
Page 17: Installation
Installation 2. Installation Your STB can be easily installed by using “Installation” Menu. Press the VOL move to installation. 2.1.Antenna setting Selecting your installed Satellite on the right side, and press “Vol+” button to enter into left side, then set all the other figures such as LNB type;... -
Page 18: Transponder List
Installation numeric buttons. Rename To change the name of the Satellite Modify To modify the longitude and direction of the Satellite Delete satellite Press the yellow button to delete the Satellite from this STB forever. Multi satellite search Press the yellow button to select the satellite name then scan button to select the scan mode “ALL,FTA,CAS”and Free OK button ,the scanning will beginning. -
Page 19: S E T U P M O T O
Installation and symbol rate value by numeric key, choose the correct Polarization, Horizontal or Vertical, then save it. Delete TP Press yellow button you can delete the channel you do want to view. 2.4 Setup Motor To set up the auto Satellite Dish (DiSEqC1.2 system) and generate the positioner system. -
Page 20: Channel Manager
Channel Manager 3.1 TV Channel edit You can easily access to any TV and Radio programs by the variable functions available from this STB, and enjoy your digital entertainment TV fun. 3.1.1 Edit channel Press Red button, then you can use the color buttons to Rename, Modify and Lock the channels. -
Page 21: C H A N N E L M A N A G E
Channel Manager 3.1.4Skip channel Press red button to select the channel you wish to skip, then press yellow button to skip the channel that you do not wish to view. 3.1.5Lock channel Press red button to select the channel you wish to lock, then press yellow button to lock the channel that you do not wish to view. - Page 22 Channel Manager press ”CH” buttons to move in the list, and press “OK” button to select current channel, press “OK” button again, to exit Channel List Menu to enjoy watching. With colored buttons (Red; Blue; Yellow; Green) presented at the top of menu, you can easily select the different sorting facilities, operating the related color buttons on remote control to select the desired functions.
- Page 23 Channel Manager FAV Group Press FAV button to highlights FAV group, and the channels are sorted by the FAV group. Set Radio Favorite Operation procedure is same as Set TV Favorite.
-
Page 24: System
4. System With system menu, you can set whatever you want the features and specifications of your STB to be most suitable for your watching. 4.1 System Information To show the detailed system information for the STB. 4.2 Factory Default To default the factory settings, by choosing CHANNELS,... -
Page 25: Usb
To play multimedia files, games, record program, update software through USB port. Go to USB music menu, choose path to music files, select one and press “USB Play” or “OK” button to start play. Press “Exit” or “USB Stop” to stop and back to music menu. -
Page 26: Usb Media
Start and stop Press “USB Play” to start recording, “USB STOP” to finish. Information Press “Info” button to check details information when recording, such as recorded time, available free memory size etc. Format of recorded file Recorded file will be saved in format of MPG. 5.3USB Media Music Go to USB music menu, choose path to music files, select one and press “USB... -
Page 27: Usb Game
Skip When display the picture in full screen, use “Former” /“next” buttons to skip to display previous/next picture. Slide play When in full screen display, use “USB play” to start slide play. Use “USB pause” to stop, “USB stop” or “Exit” to quit full screen and back to picture menu. Movie Go to USB movie menu, choose path to video files, select one and press “USB... -
Page 28: Software Update
Format supported Native32 games (SMF) You can go to www.native32.com download more free USB games. USB Game is Black and White ? Solution: Make sure the STB TV type is set to the same system ( PAL; NTSC; AUTO, etc.. ) of TV Color system. 5.5 Software upgrade Choose path to new software file, which is saved in USB device, select and press “OK”... -
Page 29: Dvr Instruction
DVR Instruction Supported Device: Most USB2.0 Hard Drive Disk are supported by the STB, however due to there being many types of HDD available in the market, if you find one particular HDD that does not work with the STB, please kindly provide us the details, and we will endeavor to solve it for you. -
Page 30: T I M E S H I F
TIMESHIFT TimeShift Never miss a moment of your favorite LIVE Sports or Movie scene, now with the SRT 4304E, you can easily enjoy it with just one press of button. TIMESHIFT MODE: Make sure you have USB device plugged into the STB, and there is free storage. Press TIMESHIFT to pause, the video screen will freeze, and recording will begin. -
Page 31: Games
6. Games This receiver contains two highly enjoyable games. 6.1 Tetris The classic game of all time, Tetris is one of the most highly playable games. 6.2 Snake The classic game of modern times. -
Page 32: Troubleshooting
Troubleshooting Should you experience any problems with this STB, please check the table below. Fault Phenomenon probably reasons Resolve Ensure the power plug is Power on, but no Please carefully check the inserted correctly into the socket display on screen power plug, to see it is on the wall. -
Page 33: Glossary
Glossary (1) 22KHz switch A tone that can be sent via the LNB coax, this tone can control the LNB or switches on the coax cable. Do not interfere with the DC or 22KHz tone that the receiver sends to the dish. (2) Antenna A device that collects and radiates electromagnetic waves includes a satellite dish and a broadband antenna. - Page 34 Glossary (11) Packet Identifier (PID) A set of numbers that identifies transport stream packets containing data from a single data stream (12) Polarization Satellite waves are polarized. They can be linear or circular. Linear polarity is Vertical or Horizontal, circular polarity is Right-hand and Left-hand circular polarity.
-
Page 35: Specification
Specification 1. Tuner & Demodulator Input Frequency Range 950MHz ~ 2150 MHz RF Input Signal Level -65 ~ -25dBm RF Impedance 75Ω RF Bandwidth 55MHz/8MHz(Under 5 Msps) LNB Power 13/18DC, +/-5%, 0.5Amax, 1.8Apeak overloaded protect LNB Tone Switch 22KHz +/- 2KHz, 0.65Vp-p+/-0.15V DiSEqC Control V1.0, V1.2, Tone burst A/B Demodulation... - Page 36 60 WEDGEWOOD ROAD, HALLAM, VICTORIA 3803 PH: +61 3 8795 7990 FAX: +61 3 8795 7991 TECHNICAL SUPPORT: 1800 820 030 STRONG & CO. (FAR EAST), LTD. P. O. BOX 85, YOKOHAMA, KANAGAWA-KEN JAPAN 231-91 FAX: +81 45 651-1842 www.strong-technologies.com Email: techau@strong-technologies.com...
Need help?
Do you have a question about the SRT 4304 and is the answer not in the manual?
Questions and answers