Table of Contents

Subscribe to Our Youtube Channel
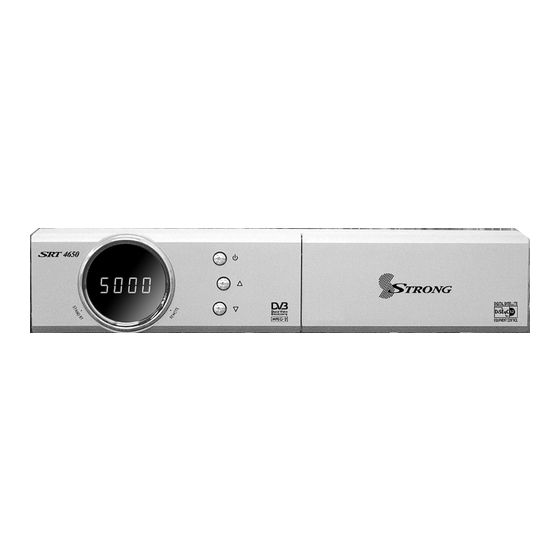
Related Manuals for Strong SRT 4650


Summary of Contents for Strong SRT 4650
- Page 1 USER’S MANUAL Digital Satellite Receiver STRONG & Co. ( FAR EAST ) , LTD. P. O. Box : 85, YOKOHAMA, KANAGAWA-KEN JAPAN 231-91 - FAX : +81 45 662-4957 Website : www.strong-technologies.com E-mail : tech@strong-technologies.com E109000257A...
-
Page 2: Table Of Contents
Contents 1. Introduction 1.1 Overview 1.2 Main Features 2. Safety/Precautions 2.1 Safety 2.2 Precautions 3. Points to Check before Use 3.1 Accessories 4. Controls/Functions 4.1 Front Panel 4.2 Rear Panel 4.3 Remote controller 5. How to Connect 6. Operation 6.1 Getting Started 6.2 System Setting 6.3 Channels 6.4 Electronic Program Guide... -
Page 3: Introduction
Introduction Safety/Precautions 1.1 Overview 2.1 Safety This satellite receiver is designed for the reception of free-to-air channels. Depending on your location, enjoy the rich choice of up to 5,000 different channels broadcasting a large range of programs: culture, sports, cinema, news, events, etc. This receiver is assembled Be sure to read this user's manual before Do not touch the power cord with wet with highly qualified electronic parts. -
Page 4: Precautions
2.2 Precautions Points to Check before Use When installing the unit 3.1 Accessories Install the unit horizontally. An uneven Do not put heavy items such as a TV installation may cause the unit to be set on the unit. That may damage the The accessories below are included with this receiver: damaged. -
Page 5: Controls/Functions
4.2 Rear Panel Controls/Functions 4.1 Front Panel No. Name Connector Function 1 RF OUT UHF 21-69 IEC 169-2 male Output to TV 2 TV ANT IN IEC 169-2 female Input from terrestrial antenna 3 AUDIO L RCA cinch Left audio output Standby/Power on Indications Lamp : Flashes red light in ‘Standby’... -
Page 6: Remote Controller
4.3 Remote controller 4.3 Remote controller POWER : To turn the receiver On/Off. Left & Right : To change the volume level in non-menu mode and modify a MUTE : To turn the sound On/Off. setting in menu mode. Numeric Keys (0-9) : To enter numerical OK : To show the Channel List in non- settings (such as channel numbers) menu mode and select an item or... -
Page 7: How To Connect
How to Connect Operation When Connecting the Receiver to a TV with RF connectors 6.1 Getting Started Connect the TV antenna to TV ANT IN After your receiver is powered on, proceed with installation as follows : Connect the RF-IN of the TV to RF-OUT 1) Menu Language Setting Connect the Video and Audio of the TV to Video and Audio: connect the red Turn on your TV and receiver. - Page 8 6.1 Getting Started 6.1 Getting Started ( When the DiSEqC Motor parameter is set as 1.2 ) 2) Antenna Setup - Move : You can move the dish to the West/East. Press the MENU button to display the main menu. - Limit : If you want to set limits, press to move in the menu.
- Page 9 6.1 Getting Started 6.1 Getting Started Press under ‘SCAN’ to scan the selected satellites. <Figure 6-5> <Figure 6-6> <Figure 6-7> <Figure 6-4> <Figure 6-5> Note : If you cannot access programs after correctly completing a scan procedure, please contact your seller or your installer. Manual Scan <Figure 6-6>...
- Page 10 6.1 Getting Started 6.1 Getting Started 4) Channel Selection 5) Other Functions of the Remote Control You can use to navigate between channels until you find the channel you want. Volume Control If you know the channel number, you can enter it with the NUMERIC buttons and wait 2 While watching a program, press to control the volume.
-
Page 11: System Setting
6.1 Getting Started 6.2 System Setting Teletext(YELLOW) 1) Time Settings The Teletext service is a text data service sometimes available from the Service Provider. This submenu allows you to set your local time, wake up time, wake up channel and sleep time. - Page 12 6.2 System Setting 6.2 System Setting 2) A/V Output Settings This submenu allows you to specify the audio/video output. <Figure 6-12> - Audio Language : Set the default audio language when selecting a channel. - Subtitle Language : Set the default subtitle language. - Video Format : Select the video output format.
- Page 13 6.2 System Setting 6.2 System Setting 6) Calculator This submenu allows you to use a calculator on the screen. <Figure 6-16> - You can switch between Hex (Hexadecimal) and Dec (Decimal) basis for arithmetic with the RED button of the remote control unit. - Use the Numerical and the buttons on the remote control unit.
-
Page 14: Channels
6.3 Channels 6.3 Channels 1) Set Favorites This submenu allows you to set up favorite groups of channels. You can select TV or Radio channels in an alternative way by pressing the TV/RADIO button. The receiver supports 8 favorite groups. Press on ‘Set Favorites’. - Page 15 6.3 Channels 6.3 Channels 4) Lock Channels 5) Skip Channels This submenu allows you to lock channels to control access to them. Once a channel is This submenu allows you to skip channels. Once a channel is set to be skipped, it will be locked, you will be asked to enter a password whenever you try to watch it.
-
Page 16: Electronic Program Guide
6.3 Channels 6.4 Electronic Program Guide 6) Delete Channels 1) EPG This submenu allows you to delete channels. You can select TV or Radio channels in an This submenu allows you to access the electronic program guide when available. alternative way by pressing the TV/RADIO button. You can choose a channel list group by Press the EPG button to display the guide menu. -
Page 17: Games
6.4 Electronic Program Guide 6.5 Games 2) Timer 1) Tetris This sub menu allows you to set the on/off time of your receiver. Press on ‘Tetris’. The following menu will be displayed. <Figure 6-27> This submenu allows you to set on/off times of your receiver. To display the timer menu, press You can choose a skill level using the RED button while in the guide menu. -
Page 18: System Information
6.5 Games 6.6 System Information Press the EXIT button to quit the game. You can check the current information about your receiver such as receiver model name, S/W (software) version, H/W (hardware) version, manufacturing date, etc. <Figure 6-33> Note : This information is useful to download new software and/or repair the receiver. -
Page 19: Troubleshooting
Troubleshooting Specifications There may be various reasons for the abnormal operation of the unit. Therefore, if the unit does not work properly, check it according to the procedures shown in the table below: System capabilities Fully DVB compliant LNB/Tuner input Connector IEC 169-24, female Problem... -
Page 20: Data Transfer
Power supply Power consumption max 20W Supply voltage 90V ~ 250V Supply frequency 50Hz ~ 60Hz Rear Panel Video 1 X RCA cinch connectors DATA TRANSFER Audio L/R 2 X RCA cinch Serial data 9pin D-sub Digital tuner input IEC 169 - 24 Loop-through Digital tuner IEC 169 - 24 is best carried out by an...
Need help?
Do you have a question about the SRT 4650 and is the answer not in the manual?
Questions and answers