Saunier Duval Themaclassic F24E Instructions For Use Installation And Servicing
Fanned flue combination boiler; fanned flue system boiler
Hide thumbs
Also See for Themaclassic F24E:
Table of Contents
Advertisement
4000124050-2 10.03
Instructions for Use
Installation and Servicing
To b e l e f t w i t h t h e u s e r
Themaclassic
F24E
Fanned Flue Combination Boiler
G.C.No. 47-047-35
Themaclassic
F18E SB
Fanned Flue System Boiler
G.C. No.41-920-35
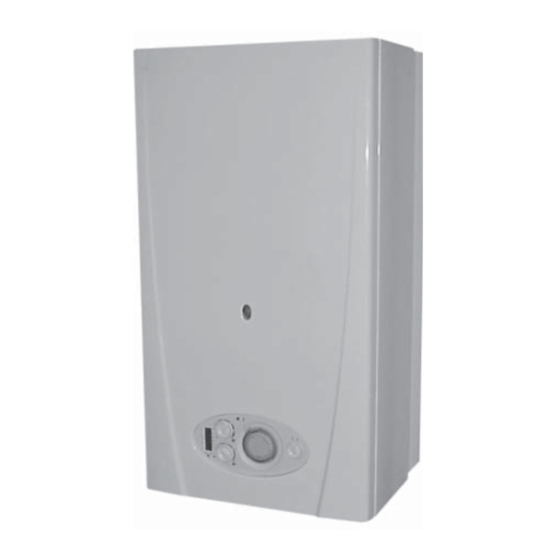
F24E shown
Hepworth Heating Ltd., Nottingham Road, Belper, Derbyshire. DE56 1JT
Advertisement
Table of Contents

Subscribe to Our Youtube Channel
Related Manuals for Saunier Duval Themaclassic F24E


Summary of Contents for Saunier Duval Themaclassic F24E
-
Page 1: Instructions For Use
4000124050-2 10.03 Instructions for Use Installation and Servicing To b e l e f t w i t h t h e u s e r Themaclassic F24E Fanned Flue Combination Boiler G.C.No. 47-047-35 Themaclassic F18E SB Fanned Flue System Boiler G.C. -
Page 2: Guarantee Registration
Guarantee Registration Thank you for installing a new Saunier Duval appliance in your home. Saunier Duval appliances' are manufactured to the very highest standard so we are pleased to offer our customers’ a Comprehensive Guarantee. This product is guaranteed for 24 months from the date of installation or 30 months from the date of manufacture, whichever is the shorter, for parts. -
Page 3: Table Of Contents
Contents CONTENTS DESCRIPTION SECTION PAGE No. Important Information Draining and Filling Appliance Introduction INSTRUCTION Appliance Safety Devices Maintenance and Servicing FOR USE User Controls and Lighting Analogue Programmer F24E only Digital Programmer Kit F24E only Technical Data General Information Heating System Design Domestic Hot Water System Design F24E only Boiler Schematic F24E Boiler Schematic F18E SB... -
Page 4: Important Information
Important Information Gas safety (Installation and use) Regulations Electrical Supply In your interests and that of gas safety, it is the law that ALL gas WARNING: This boiler must be earthed. appliances are installed and serviced by a competent person All system components shall be of an approved type and shall in accordance with the regulations. -
Page 5: Draining And Filling
(b) will flash red indicating a fault. The pressure must be reduced to 1.0 bar by opening the drain valve, refer to organisation or Saunier Duval Service using the telephone number on the inside front cover of this literature. -
Page 6: Appliance Safety Devices
Servicing/maintenance should be carried out by a competent person in accordance with the rules in force in the countries of destination. To obtain service, please call the relevant service organisation or Saunier Duval Service using the telephone number on the inside front cover of this literature. 4000124050-2... -
Page 7: User Controls And Lighting
Turn the On/Off switch to (I) electrical supply is OFF. the boiler is reset. If the fault continues call your Installation/Servicing company or Saunier Duval Service using the telephone number on the inside Domestic hot water adjustment front cover of this literature. -
Page 8: Analogue Programmer F24E Only
Programmer Instructions for Use Analogue Programmer (F24E Only) Digital Programmer Kit. (F24E Only) Part No. A20087. Not fitted as standard. Part No. A20086. Fitted as standard. KEYPAD DESCRIPTION Setting the time, see diagram 3 See diagram 4 for position of keypads as described below, •... - Page 9 Programmer Instructions for Use NOTE: MULTIPLE ON OR OFF EVENTS MAY BE Programming 24 Hour or 7 Day Schedules PROGRAMMED, SEE EXAMPLE. It may be helpful to write out the programme schedules before BEFORE PROCEEDING WITH SETTING THE TIME AND beginning.
- Page 10 Programmer Instructions for Use Event Review Troubleshooting To review the programs at any time, press Prog. key. Events will PROBLEM: Days are flashing, pressing any key does nothing appear in the order they were entered with repeated presses of except key turns output ON and OFF.
-
Page 11: Technical Data
1 Technical Data F24E F18E SB Heating Heating Heat input (max) NET Q 26,94 kW Heat input (max) NET Q 21,9 kW 91,200 BTU/H 74,722 BTU/H Heat input (min) NET Q 9,91 kW Heat input (min) NET Q 11 kW 33,820 BTU/H 37,532 BTU/H Heat output (max) NET P... -
Page 12: General Information
1 Technical Data The F24E and F18E SB are delivered in two separate packages: • The boiler including hanging bracket complete with isolating valves and fittings. • The flue system. Net lift weight (boiler only) F24E 34 kg F18E SB 32 kg Gross lift weight (boiler, hanging bracket... -
Page 13: Heating System Design
2 General Information Important Notice 2.3 Gas Supply If your boiler has been converted to use L.P.G. Propane the The gas installation must be in accordance with the relevant following note applies: standards. Propane cylinders are under pressure and should never be In GB this is BS 6891. - Page 14 3 Heating System Design 3.1 Bypass 3.3 Filling the system F18E SB. • The boiler is fitted with an adjustable automatic bypass. • Provision for filling the system must be made. The methods Ensure that under no circumstances does the flow rate drop are shown in diagram 3.3.
-
Page 15: Domestic Hot Water System Design F24E Only
4 Domestic Hot Water System Design. F24E Only General - All domestic hot water circuits, connections, fittings • The flow restrictor, supplied in the document envelope, must must be in accordance with the relevant standards and water be fitted as diagram 7.1, limiting the flow through the boiler to supply regulations. -
Page 16: Boiler Schematic F24E
5 Boiler Schematic F24E 1 - Fan. 2 - Air pressure switch. 3 - Heat exchanger. 4 - Overheat thermostat. 5 - Combustion chamber. 6 - Expansion vessel. 7 - Flame sense electrode. 8 - Burner. 9 - Ignition electrode. 10 - Pump. -
Page 17: Boiler Location, Flue And Ventilation
6 Boiler Location, Flue and Ventilation 6.1 Boiler Location The recommended clearances are shown in diagram 6.1. Note: The boiler must be mounted on a flat wall which is sufficiently robust to take its weight when full. If in doubt, expert advice should be obtained, in the event of the wall being found not suitable. -
Page 18: Fixing Jig
7 Fixing Jig The fixing jig is made up as follows: Other components within the fixing jig pack. A - Heating return fitting with isolating valve. F - Hanging bracket B (F24E Only) - Cold water inlet fitting with isolating G - wall template valve (m). -
Page 19: Piping System Installation
8 Piping System Installation 8.1 Cutting the flue hole • Remove the wall template, follow the instructions given on the wall template. • Position the wall template, taking due regard of the minimum clearances for the selected flue application, see diagram 8.1. •... -
Page 20: Boiler Installation
9 Boiler Installation • If fitted ensure the plastic plugs are removed from water 9.1 Sheet metal parts and gas pipes. NOTE: There will be some spillage of water. WARNING: When installing or servicing this boiler, care should • (F24E Only) Fit the cold water inlet restrictor (supplied in the be taken when handling the edges of sheet metal parts to avoid document envelope) into cold water inlet isolating valve, see the possibility of personal injury. -
Page 21: Horizontal Telescopic Top Flue Installation
10 Horizontal Telescopic Top Flue Installation The Horizontal Telescopic Top Flue, Kit No. A2004500 SIDE FLUE Suitable for installations that require a flue length "L" from 430 minimum to 660 maximum. If longer flueing is required extensions and bends are available, see note below. If the flue length, see diagram 10.2. - Page 22 10 Horizontal Telescopic Top Flue Installation 10.3 Installation of telescopic flue assembly STEP 1. • For flue lengths up to 0.5m fit the restrictor (supplied in the document envelope) inside the fan outlet, see diagram 10.3. FLUE LENGTH Outside wall face •...
-
Page 23: Horizontal Top Flue Installation
10a Horizontal Top Flue Installation 10a.1 The Horizontal Top flue - kit 86285H SIDE FLUE Is suitable for installations that require a max. flue length "L" of 740mm. If a shorter flue length is required, the flue can be cut to a min. length"L"... - Page 24 10a Horizontal Top Flue Installation 10a.4 Installation of horizontal top flue Outside Flue assembly wall face centre line Important: If the flue has been cut, ensure that there are no burrs that could damage the ‘O’ ring. • For flue systems less than 0,5 m long, fit the flue restrictor (a) into the fan outlet, see diagram 10a.4.
-
Page 25: Electrical Connection
Important: If a replacement supply cable is required it must be arising from incorrect wiring cannot be put right under the purchased. Part No. S1008600. terms of the Saunier Duval guarantee. All system components must be of an approved type. 11.2 Voltage Free External Controls... - Page 26 11 Electrical Connection 11.3 Mains Voltage External Controls WARNING: UNDER NO CIRCUMSTANCES MUST ANY MAINS VOLTAGE BE APPLIED TO ANY OF THE TERMINALS ON THE VOLTAGE FREE HEATING CONTROLS STRAIN CONNECTION TERMINAL. RELIEF When mains voltage external controls are used, remove the MAINS VOLTAGE HEATING CONTROLS CONNECTION PLUG from the fittings pack and install on the control interface PCB as follows.
-
Page 27: Commissioning
12 Commissioning Important: The commissioning and first firing of the boiler Air in pipes must only be done by a competant person. Important: A central heating system can not operate correctly unless it is filled with water and air bled from the system. If Gas installation these conditions are not met the system may be noisy. - Page 28 12 Commissioning 5. • Bleed each radiator to remove air, ensure all • Leave cap open on automatic air vent. bleed screws are re-tightened. • If necessary repressurise the system, refer to procedure 4 8. • Open various hot water taps to bleed system 7.
-
Page 29: Changing Gas Type
12 Commissioning When all adjustments are completed. Please ensure the “Benchmark” logbook is completed and left with the user and the magnetic lighting instruction label is • Adjust heating temperature to maximum. placed on the surface of the boiler casing. •... -
Page 30: Routine Cleaning And Inspection
15 Routine Cleaning and Inspection REMEMBER, when replacing a part on this appliance, use only spare parts that you can be assured conform to the safety and performance specification that we require. Do not use reconditioned or copy parts that have not been clearly authorised by Hepworth Heating. - Page 31 15 Routine Cleaning and Inspection 15.3 Front panel • Unscrew and remove the two retaining screws from the bottom of the front panel. • Remove front panel by lifting up and forward. 15.4 Control panel • Lower forwards to gain access to lower part of boiler. 15.5 Sealed chamber cover •...
- Page 32 15 Routine Cleaning and Inspection 15.11 Heat exchanger, refer to diagram 15.9 • Remove air pressure switch sensing tube from the side of the flue hood. • Unscrew and remove the two retaining screws from front of each side panel. •...
- Page 33 15 Routine Cleaning and Inspection 15.12 (F24E Only) Domestic water inlet filter, CLIP DOMESTIC WATER refer to diagram 15.10 INLET FILTER If the water flow rate through the appliance has reduced it may HOUSING be necessary to clean or replace the domestic water inlet filter. •...
-
Page 34: Fault Finding
16 Fault Finding Before trying to operate the boiler make sure that : Overheat thermostat reset button • All gas supply cocks are open and that the gas supply has Refer to Section 18.10 to locate the overheat thermostat been purged of air. reset button. - Page 35 16 Fault Finding TYPE OF FAULT CHECK No display on control panel • 230V supply • PCB fuse • Connection between PCBs No domestic hot water F24E Only) • Loose connections on control board (PCB) No central heating • Connections on air pressure switch (electrical or tubes) (Red flashing warning light and flashing disconnected fault code in display)
- Page 36 16 Fault Finding FAULT: NO HEATING Are the external heating Rectify fault on external controls. controls calling for heat? Rectify, check the 230V Is the polarity correct? controls board. Connect 1 and 2 on J10, Faulty main PCB. does boiler fire in central heating? Faulty 230V controls board.
- Page 37 16 Fault Finding F1 FAULT DISPLAYED FAULT: THE BURNER LIGHTS BUT THEN GOES OUT. THERE IS NO FLAME DETECTED. The flame is not spreading across the whole burner and is not reaching Check that the gas taps are fully open the sensing electrode.
- Page 38 16 Fault Finding F1 FAULT DISPLAYED FAULT: THE BURNER DOES NOT LIGHT AT ALL, BUT THERE IS AN IGNITION SPARK. Are the gas taps on? Turn on the gas taps. Is there 24Vdc at the gas control valve? Check the wiring. for testing see component testing data.
- Page 39 16 Fault Finding F24E ONLY FAULT: THE WATER AT THE TAPS IS LUKE-WARM. Is the temperature higher if you reduce Check the 3-way valve is not passing the flow through the taps? into the radiators. (The radiators should stay cold in Summer setting) Check that the cold water inlet restrictor is fitted.
-
Page 40: Wiring Diagram F24E
17 Wiring Diagram F24E AIR PRESSURE SWITCH IGNITION PLUG ELECTRODES IGNITOR UNIT SENSE ELECTRODE PUMP CONTROL OVERHEAT VALVE THERMOSTAT CHASSIS THERMISTOR EARTH WATER PRESSURE SENSOR THREE-WAY VALVE MAINS VOLTAGE HEATING CONTROLS PLUG 230V SWITCHED LIVE FROM OPTIONAL FROST STAT. 230V SWITCHED LIVE FROM HEATING CONTROLS. REMOVE VOLTAGE FREE LINK CONTROLS VOLTAGE FREE... -
Page 41: Wiring Diagram F18E Sb
17a Wiring Diagram F18E SB AIR PRESSURE SWITCH IGNITION PLUG ELECTRODES SENSE ELECTRODE IGNITOR UNIT CONTROL VALVE OVERHEAT PUMP CH THERMOSTAT CHASSIS THERMISTOR EARTH WATER PRESSURE SENSOR MAINS VOLTAGE HEATING CONTROLS PLUG 230V SWITCHED LIVE FROM OPTIONAL FROST STAT. 230V SWITCHED LIVE FROM HEATING CONTROLS. REMOVE VOLTAGE FREE LINK CONTROLS VOLTAGE FREE... -
Page 42: Replacement Of Parts
18 Replacement of Parts To Drain the central heating circuit • Open drain valve fitted at the lowest point in the system. • Allow air into the system by opening a radiator bleed screw or the boilers drain valve (f). To Drain the Domestic hot water circuit (F24E Only) •... - Page 43 18 Replacement of Parts 18.2 Fan. Before starting refer to the front of Section 18 Important information. • Remove the front panel, refer to Section 15.3. RETAINING CLIPS • Remove the sealed chamber cover, refer to Section 15.5. AIR PRESSURE •...
- Page 44 18 Replacement of Parts 18.9 Burner injector assembly, refer to diagram BURNER INJECTOR 18.6. Before starting refer to the front of Section 18 Important information. • Remove the front panel, refer to Section 15.3. • Lower the control panel, refer to Section 15.4. •...
- Page 45 18 Replacement of Parts 18.13 Heat exchanger, refer to diagram 18.7. 18.15 Printed circuit board (PCB), refer to diagram 18.9. Before starting refer to the front of Section 18 Important information. Before starting refer to the front of Section 18 Important information.
- Page 46 18 Replacement of Parts 230V CONTROLS BOARD MAINS CONTROL PANEL SWITCH USER INTERFACE PROGRAMMER F24E shown BOARD Diagram 18.10 18.16 User interface board, refer to diagram HEX HEAD 18.10. SCREW Before starting refer to the front of Section 18 Important (4 OFF) information.
- Page 47 18 Replacement of Parts 18.21 (F24E Only) Filling system tap, refer to diagram 18.12. Before starting refer to the front of Section 18 Important information. • Remove the front panel, refer to Section 15.3. • Lower the control panel, refer to Section 15.4. •...
- Page 48 18 Replacement of Parts 18.25 System water pressure sensor, refer to GAS CONTROL diagram 18.15. VALVE Before starting refer to the front of Section 18 Important information. • Remove the front panel, refer to Section 15.3. • Lower the control panel, refer to Section 15.4. Drain down the boiler, refer to relevant part of Section 18.1.
- Page 49 18 Replacement of Parts 18.29 Gas control valve stepper motor, refer to diagram 18.18 Before starting refer to the front of Section 18 Important information. • Remove the front panel, refer to Section 15.3. • Lower the control panel, refer to Section 15.4. •...
- Page 50 18 Replacement of Parts 18.32 (F24E Only) Three-way valve actuator, refer to diagram 18.21. Before starting refer to the front of Section 18 Important information. • Remove the front panel, refer to Section 15.3. • Lower the control panel, refer to Section 15.4. •...
- Page 51 18 Replacement of Parts 18.35 Expansion vessel Renewal of the expansion vessel requires the boiler to be removed from the wall. As an alternative, a separate expansion vessel of the same specification may be connected as close as possible to the boiler, leaving the original in position, refer to the installation instructions.
-
Page 52: Spare Parts
19 Spare parts When ordering spare parts, quote the part number and description, stating the appliance model number and serial number from the data badge. Short parts list Description Part No. G.C. No. Central heating thermistor S57398 ••••••• S10088 ••••••• Air pressure switch S10089 •••••••...
Need help?
Do you have a question about the Themaclassic F24E and is the answer not in the manual?
Questions and answers