Table of Contents
Advertisement
Quick Links
Advertisement
Table of Contents

Related Manuals for Swissvoice Avena 748


Summary of Contents for Swissvoice Avena 748
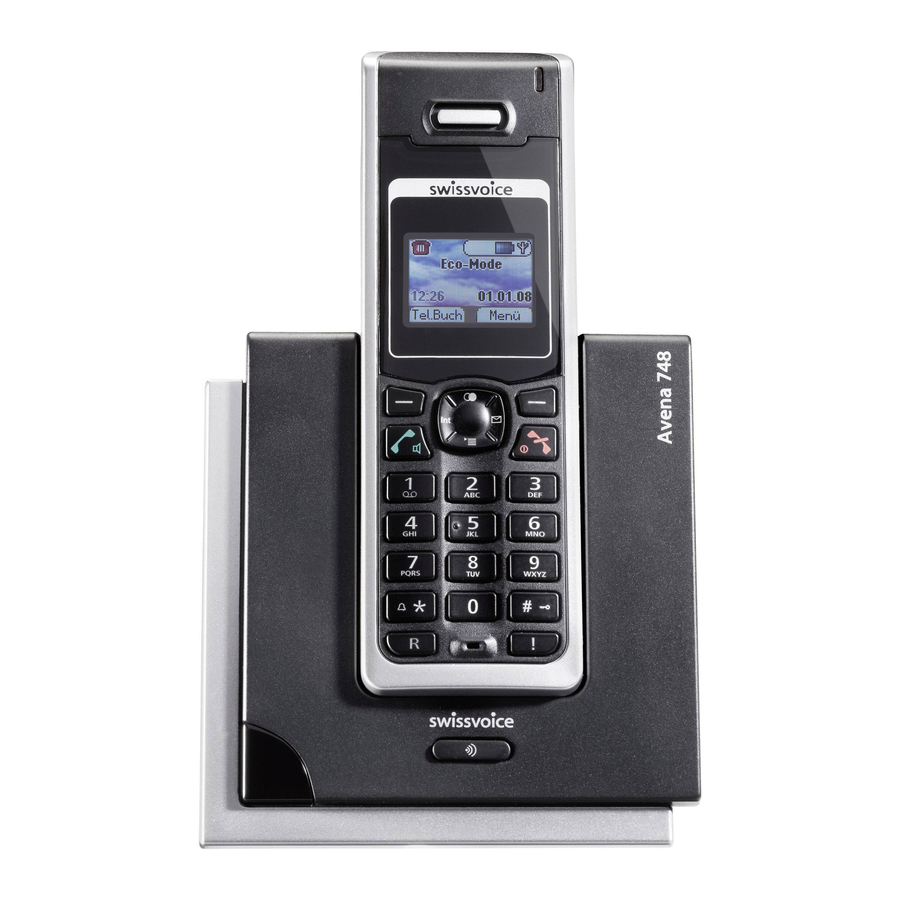
- Page 1 Avena 748/758 Cordless analogue telephone DECT User Manual...
-
Page 2: Safety Precautions
Safety precautions This DECT cordless telephone is designed for transmitting voice calls over the analogue telephone network. Any other use whatsoever is not permitted and is regarded as in violation of the provisions. The user manual with safety precautions is a part of the product package and must be passed on to the new owner on reselling. -
Page 3: Table Of Contents
Contents Your Avena 748/758 is designed for connection to the analogue telephone network. This telephone is available either with one handset (Avena 748/758) or as a set with two handsets and a charging bay (Avena 748/758 Duo). The Avena 758 offers the additional feature of an integrated digital answer machine. - Page 4 About the menus ……………………………………………………………………………21 Menu navigation …………………………………………………………………………21 Back to previous menu …………………………………………………………………21 End menu …………………………………………………………………………………21 Avena 758 base station with answer machine ……………………………………………22 Avena 748 base station ………………………………………………………………………23 Telephoning …………………………………………………………………………………24 Making an external call ………………………………………………………………………24 Call preparation …………………………………………………………………………24 Ending a call ……………………………………………………………………………24...
- Page 5 Contents Group call (paging) …………………………………………………………………………27 Keypad lock …………………………………………………………………………………27 Internal calls …………………………………………………………………………………28 Internal enquiry call …………………………………………………………………………29 Brokering (switching between two calls) …………………………………………………30 Call transfer to another handset ……………………………………………………………30 Conference calls ………………………………………………………………………………31 External enquiry call …………………………………………………………………………31 Directory………………………………………………………………………………………32 Directory entries ………………………………………………………………………………32 Adding a new entry ……………………………………………………………………32 Tips for entering names/numbers ………………………………………………………32 Editing entries ……………………………………………………………………………33...
- Page 6 Contents Audio …………………………………………………………………………………………37 Handset/base station ringer …………………………………………………………………37 Beeps …………………………………………………………………………………………38 Key beep …………………………………………………………………………………38 Range beep ………………………………………………………………………………38 Charging beep ……………………………………………………………………………38 Accu beep ………………………………………………………………………………38 Confirmation beep ………………………………………………………………………38 Family …………………………………………………………………………………………39 Direct call (baby call) …………………………………………………………………………39 Room monitoring (baby surveillance) ………………………………………………………40 Charges ………………………………………………………………………………………41 Cost of last call ………………………………………………………………………………41 Summary ………………………………………………………………………………………41 Settings ………………………………………………………………………………………41 Type of Display ……………………………………………………………………………41...
- Page 7 Contents Call waiting …………………………………………………………………………………44 Activating/deactivating call waiting ……………………………………………………44 Accepting a waiting call …………………………………………………………………44 Anonymous call (Identification restriction) …………………………………………………45 Recall …………………………………………………………………………………………45 Call back on busy (Completion of Calls to Busy Subscriber/CCBS) …………………45 Auto Redial ………………………………………………………………………………46 Network answer machine (Voicebox) ………………………………………………………46 Provider ………………………………………………………………………………………47 SMS ……………………………………………………………………………………………48 SMS –...
- Page 8 Contents Message playback ………………………………………………………………………54 Delete messages …………………………………………………………………………54 Listening over the handset ………………………………………………………………54 Recording a call …………………………………………………………………………55 Remaining time …………………………………………………………………………55 VIP number* ……………………………………………………………………………55 SMS notification* ………………………………………………………………………55 Operating the answer machine on the base station ………………………………………56 On/off ……………………………………………………………………………………56 Playing, repeating, deleting and skipping messages …………………………………56 Delete all listened messages ……………………………………………………………56 Listening over the base station …………………………………………………………56 Answer machine settings ……………………………………………………………………57...
- Page 9 Contents Display ……………………………………………………………………………………59 • Wallpaper ………………………………………………………………………………59 • Menu color ……………………………………………………………………………59 • Font ……………………………………………………………………………………59 • Contrast ………………………………………………………………………………60 • Backlight ………………………………………………………………………………60 • Screen Saver ……………………………………………………………………………60 Keypad backlight …………………………………………………………………………60 Handset Name ……………………………………………………………………………60 Telephony ……………………………………………………………………………………61 Automatic DTMF …………………………………………………………………………61 Auto Talk …………………………………………………………………………………61 System PIN ……………………………………………………………………………………61 PBX ……………………………………………………………………………………………62 Repeater ………………………………………………………………………………………62 Eco Mode ……………………………………………………………………………………63...
- Page 10 Contents Maintenance …………………………………………………………………………………66 Reset …………………………………………………………………………………………66 Software version ……………………………………………………………………………66 Installation assistant General information ………………………………………………………………………67 Approval and conformity ……………………………………………………………………67 Warranty conditions …………………………………………………………………………67 Technical Data …………………………………………………………………………………68 Index …………………………………………………………………………………………69 Warranty Certificate ………………………………………………………………………73...
-
Page 11: Introduction
Introduction Swissvoice Your Avena 748/758 is fitted with the latest innovations in terms of reduction of electro- magnetic radiation (so called “electro-smog”) as well as electrical power consumption reduction. The Swissvoice includes three main features: Multi Handset Low Radiation Mode (Eco Mode) When in standby, the electromagnetic radiation is automatically shut down between the base station and the handset(s). -
Page 12: Setting Up The Telephone
➭ 2 rechargeable batteries NiMH AAA 800 mAh Model No. GP80AAAHC ➭ 1 user manual ➭ 1 belt clip (mounted) Additional items for Avena 748/758 Duo ➭ Second handset ➭ 2 additional rechargeable batteries ➭ Charging bay (for the second handset) with power supply... -
Page 13: Location
Setting up the telephone Location To obtain the best possible range, we recommend positioning the telephone in a location central to your sphere of activity. Avoid positioning the telephone in niches, recesses and behind steel doors. The maximum range between the base station and handset is approximately 50 meters indoors and 300 meters outdoors. -
Page 14: Setting Up The Base Station Or Charging Unit
Setting up the telephone Setting up the base station or charging unit ➭ Do not expose the base station or charging unit to direct sunlight. ➭ Protect the base station or charging unit against moisture. Do not position the base station or charging unit in rooms exposed to condensation, corrosive steam or excessive dust. -
Page 15: The Stand
Setting up the telephone The stand Inserting the stand 1. Lay the base station down on the table (front side down). 2. Insert the stand in the grooves ➀ of the base station and press it on lightly. 3. Make sure that the lower support tabs ➁... -
Page 16: Connecting The Phone
Setting up the telephone Connecting the phone Before you can start using your telephone you must plug in the telephone connector cable and the mains cable. Note The cables must pass above the stand to assure the proper standing of the base station. -
Page 17: Setting Up The Handsets
Setting up the telephone Setting up the handsets Your handsets will be ready for operation (for making or accepting calls) only once the batteries have been fully charged for the first time. Inserting the rechargeable batteries The bottom part of the handset contains a battery compartment for housing two type AAA batteries (microcells). -
Page 18: Charging The Batteries
Setting up the telephone Charging the batteries The batteries are not yet charged when you first unpack the telephone. Insert the hand- set in the base station or charging unit for charging. The flashing battery symbol on the handset shows the charging status. The batteries will take around 14 hours to fully charge. Note •... -
Page 19: Language Choice/Installation Assistant
Setting up the telephone Note You can replace the handset in the charging/base station after every call. Charging is electronically controlled to ensure optimal charging of batteries in different charge states. Avoid removing the batteries from the handset for no good reason, since this affects the optimum charging cycle. -
Page 20: Getting To Know Your Telephone
Getting to know your telephone Handset keys Earpiece Backlit display Navigation key Redial Internal call key Softkey (multifunctional key) Softkey (multifunctional key) Call list Message key Talk key “End call” key Alphanumerical keypad PQRS WXYZ Hash key Activating the key lock Enquiry key with Key “Write SMS Message”... - Page 21 Getting to know your telephone Softkeys (multifunctional keys) Right softkey: Choose menu options, confirms entries/settings. Left softkey: returns to previous menu step. Navigation key For scrolling up/down or right/left. In answer machine mode, message playback: right = skip forward, left = replay message; double click = skip back. Redial Open redial list.
-
Page 22: Handset Display Symbols
Getting to know your telephone Handset display symbols The following symbols are displayed on your handset. Coverage symbol Battery full Reception displayed when the handset is Indicates that the batteries are fully charged. within range of the base station. Battery empty Flashes when out of range of the base station or not registered with the base station. -
Page 23: About The Menus
Getting to know your telephone About the menus Menu navigation In standby when pressing the softkey under MENU the display shows the menu “Directory” together with the corresponding symbol. Pressing the navigation key (up /down) will lead to the further available menus. The title of the selected menu appears together with the corresponding symbol. -
Page 24: Avena 758 Base Station With Answer Machine
Getting to know your telephone Avena 758 base station with answer machine Group call on handsets (paging) Switches the answer machine on or off Adjust loudspeaker volume Message Previous Delete counter/ Status indicator Playback/ Next Stop... -
Page 25: Avena 748 Base Station
Getting to know your telephone Avena 748 base station “In operation” LED Group call on handsets (paging) -
Page 26: Telephoning
Telephoning Making an external call Press , wait for the dialling tone and dial the number. Call preparation First, enter the number. Press to dial the number. If you enter an incorrect number, you can: • delete it by pressing repeatedly the foxkey under •... -
Page 27: Handsfree Operation
Telephoning Handsfree operation You can use the handsfree function to conduct calls without holding the handset in your hand and allow others present in the room to take part in the call. Activating handsfree before a call: 1. Press . The display shows . -
Page 28: Redial
Telephoning Redial The 15 last-dialled numbers are saved in a redial list. If a name and number are already stored in the directory, the name is shown instead of the number. Redialling a number from the list If the telephone is in standby mode: Press to open the redial list and press to scroll through the list. -
Page 29: Sending Sms Messages From The Redial List
Telephoning Sending SMS messages from the redial list* 1. Press the softkey under . Use to scroll through the list to find the entry you are seeking, and press the softkey under OPTIONS, WRITE MESSAGE. 2. Write and send your SMS message. Group call (paging) You can activate a group call to locate a mislaid handset. -
Page 30: Internal Calls
Telephoning Internal calls You can call other handsets which are registered with your base station. This allows you to make internal calls free of charge. 1. Press , dial the relevant handset number and press OK to confirm. Pressing automatically dials the second handset if only two handsets are registered with the base station. -
Page 31: Internal Enquiry Call
Telephoning Internal enquiry call You are conducting an external call and want to call an internal party without ending the external call. 1. Press 2. Dial the desired handset number and press OK to confirm. The external call is put on hold. -
Page 32: Brokering (Switching Between Two Calls)
Telephoning Brokering (switching between two calls) You have two active calls (1 internal and 1 external), one of which is on hold. 1. Press the key or the softkey under OPTIONS, BROKERING to switch between the call partners. Press the softkey under OPTIONS, CONFERENCE to connect all three call partners with each other. -
Page 33: Conference Calls
Telephoning Conference calls You have two active calls (1 internal and 1 external), one of which is on hold. 1. Press the softkey under OPTIONS, JOIN to connect all three call partners with each other. Each call partner can leave the conference call by pressing 2. -
Page 34: Directory
Directory You can store up to 200 names and numbers in the directory on each handset. Every entry contains a name and telephone number. Names can be up to 24 letters long and numbers up to 24 digits long. Directory entries Adding a new entry If the telephone is in standby mode: 1. -
Page 35: Editing Entries
Directory Editing entries 1. Press the softkey under DIRECTORY. Use to scroll through the list to find the entry you are seeking, and press the softkey under OPTIONS. 2. Select EDIT ENTRY, modify the name and/or number and save the entry. Deleting directory entries/entire directory You can delete individual entries or the entire directory. -
Page 36: Copying Directory Entries
Directory Copying directory entries If you operate several handsets, you can copy entries from one handset to another. This way, you only have to enter names and numbers once. While you are copying entries from one handset to another, you can make external calls on another handset registered with the base station. -
Page 37: Calls List
Calls list* If your network operator supports caller ID presentation* (CLIP), the caller’s number (if he did not not withheld his own number) is displayed before you accept the call. If you have received new calls, a message to this effect appears in the display. A list is kept of answered and unanswered calls. -
Page 38: Saving Numbers From The Calls List To The Directory
Calls list* Saving numbers from the calls list to the directory 1. Press . Scroll through until you reach the entry you are seeking. 2. Press the softkey under OPTIONS, SAVE NUMBER . Enter the associated name and save the entry. Deleting individual entries 1. -
Page 39: Audio
Audio Procedure: AUDIO 1. Press the softkey under MENU. Press to scroll to ad press OK to confirm. 2. Scroll to the relevant submenu and make the relevant settings: Handset/base station ringer You can programme different ringer melodies on the handset and base station to signal external and internal calls. -
Page 40: Beeps
Audio Beeps Your telephone supports various tones which you can activate or deactivate: Key beep Every time a key is pressed, a brief beep is heard. Range beep A warning beep is sounded if you exceed the maximum range. Move closer to the base station. -
Page 41: Family
Family Procedure: 1. Press the softkey under MENU. Press to scroll to FAMILY and press OK to confirm. 2. Scroll to the relevant submenu and make the relevant settings: Direct call (baby call) If you activate direct call on your telephone, the handset dials a preprogrammed number when any handset key is pressed. -
Page 42: Room Monitoring (Baby Surveillance)
Family Room monitoring (baby surveillance) You can set a baby call/noise alarm. Once this function is set, your phone monitors noises in its immediate vicinity and triggers a call to the programmed number if the noise exceeds a set level (defined by the user). The person called hears the noises and is alerted to the fact that, for instance, a child is crying in the room. -
Page 43: Charges
Charges Procedure: CHARGES 1. Press the softkey under MENU. Press to scroll to and press OK to confirm. 2. Scroll to the relevant submenu and make the relevant settings: Cost of last call You can display the cost of the last call. Summary You can display the total per handset and the total for all calls. -
Page 44: Calendar/Clock
Calendar/clock Procedure: 1. Press the softkey under MENU. Press to scroll to CALENDAR/CLOCK and press OK to confirm. 2. Scroll to the relevant submenu and make the relevant settings: Alarm To set the alarm, you need to activate the alarm function and enter the time and pre- ferred alarm melody. -
Page 45: Network Functions
Network functions Please note that the services in this chapter are supplementary network services and thus subject to availability from your network operator. To activate certain network functions, you have to send special codes to the network. Often these codes contain special characters such as . -
Page 46: Call Waiting
Network functions Call waiting With this service you can have a telephone conversation and still be informed that someone else is calling you. In this case you will hear the “Call waiting” tone and you can answer this call. Activating/deactivating call waiting 1. -
Page 47: Anonymous Call (Identification Restriction)
Network functions Anonymous call (Identification restriction) When you call someone, your number is shown on the other person’s phone if it supports this function. You can withhold your number for the next call i.e. you can call anonymously. Note • “Anonymous call” is only activated for the next call (the procedure must be repeated for each call). -
Page 48: Auto Redial
Network functions Auto Redial The automatic redial calls for you an occupied number in regular intervals. If a number you have dialled is busy, you can activate Auto Redial by pressing the softkey under OPTIONS, AUTO REDIAL. You can then set the number of repetitions and the desired interval. Note An activated auto redial can be deactivated in the menu NET FUNCTIONS... -
Page 49: Provider
Network functions Provider You can also make calls over another provider. Under PROVIDER LIST , enter the names and prefixes of the providers (max. 5) to whose service you have subscribed. You can link every directory entry to one of the providers in this list. -
Page 50: Sms
SMS – Short Messaging Service Sending and receiving SMS messages is a network function. To send and receive SMS messages, your telephone line must have active Caller Identification Presentation (CLIP) and Connected Line Presentation (COLP)*. Check with your network operator to find out whether the SMS network function is available and about charges, if applicable. -
Page 51: Inbox
Inbox New SMS messages are signalled in the display by and saved in the inbox. Press the softkey under INBOX to read new SMS messages. Or BACK, to read SMS messages later. Once you have read the SMS messages, you can answer, forward, save or delete them, or call the sender. -
Page 52: Templates
Templates To simplify writing SMS messages, you can create up to 5 templates. You can edit and delete these templates or create a new SMS message template. Settings Service centres Before you can send and receive SMS messages, an SMS service centre must be pro- grammed with the associated access number. -
Page 53: Additional Information To Activate The T-Com Sms Service
Additional information to activate the T-Com SMS service The Short Message Service by T-Com is managed via the SMS service center with the access number 0193010. To register you have to send a registration SMS to the SMS service center once. To receive the SMS as text message your telephone line must have active Caller Identification Presentation (CLIP) to be able to read the SMS (on basis of the trans- mitted telephone number 0193010 of the T-Com center). -
Page 54: Answer Machine (Avena 758 Only)
Answer machine (Avena 758 only) You can operate your answer machine: from the base station from the handset remotely from an external DTMF telephone Your telephone is delivered with the answer machine switched on (default setting). Operating the answer machine from the handset You can switch your answer machine on and off, listen to messages and program set- tings from any registered handset. -
Page 55: Recording/Playing Back An Outgoing Message
Answer machine (Avena 758 only) Recording/playing back an outgoing message You can replace the standard outgoing message with a personal one and revert to the standard message at any time. 1. Press the softkey under MENU, press to scroll to ANSWER MACHINE and press OK to confirm. -
Page 56: Message Playback
Answer machine (Avena 758 only) Message playback If you have messages on your answer machine, the display shows and the message counter on the base station shows the total of messages (old an new). If you have new messages, the message counter is flashing. 1. -
Page 57: Recording A Call
Answer machine (Avena 758 only) Recording a call While you are on the telephone you can record the call via the handset. During an active call, press the softkey under OPTION, RECORDING and press OK to confirm. The answer machine is switched on and the conversation is recorded. Press RECORDING OFF to stop recording the conversation. -
Page 58: Operating The Answer Machine On The Base Station
Answer machine (Avena 758 only) Operating the answer machine on the base station On/off Press Playing, repeating, deleting and skipping messages All recorded messages and memos are shown on the display. Press . Messages are played, starting with the most recent message. During playback, press: once to delete the active message. -
Page 59: Answer Machine Settings
Answer machine (Avena 758 only) Answer machine settings Procedure: ANSWER SETTINGS 1. Press the softkey under MENU. Press to scroll to in the ANSWER MACHINE menu and press OK to confirm. 2. Make the settings in the relevant submenu: Answer mode Select the outgoing message which callers will hear. -
Page 60: Remote Activation Of Answer Machine
Answer machine (Avena 758 only) Remote activation of answer machine If you have forgotten to switch your answer machine on, you can do this remotely from an external telephone. Dial your number and let it ring 12 times. Enter your 4-digit secu- rity PIN and press to switch on the answer machine. -
Page 61: Settings
Settings Language Procedure: 1. Press the softkey under MENU. Press to scroll to LANGUAGE in the SETTINGS menu and press OK to confirm. 2. Set the preferred display language. Display texts will appear in the set language. Presentation Procedure: PRESENTATION SETTINGS 1. -
Page 62: Contrast
Settings • Contrast To optimise legibility, you can adjust the display contrast. • Backlight You can activate or deactivate backlighting for the display. • Screen Saver Activate or deactivate the screensaver. Keypad backlight Activate or deactivate keypad lighting. Handset Name To better distinguish between handsets, you can give each handset a name. -
Page 63: Telephony
Settings Telephony Procedure: 1. Press the softkey under MENU. Press to scroll to TELEPHONY in the SETTINGS menu and press OK to confirm. 2. Scroll to the relevant submenu and make the following settings: Automatic DTMF Activate “Automatic DTMF” to switch automatically to DTMF dialling during an active call. Auto Talk An incoming call can be accepted by pressing the talk key. -
Page 64: Pbx
Settings See “PBX access”. Repeater You can use up to 6 repeaters to extend the range and receiving power of your base station. The repeaters must first be registered and activated on the base station. Per repeater, up to 2 handsets can conduct a call simultaneously. Procedure: REPEATER SETTINGS... -
Page 65: Eco Mode
Settings Eco Mode Multi Handset Low Radiation Mode Electromagnetic radiation is shut down between the base station and all declared hand- sets. Handsets and base station are waiting for a wake-up signal either in form of an incoming call, when activating a handset or when the system synchronises data. When Eco Mode is set to ON, and as long as you are not conducting a conversation, ECO MODE is displayed instead of the handset name and the range symbol is depicted in... -
Page 66: Additional Handsets/Base Stations
Additional handsets / base stations Registering additional handsets You can register up to 6 handsets with the base station. The base station must be within range. Note If you purchase additional handsets for your base station, • the batteries must first be fully charged! •... -
Page 67: Pbx Access
PBX access Compatibility Your telephone is designed for use in the analogue telephone network and can be operated on a PBX that supports DTMF dialling and flash signalling. Contact your network operator for further information. Access Code You may need to enter an access code (e.g. 0) to allow the public exchange to assign an external line for external calls or for calling back numbers in the calls list. -
Page 68: Maintenance
Maintenance Reset You can reset the telephone to default status as follows: Procedure: 1. Press the softkey under MENU. Scroll to MAINTENANCE in the SETTINGS menu. Press OK to confirm. 2. Select the handset or base station, press RESET and press OK to confirm. The default settings are restored. -
Page 69: General Information
The declaration of conformity may be viewed at: www.swissvoice.net. The CE symbol confirms the conformity of the telephone with the above directive. -
Page 70: Technical Data
✕ model no: SSA-5W-05 EU 060060F Length/width/height = 152 23 mm Mains unit Base station Avena 748 weight: 169 g primary: 100–240 VAC/50–60 Hz/200 mA Base station Avena 758 weight: 180 g secondary: 6VDC/600mA Weight of handset: Handset operation time:... -
Page 71: Index
Index Accepting a call …………………………24 Calendar/clock ……………………………42 Access Code ………………………………65 Call back on busy ………………………45 Accu beep ………………………………38 Call forwarding …………………………43 Additional handsets/base stations ………64 Call key ……………………………………19 Adjust time/date …………………………42 Call preparation …………………………24 Alarm ……………………………………42 Call transfer ………………………………30 Alphanumerical keypad …………………19 Call waiting ………………………………44 Anonymous call …………………………45 Calls list……………………………………35... - Page 72 Index Deregistering a handset …………………64 Handset Name ……………………………60 Direct call …………………………………39 Handset secrecy …………………………25 Directory …………………………………32 Handsfree operation ……………………25 Directory entries …………………………32 Hash key …………………………………19 Display ……………………………………59 Display symbols …………………………20 Disposal …………………………………U2 Identification restriction …………………45 Drafts ……………………………………49 Inbox ………………………………………49 DTMF/keypad information ………………24 Index ………………………………………69 Duo ………………………………………10 Inserting the stand ………………………13...
- Page 73 Index Maintenance ……………………………66 Paging ……………………………………27 Making an external call …………………24 PBX access ………………………………65 Menu color ………………………………59 PIN alarm …………………………………58 Menus ……………………………………21 Presentation ………………………………59 Message key………………………………19 Provider……………………………………47 Message playback ………………………54 Messages …………………………………56 Multi Handset Low Radiation Mode ……63 Radiation reduction in communication 9, 63 Range beeps………………………………38 Recall………………………………………45 Navigation key ……………………………19...
- Page 74 Warranty conditions ……………………67 Settings …………………………41, 50, 59 Writing SMS messages …………………48 Short Message Service …………………51 SMS notification …………………………55 Softkeys …………………………………19 Software version …………………………66 Swissvoice ………………………9 Switching …………………………………30 System PIN ………………………………61 T-Com SMS service ………………………51 Technical Data ……………………………68 Telephoning ………………………………24 Telephony …………………………………61 Templates …………………………………50...
-
Page 75: Warranty Certificate
Warranty Certificate Warranty Certificate Garantieschein, Bon de garantie, Certificato di garanzia, Garantiebewijs, Takuutodistus, Garantibevis, Garantisedel, Garantibevis, Certificado de Garantía, Talão de garantia device type: (Gerätetyp, type d’appareil, tipo di apparecchio, toesteltype, laitetyyppi, maskintype, apparattyp, apparattype, modelo del aparato, modelo do aparelho): serial number: (Seriennummer, numéro de série, numero di serie, serienummer, sarjanumero, serienummer, serienummer, serienummer, número de serie, número de série):... - Page 80 Internet: www.swissvoice.net © Swissvoice SA 2009 All rights as well as delivery possibilities and technical changes reserved. 20404833en_ba_000_b0 SV 20404833...
Need help?
Do you have a question about the Avena 748 and is the answer not in the manual?
Questions and answers