
Related Manuals for Socket CHS 8Ci


Summary of Contents for Socket CHS 8Ci
- Page 1 QUICK START GUIDE CHS 8Ci Bluetooth Cordless Scanner This document pertains to the following model: CHS 8Ci SKU# CX2881-1476 (P/N 8550-00069)
-
Page 2: Package Contents
Lanyard USB Charging Cable © 2013 Socket Mobile, Inc. All rights reserved. Socket and the Socket logo are registered trademarks or trademarks of Socket Mobile, Inc. The Bluetooth word mark and logo are registered trademarks of the Bluetooth SIG, Inc. USA, and any use by Socket Mobile, Inc. -
Page 3: Product Information
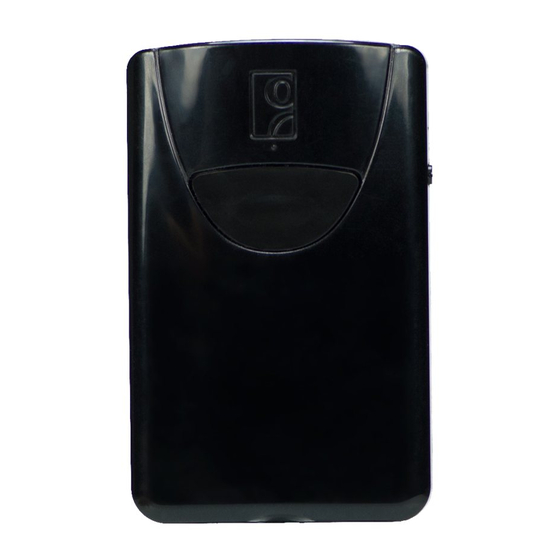
PRODUCT INFORMATION... -
Page 4: Product Specifications
PRODUCT SPECIFICATIONS Light Source 630nm +- 30nm visible red LED Scan Rate 5 scans / sec Sensor Linear CMOS sensor Resolution 5mil / 0.127mm Bluetooth Profile SPP, HID Battery Life 8 hours (1 scan / 5 sec) Charge Time 4 hours fully charged Wireless Range 10M / 33ft line of sight Operating Temp... -
Page 5: Charge The Battery
CHARGE THE BATTERY Charge the CHS The CHS must be fully charge before first use. Initial charging takes 4 hours with the USB charging cable connected to a USB charging port. Insert the Micro USB side of the USB Charging Cable (included) into the CHS port and the USB side of the Charging Cable into the USB con- nector of an AC adapter (not included). -
Page 6: Getting Started
GETTING STARTED Successful Scanning 1. Hold the scanner 5-7 cm away from the barcode. 2. Aim the scan beam straight across the entire barcode. 3. Keep your hand steady! - Page 7 BLUETOOTH MODE - HID - SPP - iOS The CHS 8Ci supports three modes of Bluetooth wireless communication: HID, SPP, and iOS. By default, the CHS 8Ci is set to HID Keyboard mode. Apple Android Windows Operating System ✓ ✓...
-
Page 8: Bluetooth Basics
BLUETOOTH BASICS Pair and Connect When Bluetooth is activated on your device and the CHS is in discoverable mode, Bluetooth pairing will begin. When the two devices recognize each other, they can pair. Once the devices have paired, it is necessary to connect. (Follow the instructions in the following pages to connect the CHS to your device.) Once the devices have connected, they will automatically recognize each other whenever they are within range, and it will not be... - Page 9 BLUETOOTH BASICS The CHS 8Ci keeps the pairing information of the last connected host. Power off to disconnect the scanner, then power on to reconnect the scanner. To disconnect your CHS: Power off - press and hold down the power button until the CHS beeps (high-low tone).
- Page 10 Scan this barcode to set the CHS to HID mode. Enable Bluetooth on the Apple device. A Bluetooth device search will begin. Select Socket CHS in the list of found devices. Tap Pair if prompted. The CHS will beep once to confirm connection.
- Page 11 Enable Bluetooth on the Apple device. A Bluetooth device search will begin. Select Socket CHS in the list of found devices. The CHS will beep once to confirm connection. Now you are ready to scan barcodes in iOS mode using your Apple device! Use ScannerSettings (available at the App Store - http://www.
- Page 12 ANDROID - SPP - INSTALL SOCKETSCAN 10 To install the software: Use this QR code to find SocketScan 10 software for your Android device in the Google Play Store, or search for it manually using keyword “SocketScan 10. ” Follow the on-screen instructions to download and install SocketScan 10.
- Page 13 ANDROID - SPP - CONFIGURE DEVICE Configure your device: Open SocketScan 10 application. If prompted, allow SocketScan 10 to turn on Bluetooth. When prompted to set SocketScan 10 as the keyboard language, tap Back Tap Home , then Menu Tap on Settings, then Language and Keyboard. Under Keyboard Settings, select SocketScan 10.
- Page 14 Tap Input Method and select SocketScan 10 as the input method. In SocketScan 10, tap Menu then select Socket EZ Pair. Scan the barcode on the screen to put your scanner in SPP mode. The CHS will beep 3 times.
- Page 15 12. The CHS will beep once when it has connected and is ready to scan barcodes. Tap Back to close Socket EZ Pair. 13. A CHS registration icon will appear on top of the screen. Swipe the icon down to open the registration software. Follow the instructions to register your CHS.
-
Page 16: Using The Scanner
USING THE SCANNER Scanning Barcodes After connecting the CHS to your device, open an application. Place the cursor where you want to enter data. Hold the CHS about 5-7 cm from the barcode and press and hold the trigger button. Make sure the red aiming beam covers the entire width of the barcode. - Page 17 USING THE SCANNER WITH THE KLIP CASE Scanning Barcodes Using the Klip Case The Klip Case connects the CHS 8Ci to various phone models allowing for single-handed scanning and multi-tasking operations. Socket provides Klip Cases that fit with the following phone models: •...
- Page 18 USING THE SCANNER WITH THE KLIP CASE Place front end of the scanner in the Klip Case. Push the back end of the scanner down until it clicks into place.
- Page 19 USING THE SCANNER WITH THE KLIP CASE The bottom of the scanner and the Klip Case surface should lay flush against each other, with no room to wiggle. Press tab to remove scanner from Klip Case.
- Page 20 SINGLE-HANDED SCANNING For single-handed scanning and multi-tasking operation of the CHS, attach the Klip Case to your phone or iPod touch. Make sure the scan beam window of the CHS is pointing in the same direction as the TOP of your phone or iPod touch. Top of phone or iPod touch Scan beam window...
- Page 21 MULTI-TASKING OPERATION For optimal convenience, hold the CHS and device in one hand, with the CHS on the underside, and the surface of the device facing up so that you may use your other hand to interact with the application.
-
Page 22: Led Status Indicators
LED STATUS INDICATORS LED Activity Meaning Bluetooth 1 BLUE blink every Bluetooth is ON but not Front LED second connected. 1 BLUE blink every CHS is connected to 3 seconds host device. Solid BLUE light for Hard reset sequence 10 seconds initiated. - Page 23 BEEP STATUS INDICATORS Beep Pattern Meaning Low-high tone Power ON High-low tone Power OFF High-high tone A proper USB charging port is detected. 1 beep CHS connected to host device and ready to scan barcodes. 1 low beep You have double-pressed the power button when support for simultaneous scanning an onscreen keyboard entry for Apple iOS.
-
Page 24: Command Barcodes - Bluetooth Mode
COMMAND BARCODES - BLUETOOTH MODE Bluetooth Mode - HID - SPP - iOS Use the following barcodes to change Bluetooth mode. HID Mode SPP Mode iOS Mode... - Page 25 COMMAND BARCODES - FACTORY RESET Factory Reset Configures the CHS to revert all settings to factory defaults. The CHS will power off after scanning this barcode.
- Page 26 NOTES...
-
Page 27: Fcc Warning Statement
FCC WARNING STATEMENT This equipment has been tested and found to comply with the limits for a Class B digital device, pursuant to Part 15 of the FCC Rules. These limits are designed to provide reasonable protection against harmful interference in a residential installation. This equipment generates, uses and can radiate radio frequency energy and, if not installed and used in accordance with the instructions, may cause harmful interference to radio communications. - Page 28 9/2013 # 6430-00351-B Printed in U.S.A...
Need help?
Do you have a question about the CHS 8Ci and is the answer not in the manual?
Questions and answers