
Related Manuals for American Dynamics RAS915LS


Summary of Contents for American Dynamics RAS915LS
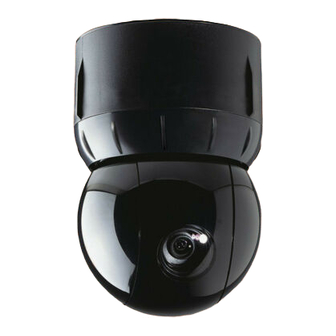
- Page 1 SpeedDome Ultra VII 22x Camera Dome RAS915LS RAS915LS-1 RAS916LS RAS916LS-1 RAS916WLS RAS916WLS-1 Configuration Utility Operator’s Manual 8200-0184-02 D...
- Page 3 ® SpeedDome Ultra VII 22x Camera Dome Configuration Utility Operator’s Manual Version – 0710-0147-0107...
- Page 4 The dealer, through whom you originally purchased this product, is your point of contact if you have a need for service or support. Our dealers are fully empowered to provide the very best in customer service and support. Dealers should contact American Dynamics at (800) 507-6268 or (561) 912-6259, or on the web at www.americandynamics.net.
-
Page 5: Table Of Contents
T A B L E O F C O N T E N T S PREFACE: BEFORE YOU BEGIN ... V What’s In This Manual? ... vi Text Conventions ... vii Related Documents ... vii Getting Help ... vii CHAPTER 1: USING THE DOME CONFIGURATION UTILITY... 1–1 What is the Dome Configuration Utility? ... - Page 6 APPENDIX A: SENSORNET AND RS-422 PROTOCOLS COMMAND SUMMARY ... A–1 Command Summary ... A–2 Supported Controllers and Matrix Switching Systems... A–3 Performance Notes ... A–6 APPENDIX B: MANCHESTER PROTOCOL COMMAND SUMMARY ... B–1 Command Summary ... B–2 Supported Controllers ... B–4 Performance Notes ...
-
Page 7: Before You Begin
P R E F A C E Before You Begin This preface provides important information that you should be familiar with before using the SpeedDome Ultra VII camera dome. It includes a document overview, text conventions, a list of related documents, and how to obtain product help. In This Preface •... -
Page 8: What's In This Manual
What’s In This Manual? The SpeedDome Ultra VII Configuration Utility Operator's Manual is organized as follows: • Chapter 1:Using the Dome Configuration Utility, describes how to use the SpeedDome Ultra VII Camera Dome configuration utility. • Chapter 2: Configuring Pan, Tilt, Zoom, and Synchronization Options, describes how to set the “flip”... -
Page 9: Text Conventions
Text Conventions This book uses text in different ways to identify different kinds of information. Bold Italics Italics Bold Related Documents Other sources provide supplemental information about your SpeedDome Ultra VII Camera Dome. These sources serve to enhance your understanding of the product and its use. •... - Page 10 N O T E S : viii SpeedDome Ultra VII Operator's Manual...
-
Page 11: Chapter 1: Using The Dome Configuration Utility
C H A P T E R 1 Using the Dome Configuration Utility The SpeedDome Ultra VII 22x camera dome is an optical zoom camera enclosed in a compact dome housing. The camera dome supports advanced features such as 11X digital zoom (up to 242X total zoom), open shutter settings, privacy zones, and direction indicators. -
Page 12: What Is The Dome Configuration Utility
What is the Dome Configuration Utility? The Dome Configuration Utility provides a means to setting features for your camera dome via a text overlay menu. You access this utility using a keystroke combination on your camera controller. The utility provides settings relating to camera functions, alarms, text display, privacy zones, direction indicators and password protection. -
Page 13: Working With The Dome Configuration Utility
Working with the Dome Configuration Utility Once the Dome Configuration Menu is displayed, you may select a menu item, and then modify the settings you want to change. The following table summarizes the controller commands for SensorNet, RS-422, and Manchester protocols. For combination keystrokes, press and hold each button in sequence, then release. -
Page 14: Restoring Factory Settings
To enter the password using SensorNet, RS-422, or Manchester protocols: 1. Use the Pan/Tilt control to move the highlight the appropriate character. 2. Press Focus to select the highlighted character. If you need to change a character that has been entered: •... -
Page 15: Exiting The Configuration Utility
Exiting the Configuration Utility Under SensorNet, RS-422, and Manchester protocols, you may save your changes and exit the utility from any screen by pressing and holding Iris Close, then pressing Focus. From the Dome Configuration Menu, you have two choices for exiting the utility: Exit and Save Changes or Quit Without Saving. Use the Pan/Tilt control to move the highlight bar up and down on the screen. - Page 16 Quick Set Command 0+Quick Set 1+ Quick Set 2+ Quick Set 3+ Quick Set 4+ Quick Set 15+ Quick Set 16+ Quick Set 17+ Quick Set 20+ Quick Set Refer to your controller instructions to determine if the Quick Set Menu is supported. 1–6 Description Toggles between displaying and hiding the quick set menu.
-
Page 17: Where To Go Next
Where To Go Next Now that you understand how to start and work with the Dome Configuration Utility, you are ready to begin changing the settings for your dome. Use the following chart to determine which chapters you should use next. Chapter Chapter 2: Configuring Pan, Tilt, Zoom, and Synchronization Options... -
Page 18: Keeping Records For The Dome's Settings
Chapter Appendix A: SensorNet and RS-422 Command Summary Appendix B: Manchester Command Summary Appendix C: Pelco Coaxitron and “P” Protocols Command Summary Appendix D: Panasonic Up-the-Coax Command Summary Appendix E: AD Up-the-Coax Command Summary Appendix F: Vicon Protocol Command Summary Appendix R: Dome Configuration Records Appendix S: Software License... -
Page 19: Chapter 2: Configuring Pan, Tilt, Zoom, And Synchronization Options
C H A P T E R 2 Configuring Pan, Tilt, Zoom, and Synchronization Options This chapter describes the use of the Pan/Tilt/Zoom/Sync Opts menu. Use this screen to set the Auto Flip feature, configure the Zoom Stop settings, and set the Line Lock option. In This Chapter •... -
Page 20: Overview Of Pan / Tilt / Zoom/Synchronization Options Screen
Overview of Pan / Tilt / Zoom/Synchronization Options Screen When Pan/Tilt/Zoom/Sync Opts is selected from the Dome Configuration Menu, the following screen appears: Use this screen to enable or disable the “automatic flip” feature, configure the zoom stop settings, set the line lock options, change the freeze frame settings, and return to auto iris/auto focus settings. -
Page 21: Adjusting The Zoom Stop Settings
Adjusting the Zoom Stop Settings The SpeedDome Ultra VII includes a 22X optical zoom camera with 11X digital zoom capability. The maximum possible zoom is 242X. Zoom stop settings define how the zoom function is partitioned. Depending on the current zoom level, the camera will either stop at the first zoom stop setting or continue to the maximum zoom setting. -
Page 22: Configuring The Line Lock Setting
Configuring the Line Lock Setting Use the Line Lock setting to prevent vertical rolling or adjust the appearance of overlay text on color monitors. If you experience problems with vertical video rolling when switching multiple cameras to a single monitor, enabling the Line Lock setting phase locks the video with the AC power line. All cameras connected to the same power supply will be synchronized. -
Page 23: Configuring The Freeze Frame Setting
Configuring the Freeze Frame Setting If you need to maintain a static image when calling automatic functions, such as presets or patterns, use the Freeze Frame setting. This prevents the display of the dome movement and lens adjustments from being displayed on-screen while the preset or pattern is being sought. When the Freeze Frame setting is enabled, the scene currently displayed on the monitor will be preserved (frozen) on-screen until the pattern or preset is ready for display. -
Page 24: Configuring Auto Iris/Auto Focus Resume Settings
Changing the Freeze Frame Setting 1. Select Pan/Tilt/Zoom/Sync Opts from the Dome Configuration Menu. 2. Move the highlight bar to Freeze Frame. Change the setting. • Select On to enable Freeze Frame. This freezes the current scene when presets or patterns are selected. -
Page 25: What To Do Next
What To Do Next When you select Exit from the Pan/Tilt/Zoom screen, the Dome Configuration Menu appears. Chapter 2 Chapter 3 Chapter 4 Chapter 5 Chapter 6 Chapter 7 From this screen you can: • Select an option to make additional changes. •... - Page 26 N O T E S : 2–8 SpeedDome Ultra VII Operator's Manual...
-
Page 27: Chapter 3: Configuring Camera Features
C H A P T E R 3 Configuring Camera Features This chapter describes the settings used to control the camera features. It describes how to change the white balance settings, automatic gain control, and open shutter settings to improve camera performance. -
Page 28: Adjusting White Balance Settings
Adjusting White Balance Settings White balance is normally compensated for by the automatic white balance gain control. In some lighting conditions, you may need to manually adjust the red and blue settings for optimal viewing. When Automatic White Balance is enabled, the red and blue setting values are based on feedback from the camera. -
Page 29: Working With Agc And Open Shutter Settings
Changing Automatic White Balance Settings 1. Select Camera Functions from the Dome Configuration Menu. The highlight appears on the Auto White Bal setting. 2. Change the setting. • Select Off to manually adjust the red or blue settings. Continue with step 3. •... - Page 30 Understanding How Advanced Shutter Settings Improve Low-Light Performance The camera dome supports the ability to view color images from extremely low-light situations. feature is called Open Shutter and is only in effect during low-l not be obtainable otherwise. It does not affect the camera performance in norm situations.
- Page 31 The Relationship between AGC and Open Shutter Settings Table 3–1 explains which settings may be changed based on the current AGC/Shutter setting. Table 3–1: AGC Maximum Gain and Shutter Limit settings AGC/Shutter Setting AGC Off AGC On Open Shutter Configuring AG C and Open S hutter Se 1.
-
Page 32: What To Do Next
What To Do Next When you select Exit from the Camera Functions screen, the Dome Configuration Menu appears. Chapter 2 Chapter 3 Chapter 4 Chapter 5 Chapter 6 Chapter 7 From this screen you can: • Select an option to make additional changes. •... -
Page 33: Chapter 4: Configuring Alarms, Areas, Home, Privacy Settings, Presets And Scan Limits
C H A P T E R 4 Configuring Alarms, Areas, Home, Privacy Settings, Presets and Scan Limits This chapter describes settings associated with Alarms, Areas, the Home Position, Privacy Zones, Presets and Scan Limits. It explains how to set a default action to run when a dome alarm occurs, as well as how to define the normal alarm input states. -
Page 34: Overview Of Alarms, Areas, Home, North Position, Preset, Privacy, And Scan Limit Settings
Overview of Alarms, Areas, Home, North Position, Preset, Privacy, and Scan Limit Settings When Alarms/Areas/Home/Presets/PZ is selected from the Dome Configuration Menu, the following screen appears: From this menu you can choose to configure alarm actions, configure normal states for alarm inputs, assign the “home position”, establish the north position for the dome, set area boundaries, set privacy zones, program presets and set scan limits. -
Page 35: Configuring Alarm Actions
Configuring Alarm Actions I M P O R T A N T When operating on Manchester networks, the dome can be programmed to respond to any of the four available alarm inputs. However, the dome cannot transmit alarm input states to the host controller. If transmitting the alarm state to the host controller is required, the alarm device must be wired directly to the host controller. - Page 36 Setting Alarm Actions I M P O R T A N T Some controllers allow the alarm actions for domes to be specified at the controller. See the appendixes for information about which controllers support this function. Do not use both the dome configuration utility and the controller to assign the alarm actions for the same input.
-
Page 37: Configuring Normal Input States For Alarms
Configuring Normal Input States for Alarms I M P O R T A N T Some controllers allow the normal input states for domes to be specified at the controller. These controllers include VM96, AD matrices with AD2083-02A code units or AD168 matrix with the AD168CCM or AD2083-02A code unit. -
Page 38: Assigning The Dome's Home Position
Setting Alarm Input States 1. Select Alarms/Areas/Home/Presets/PZ from the Dome Configuration Menu. 2. Select Set Alarm States. 3. Select the appropriate input line, and then change the setting. • Select Open if the alarm normal input state is open. • Select Closed if the alarm normal input state is closed. - Page 39 Setting the Home Position 1. Select Alarms/Areas/Home/Presets/PZ from the Dome Configuration Menu. 2. Select Set Home Position. The highlight bar appears on the Home Position setting. 3. Select a setting. • Select Preset to use a preset as the home position. Continue with step 4. •...
-
Page 40: Setting The North Position
Setting the North Position Direction Indicators permit you to understand the approximate pointing position of the dome to an established reference point. This reference point is called “North” and may correspond to magnetic north (if it is known) or some other landmark or fixture. When the dome is initially installed, “North” defaults to a pre-defined position (0°... -
Page 41: Programming Area Boundaries
Programming Area Boundaries If the dome is installed in a location where you can see numerous departments or other identifiable objects, you might want to consider programming area boundaries. Areas are programmed start- and end-points of a camera's field of view. Each area is a part of a circular viewing area that extends around the dome. -
Page 42: Area Boundaries
Note: for assigning new names appear in Chapter 5. To program areas, select Area Boundaries from the Alarms/Areas/Home/Presets/PZ screen. The following screen appears: If no boundary is set, pressing Focus quits without making any changes. The dome supports from 2 to 16 areas. I M P O R T A N T If areas were previously programmed, you cannot restore the previously programmed boundaries by selecting Quit Without Saving from the Dome Configuration Menu... -
Page 43: Establishing Privacy Zones
Note: You will receive an error message under the following conditions: • • Return to step 2 and start again. 7. When the last area boundary is set, save the changes. A message appears confirming that the areas have been successfully saved. Press Focus to continue. 8. - Page 44 From this screen you can program up to eight Privacy Zones, delete all or specific Privacy Zones, or temporarily hide all Privacy Zones. For more information see: Topic How Privacy Zones are Programmed Programming Privacy Zones Removing or Hiding Privacy Zones Deleting Specific Privacy Zones Deleting All Privacy Zones Hiding Privacy Zones...
- Page 45 The circled arrows represent the target area on the screen for creating the Privacy Zone. Normally, this target area remains in the center of the screen. Using the Pan/Tilt control moves the target area by panning or tilting the dome. If the dome reaches its maximum tilt position, the Privacy Zone may still be established in the upper part of the display.
- Page 46 Removing or Hiding Privacy Zones If you made an error during programming or no longer require Privacy Zones, individual zones or all Privacy Zones may be deleted. To temporarily remove the Privacy Zones, you may disable their appearance by changing the Hide All Zones setting to Yes. To delete individual Privacy Zones, you must adjust the position of the arrows to the area of the screen where the zone is recognized by the firmware.
- Page 47 Deleting Specific Privacy Zones To delete individual Privacy Zones, use the following procedure. To delete all Privacy Zones, see Deleting All Privacy Zones on page 4–15. 1. Select Alarms/Areas/Home/Presets/PZ from the Dome Configuration Menu. 2. Select Privacy Zones. The Program Privacy Zones screen displays. 3.
-
Page 48: Programming Presets
Programming Presets If you need to view specific places routinely, you should program presets. A preset is a programmed video scene with automatic pan, tilt, zoom, focus and iris settings. Once programmed, entering the number and pressing a button on your controller automatically calls up the preset. In addition, presets may be assigned to alarm actions or as the “home”... -
Page 49: Establishing Scan Limits
4. Adjust the camera until you see the scene you want to use as the preset. Adjust the zoom and iris settings as necessary. When satisfied with the scene, save the preset. 5. Repeat steps 3 and 4 for each preset you want to program. When finished, select Exit. 6. - Page 50 Figure 4–6: Left and Right Scan Limits Scan Types Three types of scans may be activated: smooth scan, stepped scan, and random scan. A smooth scan slowly pans between the left and right scan limits, starting at the left scan limit. When the right scan limit is reached, the scan reverses.
-
Page 51: Scan Limits
pan right until it reaches the right scan limit. Figure 4–8 illustrates a random scan. In this figure, the dashed line represents the scan area, and the solid line represents the scan pattern. The circle on the scan represents the start point. Each arrowhead represents a pause. “X” represents a change in direction. -
Page 52: What To Do Next
Note: 3. Adjust the pan position of the dome to set the left scan limit. Press Zoom to select. 4. Pan the dome to the right to set the right scan limit. Press Zoom to select. When the Alarms/Areas/Home/Presets/PZ screen appears, select Exit. The Dome Configuration Menu appears. -
Page 53: Chapter 5: Configuring Text Displayed On-Screen
C H A P T E R 5 Configuring Text Displayed On-Screen This chapter describes how to modify settings related to text displayed by the dome. It includes settings for displaying dome status information, names, diagnostics, and pointing direction. It also provides instructions for programming names and configuring text display options. -
Page 54: Displaying Or Hiding Status Information
Displaying or Hiding Status Information You can choose to display the status of the zoom setting, auto focus, and auto iris. This information will appear in the upper left corner of the monitor. The information only appears when there is a change in the status of any item and remains on the screen for 5 seconds. -
Page 55: Displaying Or Hiding All Name Information
Displaying or Hiding All Name Information The dome provides the ability to display the dome name, the area where the dome is pointing, the name of the preset or pattern that is running, and alarm names. When the display of camera or area names is enabled, the information appears on the screen continuously. -
Page 56: Displaying Diagnostic Tests During Reset
Displaying Diagnostic Tests During Reset You can choose to have dome diagnostic tests run whenever the dome resets. The diagnostic information displayed includes: • Communications Loopback Test • Camera Loopback Test • Motor Circuit Test. If you do not want diagnostic information to appear when the dome resets, a screen displaying the firmware version numbers for the Boot and Application code and the maximum optical zoom for the dome appears. -
Page 57: Displaying Direction Indicators
Displaying Direction Indicators Direction Indicators let you know the approximate pointing direction of the dome in relation to an established point called “North”. Directions for setting the North Position are covered in Chapter 4. When enabled, the Direction Indicators appear along the top edge of the display. In addition, a tilt elevation indicator also appears along the left edge of the display. -
Page 58: Configuring The Display Of Name Information
Figure 5-5 represents pointing the dome precisely at 225° from North (Southwest) with a tilt of 25° below the virtual horizon. Panning to the left points the dome towards the South. Panning to the right points the dome towards the West. Figure 5-5: Pointing the dome precisely southwest with a tilt elevation of –25°... -
Page 59: Assigning Or Changing Name Information
Changing the Display of Selected Name Information 1. Select On-Screen Text Display from the Dome Configuration Menu. 2. Move the highlight to Name Configuration Menu and select. The Name Configuration Menu appears. 3. Move the highlight bar to the item whose display setting you want to change. 4. - Page 60 Setting or Changing Names 1. Select On-Screen Text Display from the Dome Configuration Menu. 2. Select Name Configuration Menu. The Name Configuration Menu appears. 3. Select the name setting you want to change. The choices are Camera Name, Area Name, Preset Name, Pattern Name, and Alarm Name.
-
Page 61: Changing The Settings For Text Displayed On-Screen
7. Move the blinking highlight around the available characters. When the correct character is highlighted, press Focus to select it. If you make a mistake, Zoom In moves the cursor one space right, and Zoom Out moves the cursor one space left in the name. 8. - Page 62 Figure 5-7: Examples of text attributes If the video background is light, enable character outlines. If on-screen text obscures the video being displayed, enable translucent names. Character outlines and translucent names may be used together to best suit your video environment. I M P O R T A N T If you have Privacy Zones enabled, the appearance of the text automatically changes to solid.
-
Page 63: What To Do Next
What To Do Next When you select Exit from the On-Screen Text Display screen, the Dome Configuration Menu appears. Figure 5-8: Dome Configuration Menu Chapter 2 Chapter 3 Chapter 4 Chapter 5 Chapter 6 Chapter 7 From this screen you can: •... - Page 64 N O T E S : 5–12 SpeedDome Ultra VII Operator's Manual...
-
Page 65: Chapter 6: Configuring Language And Password Settings
C H A P T E R 6 Configuring Language and Password Settings This chapter explains how to change the language for dome messages and text, and how to set and enable the dome password. In This Chapter • Overview of Language and Password Settings ...6–1 •... -
Page 66: Selecting A Language For Dome Messages And Prompts
Selecting a Language for Dome Messages and Prompts The dome supports menus, status information and prompts in English, Spanish, French, German, Italian, and Portuguese. When the dome is initially installed, the language setting is English. I M P O R T A N T If Portuguese is the selected language, the characters “ã”... -
Page 67: Setting And Enabling The Dome Password
4. Do one of the following: • To continue with changing the language, select Continue. The dome automatically resets. To verify the language change, continue with step 5. Otherwise, continue with step 6. • To cancel the language change, select Cancel. The Language Selection screen appears. You may choose a different language, or select Exit to return to the Language / Password screen. -
Page 68: What To Do Next
Enabling or Disabling Password Protection Password protection must be enabled before passwords can be used. To enable or disable the dome password: 1. Select Language/Password from the Dome Configuration Menu. 2. Move the highlight bar to Password Protection. 3. Change the setting. •... -
Page 69: Chapter 7: Displaying Dome Information
C H A P T E R 7 Displaying Dome Information This chapter explains how to display dome information and operating information. In This Chapter • Understanding the Dome Information Screen...7–1 • Viewing Dome Operating Statistics...7–2 • What To Do Next ... 7–3 Understanding the Dome Information Screen The Dome Information screen provides essential information about the SpeedDome Ultra VII camera dome if service is required. -
Page 70: Viewing Dome Operating Statistics
Viewing Dome Operating Statistics When Dome Statistics is selected from the Dome Information screen, the following information is displayed: From this screen, you can identify the operating statistics for various features of the dome. The information represents either runtime in seconds or number of occurrences (displayed in hexadecimal values). -
Page 71: What To Do Next
What To Do Next When you select Exit from the Dome Information screen, the Dome Configuration Menu appears. Chapter 2 Chapter 3 Chapter 4 Chapter 5 Chapter 6 Chapter 7 From this screen you can: • Select an option to make additional changes. •... - Page 72 N O T E S : 7–4 SpeedDome Ultra VII Operator's Manual...
-
Page 73: Appendix A: Sensornet And Rs-422 Protocols Command Summary
A P P E N D I X A SensorNet and RS-422 Protocols Command Summary This appendix summarizes the SensorNet and RS-422 controller commands used with the Configuration Utility. It also provides a list of compatible controllers. In This Appendix •... - Page 74 Command Summary The following table lists the commands to operate the configuration utility when the dome is installed in a SensorNet or RS-422 environment. If you want to … Start the configuration utility. Move the highlight bar on the active menu. Select the highlighted item on the active menu.
-
Page 75: Supported Controllers And Matrix Switching Systems
Supported Controllers and Matrix Switching Systems This section provides information about the SensorNet and RS-422 controllers and matrix switchers that are compatible with SpeedDome Ultra VII. Refer to the controller information for details concerning specific functions supported. Note: This list of controllers is complete as of the time of publication. Other controllers may be supported. - Page 76 VM32/AD32 Supported Protocols SensorNet RS-422 Maximum Presets 96 – SensorNet 4 – RS-422 Maximum Patterns Quick Set Menu Not supported Address Range 1-32 Notes: (1) Requires RCSN422 code converter. (2) Patterns are limited by time and the number of available dome commands. Total time for each pattern cannot exceed 6 minutes 50 seconds.
- Page 77 AD2050 Supported Protocol RS-422 Maximum Presets Maximum Patterns Quick Set Menu Not supported Address Range 1-1024 Notes: (1) Requires the AD2083-02 series code converter. (2) Preset information is stored at the converter, not the dome. (3) Requires AD2083-02 with firmware version 0701-11YB- 156A or newer.
-
Page 78: Performance Notes
Performance Notes The following considerations should be made when using the SpeedDome Ultra VII camera dome in a SensorNet or RS-422 environment. Alarm Action Configuration The following controllers allow the alarm actions for domes to be specified at the controller: •... -
Page 79: Appendix B: Manchester Protocol Command Summary
A P P E N D I X B Manchester Protocol Command Summary This appendix summarizes the Manchester controller commands used with the Configuration Utility. It also provides a list of additional Manchester commands that can be used with the dome and compatible controllers. - Page 80 Command Summary The following table lists the commands to operate the configuration utility when the dome is installed in a Manchester environment. The keyboard must be in programming mode to perform these functions. If you want to … Start the configuration utility. Move the highlight bar on the active menu.
- Page 81 Additional Manchester Commands The following tables summarize the special commands available when using the dome in a Manchester network. These commands are available when you enter the number listed and press the Set Preset or Call Preset button on the controller. Set Commands This table describes the functions that can be performed when you enter the number listed then press the Set Preset button.
-
Page 82: Supported Controllers
Supported Controllers The following Manchester controllers are compatible with SpeedDome Ultra VII: Controller Presets AD2150 MP48 AD168/MP168 AD2050 AD1024 AD2052 This list of controllers is complete as of the time of publication. Other controllers may be supported. Contact your Sales Representative for current information. Performance Notes The following considerations should be made when using the SpeedDome Ultra VII camera dome in a Manchester environment. -
Page 83: Appendix C: Pelco Coaxitron And "P" Protocols Command Summary
A P P E N D I X C Pelco Coaxitron and “P” Protocols Command Summary This appendix summarizes the SpeedDome Ultra VII features that are supported by the Pelco Coaxitron and “P” protocols. In addition, it provides the controller commands used with the Configuration Utility. -
Page 84: Supported Speeddome Ultra Vii Features
Supported SpeedDome Ultra VII Features The following SpeedDome Ultra VII features are supported with Coaxitron and P protocols: • 11X digital zoom (up to 242X total zoom) • 85 Total Presets (1-32, 35-87) • 3 Patterns • 16 Areas • 4 Alarm Inputs and Outputs •... -
Page 85: Pelco Command Summary
Pelco Command Summary The following table lists the commands to operate the configuration utility when the dome is installed in a Pelco environment. If you want to … Start the configuration utility. Move the highlight bar on the active menu. Select the highlighted item on the active menu. -
Page 86: Performance Notes
Performance Notes The following SpeedDome Ultra VII features are not supported with the Pelco protocols: • PAL video format. This will be supported after further testing. • Long line length applications that require video amplifiers or fiber optics. Address Settings The dome must have the correct address setting to operate with Pelco Coaxitron and “P”... - Page 87 Setting Left and Right Scan Limits Scan Limits allow you to set left and right boundaries for use with the Auto Scan, Frame Scan, and Random Scan functions. If the scan limits are not set, the dome pans continuously to the right when these functions are activated.
- Page 88 Activating Frame Scan Frame Scan pans between the left and right scan limits, pausing briefly (3 seconds) at each frame. A frame is equivalent to approximately 10° when the zoom setting is 1X. If the scan limits are not programmed, the Frame Scan pans to the right, pausing at each frame. To activate the Frame Scan: 1.
-
Page 89: Appendix D: Panasonic Up-The-Coax (Utc) Protocol Command Summary
A P P E N D I X D Panasonic Up-the-Coax (UTC) Protocol Command Summary This appendix summarizes the SpeedDome Ultra VII features that are supported by the Panasonic UTC protocol. In addition, it provides the controller commands used with the Configuration Utility. It also provides information about tested Panasonic equipment. -
Page 90: Supported Speeddome Ultra Vii Features
Supported SpeedDome Ultra VII Features The following SpeedDome Ultra VII features are supported with the UTC (Up-the-Coax) protocol: • 11X digital zoom (up to 242X total zoom) • 64 Total Presets • Apple Peel Pattern (using Auto Pan keys) • 16 Areas •... -
Page 91: Panasonic Utc Command Summary
Panasonic UTC Command Summary The following table lists the commands to operate the configuration utility when the dome is installed in a Panasonic UTC environment. If you want to … Start the configuration utility. Move the highlight bar on the active menu. Select the highlighted item on the active menu. -
Page 92: Performance Notes
Performance Notes When selecting a dome, a 3- to 5-second delay is necessary for the Panasonic multiplexer to properly identify the dome type. If the dome is moved before the interrogation is complete, the controller recognizes the dome as a “single speed” dome. Once the dome stops moving and the interrogation completes, the normal 8 speed settings are available. -
Page 93: Tested Panasonic Equipment
5. Use the joystick to move the highlight to Presets. Press Set to select. The Select Preset to Program screen displays. SELECT PRESET TO PROGRAM PRESET NUMBER 1-64 FOCUS FAR to program preset 6. Use the joystick to select the Preset you want to program. If the Preset has been programmed the dome automatically moves to that position. - Page 94 N O T E S : D–6 SpeedDome Ultra VII Operator's Manual...
-
Page 95: Appendix E: Ad Up-The-Coax (Utc) Protocol Command Summary
A P P E N D I X E AD Up-the-Coax (UTC) Protocol Command Summary This appendix summarizes the AD-UTC controller commands used with the Configuration Utility. It also provides a list of additional AD-UTC commands that can be used with the dome and compatible controllers. - Page 96 Command Summary The following table lists the commands to operate the configuration utility when the dome is installed in an AD Up-the-Coax (AD-UTC) environment. The keyboard must be in programming mode to perform these functions. If you want to … Start the configuration utility.
- Page 97 Additional AD-UTC Commands The following tables summarize the special commands available when using the dome in an AD-UTC network. These commands are available when you enter the keyboard combination provided. If you want to … Program selected Preset Recall selected Preset Start selected Pattern programming Save Pattern programming Run selected Pattern continuously...
-
Page 98: Supported Keyboards
Supported Keyboards The following AD keyboards are compatible with SpeedDome Ultra VII when used with a suitable AD-UTC host: Keyboard ADCC0200 ADCC0300 This list of keyboards is complete as of the time of publication. Other keyboards may be supported. Contact your Sales Representative for current information. Performance Notes Keep the following considerations in mind when using the SpeedDome Ultra VII camera dome in the AD-UTC environment. - Page 99 Table E-1: Quick Set Menu commands Quick Set Command / Menu Item : Toggle Quick Set Menu : Dome Config Menu : Auto Iris/Auto Focus : Flip : Peel Pattern : Smooth Scan : Stepped Scan : Random Scan : Dome Information Note: You can access any quick set feature by entering the menu number and pressing After a selection is made, the Quick Set menu automatically closes.
- Page 100 N O T E S : E–6 SpeedDome Ultra VII Operator's Manual...
-
Page 101: Appendix F: Vicon Command Summary
A P P E N D I X F Vicon Command Summary This appendix summarizes the SpeedDome Ultra VII features that are supported by the Vicon protocol. In addition, it provides the controller commands used with the Configuration Utility. It also provides information about tested Vicon equipment and supported Vicon features. -
Page 102: Vicon Command Summary
Vicon Command Summary The following table lists the Vicon controller key sequence to control the indicated SpeedDome Ultra VII functions. If you want to … Set Auto Iris ON/OFF (LED indicates Auto Iris state: ON = AUTO) Set Auto Focus ON/OFF (LED indicates Auto Focus state: ON = AUTO) Goto Presets Program Presets... -
Page 103: Operating The Dome Configuration Menu
If you want to … Auto Pan Left Limit See Setting Left and Right Auto Pan Scan Limits on page F–4. Auto Pan Right Limit See Setting Left and Right Auto Pan Scan Limits on page F–4. Auto Pan ON/OFF (LED indicates Auto Pan state: ON = Auto Pan is running.) Operating the Dome Configuration Menu The following table lists the commands to operate the configuration utility when the dome is installed... -
Page 104: Setting Left And Right Auto Pan Scan Limits
Setting Left and Right Auto Pan Scan Limits I M P O R T A N T You must program the Left Scan Limit setting before programming the Right Scan Limit setting. This procedure erases any previously programmed Right Scan Limit setting. -
Page 105: Wiring Configurations
Wiring Configurations In Vicon systems where the domes support loop through, daisy chain the SpeedDome Ultra VII domes off the last Vicon dome in the communications chain. Figure F-1: SpeedDome Ultra VII dome loop-through wiring from Vicon dome To controller or other domes Command Vicon dome... -
Page 106: Tested Vicon Equipment
Tested Vicon Equipment The following Vicon equipment has been tested with SpeedDome Ultra VII: Vicon 1300 CPU Systems • Vicon 1400 CPU Systems • Vicon 1500 CPU Systems • Vicon VPS 324 • F–6 SpeedDome Ultra VII Operator's Manual... -
Page 107: Appendix R: Dome Configuration Records
A P P E N D I X R Dome Configuration Records Use the pages in this appendix to record the configuration settings for your SpeedDome Ultra VII Camera Dome. Make copies of these pages for each dome. Whenever you change settings for a dome, update the information recorded on these pages. -
Page 108: Configuration Settings
DOME NUMBER: ___________________ Configuration Settings Pan / Tilt / Zoom / Sync Options Menu Item Default Setting (Choices) Proportional Flip Off (On / Off) 1st Zoom Stop X 33 (22 /33) Max Total Zoom X 88 (44, 66, 88, 110, 132, 154, 176, 198, 220, 242) Line Lock On (On / Off) Freeze Frame... -
Page 109: Area Boundaries
DOME NUMBER: ___________________ Area Boundaries Up to 16 areas can be programmed. Use this form to identify the start and end points of each area. This will assist you in restoring the boundaries if the areas should be erased. Area Number Area 1 Area 2 Area 3... -
Page 110: Language Password
DOME NUMBER: ___________________ Language / Password Menu Item Default Setting (Choices) Language Selection English (English / Spanish / French / German / Italian / Portuguese) Password Protection Off (On / Off) Note: The SpeedDome Ultra VII password should be provided to authorized operators only. Name Configuration Menu Item Default Setting (Choices) -
Page 111: Presets
DOME NUMBER: ___________________ LOCATION: ________________________ Presets Up to 96 presets can be programmed for each dome. Use this form to describe the scene being viewed for each preset. This will assist you in restoring the presets if they should be erased. Preset Number Description Assigned Name... - Page 112 DOME NUMBER: ___________________ LOCATION: ________________________ Preset Number Description Assigned Name Preset 49 Preset 50 Preset 51 Preset 52 Preset 53 Preset 54 Preset 55 Preset 56 Preset 57 Preset 58 Preset 59 Preset 60 Preset 61 Preset 62 Preset 63 Preset 64 Preset 65 Preset 66...
-
Page 113: Appendix S: Software License Agreement
A P P E N D I X S Software License Agreement By using this software, you accept the terms and conditions of this license agreement. Read this license agreement carefully. 1. General. Software is being licensed to the Customer pursuant to the following terms and conditions, which supplement any purchase or lease agreement (the "Equipment Agreement") between Customer and Sensormatic Electronics Corporation ("SEC"). - Page 114 Customer may make up to 2 copies of the Software solely for back-up and archival purposes. Customer will not remove or modify the copyright and other proprietary notices and legends of SEC and its suppliers contained in the Software and Documentation and will reproduce all such notices and legends on all copies of the Software made by Customer.
- Page 115 SEC AND ITS SUPPLIERS, EMPLOYEES, AGENTS AND FRANCHISEES WILL IN NO EVENT BE LIABLE FOR ANY INCIDENTAL, CONSEQUENTIAL OR OTHER DIRECT OR INDIRECT DAMAGES (FOR LOSS OF BUSINESS INFORMATION OR PROFITS OR OTHERWISE) SUFFERED BY CUSTOMER, ANY OF ITS EMPLOYEES OR AGENTS OR ANY OTHER PERSON ARISING OUT OF OR IN CONNECTION WITH THE USE OR INABILITY TO USE THE SOFTWARE OR THE DOCUMENTATION, OR THE MAINTENANCE OR SUPPORT THEREOF, EVEN IF THEY HAVE BEEN ADVISED OF THE POSSIBILITY OF SUCH...
- Page 116 N O T E S : S–4 SpeedDome Ultra VII Operator's Manual...
-
Page 117: Speeddome Ultra Vii Glossary
S P E E D D O M E U L T R A V I I G L O S S A R Y Alarm Actions The assigned responses for the dome when inputs change from normal to abnormal states. - Page 118 Freeze Frame A feature that allows the current image to be maintained on-screen when switching to a preset or pattern. This function prevents the display of the dome movement and lens adjustments while the preset or pattern position is sought. Once the preset or pattern is ready for display, the image switches smoothly to the new scene.
- Page 119 Privacy Zones Masked areas of the camera dome's viewing area. These masks prevent operators of the surveillance system from viewing these designated zones. Each Privacy Zone has four sides, and the zones may overlap to form irregular shapes. The Privacy Zones move in relation to the dome pan/tilt position.
- Page 120 N O T E S : Glossary-4 SpeedDome Ultra VII Operator's Manual...
- Page 121 I N D E X –A– Advanced Shutter Settings Overview, 3–4 Alarm Actions Configuring, 4–3 Area Boundaries Overview, 4–9, 4–10 Programming, 4–10 Auto Focus configuring settings, 2–6 Auto Iris configuring settings, 2–6 , E–5 Auto Iris/Auto Focus 1–6 Auto Scan Pelco protocols, C–5 Automatic Flip Configuring, 2–2...
- Page 122 , E–5 Smooth Scan 1–6 , E–5 Stepped Scan 1–6 Supported Controllers Manchester, B–4 Supported Features Coaxitron, C–2 P Protocol, C–2 Panasonic UTC, D–2 Pelco specific, C–4 Vicon protocol, F–1 Supported Keyboards AD-UTC, E–4 Index-2 –T– Text Display Attributes Changing appearance, 5–9, 5–10 , E–5 Toggle Quick Set Menu 1–6...
- Page 124 Please visit our website for more information www.americandynamics.net © 2003 Sensormatic Electronics Corporation Product specifications subject to change without notice. Certain product names mentioned herein may be trade names and/or registered trademarks of other companies. 8200-0184-02 D...
Need help?
Do you have a question about the RAS915LS and is the answer not in the manual?
Questions and answers