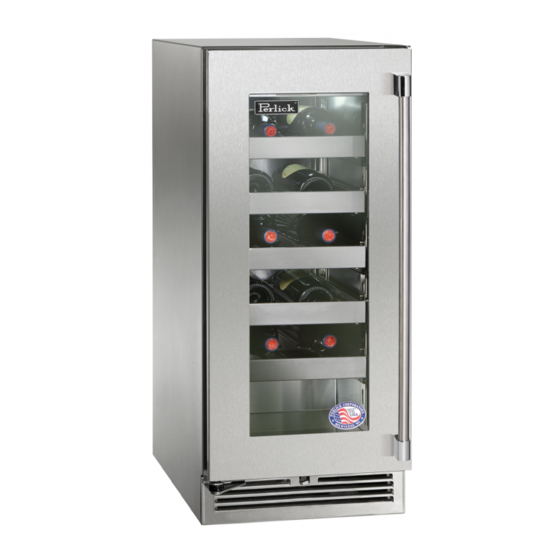
Perlick 15" signature series Operation Manual
15" signature series refrigerator refrigerated drawers beer dispenser beverage center wine reserve
Hide thumbs
Also See for 15" signature series:
- Installation & operation manual (30 pages) ,
- Product manual (28 pages) ,
- Operation & installation manual (16 pages)
Summary of Contents for Perlick 15" signature series
- Page 1 Installation & Operation Manual 15" Signature Series Refrigerator Refrigerated Drawers Beer Dispenser Beverage Center Wine Reserve...
-
Page 2: Table Of Contents
. If warranty registration is not completed, built with commercial-grade stainless steel – providing you with the Perlick will use the date of sale as the first date of warranty for the unit. beauty and durability for a lifetime of use. -
Page 3: General Precautions
CAUTION WARNING Use only Perlick replacement parts. Imitation parts can dam- • Never attempt to repair or perform maintenance on the age the unit, and may void the warranty. unit until the electricity has been disconnected. - Page 4 15" Signature Series Operation / Installation Manual 50” area in which electrical outlet must be located ” distance same on both sides of cabinet ” minimum clearance to side wall 98° minimum door swing for pull-out ” door shelf clearance swing clearance ”...
-
Page 5: Preparing The Space
All Perlick units come equipped with a NEMA 5-15P, 90° plug with a 5’ A set of metal anti-tip brackets and #10 x 3/4" screws are supplied with cord (minimum) extending beyond the rear of the unit. The electrical out- the unit. -
Page 6: Anti-Tip Brackets
15" Signature Series Operation / Installation Manual I I M M P P O O R R T T A A N N T T : : If installing on a concrete floor, concrete fasteners are required and are not included in the Anti-Tip kit. INSTALLATION CAUTION Finished flooring should be protected with appropriate mate-... -
Page 7: Door Options
The panel and door handles are supplied by the customer. Figure 5. Sliding Shelf Mounting Brackets All Perlick units accept any of the above door configurations and are fully interchangeable. The following instructions cover installing a solid wood overlay or glass wood overlay panel and handle to a door or drawer. -
Page 8: Wood Overlay Installation
15" Signature Series Operation / Installation Manual Handle Installation Mounting bracket CAUTION Handle mounting on wood overlay door should be mounted on overlay panel only (not the door) to avoid damage to the fac- Lock strike tory door. Lockwasher 1. Handle must be attached to overlay before mounting overlay onto door. - Page 9 15" Signature Series Operation / Installation Manual Ø ” ” deep ” Ø ” ” 0” ” thru ” ” 1” ” ” ” ” deep ” 2” ” ” ” Ø ” 9” ” Deep ” deep Typical ” ”...
-
Page 10: Wooden Wine Rack Trim Finishing
15" Signature Series Operation / Installation Manual WOODEN WINE RACK TRIM FINISHING Loading Product I I M M P P O O R R T T A A N N T T : : Before storing perishables, allow unit to run for a minimum All wine racks come with an unfinished solid hardwood face, which can of 24 hours to allow temperature stabilization after start-up. -
Page 11: Adjusting The Setpoint
15" Signature Series Operation / Installation Manual Adjusting the Setpoint MAINTENANCE The setpoint is the desired temperature to be maintained in the unit. WARNING Shut off the electricity to the unit before cleaning the con- To adjust the setpoint: denser and other routing maintenance. 1. -
Page 12: Primary Key Functions
15" Signature Series Operation / Installation Manual Primary Key Functions Turns on/off the power to the unit Displays maximum stored temperature, also used for navigating control codes and changing Disabled displayed values within the various menu options. Fast freezing cycle is started by holding button down for 3 seconds. -
Page 13: Troubleshooting
15" Signature Series Operation / Installation Manual TROUBLESHOOTING If the unit appears to be malfunctioning, read through the OPERATION section first, then check the guide below to identify and resolve the problem. DANGER Electrocution hazard! Never attempt to repair or perform maintenance on the unit until the main electrical power has been dis- connected. - Page 14 The use of non-Perlick parts can damage the unit and may void the warranty. • Check the model and serial number of the unit located on the label attached to the inside top of the cabinet. Call a Perlick Factory Authorized Service Center.
-
Page 15: Warranty
Perlick’s sole liability and your exclusive remedy under this warranty are set forth in the initial paragraph above. Perlick... - Page 16 15" Signature Series Operation / Installation Manual NOTES © 2008...
- Page 17 15" Signature Series Operation / Installation Manual NOTES © 2008...
- Page 18 8300 W. Good Hope Road • Milwaukee, WI 53223 • 1-800-558-5592 • Fax: 414-353-7069 • www.bringperlickhome.com Perlick is committed to continuous improvement. Therefore, we reserve the right to change specifications without warning. Document No. Z2305 © 2008 15" One Door Cabinet Installation / Operation Manual...


Need help?
Do you have a question about the 15" signature series and is the answer not in the manual?
Questions and answers