
Subscribe to Our Youtube Channel
Related Manuals for Pentair ThermalFlo


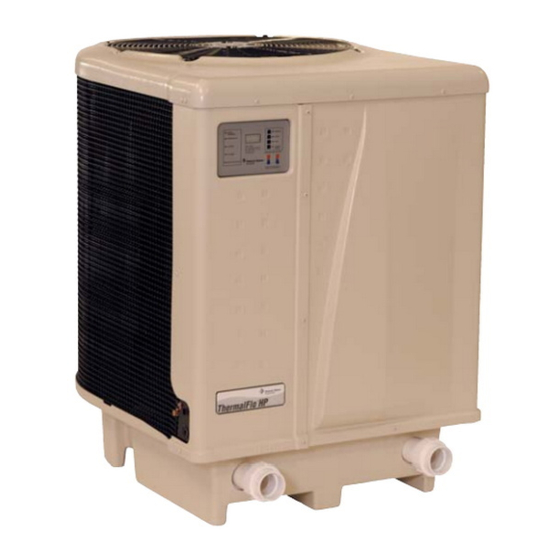
Summary of Contents for Pentair ThermalFlo
- Page 1 ™ ThermalFlo Heat Pump Installation User's Guide IMPORTANT SAFETY INSTRUCTIONS READ AND FOLLOW ALL INSTRUCTIONS SAVE THESE INSTRUCTIONS...
-
Page 2: Customer Service
10951 West Los Angeles Ave., Moorpark, CA 93021 • (805) 553-5000 Trademarks and Disclaimers.The Pentair Water Pool and Spa logo and ThermalFlo are trademarks of Pentair Water Pool and Spa, Inc. Other trademarks and trade names may be used in this document to refer to either the entities claiming the marks and names or their products. Pentair Water Pool and Spa, Inc. -
Page 3: Table Of Contents
General Features ..................... 2 Section 2: Installation ....................... 3 Installing the ThermalFlo ..................3 Materials needed for Installation ................3 ThermalFlo Heat Pump Dimensions ................ 4 Location ........................4 Clearances ......................5 Roof Run-off ......................5 Equipment Pad ......................5 Drainage and Condensation .................. - Page 4 Contents, Section 3: Operating the ThermalFlo ................15 Initial Start-up Precautions ..................15 Operating the Controller ..................16 Controller Panel ....................... 16 Indicator Lights / LEDs .................... 17 System Indicator LEDs ................... 17 Mode Indicator LEDs ....................17 Operation of Controller Buttons ................18 Temperature Setting ....................
-
Page 5: Important Safety Precautions
Call (800) 831-7133 for additional free copies of these instructions. Codes and Standards The ThermalFlo HP heat pump is listed by ETL as complying with the latest edition of the “UL Standard for Safety for Heating and Cooling Equipment”, UL 1995 and CSA C22.2 No. 236. -
Page 6: Consumer Information And Safety
Consumer Information and Safety The ThermalFlo series of heat pumps are designed and manufactured to provide many years of safe and reliable service when installed, operated and maintained according to the information in this manual and the installation codes referred to in later sections. -
Page 7: Swimming Pool Energy Saving Tips
6. Where possible, shelter the pool from prevailing winds with well-trimmed hedges or other landscaping, cabanas, or fencing. 7. Always use a pool cover when practical. Besides providing a valuable safety feature, a pool cover will reduce heat loss, conserve chemicals, and reduce the load on filter systems. ThermalFlo Installation and User’s Guide... -
Page 8: General Installation Information
Warranty Information The ThermalFlo heat pump is sold with a limited factory warranty. Details are specified on the warranty card. Make all warranty claims to an authorized Pentair Water dealer or directly to the factory. Claims must include the heat pump serial number and model (this information can be found on the rating plate), installation date, and name of the installer. -
Page 9: Section 1: Introduction
ThermalFlo HP heat pumps transfer the heat from the outside air to your pool, providing the most energy efficient pool and spa heating available. Compared to gas, oil, or electric heaters, ThermalFlo HP heat pumps operate up to 80% less, saving you hundreds of dollars in energy costs each year. -
Page 10: General Features
Elevated base pan for positive drainage of condensation. • 2-inch plumbing connections for easy installation. • Separate isolated electrical compartment prevents internal corrosion, extends heater life. • Compatible with IntelliTouch control systems. • ETL listed for safe operation. ThermalFlo Installation and User’s Guide... -
Page 11: Section 2: Installation
Section 2 Installation The following general information describes how to install the ThermalFlo heat pump. Note: Before installing this product, read and follow all warning notices and instructions starting on page iii. Installing the ThermalFlo Only a qualified service person should install the ThermalFlo heat pump. -
Page 12: Thermalflo Heat Pump Dimensions
CAUTION — When pool equipment is located below the pool surface, a leak from any component can cause large scale water loss or flooding. Pentair Water Pool and Spa, Inc. cannot be responsible for such water loss or flooding which may cause damage to the product. -
Page 13: Clearances
NOTE: Ensure that the pad is pitched not more than 1/4 in. per foot toward the compressor end (front) of the heat pump. Pitch slab from back to front 1/4 in. per foot maximum and level from side to side. ThermalFlo Installation and User’s Guide... -
Page 14: Drainage And Condensation
The hook should fit between the lip of the base panel and the evaporator coil guard, see Figure 5. 5. Mark the position of the hole in each clamp on the equipment pad. Figure 4. ThermalFlo Installation and User’s Guide... -
Page 15: Water Connections
If the heat pump is installed outside of this range, an external pressure switch may need to be installed in the plumbing upstream of the heat pump. Call the Pentair Water Heat Pump Technical Service department at (800) 831-7133 for details. -
Page 16: Water Connections (Quick Connect)
Automatic Flow Control Valve The inlet/outlet header of the ThermalFlo HP heat pump comes equipped with an internal automatic flow control valve. The automatic flow control valve maintains the proper flow through the heat pump at rates up to 125 gpm (475 lpm). -
Page 17: Multiple Unit Installation
“Chiller” mode, if so equipped, during the hottest portion of the year and a heater during the cooler months. The Pentair Water heat pump may be used in conjunction with a gas or electric heater or any combination of heat sources including solar. All heat sources must be plumbed in series to work correctly and efficiently. -
Page 18: Multiple Heat Pump Connections
Flow Meter Flow Meter 3" Ball Valve Bypass To Pool Pool Pump Minimum 3" PVC Pipe Figure 10. Four Heat Pump Plumbing Layout ThermalFlo Installation and User’s Guide... -
Page 19: Electrical Connections
Canadian Electrical Code (CEC) C22.1, unless local code requirements indicate otherwise. All wiring must be done by a certified electrician. The following is the procedure to wire the ThermalFlo HP to the electrical source: Be sure the power to the circuit for the heat pump is turned off. -
Page 20: Electrical Wiring Diagram
Transformer ORANGE YELLOW Capacitor 208 VAC 50 mf 7.5 mf BLUE BLACK 240 VAC BLACK BLACK Relay BLUE PURPLE Contactor BROWN BROWN WHITE GREEN Compressor PURPLE BLACK Incoming 220 VAC 473073 Power Connection Figure 11. ThermalFlo Installation and User’s Guide... -
Page 21: Relay Remote Controls
This will allow you to access the Remote terminals on the back of the ThermalFlo HP control board for the remote control installation. 4. Run the wires from the pool/spa remote control system into the upper electrical compartment. -
Page 22: Connecting Thermalflo To Intellitouch
Connecting the ThermalFlo to the IntelliTouch or EasyTouch Load Center To connect the ThermalFlo cable to the Personality Board in the IntelliTouch or EasyTouch Load Center: 1. Turn off the main system power before making any connections. 2. Unlatch the front door spring latche(s), and open the front door of the IntelliTouch or EasyTouch Load Center. -
Page 23: Section 3: Operating The Thermalflo
ATTENTION After starting the ThermalFlo heat pump, please note that there is a 5 minute delay before the compressor begins operation. The heat pump display will show the remaining delay time in minutes and hundredths of a minute. -
Page 24: Operating The Controller
An advanced microprocessor based controller that provides a sophisticated yet simple interface to operate your heat pump for maximum efficiency and enjoyment of your pool, controls the ThermalFlo HP heat pump. It will control incoming water temperature between a minimum of 60º and a maximum of 104º F. The controller also serves as system status indicator, using LED lights and error codes, see Figure 15. -
Page 25: Indicator Lights / Leds
2. POOL LED: On when heat pump is maintaining water temperature at the POOL setpoint. 3. SPA LED: On when heat pump is maintaining water temperature at the SPA setpoint. 4. POWER/MODE LED: On when the heat pump is OFF and there is power to the unit. ThermalFlo Installation and User’s Guide... -
Page 26: Operation Of Controller Buttons
Auto-Heat/Cool Mode (Applicable to Model HP 1200R ThermalFlo heat pumps only) The Model HP 1200R ThermalFlo heat pump has the ability to operate as a heater, cooler and to automatically switch back and forth between heating and cooling. This is controlled by the POWER/MODE button. -
Page 27: Troubleshooting The Controller
The control panel contains a three digit LED display. These LEDs display temperatures, lock out status and error codes. The error codes are listed below: a t l . y l t l u o i t t s i ° 5 ° 6 ThermalFlo Installation and User’s Guide... -
Page 28: Water Pressure Switch Adjustment
Do not adjust the pressure switch if the heat pump is installed more than 15 feet [4.57 m] above or 6 feet [1.83 m] below the pool surface. Consult your local Pentair Water representative for recommendations. On some installations, the piping from the heat pump to the pool is very short. The back pressure could be too low to trigger the pressure switch. -
Page 29: Section 4: General Maintenance
Inlet Union from falling into the unit. Do not wrap the sides of the heat pump with any plastic or other material that will retain heat or moisture inside the unit. Water Figure 16. Outlet Union ThermalFlo Installation and User’s Guide... -
Page 30: Spring Start-Up
Owner Inspection Pentair Water recommends that you inspect your heat pump on a continual basis and especially after abnormal weather conditions. The following basic guidelines are suggested for your inspection: 1. Make sure the front of the unit is accessible for future service. -
Page 31: Professional Maintenance And Service
Professional Maintenance and Service The Pentair ThermalFlo Heat Pump is one of the most efficient ways to heat a pool or spa. The heat pump transfers heat from the outside air to the pool or spa water by means of an internal heat exchanger. - Page 32 ThermalFlo Installation and User’s Guide...
-
Page 33: Section 5: Troubleshooting
Section 5 Troubleshooting Use the following troubleshooting information to resolve possible problems with your ThermalFlo heat pump. WARNING — RISK OF ELECTRICAL SHOCK OR ELECTROCUTION. Improperly installation will create an electrical hazard which could result in death or serious injury to pool users, installers, or others due to electrical shock, and may also cause damage to property. - Page 34 Set pool pump timer longer. Call your for a long enough running period. Pool is not dealer for advice. Call the factory for advice. covered. High wind speed over pool. Shaded pool area. ThermalFlo Installation and User’s Guide...
- Page 35 Check that fan is operating and air is coming out of cycles and control board display the top of the heat pump, while short cycling. If heat shows LOW REFRIGERANT pump does not run at all, call for service. PRESSURE. EO1 Error ThermalFlo Installation and User’s Guide...
-
Page 36: Section 6: Replacement Parts
Section 6 Replacement Parts Illustrated Parts SEE DETAIL A DETAIL A ThermalFlo Installation and User’s Guide... -
Page 37: Replacement Parts List
473155 TRANSFORMER 473423 WIRE HARNESS, MAIN 473150 RELAY, FAN 473149 CONTACTOR 470146 CAPACITOR 473315 WIRE HARNESS, SENSOR TERMINAL BLOCK 473135 VALVE, REVERSING (MODEL # 1200R) (NOT SHOWN) 473136 SOLENOID, REVERSING (MODEL # 1200R) (NOT SHOWN) ThermalFlo Installation and User’s Guide... - Page 38 Notes ThermalFlo Installation and User’s Guide...
- Page 40 P/N 473426 Rev. B 3/20/06...
Need help?
Do you have a question about the ThermalFlo and is the answer not in the manual?
Questions and answers