Juniper SRX3600 Hardware Manual
Hide thumbs
Also See for SRX3600:
- Hardware manual (320 pages) ,
- Getting started manual (30 pages) ,
- Replacing (3 pages)

Related Manuals for Juniper SRX3600


Summary of Contents for Juniper SRX3600
-
Page 1: Srx3600 Services Gateway
SRX3600 Services Gateway Hardware Guide Published: 2013-06-21 Copyright © 2013, Juniper Networks, Inc. - Page 2 Products made or sold by Juniper Networks or components thereof might be covered by one or more of the following patents that are owned by or licensed to Juniper Networks: U.S. Patent Nos. 5,473,599, 5,905,725, 5,909,440, 6,192,051, 6,333,650, 6,359,479, 6,406,312, 6,429,706, 6,459,579, 6,493,347, 6,538,518, 6,538,899, 6,552,918, 6,567,902, 6,578,186, and 6,590,785.
- Page 3 END USER LICENSE AGREEMENT The Juniper Networks product that is the subject of this technical documentation consists of (or is intended for use with) Juniper Networks software. Use of such software is subject to the terms and conditions of the End User License Agreement (“EULA”) posted at http://www.juniper.net/support/eula.html.
- Page 4 Copyright © 2013, Juniper Networks, Inc.
-
Page 5: Table Of Contents
SRX3600 Services Gateway Chassis ........ - Page 6 Required Tools and Parts for Unpacking the SRX3600 Services Gateway ..41 Unpacking the SRX3600 Services Gateway ......41 Verifying Parts Received with the SRX3600 Services Gateway .
- Page 7 Troubleshooting with Chassis and Interface Alarm Messages on the SRX3600 Services Gateway ........101 Juniper Networks Technical Assistance Center .
- Page 8 DC Power Electrical Safety Guidelines and Warnings ....168 SRX3600 Services Gateway Agency Approvals ......174 SRX3600 Services Gateway Compliance Statements for EMC Requirements .
- Page 9 Signal Loss in Multimode and Single-Mode Fiber-Optic Cable for the SRX3600 Services Gateway ........196 Attenuation and Dispersion in Fiber-Optic Cable for the SRX3600 Services Gateway .
- Page 10 SRX3600 Services Gateway ........
-
Page 11: About This Guide
Audience This guide is designed for network administrators who are installing and maintaining a Juniper Networks SRX3600 Services Gateway or preparing a site for services gateway installation. To use this guide, you need a broad understanding of networks in general and the Internet in particular, networking principles, and network configuration. - Page 12 SRX3600 Services Gateway Hardware Guide Table 1: Notice Icons Icon Meaning Description Informational note Indicates important features or instructions. Caution Indicates a situation that might result in loss of data or hardware damage. Warning Alerts you to the risk of personal injury or death.
-
Page 13: Srx Series Documentation And Release Notes
SRX Series Release Notes differs from the information in the documentation, follow the SRX Series Release Notes. Obtaining Documentation To obtain the most current version of all Juniper Networks technical documentation, see the products documentation page on the Juniper Networks website at www.juniper.net/techpubs/ To order printed copies of this guide and other Juniper Networks technical documents, contact your sales representative. -
Page 14: Documentation Feedback
7 days a week, 365 days a year. Self-Help Online Tools and Resources For quick and easy problem resolution, Juniper Networks has designed an online self-service portal called the Customer Support Center (CSC) that provides you with the following features: Find CSC offerings: www.juniper.net/customers/support... - Page 15 About This Guide Join and participate in the Juniper Networks Community Forum: www.juniper.net/company/communities Open a case online in the CSC Case Manager: www.juniper.net/cm To verify service entitlement by product serial number, use our Serial Number Entitlement (SNE) Tool located at https://tools.juniper.net/SerialNumberEntitlementSearch...
- Page 16 SRX3600 Services Gateway Hardware Guide Copyright © 2013, Juniper Networks, Inc.
-
Page 17: Srx3600 Services Gateway Overview
PART 1 SRX3600 Services Gateway Overview Introduction to the SRX3600 Services Gateway on page 3 SRX3600 Services Gateway Hardware Components on page 7 Copyright © 2013, Juniper Networks, Inc. - Page 18 SRX3600 Services Gateway Hardware Guide Copyright © 2013, Juniper Networks, Inc.
-
Page 19: Introduction To The Srx3600 Services Gateway
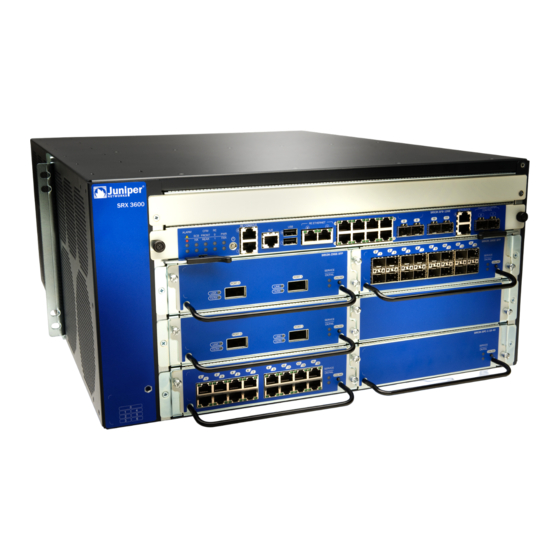
30 gigabits per second (Gbps) in full duplex and is five rack units (U) tall. Nine services gateways can be stacked in a single floor-to-ceiling rack for increased port density per unit of floor space. The SRX3600 Services Gateway provides 12 common form-factor module (CFM) slots that can be populated with up to seven Services Processing Cards (SPCs), up to three Network Processing Cards (NPCs), up to six I/O cards (IOCs), and up to eleven Network Processing I/O cards (NP-IOCs). -
Page 20: Srx3600 Services Gateway Performance And Features
Power supplies 2 for nonredundant configuration 3 or 4 for redundant configuration Related Available Components for the SRX3600 Services Gateway on page 9 Documentation SRX3600 Services Gateway Physical Specifications on page 4 SRX3600 Services Gateway Chassis on page 7 SRX3600 Services Gateway Physical Specifications... - Page 21 3.1 lb (1.4 kg) Related Available Components for the SRX3600 Services Gateway on page 9 Documentation Hardware Component Locations in the SRX3600 Services Gateway Chassis on page 11 SRX3600 Services Gateway Chassis on page 7 Copyright © 2013, Juniper Networks, Inc.
- Page 22 SRX3600 Services Gateway Hardware Guide Copyright © 2013, Juniper Networks, Inc.
-
Page 23: Srx3600 Services Gateway Hardware Components
CHAPTER 2 SRX3600 Services Gateway Hardware Components Nearly all components of the SRX3600 Services Gateway are field-replaceable units (FRUs), including the Switch Fabric Board (SFB), Routing Engine, Network Processing Cards (NPCs), Service Processing Cards (SPCs), and I/O cards (IOCs), power supply, fan tray, and filter. -
Page 24: Chassis
Related SRX3600 Services Gateway Description on page 3 Documentation SRX3600 Services Gateway CFMs on page 9 Available Components for the SRX3600 Services Gateway on page 9 Grounding the SRX3600 Services Gateway on page 76 Copyright © 2013, Juniper Networks, Inc. -
Page 25: Srx3600 Services Gateway Component Basics
This section describes the card form factors, the services gateway components available, and where they can be installed in the SRX3600 Services Gateway. It also describes the flow of data through the services gateway. This section includes the following topics:... - Page 26 “SRX3600 Services Gateway SPCs” on page 20 for details about these cards. Table 6 on page 10 shows the supported combinations of SPCs, NPCs, and IOCs that can be installed in the SRX3600 Services Gateway. Table 6: Supported Combinations of SPCs, NPCs, and IOCs NPCs SPCs...
-
Page 27: Srx3600 Services Gateway Chassis
Data Flow in the SRX3600 Services Gateway on page 13 Hardware Component Locations in the SRX3600 Services Gateway Chassis The SRX3600 Services Gateway is populated with one SFB, one Routing Engine, two power supplies, and a fan tray at the factory. You must install all other cards required to meet your configuration needs. - Page 28 NP-IOC. However, if there are no NPCs in the chassis, the Ethernet ports in the SFB will not be functional. See“SRX3600 Services Gateway NPCs” on page 20 and“SRX3600 Services Gateway SPCs” on page 20 details about these cards. Related...
-
Page 29: Data Flow In The Srx3600 Services Gateway
Installation Overview for the SRX3600 Services Gateway on page 47 SRX3600 Services Gateway Midplane The midplane in the SRX3600 Services Gateway is in the center of the chassis and provides connections for installing up to six common form-factor modules (CFMs) through the front of the chassis and up to six CFMs through the rear of the chassis. -
Page 30: Srx3600 Services Gateway Switch Fabric Board
Related SRX3600 Services Gateway Chassis on page 7 Documentation Available Components for the SRX3600 Services Gateway on page 9 SRX3600 Services Gateway Switch Fabric Board on page 14 SRX3600 Services Gateway NPCs on page 20 SRX3600 Services Gateway SPCs on page 20... - Page 31 Chapter 2: SRX3600 Services Gateway Hardware Components Figure 7: Switch Fabric Board Table 8 on page 15 describes the behavior of the Power button near the left end of the SFB front panel. Table 8: Power Button Behavior Condition Action...
- Page 32 SRX3600 Services Gateway Hardware Guide Table 9: Switch Fabric Board LED Indicators (continued) Label Color Status Indicated Behavior Critical On steadily A critical alarm is present in the system. A hardware (Bottom) component or software module has failed, or the network management interface is down.
- Page 33 Chapter 2: SRX3600 Services Gateway Hardware Components Table 9: Switch Fabric Board LED Indicators (continued) Label Color Status Indicated Behavior Green On steadily The SFB and all installed CFM cards are operating SERVICE (top) normally. The LEDs on all installed CFM SERVICE cards are green.
- Page 34 SRX3600 Services Gateway Hardware Guide Table 9: Switch Fabric Board LED Indicators (continued) Label Color Status Indicated Behavior (top) Green On steadily The services gateway is receiving power. The Power Good signal for all installed power supplies has been received after Routing Engine initialization.
- Page 35 Related SRX3600 Services Gateway Chassis on page 7 Documentation Available Components for the SRX3600 Services Gateway on page 9 SRX3600 Services Gateway NPCs on page 20 SRX3600 Services Gateway SPCs on page 20 SRX3600 Services Gateway NP-IOCs on page 22...
-
Page 36: Srx3600 Services Gateway Npcs
Related SRX3600 Services Gateway Chassis on page 7 Documentation Installing CFM Cards in the SRX3600 Services Gateway on page 59 Available Components for the SRX3600 Services Gateway on page 9 SRX3600 Services Gateway Switch Fabric Board on page 14 SRX3600 Services Gateway SPCs on page 20... -
Page 37: Srx3600 Services Gateway Iocs
Network Processing Card (NPC) and to forward data packets out the physical ports after services processing. The SRX3600 Services Gateway has six slots in the front of the chassis where you can install IOCs. You can install any combination of IOCs in the slots. -
Page 38: Srx3600 Services Gateway Np-Iocs
Related SRX3600 Services Gateway Chassis on page 7 Documentation Installing CFM Cards in the SRX3600 Services Gateway on page 59 Available Components for the SRX3600 Services Gateway on page 9 SRX3600 Services Gateway Switch Fabric Board on page 14 SRX3600 Services Gateway NPCs on page 20... -
Page 39: Srx3600 Services Gateway Routing Engine
Related SRX3600 Services Gateway Chassis on page 7 Documentation Installing CFM Cards in the SRX3600 Services Gateway on page 59 Available Components for the SRX3600 Services Gateway on page 9 SRX3600 Services Gateway Switch Fabric Board on page 14 SRX3600 Services Gateway NPCs on page 20... -
Page 40: Srx3600 Services Gateway Srx Clustering Module
Documentation Available Components for the SRX3600 Services Gateway on page 9 Hardware Component Locations in the SRX3600 Services Gateway Chassis on page 11 SRX3600 Services Gateway SRX Clustering Module The SRX Clustering Module (SCM) is a card that you can install in the services gateway to enable the dual control link feature for chassis cluster supported in Junos OS Release 10.2 and later. -
Page 41: Srx3600 Services Gateway Power Supplies
SRX3600 Services Gateway Power Supplies The SRX3600 Services Gateway uses either two AC or two DC power supplies. Either a third AC or DC power supply, or a third and a fourth AC or DC power supply, can may be used with its matching type of power supply to offer redundancy. -
Page 42: Srx3600 Services Gateway Ac Power Supply Electrical Specifications
Related SRX3600 Services Gateway Chassis on page 7 Documentation Hardware Component Locations in the SRX3600 Services Gateway Chassis on page 11 SRX3600 Services Gateway AC Power Supply Electrical Specifications on page 188 SRX3600 Services Gateway AC Power Supply Electrical Specifications Table 11 on page 26 lists the AC power supply electrical specifications. -
Page 43: Srx3600 Services Gateway Dc Power Supply Overview
Related SRX3600 Services Gateway Chassis on page 7 Documentation Hardware Component Locations in the SRX3600 Services Gateway Chassis on page 11 SRX3600 Services Gateway AC Power Supply Overview on page 25 SRX3600 Services Gateway DC Power Supply Overview In a DC power configuration, the services gateway contains two to four DC power supplies, located at the rear of the chassis in slots PEM0 through PEM3. - Page 44 Under-voltage condition on the 12V output Over-voltage condition on the 12V output Over-current condition on the 12V output Related SRX3600 Services Gateway Chassis on page 7 Documentation Hardware Component Locations in the SRX3600 Services Gateway Chassis on page 11 Copyright © 2013, Juniper Networks, Inc.
-
Page 45: Srx3600 Services Gateway Fan Tray
Chapter 2: SRX3600 Services Gateway Hardware Components SRX3600 Services Gateway DC Power Supply Overview on page 27 SRX3600 Services Gateway Fan Tray The cooling system consists of a fan tray containing 10 fans and an air filter. These components work together to keep all services gateway components within the acceptable temperature range. - Page 46 Related SRX3600 Services Gateway Chassis on page 7 Documentation Hardware Component Locations in the SRX3600 Services Gateway Chassis on page 11 Available Components for the SRX3600 Services Gateway on page 9 Copyright © 2013, Juniper Networks, Inc.
-
Page 47: Setting Up The Srx3600 Services Gateway
Installing Additional Components in the SRX3600 Services Gateway on page 59 Connecting the SRX3600 Services Gateway on page 71 Grounding and Providing Power to the SRX3600 Services Gateway on page 75 Performing Initial Software Configuration on the SRX3600 Services Gateway on page 85... - Page 48 SRX3600 Services Gateway Hardware Guide Copyright © 2013, Juniper Networks, Inc.
-
Page 49: Preparing The Site For Srx3600 Services Gateway Installation
This section includes the following topics: Site Preparation Checklist for the SRX3600 Services Gateway on page 33 SRX3600 Services Gateway Cabinet Requirements on page 34 SRX3600 Services Gateway Rack Requirements on page 35... -
Page 50: Srx3600 Services Gateway Cabinet Requirements
The services gateway can be installed in an enclosed cabinet. The cabinet requirements are described in the following topics: SRX3600 Services Gateway Cabinet Size and Clearance Requirements on page 34 SRX3600 Services Gateway Cabinet Airflow Requirements on page 35 SRX3600 Services Gateway Cabinet Size and Clearance Requirements The minimum size cabinet that can accommodate the services gateway is 27.5 in. -
Page 51: Srx3600 Services Gateway Cabinet Airflow Requirements
SRX3600 Services Gateway Spacing of Mounting Bracket Holes on page 37 SRX3600 Services Gateway Rack Requirements The SRX3600 Services Gateway can be installed in a rack. Many types of racks are acceptable, including four-post (telco) racks and open-frame racks. The rack requirements... -
Page 52: Srx3600 Services Gateway Rack Size And Strength Requirements
Cabinets, Racks, Panels, and Associated Equipment (document number EIA-310-D) published by the Electronics Industry Association. You can stack eight SRX3600 Services Gateways in a rack that has at least 40 U (70 in. or 1.78 m) of usable vertical space. -
Page 53: Srx3600 Services Gateway Spacing Of Mounting Bracket Holes
Clearance Requirements for Airflow and Hardware Maintenance of the SRX3600 Services Gateway on page 38 Connecting the SRX3600 Services Gateway to the Building Structure on page 38 SRX3600 Services Gateway Spacing of Mounting Bracket Holes The services gateway can be mounted in any rack that provides holes or hole patterns spaced at 1 U (1.75 in.) increments. -
Page 54: Connecting The Srx3600 Services Gateway To The Building Structure
Related Rack-Mounting Requirements and Warnings on page 149 Documentation SRX3600 Services Gateway Rack Size and Strength Requirements on page 36 Clearance Requirements for Airflow and Hardware Maintenance of the SRX3600 Services Gateway on page 38 SRX3600 Services Gateway Spacing of Mounting Bracket Holes on page 37... - Page 55 SRX3600 Services Gateway Rack Size and Strength Requirements on page 36 Documentation Connecting the SRX3600 Services Gateway to the Building Structure on page 38 SRX3600 Services Gateway Spacing of Mounting Bracket Holes on page 37 Copyright © 2013, Juniper Networks, Inc.
- Page 56 SRX3600 Services Gateway Hardware Guide Copyright © 2013, Juniper Networks, Inc.
-
Page 57: Unpacking The Srx3600 Services Gateway
Unpacking the SRX3600 Services Gateway This section includes the following topics: Required Tools and Parts for Unpacking the SRX3600 Services Gateway on page 41 Unpacking the SRX3600 Services Gateway on page 41 Verifying Parts Received with the SRX3600 Services Gateway on page 44... - Page 58 Position the shipping carton with the arrows pointing up. Remove the plastic handle inserts and lift the cardboard cover off the services gateway. Remove the accessory box and the SRX3600 Services Gateway Getting Started Guide. Remove the foam covering the top of the services gateway.
- Page 59 Chapter 4: Unpacking the SRX3600 Services Gateway Figure 20: Opening the Shipping Carton With a person on each side of the carton, carefully lift the services gateway from the carton and place on lift. Remove the bag covering the services gateway.
-
Page 60: Verifying Parts Received With The Srx3600 Services Gateway
SRX3600 Services Gateway Hardware Guide Related Required Tools and Parts for Unpacking the SRX3600 Services Gateway on page 41 Documentation Verifying Parts Received with the SRX3600 Services Gateway on page 44 Verifying Parts Received with the SRX3600 Services Gateway A packing list is included in each shipment. Check the parts in the shipment against the items on the packing list. - Page 61 Juniper Compliance Form Letter; RoHS Declaration of Conformity Document sleeve ESD wrist strap with cable Related Required Tools and Parts for Unpacking the SRX3600 Services Gateway on page 41 Documentation Unpacking the SRX3600 Services Gateway on page 41 Copyright © 2013, Juniper Networks, Inc.
- Page 62 SRX3600 Services Gateway Hardware Guide Copyright © 2013, Juniper Networks, Inc.
-
Page 63: Installing The Srx3600 Services Gateway
Installation on page 49 Installing the Mounting Hardware for the SRX3600 Services Gateway on page 49 Installing the SRX3600 Services Gateway in a Rack or Cabinet Using a Mechanical Lift on page 51 Installing the SRX3600 Services Gateway in a Rack or Cabinet Without a Mechanical... -
Page 64: Srx3600 Services Gateway Safety Requirements, Warnings, And Guidelines
Preparing the SRX3600 Services Gateway for Rack-Mount or Cabinet Installation on Documentation page 49 Installing the Mounting Hardware for the SRX3600 Services Gateway on page 49 Installing the SRX3600 Services Gateway in a Rack or Cabinet Using a Mechanical Lift on page 51 Copyright © 2013, Juniper Networks, Inc. -
Page 65: Installation
139. Documentation Installing the Mounting Hardware for the SRX3600 Services Gateway on page 49 Installing the SRX3600 Services Gateway in a Rack or Cabinet Using a Mechanical Lift on page 51 Installing the Mounting Hardware for the SRX3600 Services Gateway The specific mounting hardware used depends on the type of rack being utilized. - Page 66 SRX3600 Services Gateway Hardware Guide Figure 21: Attaching Mounting Hardware for Two-Post Rack For a four-post rack, mount the brackets near the front edge of the chassis, as shown Figure 22 on page Figure 22: Attaching Mounting Hardware for Cabinet or Four-Post Rack...
-
Page 67: Mechanical Lift
Preparing the SRX3600 Services Gateway for Rack-Mount or Cabinet Installation on page 49 Installing the SRX3600 Services Gateway in a Rack or Cabinet Using a Mechanical Lift on page 51 Installing the SRX3600 Services Gateway in a Rack or Cabinet Using a Mechanical Lift Ensure the rack is in its permanent location and is secured to the building. - Page 68 “Installing the Mounting Hardware for the SRX3600 Services Gateway” on page Install a mounting screw into each of the two aligned holes, as shown in...
- Page 69 Related SRX3600 Services Gateway Definition of Safety Warning Levels on page 139. Documentation Preparing the SRX3600 Services Gateway for Rack-Mount or Cabinet Installation on page 49 Copyright © 2013, Juniper Networks, Inc.
-
Page 70: Mechanical Lift
SRX3600 Services Gateway Hardware Guide Installing the SRX3600 Services Gateway in a Rack or Cabinet Without a Mechanical Lift If you cannot use a mechanical lift to install the services gateway (the preferred method), you can install it manually. Before installing the services gateway manually, you must first remove components from the chassis, and you must reinstall the components once the services gateway is installed in the rack. - Page 71 Chapter 5: Installing the SRX3600 Services Gateway NPCs SPCs Fan tray The procedure in this section for removing components from the chassis is for initial installation only, and assumes that you have not connected power cables to the services gateway.
-
Page 72: Lifting The Srx3600 Services Gateway Chassis Into The Rack
Required Tools for Installing the SRX3600 Services Gateway Without a Mechanical Documentation Lift on page 54 Lifting the SRX3600 Services Gateway Chassis into the Rack on page 56 Reinstalling Components in the SRX3600 Services Gateway Chassis on page 57 Lifting the SRX3600 Services Gateway Chassis into the Rack Lifting the chassis and mounting it in a rack requires two people. -
Page 73: Reinstalling Components In The Srx3600 Services Gateway Chassis
Required Tools for Installing the SRX3600 Services Gateway Without a Mechanical Documentation Lift on page 54 Removing Components from the Chassis for Manual Lifting of the SRX3600 Services Gateway on page 54 Reinstalling Components in the SRX3600 Services Gateway Chassis on page 57... - Page 74 SRX3600 Services Gateway Hardware Guide Copyright © 2013, Juniper Networks, Inc.
-
Page 75: Installing Additional Components In The Srx3600 Services Gateway
This section includes the following topics: Installing CFM Cards in the SRX3600 Services Gateway on page 59 Installing SPCs in an Operating SRX3600 Services Gateway Chassis Cluster on page 62 Installing an SCM in the SRX3600 Services Gateway on page 65... - Page 76 CFM types, see “Hardware Component Locations in the SRX3600 Services Gateway Chassis” on page 11. For information about the slot eligibility of specific CFMs, see the SRX1400, SRX3400, and SRX3600 Services Gateway Module Guide at http://www.juniper.net/techpubs/ NOTE:...
- Page 77 Chapter 6: Installing Additional Components in the SRX3600 Services Gateway Tighten the screws on either side of the card (Figure 30 on page 61). Figure 30: Installing a CFM (SPC Shown, Other CFMs Similar) SRX 3 K -SP C -1 -10 -4 0 If you are installing additional CFMs at this time, repeat steps 4 through 7, and then continue with the following steps to connect the appropriate cables.
-
Page 78: Installing Spcs In An Operating Srx3600 Services Gateway Chassis Cluster
Hardware Component Locations in the SRX3600 Services Gateway Chassis on page 11 Installing SPCs in an Operating SRX3600 Services Gateway Chassis Cluster If your SRX3600 Services Gateway is part of a chassis cluster, you can install additional SPCs in the services gateways in the cluster without incurring downtime on your network. - Page 79 Chapter 6: Installing Additional Components in the SRX3600 Services Gateway To install SPCs in an SRX3600 Services Gateway cluster without incurring downtime: Use the console port on the routing engine to establish a command-line interface (CLI) session with one of the devices in the cluster.
- Page 80 Wait for the secondary services gateway to completely shut down. Install the new SPC or SPCs in the powered-off services gateway using the procedure “Installing CFM Cards in the SRX3600 Services Gateway” on page Power on the secondary services gateway and wait for it to finish starting.
-
Page 81: Installing An Scm In The Srx3600 Services Gateway
Use the show chassis cluster status command to make sure that the priority for all redundancy groups is greater than zero. Related Installing CFM Cards in the SRX3600 Services Gateway on page 59 Documentation Installing CFM Cards in the SRX3600 Services Gateway on page 59... -
Page 82: Installing An Ac Power Supply In The Srx3600 Services Gateway
Related SRX3600 Services Gateway SRX Clustering Module on page 24 Documentation Replacing an SCM on the SRX3600 Services Gateway on page 119 Installing an AC Power Supply in the SRX3600 Services Gateway NOTE: For the services gateway to meet NEBS and ETSI standards, all four AC power supplies must be Revision 09 or later. - Page 83 Chapter 6: Installing Additional Components in the SRX3600 Services Gateway NOTE: The same AC power supply is used in both the SRX3400 and SRX3600 Services Gateways. However, this power supply is not interchangeable with that used in the SRX1400 Services Gateway. The SRX1400 Services Gateway power supply will fit into the SRX3600 Services Gateway, but will not work properly.
- Page 84 The power supply faceplate should be flush with any adjacent power supply faceplate or blank installed in the power supply slot. “Connecting the SRX3600 Services Gateway to an AC Power Source” on page 77 for information on connecting the power supply to AC power.
-
Page 85: Installing A Dc Power Supply In The Srx3600 Services Gateway
NOTE: The same DC power supply is used in both the SRX3400 and SRX3600 Services Gateways. However, this power supply is not interchangeable with that used in the SRX1400 Services Gateway. The SRX1400 Services Gateway power supply will fit into the SRX3600 Services Gateway, but will not work properly. - Page 86 The power supply faceplate should be flush with any adjacent power supply faceplate. “Connecting the SRX3600 Services Gateway to a DC Power Source” on page 80 information on connecting the power supply to DC power.
-
Page 87: Connecting The Srx3600 Services Gateway
Gateway This section includes the following topics: Required Tools and Parts for Connecting the SRX3600 Services Gateway on page 71 Connecting the SRX3600 Services Gateway to Management Devices on page 71 Required Tools and Parts for Connecting the SRX3600 Services Gateway... -
Page 88: Connecting The Srx3600 Services Gateway To A Management Console Or An Auxiliary Device
One Ethernet cable is provided with the services gateway. Plug the other end of the cable into the network device. Related Required Tools and Parts for Connecting the SRX3600 Services Gateway on page 71 Documentation Connecting the SRX3600 Services Gateway to a Management Console or an Auxiliary... - Page 89 HA R EA R 1 FA N Figure 38: Console and Auxiliary Cable Connector Related Required Tools and Parts for Connecting the SRX3600 Services Gateway on page 71 Documentation Connecting the SRX3600 Services Gateway to a Network for Out-of-Band Management on page 72...
- Page 90 SRX3600 Services Gateway Hardware Guide Copyright © 2013, Juniper Networks, Inc.
-
Page 91: Grounding And Providing Power To The Srx3600 Services Gateway
Grounding and Providing Power to the SRX3600 Services Gateway This section includes the following topics: Required Tools and Parts for Grounding and Providing Power to the SRX3600 Services Gateway on page 75 Grounding the SRX3600 Services Gateway on page 76... -
Page 92: Grounding The Srx3600 Services Gateway
Attach an ESD grounding strap to your bare wrist and connect the strap to one of the ESD points on the chassis. For more information about ESD, see “Preventing Electrostatic Discharge Damage to the SRX3600 Services Gateway” on page 145. Place the grounding cable lug over the grounding point—a pair of M5 holes to the left of the power supply slots. -
Page 93: Connecting The Srx3600 Services Gateway To An Ac Power Source
Dress the grounding cable and verify that it does not touch or block access to services gateway components, and that it does not drape where people could trip on it. Related Required Tools and Parts for Grounding and Providing Power to the SRX3600 Services Documentation Gateway on page 75... - Page 94 SRX3600 Services Gateway Hardware Guide CAUTION: Do not mix AC and DC power supplies within the same services gateway. Damage to the services gateway might occur. To connect the AC power cords to the services gateway for each power supply: Locate the power cord or cords you will use to connect the services gateway to AC power.
- Page 95 On state. Related Required Tools and Parts for Grounding and Providing Power to the SRX3600 Services Documentation Gateway on page 75 Grounding the SRX3600 Services Gateway on page 76...
-
Page 96: Connecting The Srx3600 Services Gateway To A Dc Power Source
SRX3600 Services Gateway Hardware Guide Connecting the SRX3600 Services Gateway to a DC Power Source You connect DC power to the services gateway by attaching power cables from the external DC power sources to the terminal studs on the power supply faceplates. You must provide the power cables. - Page 97 On state. Related Required Tools and Parts for Grounding and Providing Power to the SRX3600 Services Documentation Gateway on page 75 Copyright © 2013, Juniper Networks, Inc.
-
Page 98: Powering On The Srx3600 Services Gateway
SRX3600 Services Gateway Hardware Guide Grounding the SRX3600 Services Gateway on page 76 Connecting the SRX3600 Services Gateway to an AC Power Source on page 77 Powering On the SRX3600 Services Gateway on page 82 Powering Off the SRX3600 Services Gateway on page 82... - Page 99 On state. Related Required Tools and Parts for Grounding and Providing Power to the SRX3600 Services Documentation Gateway on page 75 Grounding the SRX3600 Services Gateway on page 76...
- Page 100 SRX3600 Services Gateway Hardware Guide Copyright © 2013, Juniper Networks, Inc.
-
Page 101: Srx3600 Services Gateway Software Configuration Overview
This section includes the following topics: SRX3600 Services Gateway Software Configuration Overview on page 85 Performing Initial Software Configuration on the SRX3600 Services Gateway on page 86 SRX3600 Services Gateway Software Configuration Overview The services gateway is shipped with the Junos operating system (Junos OS) preinstalled and ready to be configured when the services gateway is powered on. -
Page 102: Gateway
SRX3600 Services Gateway Hardware Guide Related Performing Initial Software Configuration on the SRX3600 Services Gateway on page 86 Documentation SRX3600 Services Gateway Switch Fabric Board on page 14 Performing Initial Software Configuration on the SRX3600 Services Gateway This procedure connects the services gateway to the network but does not enable it to forward traffic. - Page 103 Chapter 9: Performing Initial Software Configuration on the SRX3600 Services Gateway Configure the traffic interface. [edit] admin@# set interfaces ge-0/0/0 unit 0 family inet address address/prefix-length admin@# set interfaces ge-0/0/1 unit 0 family inet address address/prefix-length Configure the default route.
- Page 104 SRX3600 Services Gateway Hardware Guide any emergency; file messages { any any; authorization info; file interactive-commands { interactive-commands any; license { autoupdate { url https://ae1.juniper.net/junos/key_retrieval; interfaces { ge-0/0/0 { unit 0 { family inet { address 192.1.1.1/24; ge-0/0/1 { unit 0 { family inet { address 5.1.1.1/24;...
- Page 105 Chapter 9: Performing Initial Software Configuration on the SRX3600 Services Gateway source-address any; destination-address any; application any; then { permit; Commit the configuration to activate it on the services gateway. [edit] admin@# commit Optionally, configure additional properties by adding the necessary configuration statements.
- Page 106 SRX3600 Services Gateway Hardware Guide Copyright © 2013, Juniper Networks, Inc.
- Page 107 Maintenance, Replacement, and Troubleshooting Procedures Maintaining the SRX3600 Services Gateway Hardware Components on page 93 Troubleshooting the SRX3600 Services Gateway on page 99 Replacing Hardware Components on the SRX3600 Services Gateway on page 107 Copyright © 2013, Juniper Networks, Inc.
- Page 108 SRX3600 Services Gateway Hardware Guide Copyright © 2013, Juniper Networks, Inc.
-
Page 109: Maintaining The Srx3600 Services Gateway Hardware Components
Components on page 93 Routine Maintenance Procedures for the SRX3600 Services Gateway on page 93 Maintaining the Air Filter on the SRX3600 Services Gateway on page 94 Maintaining the Fan Tray on the SRX3600 Services Gateway on page 94 Maintaining the Routing Engine on the SRX3600 Services Gateway on page 95... -
Page 110: Maintaining The Air Filter On The Srx3600 Services Gateway
Documentation Components on page 93 Maintaining the Air Filter on the SRX3600 Services Gateway on page 94 Maintaining the Fan Tray on the SRX3600 Services Gateway on page 94 Maintaining the Routing Engine on the SRX3600 Services Gateway on page 95... -
Page 111: Maintaining The Routing Engine On The Srx3600 Services Gateway
Components on page 93 Routine Maintenance Procedures for the SRX3600 Services Gateway on page 93 Maintaining the Air Filter on the SRX3600 Services Gateway on page 94 Maintaining the Routing Engine on the SRX3600 Services Gateway on page 95 Maintaining the Power Supplies on the SRX3600 Services Gateway on page 97 Maintaining the Routing Engine on the SRX3600 Services Gateway The host subsystem comprises a Routing Engine installed directly into the midplane. - Page 112 SRX3600 Services Gateway Routing Engine on page 23 Routine Maintenance Procedures for the SRX3600 Services Gateway on page 93 Maintaining the Air Filter on the SRX3600 Services Gateway on page 94 Maintaining the Fan Tray on the SRX3600 Services Gateway on page 94 Maintaining the Power Supplies on the SRX3600 Services Gateway on page 97 Copyright ©...
-
Page 113: Maintaining The Power Supplies On The Srx3600 Services Gateway
Grounding the SRX3600 Services Gateway on page 76 Routine Maintenance Procedures for the SRX3600 Services Gateway on page 93 Maintaining the Air Filter on the SRX3600 Services Gateway on page 94 Maintaining the Fan Tray on the SRX3600 Services Gateway on page 94 Maintaining the Routing Engine on the SRX3600 Services Gateway on page 95 Copyright ©... - Page 114 SRX3600 Services Gateway Hardware Guide Copyright © 2013, Juniper Networks, Inc.
-
Page 115: Troubleshooting The Srx3600 Services Gateway
This section includes the following topics: Troubleshooting Hardware Components on the SRX3600 Services Gateway on page 99 Troubleshooting the Cooling System on the SRX3600 Services Gateway on page 101 Troubleshooting IOCs and NP-IOCs on the SRX3600 Services Gateway on page 102... -
Page 116: Troubleshooting With Leds On The Srx3600 Services Gateway
SRX3600 Services Gateway SRX Clustering Module on page 24 SRX3600 Services Gateway AC Power Supply Overview on page 25 SRX3600 Services Gateway DC Power Supply Overview on page 27 Troubleshooting with the CLI on the SRX3600 Services Gateway on page 99 Copyright © 2013, Juniper Networks, Inc. -
Page 117: Troubleshooting With Chassis And Interface Alarm Messages On The Srx3600 Services Gateway
Troubleshooting with Chassis and Interface Alarm Messages on the SRX3600 Services Gateway on page 101 Troubleshooting with Chassis and Interface Alarm Messages on the SRX3600 Services Gateway When the Routing Engine detects an alarm condition, it lights the red or yellow alarm LED on the SFB as appropriate. -
Page 118: Troubleshooting Iocs And Np-Iocs On The Srx3600 Services Gateway
If all power supplies have failed, the system temperature might have exceeded the threshold, causing the system to shut down. Related Replacing the Fan Tray on the SRX3600 Services Gateway on page 109 Documentation Troubleshooting with the CLI on the SRX3600 Services Gateway on page 99... - Page 119 Chapter 11: Troubleshooting the SRX3600 Services Gateway Empty Empty Online 1024 Online 1024 Empty Using a question mark (?) gives you a listing of the various options for the command: user@host> show chassis fpc ? Possible completions: <[Enter]> Execute this command <fpc-slot>...
-
Page 120: Troubleshooting Npcs On The Srx3600 Services Gateway
For further description of the output from the commands, see the Junos System Basics and Services Command Reference. Troubleshooting NPCs on the SRX3600 Services Gateway To troubleshoot an NPC, follow these guidelines: Make sure the NPC is properly seated in the midplane and its screws are tightened. -
Page 121: Troubleshooting The Power System On The Srx3600 Services Gateway
For further description of the output from the commands, see the Junos System Basics and Services Command Reference. Troubleshooting the Power System on the SRX3600 Services Gateway To verify that a power supply is functioning normally, perform the following steps: Check the LEDs on each power supply faceplate. - Page 122 SRX3600 Services Gateway AC Power Supply Electrical Specifications on page 26 Documentation Troubleshooting with the CLI on the SRX3600 Services Gateway on page 99 Troubleshooting the Cooling System on the SRX3600 Services Gateway on page 101 Troubleshooting IOCs and NP-IOCs on the SRX3600 Services Gateway on page 102...
-
Page 123: Replacing Hardware Components On The Srx3600 Services Gateway
Required Tools and Parts for Replacing Hardware Components on the SRX3600 Services Gateway on page 108 Replacing Cooling System Components on the SRX3600 Services Gateway on page 109 Replacing Host Subsystem Components on the SRX3600 Services Gateway on page 114... -
Page 124: Required Tools And Parts For Replacing Hardware Components On The Srx3600 Services Gateway
Replacing a Routing Engine on the SRX3600 Services Gateway on page 117 Replacing a CFM Card on the SRX3600 Services Gateway on page 120 Replacing an AC Power Supply on the SRX3600 Services Gateway on page 127 Replacing a DC Power Supply on the SRX3600 Services Gateway on page 131... -
Page 125: Replacing Cooling System Components On The Srx3600 Services Gateway
Replacing a Routing Engine on the SRX3600 Services Gateway on page 117 Replacing a CFM Card on the SRX3600 Services Gateway on page 120 Replacing an AC Power Supply on the SRX3600 Services Gateway on page 127 Replacing a DC Power Supply on the SRX3600 Services Gateway on page 131... - Page 126 ESD points on the chassis. For more information about ESD, see “Preventing Electrostatic Discharge Damage to the SRX3600 Services Gateway” on page 145. Turn the screw to the left on the fan tray door. Open it to the right and remove it.
- Page 127 Chapter 12: Replacing Hardware Components on the SRX3600 Services Gateway Figure 43: Removing the Fan Tray Grasp the fan tray and pull it out approximately 6 in. (15 cm). Place one hand under the fan tray to support it and pull the fan tray completely out of the chassis and set it aside.
-
Page 128: Replacing The Air Filter On The Srx3600 Services Gateway
Documentation Services Gateway on page 108 Replacing the Air Filter on the SRX3600 Services Gateway on page 112 Replacing the Air Filter on the SRX3600 Services Gateway The services gateway has one air filter that installs vertically in the rear of the chassis. - Page 129 Chapter 12: Replacing Hardware Components on the SRX3600 Services Gateway To replace the air filter: Attach an ESD grounding strap to your bare wrist and connect the strap to one of the ESD points on the chassis. For more information about ESD, see “Preventing...
-
Page 130: Replacing Host Subsystem Components On The Srx3600 Services Gateway
Documentation Services Gateway on page 108 Replacing the Fan Tray on the SRX3600 Services Gateway on page 109 Replacing Host Subsystem Components on the SRX3600 Services Gateway To replace subsystem components of the services gateway, you must power down the services gateway. - Page 131 Chapter 12: Replacing Hardware Components on the SRX3600 Services Gateway LED blinks to show you that the services gateway is shutting down. Wait for the services gateway to shut down before you proceed to the next step. Place an electrostatic bag or antistatic mat on a flat, stable surface.
- Page 132 Required Tools and Parts for Replacing Hardware Components on the SRX3600 Documentation Services Gateway on page 108 Replacing a Routing Engine on the SRX3600 Services Gateway on page 117 Replacing a CFM Card on the SRX3600 Services Gateway on page 120 Copyright © 2013, Juniper Networks, Inc.
-
Page 133: Replacing A Routing Engine On The Srx3600 Services Gateway
Chapter 12: Replacing Hardware Components on the SRX3600 Services Gateway Replacing an AC Power Supply on the SRX3600 Services Gateway on page 127 Replacing a Routing Engine on the SRX3600 Services Gateway The Routing Engine is located in the rear slot labeled on the services gateway. - Page 134 SRX3600 Services Gateway Hardware Guide Press both of the ejector handles inward to seat the Routing Engine. Tighten the captive screws on the left and right of the Routing Engine. Figure 51: Installing a Routing Engine Ejector levers Captive screw Reconnect cables previously attached to the AUX or USB ports.
-
Page 135: Replacing An Scm On The Srx3600 Services Gateway
Replacing the SFB on the SRX3600 Services Gateway on page 114 Replacing a CFM Card on the SRX3600 Services Gateway on page 120 Replacing an AC Power Supply on the SRX3600 Services Gateway on page 127 Replacing an SCM on the SRX3600 Services Gateway When installed, the SRX Clustering Module (SCM) is located in the rear slot labeled on the services gateway. -
Page 136: Replacing A Cfm Card On The Srx3600 Services Gateway
SRX3600 Services Gateway SRX Clustering Module on page 24 Documentation Installing an SCM in the SRX3600 Services Gateway on page 65 Replacing a CFM Card on the SRX3600 Services Gateway The most common modules for the services gateway use the CFM format:... - Page 137 Chapter 12: Replacing Hardware Components on the SRX3600 Services Gateway To replace a CFM card: Place an electrostatic bag or antistatic mat on a flat, stable surface. Attach an ESD grounding strap to your bare wrist and connect the strap to one of the ESD points on the chassis.
- Page 138 If you need to replace IOC transceivers, see “Replacing SFP, SFP+, and XFP Transceivers on the SRX3600 Services Gateway” on page 124; otherwise, continue with step 10. Carefully align the sides of the replacement CFM with the guides inside the chassis.
- Page 139 Replacing the SFB on the SRX3600 Services Gateway on page 114 Replacing a Routing Engine on the SRX3600 Services Gateway on page 117 Replacing an AC Power Supply on the SRX3600 Services Gateway on page 127 Copyright © 2013, Juniper Networks, Inc.
-
Page 140: Replacing Sfp, Sfp+, And Xfp Transceivers On The Srx3600 Services
SRX3600 Services Gateway Hardware Guide Replacing SFP, SFP+, and XFP Transceivers on the SRX3600 Services Gateway Small form-factor pluggable (SFP), enhanced small form-factor pluggable (SFP+), and 10-Gigabit SFP (XFP) are transceivers that you install in sockets in various cards or modules in the services gateway. - Page 141 Chapter 12: Replacing Hardware Components on the SRX3600 Services Gateway Label the cables connected to the transceiver so that you can reconnect them correctly later. WARNING: Do not look directly into a fiber-optic transceiver or into the end of a fiber-optic cable. Fiber-optic transceivers contain laser light sources that can damage your eyes.
-
Page 142: Replacing Power System Components On The Srx3600 Services Gateway
The following topics provide instructions on how to replace power system components: Replacing an AC Power Supply on the SRX3600 Services Gateway on page 127 Replacing AC Power Supply Cables on the SRX3600 Services Gateway on page 129... -
Page 143: Replacing An Ac Power Supply On The Srx3600 Services Gateway
Gateway NEBS and ETSI Compliance” on page 176 for more information. NOTE: The same AC power supply is used in both the SRX3400 and SRX3600 Services Gateways. However, this power supply is not interchangeable with that used in the SRX1400 Services Gateway. The SRX1400 Services Gateway power supply will fit into the SRX3600 Services Gateway, but will not work properly. - Page 144 SRX3600 Services Gateway Hardware Guide Figure 58: Removing an AC Power Supply Orient the replacement power supply so that the tab is on the right side, as shown in Figure 59 on page 128. Figure 59: Inserting an AC Power Supply Using both hands, slide the replacement power supply straight into the chassis until the power supply is fully seated in the chassis slot.
-
Page 145: Replacing Ac Power Supply Cables On The Srx3600 Services Gateway
Required Tools and Parts for Replacing Hardware Components on the SRX3600 Documentation Services Gateway on page 108 Replacing AC Power Supply Cables on the SRX3600 Services Gateway on page 129 Replacing AC Power Supply Cables on the SRX3600 Services Gateway WARNING: Before working on an AC-powered services gateway or near power supplies, unplug the power cord. - Page 146 Related Required Tools and Parts for Replacing Hardware Components on the SRX3600 Documentation Services Gateway on page 108 Replacing an AC Power Supply on the SRX3600 Services Gateway on page 127 Copyright © 2013, Juniper Networks, Inc.
-
Page 147: Replacing A Dc Power Supply On The Srx3600 Services Gateway
NOTE: The same DC power supply is used in both the SRX3400 and SRX3600 Services Gateways. However, this power supply is not interchangeable with that used in the SRX1400 Services Gateway. The SRX1400 Services Gateway power supply will fit into the SRX3600 Services Gateway, but will not work properly. - Page 148 SRX3600 Services Gateway Hardware Guide Remove the screws and washers from the terminals. Use a number-2 Phillips screwdriver to loosen and remove the screws. Remove the cable lugs from the terminals. Carefully move the power cables out of the way.
- Page 149 Chapter 12: Replacing Hardware Components on the SRX3600 Services Gateway Figure 63: Inserting a DC Power Supply Using both hands, slide the replacement power supply straight into the chassis until the power supply is fully seated in the chassis slot. Make sure the tab on the right edge of the power supply clicks into place.
-
Page 150: Replacing Dc Power Supply Cables On The Srx3600 Services Gateway
Documentation Services Gateway on page 108 Replacing DC Power Supply Cables on the SRX3600 Services Gateway on page 134 Replacing DC Power Supply Cables on the SRX3600 Services Gateway To replace a power supply cable connected to a DC power supply: Attach an ESD grounding strap to your bare wrist and connect the strap to an approved site ESD grounding point. - Page 151 LED on the power supply lights green steadily. Related Required Tools and Parts for Replacing Hardware Components on the SRX3600 Documentation Services Gateway on page 108 Replacing a DC Power Supply on the SRX3600 Services Gateway on page 131 Copyright © 2013, Juniper Networks, Inc.
- Page 152 SRX3600 Services Gateway Hardware Guide Copyright © 2013, Juniper Networks, Inc.
-
Page 153: Appendixes
SRX3600 Services Gateway Environmental Specifications on page 179 SRX3600 Services Gateway Power Guidelines, Requirements, and Specifications on page 181 Cable and Wire Guidelines for the SRX3600 Services Gateway Hardware on page 195 Contacting Customer Support and Returning the SRX3600 Services Gateway Hardware on page 201 Product Recycling on page 209 Copyright ©... - Page 154 SRX3600 Services Gateway Hardware Guide Copyright © 2013, Juniper Networks, Inc.
-
Page 155: Appendix A Safety And Regulatory Compliance Information
Equipment on page 147 SRX3600 Services Gateway Installation Safety Guidelines and Warnings on page 148 SRX3600 Services Gateway Laser and LED Safety Guidelines and Warnings on page 154 SRX3600 Services Gateway Maintenance and Operational Safety Guidelines and Warnings on page 157... - Page 156 SRX3600 Services Gateway Hardware Guide WARNING: This symbol alerts you to the risk of personal injury from a laser. WARNING: This symbol means danger. You are in a situation that could cause bodily injury. Before you work on any equipment, be aware of the hazards involved with electrical circuitry and be familiar with standard practices for preventing accidents.
-
Page 157: Srx3600 Services Gateway General Safety Guidelines And Warnings
Related SRX3600 Services Gateway General Safety Guidelines and Warnings on page 141 Documentation Preventing Electrostatic Discharge Damage to the SRX3600 Services Gateway on... -
Page 158: Additional Srx3600 Services Gateway Warnings
Avoid touching uninsulated electrical wires or terminals that have not been disconnected from their power source. Such an action could cause electrical shock. Related SRX3600 Services Gateway Definition of Safety Warning Levels on page 139 Documentation Preventing Electrostatic Discharge Damage to the SRX3600 Services Gateway on... -
Page 159: Restricted Access Area Warning
Restricted Access Area Warning on page 143 Documentation SRX3600 Services Gateway General Safety Guidelines and Warnings on page 141 SRX3600 Services Gateway Definition of Safety Warning Levels on page 139 Preventing Electrostatic Discharge Damage to the SRX3600 Services Gateway on... - Page 160 Related Qualified Personnel Warning on page 142 Documentation SRX3600 Services Gateway General Safety Guidelines and Warnings on page 141 SRX3600 Services Gateway Definition of Safety Warning Levels on page 139 Preventing Electrostatic Discharge Damage to the SRX3600 Services Gateway on...
-
Page 161: Preventing Electrostatic Discharge Damage To The Srx3600 Services
ESD strap is attached to one of the ESD points on the chassis, which are shown in Figure 65 on page 145 Figure 66 on page 146. Figure 65: ESD Point on Front of SRX3600 Services Gateway Management Ethernet port Console ports... - Page 162 Figure 67: Placing a Component into an Electrostatic Bag Related SRX3600 Services Gateway General Safety Guidelines and Warnings on page 141 Documentation SRX3600 Services Gateway Definition of Safety Warning Levels on page 139 SRX3600 Services Gateway Fire Safety Requirements and Fire Suppression Equipment on page 147 Copyright ©...
-
Page 163: Srx3600 Services Gateway Fire Safety Requirements And Fire Suppression
To keep warranties effective, do not use a dry chemical fire extinguisher to control a fire at or near a Juniper Networks services gateway. If a dry chemical fire extinguisher is used, the unit is no longer eligible for coverage under a service agreement. -
Page 164: Srx3600 Services Gateway Installation Safety Guidelines And Warnings
(CFMs). The handles can break off and cause the chassis to fall and inflict injury. Related SRX3600 Services Gateway General Safety Guidelines and Warnings on page 141 Documentation Installation Instructions Warning on page 148 Rack-Mounting Requirements and Warnings on page 149... -
Page 165: Rack-Mounting Requirements And Warnings
Varning! Läs installationsanvisningarna innan du kopplar systemet till dess strömförsörjningsenhet. Related SRX3600 Services Gateway General Safety Guidelines and Warnings on page 141 Documentation Chassis Lifting Guidelines on page 148 Rack-Mounting Requirements and Warnings on page 149... - Page 166 Les directives ci-dessous sont destinées à assurer la protection du personnel: Le rack sur lequel est monté le Juniper Networks services gateway doit être fixé à la structure du bâtiment. Si cette unité constitue la seule unité montée en casier, elle doit être placée dans le bas.
- Page 167 Le seguenti direttive vengono fornite per garantire la sicurezza personale: Il Juniper Networks services gateway deve essere installato in un telaio, il quale deve essere fissato alla struttura dell'edificio. Questa unità deve venire montata sul fondo del supporto, se si tratta dell'unica unità...
- Page 168 Para garantizar su seguridad, proceda según las siguientes instrucciones: El Juniper Networks services gateway debe instalarse en un bastidor fijado a la estructura del edificio. Colocar el equipo en la parte inferior del bastidor, cuando sea la única unidad en el mismo.
-
Page 169: Ramp Warning
Om ställningen är försedd med stabiliseringsdon skall dessa monteras fast innan enheten installeras eller underhålls på ställningen. Related SRX3600 Services Gateway General Safety Guidelines and Warnings on page 141 Documentation Chassis Lifting Guidelines on page 148 Installation Instructions Warning on page 148... -
Page 170: Srx3600 Services Gateway Laser And Led Safety Guidelines And Warnings
SRX3600 Services Gateway Hardware Guide SRX3600 Services Gateway Laser and LED Safety Guidelines and Warnings This section includes the following topics: General Laser Safety Guidelines on page 154 Class 1 Laser Product Warning on page 154 Class 1 LED Product Warning on page 155... -
Page 171: Class 1 Led Product Warning
Class 1 Laser Product Warning on page 154 Laser Beam Warning on page 155 Radiation from Open Port Apertures Warning on page 156 Laser Beam Warning WARNING: Do not stare into the laser beam or view it directly with optical instruments. Copyright © 2013, Juniper Networks, Inc. -
Page 172: Radiation From Open Port Apertures Warning
SRX3600 Services Gateway Hardware Guide Waarschuwing Niet in de straal staren of hem rechtstreeks bekijken met optische instrumenten. Varoitus Älä katso säteeseen äläkä tarkastele sitä suoraan optisen laitteen avulla. Attention Ne pas fixer le faisceau des yeux, ni l'observer directement à l'aide d'instruments optiques. -
Page 173: And Warnings
Class 1 Laser Product Warning on page 154 Class 1 LED Product Warning on page 155 Laser Beam Warning on page 155 SRX3600 Services Gateway Maintenance and Operational Safety Guidelines and Warnings This section includes the following topics: Battery Handling Warning on page 158... -
Page 174: Battery Handling Warning
SRX3600 Services Gateway Hardware Guide Battery Handling Warning WARNING: Replacing the battery incorrectly might result in an explosion. Replace the battery only with the same or equivalent type recommended by the manufacturer. Dispose of used batteries according to the manufacturer's instructions. -
Page 175: Jewelry Removal Warning
Advarsel Fjern alle smykker (inkludert ringer, halskjeder og klokker) før du skal arbeide på utstyr som er koblet til kraftledninger. Metallgjenstander som er koblet til kraftledninger og jord blir svært varme og kan forårsake alvorlige brannskader eller smelte fast til polene. Copyright © 2013, Juniper Networks, Inc. -
Page 176: Lightning Activity Warning
SRX3600 Services Gateway Hardware Guide Aviso Antes de trabalhar em equipamento que esteja ligado a linhas de corrente, retire todas as jóias que estiver a usar (incluindo anéis, fios e relógios). Os objectos metálicos aquecerão em contacto com a corrente e em contacto com a ligação à... -
Page 177: Operating Temperature Warning
104°F (40°C). To prevent airflow restriction, allow at least 6 in. (15.2 cm) of clearance around the ventilation openings. Waarschuwing Om te voorkomen dat welke services gateway van de Juniper Networks services gateway dan ook oververhit raakt, dient u deze niet te bedienen op een plaats waar de maximale aanbevolen omgevingstemperatuur van 40°C wordt overschreden. -
Page 178: Product Disposal Warning
15,2 cm à volta das aberturas de ventilação. ¡Atención! Para impedir que un encaminador de la serie Juniper Networks services gateway se recaliente, no lo haga funcionar en un área en la que se supere la temperatura ambiente máxima recomendada de 40°C. -
Page 179: Srx3600 Services Gateway Electrical Safety Guidelines And Warnings
Jewelry Removal Warning on page 159 Lightning Activity Warning on page 160 Operating Temperature Warning on page 161 SRX3600 Services Gateway Electrical Safety Guidelines and Warnings This section includes the following topics: In Case of Electrical Accident on page 163... -
Page 180: General Electrical Safety Guidelines And Warnings
SRX3600 Services Gateway Hardware Guide General Electrical Safety Guidelines and Warnings Install the services gateway in compliance with the following local, national, or international electrical codes: United States—National Fire Protection Association (NFPA 70), United States National Electrical Code Canada—Canadian Electrical Code, Part 1, CSA C22.1 Other countries—International Electromechanical Commission (IEC) 60364, Part 1... - Page 181 Avvertenza Questa unità ha più di una connessione per alimentatore elettrico; tutte le connessioni devono essere completamente rimosse per togliere l'elettricità dall'unità. Advarsel Denne enheten har mer enn én strømtilkobling. Alle tilkoblinger må kobles helt fra for å eliminere strøm fra enheten. Copyright © 2013, Juniper Networks, Inc.
- Page 182 SRX3600 Services Gateway Hardware Guide Aviso Este dispositivo possui mais do que uma conexão de fonte de alimentação de energia; para poder remover a fonte de alimentação de energia, deverão ser desconectadas todas as conexões existentes. ¡Atención! Esta unidad tiene más de una conexión de suministros de alimentación;...
- Page 183 Varning! Enheten är konstruerad för användning tillsammans med elkraftssystem av TN-typ. Copper Conductors Warning WARNING: Use copper conductors only. Waarschuwing Gebruik alleen koperen geleiders. Varoitus Käytä vain kuparijohtimia. Attention Utilisez uniquement des conducteurs en cuivre. Warnung Verwenden Sie ausschließlich Kupferleiter. Copyright © 2013, Juniper Networks, Inc.
-
Page 184: Dc Power Electrical Safety Guidelines And Warnings
In Case of Electrical Accident on page 163 Documentation DC Power Electrical Safety Guidelines and Warnings on page 168 SRX3600 Services Gateway Agency Approvals on page 174 DC Power Electrical Safety Guidelines and Warnings When working with DC-powered equipment, observe the following guidelines and... - Page 185 (OFF) et, à l'aide d'un ruban adhésif, bloquer la poignée du disjoncteur en position OFF. Copyright © 2013, Juniper Networks, Inc.
- Page 186 SRX3600 Services Gateway Hardware Guide Warnung Vor Ausführung der folgenden Vorgänge ist sicherzustellen, daß die Gleichstromschaltung keinen Strom erhält. Um sicherzustellen, daß sämtlicher Strom abgestellt ist, machen Sie auf der Schalttafel den Unterbrecher für die Gleichstromschaltung ausfindig, stellen Sie den Unterbrecher auf AUS, und kleben Sie den Schaltergriff des Unterbrechers mit Klebeband in der AUS-Stellung fest.
- Page 187 -48 V. En débranchant la puissance, l'ordre approprié de câblage est -48 V à -48 V, +RTN à +RTN, a alors rectifié pour rectifier. Notez que le fil de masse devrait toujours être relié d'abord et débranché pour la dernière fois. Notez Copyright © 2013, Juniper Networks, Inc.
- Page 188 SRX3600 Services Gateway Hardware Guide que le fil de masse devrait toujours être relié d'abord et débranché pour la dernière fois. Warnung Die Stromzufuhr ist nur mit geeigneten Ringösen an das DC Netzteil anzuschliessen. Die richtige Anschlusssequenz ist: Erdanschluss zu Erdanschluss, +RTN zu +RTN und dann -48V zu -48V.
- Page 189 Varning! När flertrådiga ledningar krävs måste godkända ledningskontakter användas, t.ex. kabelsko av sluten eller öppen typ med uppåtvänd tapp. Storleken på dessa kontakter måste vara avpassad till ledningarna och måste kunna hålla både isoleringen och ledaren fastklämda. Copyright © 2013, Juniper Networks, Inc.
-
Page 190: Srx3600 Services Gateway Agency Approvals
In Case of Electrical Accident on page 163 Documentation General Electrical Safety Guidelines and Warnings on page 164 SRX3600 Services Gateway Agency Approvals on page 174 SRX3600 Services Gateway Agency Approvals The services gateway complies with the following standards: Safety... -
Page 191: Srx3600 Services Gateway Compliance Statements For Emc Requirements
Appendix A: Safety and Regulatory Compliance Information DC Power Electrical Safety Guidelines and Warnings on page 168 SRX3600 Services Gateway Compliance Statements for EMC Requirements This section includes the following topics: Canada on page 175 European Community on page 175... -
Page 192: Srx3600 Services Gateway Nebs And Etsi Compliance
SRX3600 Services Gateway NEBS and ETSI Standards on page 176 SRX3600 Services Gateway NEBS and ETSI Configuration Requirements on page 176 SRX3600 Services Gateway NEBS and ETSI Standards The SRX3600 Services Gateway, when installed and configured as described in this section, meets the following NEBS and ETSI standards: GR-63-CORE... - Page 193 1000BASE-SX SFP optical transceiver SRX-SFP-1GE-T-ET 1000BASE-T SFP copper transceiver SRX-XFP-10GE-ER-ET 10GBASE-ER XFP optical transceiver SRX-XFP-10GE-LR-ET 10GBASE-LR XFP optical transceiver SRX-XFP-10GE-SR-ET 10GBASE-SR XFP optical transceiver SRX-SFP-10GE-ER 10GBASE-ER SFP+ optical transceiver SRX-SFP-10GE-LR 10GBASE-LR SFP+ optical transceiver Copyright © 2013, Juniper Networks, Inc.
- Page 194 SRX3600 Services Gateway Hardware Guide Copyright © 2013, Juniper Networks, Inc.
-
Page 195: Requirements
APPENDIX B SRX3600 Services Gateway Environmental Specifications This section includes the following topic: SRX3600 Services Gateway Environmental Specifications on page 179 SRX3600 Services Gateway Environmental Specifications Table 23 on page 179 specifies the environmental specifications required for normal services gateway operation. In addition, the site should be as dust-free as possible. For more information, see “Site Preparation Checklist for the SRX3600 Services Gateway”... - Page 196 Related SRX3600 Services Gateway Agency Approvals on page 174 Documentation SRX3600 Services Gateway General Safety Guidelines and Warnings on page 141 SRX3600 Services Gateway Fire Safety Requirements and Fire Suppression Equipment on page 147 SRX3600 Services Gateway Definition of Safety Warning Levels on page 139...
-
Page 197: Srx3600 Services Gateway Power Guidelines, Requirements, And Specifications
This section includes the following topics: SRX3600 Services Gateway Grounding Specifications on page 181 SRX3600 Services Gateway DC Power Specifications and Requirements on page 183 SRX3600 Services Gateway AC Power Specifications and Requirements on page 188 SRX3600 Services Gateway Grounding Specifications... -
Page 198: Srx3600 Services Gateway Grounding-Cable Lug Specification
M5 screws used to secure the grounding cable to the services gateway grounding point. Figure 69: Grounding Point on Rear of SRX3600 Services Gateway To ground the services gateway, you must connect a grounding cable to earth ground and then attach it to the chassis grounding point using the two screws provided. -
Page 199: Srx3600 Services Gateway Grounding Cable Specification
SRX3600 Services Gateway DC Power Specifications and Requirements This section includes the following topics: SRX3600 Services Gateway DC Power System Electrical Specifications on page 184 SRX3600 Services Gateway DC Power Supply Electrical Specifications on page 184 Copyright © 2013, Juniper Networks, Inc. -
Page 200: Srx3600 Services Gateway Dc Power System Electrical Specifications
44.4 A @ -48 VDC Maximum DC input power 2125 W Related SRX3600 Services Gateway DC Power Supply Electrical Specifications on page 27 Documentation Power Requirements for DC-Powered SRX3600 Services Gateways on page 185 SRX3600 Services Gateway DC Power Cable Specifications on page 186... -
Page 201: Power Requirements For Dc-Powered Srx3600 Services Gateways
Appendix C: SRX3600 Services Gateway Power Guidelines, Requirements, and Specifications Power Requirements for DC-Powered SRX3600 Services Gateways NOTE: If you plan to operate a maximally configured DC-powered services gateway, we recommend that you provision 45 A @ -48 VDC for the system. -
Page 202: Srx3600 Services Gateway Dc Power Cable Specifications
Watts DC * 3.41= BTU/hr 1825 * 3.41 = 6223 BTU/hr Related SRX3600 Services Gateway DC Power System Electrical Specifications on page 184 Documentation SRX3600 Services Gateway DC Power Supply Electrical Specifications on page 27 SRX3600 Services Gateway DC Power Cable Specifications on page 186... - Page 203 “Connecting the SRX3600 Services Gateway to a DC Power Source” on page 80. For instructions on replacing a DC power cable, see “Replacing DC Power Supply Cables on the SRX3600 Services Gateway” on page 134. Table 29 on page 188 summarizes the specifications for the power cables, which you must supply.
-
Page 204: Srx3600 Services Gateway Ac Power Specifications And Requirements
), minimum 60°C wire, or as permitted by the local code Related SRX3600 Services Gateway DC Power System Electrical Specifications on page 184 Documentation SRX3600 Services Gateway DC Power Supply Electrical Specifications on page 27 Power Requirements for DC-Powered SRX3600 Services Gateways on page 185... -
Page 205: Power Requirements For Ac-Powered Srx3600 Services Gateways
AC input current rating 12.0 A @ 100-127 V / 7 A @ 200-240 V Related SRX3600 Services Gateway AC Power System Electrical Specifications on page 188 Documentation Power Requirements for AC-Powered SRX3600 Services Gateways on page 189 SRX3600 Services Gateway AC Power Cord Specifications on page 191... - Page 206 SRX3600 Services Gateway Hardware Guide NOTE: The power requirement values shown in Table 32 on page 189 are for a lightly loaded system. For a heavily loaded system, the contribution of the base system to the overall system power requirement is lower, because the power supply efficiency improves as the load increases.
-
Page 207: Srx3600 Services Gateway Ac Power Cord Specifications
Appendix C: SRX3600 Services Gateway Power Guidelines, Requirements, and Specifications Related SRX3600 Services Gateway AC Power System Electrical Specifications on page 188 Documentation SRX3600 Services Gateway AC Power Supply Electrical Specifications on page 188 SRX3600 Services Gateway AC Power Cord Specifications on page 191... - Page 208 SRX3600 Services Gateway Hardware Guide Table 34: AC Power Cord Specifications (continued) Country Electrical Specification Plug Type Model Number North America CBL-PWR-C19S-151-US15 C19 at 70-80 mm, 15 A/125 V, 2.5 m, Straight NEMA 5-15P CBL-PWR-C19S-162-US C19 at 70-80 mm, 16 A/250 V, 2.5 m,...
- Page 209 “Replacing AC Power Supply Cables on the SRX3600 Services Gateway” on page 129. Related SRX3600 Services Gateway AC Power System Electrical Specifications on page 188 Documentation SRX3600 Services Gateway AC Power Supply Electrical Specifications on page 188 Power Requirements for AC-Powered SRX3600 Services Gateways on page 189...
- Page 210 SRX3600 Services Gateway Hardware Guide Copyright © 2013, Juniper Networks, Inc.
-
Page 211: Hardware
This section includes the following topics: Signal-Distance Limitations for the SRX3600 Services Gateway on page 195 Radio Frequency Interference for the SRX3600 Services Gateway on page 195 Electromagnetic Compatibility for the SRX3600 Services Gateway on page 196 Signal-Distance Limitations for the SRX3600 Services Gateway Improperly installed wires can emit radio interference. -
Page 212: Electromagnetic Compatibility For The Srx3600 Services Gateway
Calculating the Power Margin for Fiber-Optic Cable for the SRX3600 Services Gateway on page 198 Signal Loss in Multimode and Single-Mode Fiber-Optic Cable for the SRX3600 Services Gateway Multimode fiber is large enough in diameter to allow rays of light to reflect internally (bounce off the walls of the fiber). - Page 213 Appendix D: Cable and Wire Guidelines for the SRX3600 Services Gateway Hardware generate a single wavelength of light, which travels in a straight line through the single-mode fiber. Compared with multimode fiber, single-mode fiber has higher bandwidth and can carry signals for longer distances. It is consequently more expensive.
-
Page 214: Calculating The Power Budget For Fiber-Optic Cable For The Srx3600 Services Gateway
SRX3600 Services Gateway Hardware Guide Calculating the Power Budget for Fiber-Optic Cable for the SRX3600 Services Gateway on page 198 Calculating the Power Margin for Fiber-Optic Cable for the SRX3600 Services Gateway on page 198 Calculating the Power Budget for Fiber-Optic Cable for the SRX3600 Services Gateway... - Page 215 Appendix D: Cable and Wire Guidelines for the SRX3600 Services Gateway Hardware Table 35: Estimated Values for Factors That Cause Link Loss Link-Loss Factor Estimated Link-Loss Value Higher-order mode losses Single-mode—None Multimode—0.5 dB Modal and chromatic dispersion Single-mode—None Multimode—None, if product of bandwidth and distance is less than 500 MHz–km...
-
Page 216: Gateway
Related Signal Loss in Multimode and Single-Mode Fiber-Optic Cable for the SRX3600 Services Documentation Gateway on page 196 Attenuation and Dispersion in Fiber-Optic Cable for the SRX3600 Services Gateway... -
Page 217: Contacting Customer Support And Returning The Srx3600 Services
Contacting Customer Support to Obtain Return Materials Authorization for the SRX3600 Services Gateway on page 205 Packing an SRX3600 Services Gateway or a Component for Shipment on page 206 Return Procedure for the SRX3600 Services Gateway If a problem cannot be resolved by the JTAC technician, a Return Materials Authorization (RMA) is issued. -
Page 218: Locating Srx3600 Services Gateway Component Serial Numbers
202 Locating the SRX3600 Services Gateway Chassis Serial Number Label on page 203 Locating the SRX3600 Services Gateway Power Supply Serial Number Label on page 204 Locating the SRX3600 Services Gateway Routing Engine Serial Number Label Locating the SRX3600 Services Gateway SFB Serial Number Label on page 204... -
Page 219: Locating The Srx3600 Services Gateway Chassis Serial Number Label
Documentation Locating the SRX3600 Services Gateway Chassis Serial Number Label on page 203 Locating the SRX3600 Services Gateway Power Supply Serial Number Label on page 204 Locating the SRX3600 Services Gateway SFB Serial Number Label on page 204 Locating the SRX3600 Services Gateway Chassis Serial Number Label... -
Page 220: Locating The Srx3600 Services Gateway Sfb Serial Number Label
Related Return Procedure for the SRX3600 Services Gateway on page 201 Documentation Listing the SRX3600 Services Gateway Component Serial Numbers with the CLI on page 202 Locating the SRX3600 Services Gateway SFB Serial Number Label The serial number is located on the right side of the top of the SFB (see Figure 74 on page 204). -
Page 221: Contacting Customer Support To Obtain Return Materials Authorization For The Srx3600 Services Gateway
Appendix E: Contacting Customer Support and Returning the SRX3600 Services Gateway Hardware Figure 75: AC Power Supply Serial Number Label Serial number label Related Return Procedure for the SRX3600 Services Gateway on page 201 Documentation Listing the SRX3600 Services Gateway Component Serial Numbers with the CLI on... -
Page 222: Packing An Srx3600 Services Gateway Or A Component For Shipment
Packing an SRX3600 Services Gateway or a Component for Shipment This section includes the following topics: Required Tools and Parts for Packing the SRX3600 Services Gateway on page 206 Packing the SRX3600 Services Gateway for Shipment on page 207 Packing SRX3600 Services Gateway Components for Shipment on page 207... -
Page 223: Packing The Srx3600 Services Gateway For Shipment
Return Procedure for the SRX3600 Services Gateway on page 201 Documentation Required Tools and Parts for Packing the SRX3600 Services Gateway on page 206 Packing SRX3600 Services Gateway Components for Shipment on page 207 Preventing Electrostatic Discharge Damage to the SRX3600 Services Gateway on... - Page 224 Return Procedure for the SRX3600 Services Gateway on page 201 Documentation Required Tools and Parts for Packing the SRX3600 Services Gateway on page 206 Packing the SRX3600 Services Gateway for Shipment on page 207 Copyright © 2013, Juniper Networks, Inc.
-
Page 225: Appendix F Product Recycling
APPENDIX F Product Recycling Removing the Battery from the Routing Engine of an SRX3600 Services Gateway for Recycling on page 209 Removing the Battery from the Routing Engine of an SRX3600 Services Gateway for Recycling The Routing Engine installed in the services gateway contains a CR2032 .3.0-volt lithium battery. - Page 226 Figure 76: Location of CR2032 Battery in a Routing Engine Battery Related Powering Off the SRX3600 Services Gateway on page 82 Documentation Replacing a Routing Engine on the SRX3600 Services Gateway on page 117 Copyright © 2013, Juniper Networks, Inc.
-
Page 227: Index
PART 5 Index Index on page 213 Copyright © 2013, Juniper Networks, Inc. - Page 228 SRX3600 Services Gateway Hardware Guide Copyright © 2013, Juniper Networks, Inc.
-
Page 229: Index
EMC requirements specifications............200 Canada................175 European Community..........175 Japan.................175 battery-handling warning..........158 United States..............176 braces, in configuration statements........xiii components brackets field replacement............107 angle, in syntax descriptions........xii components, packing for shipment......207 square, in configuration statements.......xiii configuration services gateway............85 Copyright © 2013, Juniper Networks, Inc. - Page 230 SRX3600 Services Gateway Hardware Guide console port (for Routing Engine management) environmental specifications...........179 cable connection during initial installation....72 preventing damage to components by....145 specifications............200 Ethernet port (for Routing Engine management) conventions cable notice icons................xi connection during initial installation....72 text and syntax..............xii...
- Page 231 DC power and grounding cables.....186 powering off the services gateway........82 powering on the services gateway........82 maintaining product disposal warning..........162 filter................94 tray................94 qualified personnel warning..........142 host subsystem..............95 power supplies..............97 modal dispersion in fiber-optic cable......197 mode loss, higher-order.............196 Copyright © 2013, Juniper Networks, Inc.
- Page 232 SRX3600 Services Gateway Hardware Guide packing for shipment..........207 rack parts list................44 clearance around, required.........38 returning................201 mounting bracket hole spacing........37 unpacking................41 securing to building............38 sevices offload mode size and strength required..........36 IOC slot resrictions............22 standards, EIA and ETSI..........36 rack requirements maintaining..............95 mounting.................149...
- Page 233 1 laser..............154 class 1 LED...............155 electrical safety guidelines........164 installation instructions..........148 jewelry removal.............159 laser beam..............155 lightning activity............160 operating temperature..........161 product disposal............162 rack-mount requirements.........149 radiation from open apertures........156 wavelength ranges supported by fiber-optic cable..................196 Copyright © 2013, Juniper Networks, Inc.
- Page 234 SRX3600 Services Gateway Hardware Guide Copyright © 2013, Juniper Networks, Inc.
Need help?
Do you have a question about the SRX3600 and is the answer not in the manual?
Questions and answers