Table of Contents
Advertisement
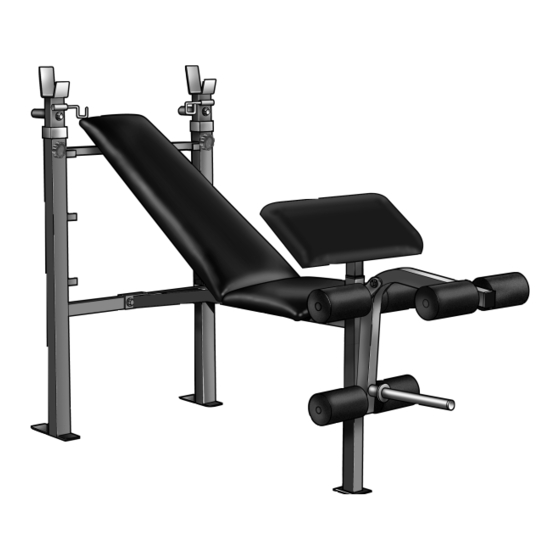
Model No. WECCBE04500
Serial No.
Write the serial number in the
space above for reference.
Serial Number
Decal
QUESTIONS?
As a manufacturer, we are com-
mitted to providing complete
customer satisfaction. If you
have questions, or if there are
missing parts, we will guarantee
complete satisfaction through
direct assistance from our factory.
TO AVOID UNNECESSARY
DELAYS, PLEASE CALL DIRECT
TO OUR TOLL-FREE CUSTOMER
HOT LINE. The trained techni-
cians on our customer hot line
will provide immediate assis-
tance, free of charge to you.
CUSTOMER HOT LINE:
1-888-936-4266
Mon.–Fri., 8 a.m.–6:30 p.m. EST
(excluding holidays)
CAUTION
Read all precautions and instruc-
tions in this manual before
using this equipment. Save this
manual for future reference.
USER'S MANUAL
www.weiderfitness.com
new products, prizes,
fitness tips, and much more!
Visit our website at
Advertisement
Table of Contents

Related Manuals for Weider 146 Bench


Summary of Contents for Weider 146 Bench
- Page 1 Model No. WECCBE04500 Serial No. Write the serial number in the space above for reference. USER’S MANUAL Serial Number Decal QUESTIONS? As a manufacturer, we are com- mitted to providing complete customer satisfaction. If you have questions, or if there are missing parts, we will guarantee complete satisfaction through direct assistance from our factory.
-
Page 2: Table Of Contents
• Read user’s manual and follow all warnings and operating instructions prior to use. • Do not allow children on or around machine. • Replace label if damaged, illegible, or removed. WEIDER is a registered trademark of ICON Health & Fitness, Inc. -
Page 3: Important Precautions
Important Precautions WARNING: To reduce the risk of serious injury, read the following important precautions before using the weight bench. 1. Read all instructions in this manual before 11. Keep hands and feet away from moving parts. using the weight bench. 12. -
Page 4: Before You Begin
Before You Begin Department at 1-888-936-4266, Monday through Thank you for selecting the versatile WEIDER ® weight bench. The WEIDER ® 146 is designed to be Friday, 8 a.m. until 6:30 p.m. EST (excluding holidays). used with your own weight set (not included) to devel- To help us assist you, please note the product model op every major muscle group of the body. -
Page 5: Part Identification Chart
Part Identification Chart R0402A M10 x 130mm Bolt (9) —1 M10 x 70mm Bolt (26)—5 11mm x 10.5mm Spacer (38)–2 M8 x 60mm Bolt (37)—2 M8 Washer (20)—18 M8 x 55mm Bolt (27)—2 M8 x 51mm Bolt (39)—1 M10 Washer (22)—4 M8 x 40mm Screw (25)—8 M8 Nylon Locknut (33)—7 M8 x 16mm Screw (23)—3... -
Page 6: Assembly
Assembly Before beginning assembly, carefully read the • For help identifying the small parts, use the PART following information and instructions: IDENTIFICATION CHART on page 5. • As you assemble the weight bench, make sure all Make Things Easier for Yourself! parts are oriented as shown in the drawings. - Page 7 3. Attach the Frame (2) to the Crossbar (3) with two M8 x 55mm Bolts (27) and two M8 Nylon Locknuts (33). 4. Attach a Dip Handle (24) to one of the Weight Rests (19) with an M8 x 60mm Bolt (37), an 11mm x 10.5mm Spacer (38), two M8 Washers (20), and an M8 Nylon Locknut (33).
- Page 8 7. Lubricate the M10 x 70mm Bolt (26). Attach the Leg Lever (4) to the bracket (C) on the Front Leg (8) with the Bolt, two M10 Washers (22) and an M10 Nylon Locknut (21). Do not tighten the Nylon Locknut; the Leg Lever must be easy to turn.
-
Page 9: Adjusting The Weight Bench
11. Press a 25.4mm Square Inner Cap (13) into each end of the seat support brackets on the Frame (2). Attach the Seat (11) to the seat support brackets on the Frame (2) with four M8 x 40mm Screws (25) and four M8 Washers (20). -
Page 10: Adjusting The Weight Rests/Dip Handles
ADJUSTING THE WEIGHT RESTS/DIP HANDLES To adjust the Weight Rests (19), remove the Large Threaded Knobs (32) from the Uprights (1, 16). Move the Weight Rests to the desired height and replace the Large Threaded Knobs. WARNING: The weight rests must be set at the same height. -
Page 11: Exercise Guidelines
USING THE BARBELL HOOKS To change weights while your barbell (not included) is on the Weight Rests (19), secure the barbell with the Barbell Hooks (28, 30). To do this, flip the Barbell Hooks over the barbell. This will reduce the possibility of the barbell tip- ping while you are changing weights. -
Page 12: Working Out
WORKING OUT The repetitions in each set should be performed smoothly and without pausing. The exertion stage of Each workout should include 6 to 10 different exercis- each repetition should last about half as long as the es. Select exercises for every major muscle group return stage. -
Page 13: Part List
Part List - Model No. WECCBE04500 R0803A Key No. Qty. Description Key No. Qty. Description Right Upright M8 x 16mm Screw Frame Dip Handle Crossbar M8 x 40mm Screw Leg Lever M10 x 70mm Bolt Backrest Tube M8 x 55mm Bolt Backrest Right Barbell Hook Support Tube... -
Page 14: Exploded Drawing
Exploded Drawing—Model No. WECCBE04500 R0803A... -
Page 15: Ordering Replacement Parts
Friday, 8 a.m. until 6:30 p.m. EST (excluding holidays). When ordering parts, please be prepared to give the fol- lowing information: • The MODEL NUMBER of the product (WECCBE04500) • The NAME of the product (WEIDER ® 146 weight bench) •... -
Page 16: Limited Warranty
Limited Warranty ICON Health & Fitness, Inc. (ICON), warrants this product to be free from defects in workmanship and mate- rial, under normal use and service conditions, for a period of one (1) year from the date of purchase. This war- ranty extends only to the original purchaser.
Need help?
Do you have a question about the 146 Bench and is the answer not in the manual?
Questions and answers