
Related Manuals for Caple C854I


Summary of Contents for Caple C854I
- Page 1 Instruction manual for induction hob Contact Caple on 0844 800 3830 or for spare parts www.4caple.co.uk...
-
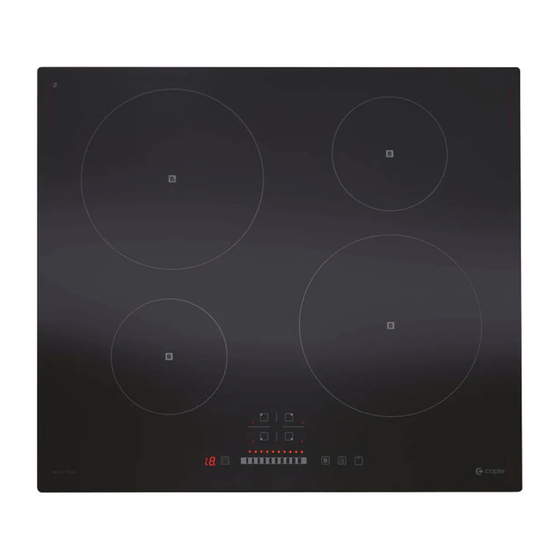
Page 2: Product Overview
Congratulations on the purchase of your new Induction Hob. We recommend that you spend some time reading this Instruction / Installation Manual in order to fully understand how to instal and operate it correctly For installation, please read the installation section. Read all the safety instructions carefully before use and keep this Instruction / Installation Manual for future reference. -
Page 3: A Word On Induction Cooking
A Word on Induction Cooking Induction cooking is a safe, advanced, efficient, and economical cooking technology. It works by electromagnetic vibrations generating heat directly in the pan, rather than indirectly through heating the glass surface. The glass becomes hot only because the pan eventually warms it up. iron pot magnetic circuit ceramic glass plate... -
Page 4: Choosing The Right Cookware
Choosing the right Cookware • Only use cookware with a base suitable for induction cooking. Look for the induction symbol on the packaging or on the bottom of the pan. • You can check whether your cookware is suitable by carrying out a magnet test. -
Page 5: Using Your Induction Hob
Using your Induction Hob To start cooking 1. Touch the ON/OFF control. After power on, the buzzer beeps once, all displays show “ – “ or “ – – “, indicating that the induction hob has entered the state of standby mode. 2. -
Page 6: If The Display Flashes
If the display flashes alternately with the heat setting • you have not placed a pan on the correct cooking zone or, • the pan you’re using is not suitable for induction cooking or, • the pan is too small or not properly centered on the cooking zone. No heating takes place unless there is a suitable pan on the cooking zone. -
Page 7: Using The Boost Function
energy saving function if you want to heat further pans, use the hotplate that is still hot. Using the Boost function Actived the boost function 1. Touching the heating zone selection control 2. Touching the boost control ,the zone indicator show “b” and the power reach Max. -
Page 8: Locking The Controls
• The function can work in any cooking zone • The cooking zone returns to its original setting after 5 minutes. • If the original heat setting equals 0, it will return to 9 after 5 minutes. Locking the Controls •... -
Page 9: Using The Timer As A Minute Minder
working times for various power levels are shown in the below table: . Power level Default working timer (hour) When the pot is removed, the induction hob can stop heating immediately and the hob automatically switch off after 2 minutes. People with a heart pace maker should consult with their doctor before using this unit. -
Page 10: Setting The Timer To Turn One Or More Cooking Zones Off
4. Touch timer control again, the “1” will flash. 5. set the time by touching the slider control (e.g.9), now the timer you set is 95 minutes. 6. When the time is set, it will begin to count down immediately. The display will show the remaining time 7. - Page 11 3. Set the time by touching the slider control. (e.g. 5) 4. Touch timer control again, the “1” will flash. 5. set the time by touching the slider control (e.g.9), now the timer you set is 95 minutes. 6. When the time is set, it will begin to count down immediately. The display will show the remaining time NOTE: The red dot next to power level indicator will illuminate indicating that zone is selected.
-
Page 12: Cooking Guidelines
(set to 15 minutes) (set to 45 minutes) 2. Once the countdown timer expires, the corresponding zone will switch off. Then it will show the new min. timer and the dot of corresponding zone will flash. • Touch the heating zone selection control, the corresponding timer will be shown in the timer indicator. -
Page 13: Cooking Tips
Cooking Tips • When food comes to the boil, reduce the temperature setting. • Using a lid will reduce cooking times and save energy by retaining the heat. • Minimise the amount of liquid or fat to reduce cooking times. •... -
Page 14: Heat Setting
Heat Settings The settings below are guidelines only. The exact setting will depend on several factors, including your cookware and the amount you are cooking. Experiment with the induction hob to find the settings that best suit you. Heat setting Suitability •... -
Page 15: Hints And Tips
Boilovers, melts, Remove these immediately • Remove stains left by melts and with a fish slice, palette knife or sugary food or spillovers as soon hot sugary spills on razor blade scraper suitable for as possible. If left to cool on the the glass Induction glass cooktops, but glass, they may be difficult to... -
Page 16: Failure Display And Inspection
The touch controls are There may be a slight film of Make sure the touch control area is difficult to operate. water over the controls or you dry and use the ball of your finger may be using the tip of your when touching the controls. -
Page 17: Technical Specification
The above are the judgment and inspection of common failures. Please do not disassemble the unit by yourself to avoid any dangers and damages to the induction hob. Technical Specification Cooking Hob C854I Cooking Zones 4 Zones Supply Voltage 220-240V~... - Page 18 L(mm) W(mm) H(mm) D(mm) A(mm) B(mm) X(mm) 56.5 52.5 50 mini Under any circumstances, make sure the Induction cooker hob is well ventilated and the air inlet and outlet are not blocked. Ensure the Induction cooker hob is in good work state. As shown below Note: The safety distance between the hotplate and the cupboard above the hotplate should be at least 760mm.
-
Page 19: Before Locating The Fixing Brackets
• the work surface is made of a heat-resistant material • if the hob is installed above an oven, the oven has a built-in cooling fan • the installation will comply with all clearance requirements and applicable standards and regulations •... -
Page 20: Connecting The Hob To The Mains Power Supply
Cautions 1. The induction hotplate must be installed by qualified personnel or technicians. We have professionals at your service. Please never conduct the operation by yourself. 2. The hob will not be installed directly above a dishwasher, fridge, freezer, washing machine or clothes dryer, as the humidity may damage the hob electronics 3. -
Page 21: Safety Warnings
the by after-sale agent with dedicated tools to avoid any accidents. • If the appliance is being connected directly to the mains an omnipolar circuit-breaker must be installed with a minimum opening of 3mm between contacts. • The installer must ensure that the correct electrical connection has been made and that it is compliant with safety regulations. -
Page 22: Health Hazard
• Do not cook on a broken or cracked cooktop. If the cooktop surface should break or crack, switch the appliance off immediately at the mains power supply (wall switch) and contact a qualified technician. • Switch the cooktop off at the wall before cleaning or maintenance. •... - Page 23 • Do not place or drop heavy objects on your cooktop. • Do not stand on your cooktop. • Do not use pans with jagged edges or drag pans across the Induction glass surface as this can scratch the glass. •...