Table of Contents
Advertisement
Advertisement
Table of Contents

Related Manuals for Indesit KD6E35W


Summary of Contents for Indesit KD6E35W
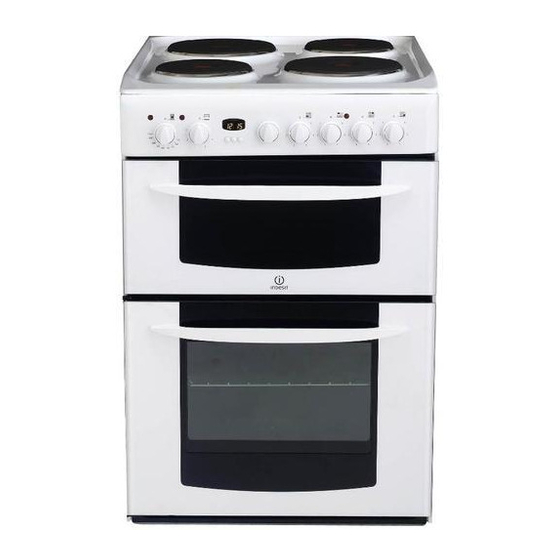
- Page 1 Free Standing Electric Cooker Instructions for installation and use KD6E35...
-
Page 2: Table Of Contents
Contents Introduction Installation Safety Information Features Control Panel Clock/Minute Minder Operation Temperature Conversion Chart Sealed Hob Grill Pan and Handle Grill Guide to Grilling Top Oven Cookery Notes Main Oven Cookery Notes Oven Temperature charts Care and Cleaning Cooking Results Not Satisfactory? Something Wrong With Your Cooker? If it Still Won’t Work... -
Page 3: Introduction
Introduction Your new appliance is guaranteed* and will give lasting service. This guarantee is only applicable if the appliance has been installed in accordance with the installation instructions detailed in this booklet. To help make best use of your cooking equipment, please read this booklet carefully. The cooker is designed specifically for domestic use and responsibility will not be accepted for use in any other installation. -
Page 4: Installation
Installation WARNING – THIS APPLIANCE MUST BE EARTHED. MAINS CONNECTION UK Household: Your cooker should have been checked to ensure that the voltage corresponds with your supply voltage, this is stated on the rating plate, which is situated on the outer rear panel.The model number and the serial number are located on the front of the cooker, as shown on the Features page. - Page 5 Installation NOTE: The rear of your cooker needs to be a required distance away from the wall.The two buffers at the rear of the Hob determine this distance. Splashback A splashback is also supplied, to prevent food from falling down the back of your cooker. To fit: Remove the two buffers from the rear of the hob - retain to one side.
-
Page 6: Safety Information
Safety Information When used properly your appliance is completely safe but as with any electrical product there are certain precautions that must be observed. PLEASE READ THE PRECAUTIONS BELOW BEFORE USING YOUR APPLIANCE. Always Remove all packing from the appliance before switching on for the first time. Understand the controls prior to using the appliance. - Page 7 Safety Information Never Never stare at Halogen heating units Never leave children unsupervised where a cooking appliance is installed as all surfaces will be hot during and after its use. Never allow anyone to sit or stand on any part of the appliance. Never store items above the appliance that children may attempt to reach.
-
Page 8: Features
Features 2000W Red Spot Clock/Minute Minder Conventional Grill Grill pan with fixed/detachable handle Top oven wirework shelf supports and Serial number Inner glass panel 2000W Red Spot 2000W Sealed Model number Fan blade label Splash Back 1500W Red Spot Control panel Grill pan food support Top oven/grill rod shelf... -
Page 9: Control Panel
Control Panel Main oven Top oven neon neon Clock / Minute Minder Main oven oven Operating In common with all cookers having controls sited above the grill controls when the compartment, care must be taken when setting the controls, due grill is in use to the hot air expelled from the grill compartment. -
Page 10: Clock Operation
Clock/Minute Minder CLOCK OPERATION 00.00 12.00 To set the Time of Day: Step 1 Check that the electricity supply to the cooker is turned on. Step 2 When switched on, the display will show 0.00 flashing intermittently. Step 3 Press the “ “... -
Page 11: Minute Minder Operation
Clock/Minute Minder MINUTE MINDER OPERATION 00.20 13.23 The minute minder can be cancelled before the bleeper sounds by pressing the ‘+’ and ‘-’ buttons together until 0.00 appears in the display window. Bleeper sound To adjust the pitch of the bleeper, press the ‘-’ button while the bleeper is sounding. -
Page 12: Temperature Conversion Chart
Temperature Conversion Chart Mark The recommended temperatures given are for conventional and fan Temperatures ovens. When using a fan oven it will be necessary to reduce the cooking time by 10 minutes per hour and lower the temperature by up to 20˚C. Also, in the majority of cases, it is not necessary to pre-heat the oven. -
Page 13: Sealed Hob
Sealed Hob USE OF HOTPLATES Under no circumstances should the hob be used with aluminium foil in contact with the hob surface. Turn the control to 6 for fast cooking. To cook more slowly or simmer, turn the control to a lower setting according to the size of the saucepan and the amount of liquid.The small Hotplate is specially for smaller pans, low temperature cooking and simmering. - Page 14 Sealed Hob General Information CHOICE OF UTENSILS Every Electric Hob deserves the right choice of utensils. We recommend for optimum performance the use of good quality utensils. PANS SHOULD NOT Be concave (bowed in) Be convex (bowed out) Be rimmed Be deeply ridged But essentially Flat Always...
-
Page 15: Grill Pan And Handle
Grill Pan and Handle Grill pan handle The grill pan handle is detachable from the pan, to facilitate cleaning and storage. The handle can be either detachable from or fixed to the pan. For a fixed handle remove the screw and washers from the grill pan bracket, tilt the handle over the recess adjacent to the bracket (A), slide it towards the centre of the pan (B) and let the handle locate over the bracket (C). -
Page 16: Grill
Grill Setting the Grill Door in grilling position CAUTION - ACCESSIBLE PARTS MAY BECOME HOT WHEN THE GRILL IS IN USE. CHILDREN SHOULD BE KEPT AWAY. GRILLING SHOULD NEVER BE UNDERTAKEN WITH THE DOOR CLOSED. The grill control is designed to provide variable heat control of either the twin grill elements on together or the single left hand grill element only, depending upon which direction the control knob is rotated. -
Page 17: Guide To Grilling
Guide To Grilling Pre - heat the grill for 5 minutes on maximum control setting before grilling GRILL CHART Food Toasting of Bread products 4 / Max for 4 mins. Small cuts of meat, reduce to lower sausages, bacon, etc. 4 / Max for 6-8 mins. -
Page 18: Top Oven Cookery Notes
Top Oven Cookery Notes The top oven should be used to cook small quantities of food. The oven is designed so that the grill element operates at a reduced heat output, this is combined with a heating element situated underneath the floor of the oven. -
Page 19: Main Oven Cookery Notes
Main Oven Cookery Notes The oven is fitted with wirework shelf supports and two rod shelves. To heat the oven turn the knob clockwise, selecting the require temperature between 80°C (176°F) and 230°C (450°F) as recommended in the temperature chart. The pilot light will immediately come on and remain on until the oven reaches the required temperature. - Page 21 Note: If soft margarine is used for cake making, temperatures recommended by the manufacturers should be followed. Temperatures recommended in this chart refer to cakes made with block margarines or butter only.
-
Page 22: Care And Cleaning
Care and Cleaning TURN OFF THE MAIN SWITCH AND ENSURE THE COOKER IS COLD BEFORE CLEANING. BEFORE SWITCHING ON AGAIN, ENSURE THAT ALL CONTROLS ARE IN THE OFF POSITION. NEVER USE BIOLOGICAL WASHING POWDER, HARSH ABRASIVES, SCOURING PADS, AEROSOL CLEANERS OR OVEN CHEMICAL CLEANERS OF ANY KIND, Cleaning materials to avoid: 1. - Page 23 Care and Cleaning Oven shelf supports The shelf supports are removable and dishwasher safe. To remove hold the support at the front and pull away from the oven side, this can then be cleaned in a sink or a dishwasher. When removed it allows access to the oven side, which can be cleaned with warm soapy water.
-
Page 24: Main Oven
Care and Cleaning Grill: Remove the grill pan and the wire grid food support, it is best to wash these items immediately after each use to prevent stains from being burnt on when used again. Wipe out the Grill compartment, use a fine steel wool soap pad to remove stubborn stains from the compartment. -
Page 25: Cleaning The Doors
Care and Cleaning Take particular care not to damage the inner surface of the door inner glass that is coated with a heat reflective layer. Do not use scouring pads, or abrasive powder, which will scratch the glass. Ensure that the glass panel is not subjected to any sharp mechanical blows. -
Page 26: Cooking Results Not Satisfactory
Cooking Results Not Satisfactory? Problem Grilling Uneven cooking front to back Fat splattering Baking (General) Uneven rising of cakes Sinking of cakes Over/Under cooking Fast/Slow cooking Uneven cooking of cakes Oven does not cook evenly Top Oven Baking Uneven cooking front to back Uneven rising of cakes... -
Page 27: Something Wrong With Your Cooker
Something Wrong with your Cooker? Before contacting your nearest Service Centre/Installer, check the problem guide below; there may be nothing wrong with your cooker. Problem Slight odour or small amount of smoke when grill / oven used for first time Nothing works Grill / Top Oven do not work - Main oven works... - Page 28 Notes...
- Page 29 Notes...
- Page 30 Notes...
-
Page 31: If It Still Won't Work
If It Still Won’t Work... Contact the Service Office ( If something is still wrong with your appliance after you have been through the ‘Something Wrong’ list: 1. Switch off and unplug the appliance from the mains. 2. Call your nearest Service Office or local importer. When you contact us we will want to know the following: 1. -
Page 32: Key Contacts
Repair Service and Information Help Desk Note: Our operators will require the following information: Indesit Company UK Limited, Morley Way, Peterborough, PE2 9JB PRINTED BY SIMLEX . FOUR ASHES, WOLVERHAMPTON. Key Contacts...
Need help?
Do you have a question about the KD6E35W and is the answer not in the manual?
Questions and answers