Table of Contents
Advertisement
Operating Instructions
GB
English, 1
ID60C2 S
ID60C2 AA
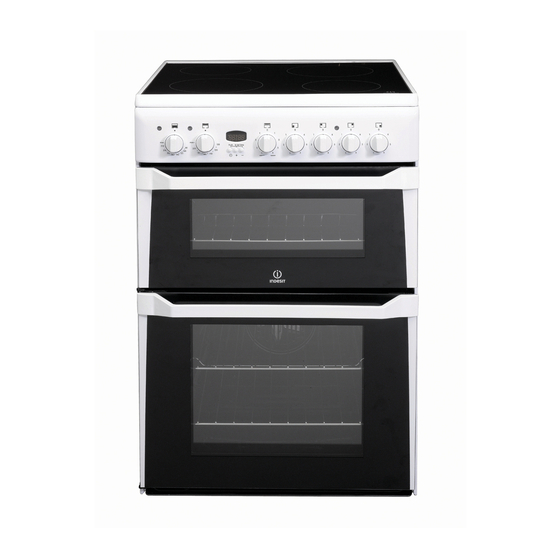
Free Standing Electric Cooker
Contents
Introduction, 2
Installation, 3
Features, 6
Ceramic Hob, 11-12
Grill, 13
Oven Temperature charts, 17-18
Care and Cleaning, 19-20
If it Still Won't Work..., 23
You must read these instructions prior to using
your appliance and retain them for future use.
GB
Advertisement
Table of Contents

Related Manuals for Indesit ID60C2 AA


Summary of Contents for Indesit ID60C2 AA
-
Page 1: Table Of Contents
Temperature Conversion Chart, 10 Ceramic Hob, 11-12 Grill, 13 ID60C2 S Guide to Grilling, 14 ID60C2 AA Top Oven Cookery Notes , 15 Main Oven Cookery Notes, 16 Oven Temperature charts, 17-18 Care and Cleaning, 19-20 Cooking Results Not Satisfactory?, 21 Something Wrong With Your Cooker?, 22 If it Still Won't Work..., 23... -
Page 2: Introduction
Introduction Your new appliance is guaranteed* and will give Technical Characteristics lasting service.This guarantee is only applicable if the appliance has been installed in accordance with the installation instructions detailed in this booklet. To help make best use of your cooking equipment, Top Oven please read this booklet carefully. -
Page 3: Installation
Installation Black/Blue (N), Red/Brown (L) and Bare Wire/Yellow- WARNING - THIS APPLIANCE MUST BE EARTHED. Green ( Mains Connection Once the connections have been made, tighten all Your cooker should have been checked to ensure the terminal screws fully. that the voltage corresponds with your supply Fasten the supply cable in place with the clamp voltage, this is stated on the rating plate, which is... -
Page 4: Safety Information
Safety Information WARNING: The appliance and its The internal surfaces of the accessible parts become hot compartment (where present) may during use. become hot. Care should be taken to avoid Never use steam cleaners or touching heating elements. pressure cleaners on the appliance. Children less than 8 years of age Remove any liquid from the lid shall be kept away unless... - Page 5 Safety Information Never When used properly your appliance is completely • Never stare at Halogen heating units safe but as with any electrical product there are • Never leave children unsupervised where a cooking certain precautions that must be observed. appliance is installed as all surfaces will be hot PLEASE READ THE PRECAUTIONS BELOW during and after its use.
-
Page 6: Features
Features 1200W Ceramic 1800W Ceramic 1800W Ceramic 1200W Ceramic Clock/Minute Minder Control panel Model number Conventional and Serial number label Grill Grill pan food support Grill pan with Top oven/grill rod fixed/detachable shelf handle Top oven wirework shelf supports Main oven wirework shelf supports Fan blade... -
Page 7: Control Panel
Control Panel Hob hot neon Main oven neon Top oven neon Clock / Minute Minder Main Right Right Grill Left Left oven oven Rear Front Front Rear Operating controls when the grill is in use Oven light In common with all cookers having controls sited The oven light will illuminate when the main oven above the grill compartment, care must be taken thermostat is operated. - Page 8 Clock and Minute Minder CLOCK OPERATION To Set Time of Day 00.00 Step 1 Check that the electricity supply to the cooker is turned on. Step 2 When switched on the display will show 0.00 flashing intermittently. Step 3 Press the " "...
-
Page 9: Clock/Minute Minder Operation
Clock and Minute Minder MINUTE MINDER OPERATION 00 . 20 To Set the Minute Minder Step 1 Press the "+" button until the required time is set. A "Bell" symbol will light up. During setting the time adjusts in 10 second intervals up to a maximum of 99mins 50secs. -
Page 10: Temperature Conversion Chart
Temperature Conversion Chart Condensation Condensation may become evident on the inner door Main and water may drip through the vent. This is normal Main Fan °F Conventional when heat and moisture are present and may be a Mark Oven Oven result of any of the following: 1. -
Page 11: Ceramic Hob
Ceramic Hob WARNING: DO NOT USE THE HOB IF IT IS CRACKED. TO AVOID ELECTRIC SHOCK - SWITCH OFF AT THE COOKER MAINS CONTROL SWITCH IMMEDIATELY AND CONTACT YOUR NEAREST SERVICE OFFICE (see KEY CONTACTS, back page). R ating s of C o okin g Zon es Mo del Fro nt L eft F ro nt R igh t... -
Page 12: Ceramic Hob
Care of the Ceramic Hob heating or cooking period. 4. Do not try to fry too much food at a time, especially frozen food. This only lowers the A l w a y s A l w a y s A l w a y s ensure that the bottom of the pan is both temperature of the oil or fat too much, resulting in A l w a y s... -
Page 13: Grill
Grill Setting the Grill Door in grilling position CAUTION - ACCESSIBLE PARTS MAY BECOME HOT WHEN THE GRILL IS IN USE. CHILDREN SHOULD BE KEPT AWAY. GRILLING SHOULD NEVER BE UNDERTAKEN WITH THE DOOR CLOSED. The grill control is designed to provide variable heat control of either the twin grill elements on together or the single left hand grill element only, depending upon which direction the control knob is rotated. -
Page 14: Guide To Grilling
Guide To Grilling Pre - heat the grill for 5 minutes on maximum control setting before grilling. GRILL CHART Food Grill Setting Approximate Cooking Time Toasting of Bread 4 / Max 3 - 10 mins. products Small cuts of meat, 4 / Max for 4 mins. -
Page 15: Top Oven Cookery Notes
Top Oven Cookery Notes The top oven should be used to cook small Operation quantities of food.The oven is designed so that the To heat the oven, turn the control knob grill element operates at a reduced heat output, this clockwise.The top oven pilot light will come on and is combined with a heating element situated remain on until the oven reaches the required... -
Page 16: Main Oven Cookery Notes
Main Oven Cookery Notes The oven is fitted with wirework shelf supports and Oven positions two rod shelves. Since the distribution of heat in the circulaire fan oven is very even, most foods will cook satisfactorily To heat the oven turn the knob clockwise, selecting on any shelf position, but the shelves should be the require temperature between 80°C (176°F) and evenly spaced. -
Page 17: Oven Temperature Charts
Oven Temperature Charts - Meat Top Oven Cooking (KD6C35 and KDP60 only) Meat Pre-heat Temperature °C Time (approx.) Position in Oven Beef/ Lamb 170/180 35 mins per 450g (1lb) + 35 mins over. (slow roasting) Beef/ Lamb 190/200 35-40 mins per 450g (1lb) (foil covered) Pork 170/180... -
Page 18: Oven Temperature Charts
Oven Temperature Charts - Baking Top Oven Cooking (KD6C35 and KDP60 only) Baking Pre-heat Temperature °C Time in mins. Position in Oven Scones 210/220 10-15 Runner 2 from bottom of oven Small Cakes 180/190 20-25 Runner 2 from bottom of oven Victoria Sandwich 170/180 20-30... -
Page 19: Care And Cleaning
Care and Cleaning removed with a clean wet cloth, (even if the TURN OFF THE MAIN SWITCH AND ENSURE THE instructions for use suggest otherwise), as they can COOKER IS COLD BEFORE CLEANING. have an etching effect when reheated. Then wipe dry. BEFORE SWITCHING ON AGAIN, ENSURE THAT To maintain hob in good condition, we would ALL CONTROLS ARE IN THE OFF POSITION. - Page 20 Care and Cleaning Wall-mounted splash panel: Control Panel: A wall-mounted splash panel is available as an Wipe with a damp cloth and polish with a dry cloth. optional extra from our Parts Department (see Key Contacts, back page). Stainless trims Care must be taken that rating label edges are not Regularly wipe with a clean, damp cloth and polish lifted during cleaning and furthermore that the...
-
Page 21: Cooking Results Not Satisfactory
Cooking Results Not Satisfactory? Problem Check E nsure th at the g rill p an is p ositioned ce ntrally b elow Grilling U neven cooking front to b ack the g rill element. Fat splattering E nsure th at the g rill is not set to too hig h a setting. E nsure th at the oven shelves are level by using a spirit Baking (G eneral) level on the rod shelf and a djusting the w heels/feet. -
Page 22: Something Wrong With Your Cooker
Something Wrong with your Cooker? Before contacting your nearest Service Centre/ Installer, check the problem guide below; there may be nothing wrong with your cooker. Problem Slight odour or small amount of smoke when grill / oven used for This is normal and should cease after a short period. first time If you find that the timer display is blank, then it is likely that there is no electricity supply to your oven. -
Page 23: If It Still Won't Work
If it Still Won't Work Contact the Service Office collected separately in order to optimise the recovery and recycling of the materials they contain If something is still wrong with your appliance after and reduce the impact on human health and the you have been through the 'Something Wrong' list: environment. -
Page 24: Guarantee Information
We have a dedicated team who can provide free advice and assistance with your appliance if you experience any technical difficulties within the first 90 days of ownership. Simply call our Indesit Service Hotline on 08448 224 224 (ROI 0818 313 413) for telephone assistance, or, where necessary, to arrange for an engineer to call. -
Page 25: Service Information
After Sales Service No one is better placed to care for your Indesit appliance during the course of its working life than us - the manufacturer. Essential Contact Information Indesit Service We are the largest service team in the country offering you access to 400 skilled telephone advisors and 1100 fully qualified engineers on call to ensure you receive fast, reliable, local service. - Page 26 Notes...
- Page 27 Notes...
- Page 28 04/2014 - 195122093.00 XEROX FABRIANO Indesit Company S.P.A. Viale Aristide Merloni,47 60044 Fabriano (AN) www.indesit.com...
Need help?
Do you have a question about the ID60C2 AA and is the answer not in the manual?
Questions and answers
Door has come off, how to replace it?
To replace the door inner glass on an Indesit ID60C2 AA:
1. Open the oven door fully.
2. Unscrew the two screws securing the glass panel to release the securing brackets. Do not remove the screws completely.
3. Turn the brackets to release the glass panel and remove it carefully.
4. When refitting, place the glass back in position.
5. Turn the brackets back to their original position to secure the glass.
6. Tighten the screws.
Support the inner glass during removal and refitting, and avoid sharp mechanical impacts.
This answer is automatically generated