
Related Manuals for Indesit KD641G


Summary of Contents for Indesit KD641G
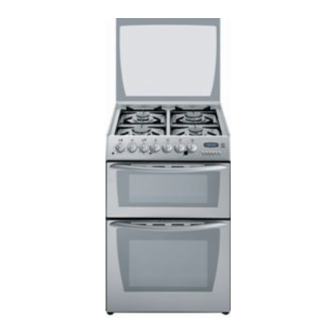
- Page 1 Free Standing Gas Cooker Instructions for installation and use KD643G KD641G KD640G...
-
Page 2: Table Of Contents
Grill Main Oven Main Oven Cooking Charts The “Slow Cook” Setting Top Oven (KD643G and KD641G only) Top Oven Cooking Charts (KD643G and KD641G only) Care and Cleaning Something Wrong With Your Cooker? Installation If it Still Won’t Work... Key Contacts You must read these instructions prior to using your appliance and retain them for future use. -
Page 3: Introduction
Introduction To help you make the best use of your cooker, PLEASE READ THIS BOOKLET CAREFULLY. Your new cooker is guaranteed and will give lasting service. The guarantee is only applicable if the cooker has been installed in accordance with the Installation Instructions. -
Page 4: Safety Information
Safety Information Please read the precautions below before using your cooker. ALWAYS . . . ALWAYS make sure you understand the controls before using the cooker. ALWAYS check that all controls on the cooker are turned off after use. ALWAYS stand back when opening an oven door to allow heat to disperse. - Page 5 Safety Information NEVER . . . NEVER leave children unsupervised where the cooker is installed as all surfaces will get hot during and after use. NEVER allow anyone to sit or stand on any part of the cooker. NEVER store items that children may attempt to reach above the cooker. NEVER heat up unopened food containers as pressure can build up causing the container to burst.
-
Page 6: Oven Timer Operation (Kd643G Only)
Oven Timer Operation (KD643G only) The oven timer offers you the following features: 1. Time of Day 2. Automatic Cooking 3. Minute Minder AUTOMATIC COOKING The main oven can be controlled automatically. GUIDANCE ON AUTOMATIC COOKING 1. Select foods which will take the same time to cook. 2. - Page 7 Know your Timer (KD643G only) CLOCKFACE The timer incorporates a 24 hour clock. Ensure the correct time of day is always set, before using your cooker. SYMBOLS A ‘bell’ symbol will light up when you select a Minute Minder Period and will remain lit for the period set.
-
Page 8: Setting The Minute Minder
Electronic Clock & Automatic Oven Timer Operation (KD643G only) SETTING THE TIME OF DAY Step 1 Make sure all oven controls are turned Off. Step 2 Check the electricity supply to the cooker is turned on. Step 3 When switched on the display will show 0.00 and the Auto symbol, Step 4 Press &... -
Page 9: Auto Cooking Programmes
Electronic Clock & Automatic Oven Timer Operation (KD643G only) AUTO COOKING PROGRAMMES There are two Auto Cooking programmes that can be selected using your timer:– (a) To set the timer to switch the oven(s) On and Off Automatically (b) To set timer to switch on immediately and OFF automatically after a set cook period. a) TO SET THE TIMER TO SWITCH THE OVEN(S) ON AND OFF AUTOMATICALLY This allows you to cook at a specified time for a chosen period before the oven switches off Automatically. - Page 10 Electronic Clock & Automatic Oven Timer Operation (KD643G only) Note 1 When cooking automatically the Cook Period can be checked at any time by simply pressing the Cook Period button. Note 2 When cooking automatically the End Time can be checked at any time by simply pressing the End Time button.
- Page 11 Electronic Clock & Automatic Oven Timer Operation (KD643G only) TO CANCEL AN AUTO COOKING PROGRAMME BEFORE THE COOK PERIOD HAS FINISHED. Step 1 Turn the oven control(s) to the OFF position. Step 2 Press the Manual button to return the oven(s) to “Manual” operation. Note 1 When cooking automatically the Cook Period can be checked at any time by simply pressing the Cook Period button.
-
Page 12: Hotplate
Hotplate ALWAYS PUSH IN THE CONROLS WHEN TURNING ANY OF THE BURNERS ON OR OFF. The hotplate has two high speed burners and two simmering burners which will accommodate pans between 100mm (4”) and 230mm (9”) diameter. All pans should be positioned centrally over the burners. TO USE THE HOTPLATE 1. -
Page 13: Safety Requirements For Deep Fat Frying
Hotplate SAFETY REQUIREMENTS FOR DEEP FAT FRYING 1. Never fill chip pans more than one third full with oil or fat. 2. Never leave oil or fat unattended during the heating or cooling period. 3. Never heat fat or fry with a lid on the pan. 4. -
Page 14: Grill
8. To turn off, turn the control knob anti-clockwise to the symbol O. Models: KD643G and KD641G only: The grill cannot be used at the same time as the top oven. - Page 15 Most cooking is done with the heat on full, but it may be desirable to reduce it for thicker pieces of meat or for keeping food warm. Models KD643G and KD641G only: There are 5 shelf positions available for grilling. Model KD640G: There are 2 shelf positions available for grilling.
-
Page 16: Main Oven
Main Oven ALWAYS PUSH IN THE CONROLS WHEN TURNING ANY OF THE BURNERS ON OR OFF. The oven has different heat zones – the thermostat settings refer to the temperature on the middle shelf position; above this shelf it is hotter and below it is cooler. Two shelves provide five possible cooking levels enabling full use of the different temperatures inside the oven. -
Page 17: Main Oven Cooking Charts
Main Oven Cooking Chart The following times and setting are for guidance only. You may wish to alter the setting to give a result more to your satisfaction. When a different setting to that shown below is given in a recipe, the recipe instructions should be followed. -
Page 18: Main Oven Cooking Chart
Main Oven Cooking Chart Food CAKES, PASTRIES AND BISCUITS Small cakes - 2 trays - 1 tray Victoria sandwich 2x8" (205mm) Fatless sponge 2x7" (180mm) - 3 egg mix Christmas cake Madeira cake 7" (180mm) Rich Fruit cake 9" (230mm) Shortcrust pastry Rich Shortcrust pastry - 1 tray Flaky &... -
Page 19: The "Slow Cook" Setting
The ‘Slow Cook’ Setting The ‘Slow Cook’ setting is used for slow cooking, keeping food warm and warming plates for short periods. Set the main oven thermostat to ‘S’ or ‘90˚C’ . USING THE ‘SLOW COOK’ SETTING FOR SLOW COOKING 1. -
Page 20: Top Oven (Kd643G And Kd641G Only
3. Push in and turn the top oven/grill control fully anti-clockwise: - Model number KD643G, sparking will continue until burner is lit. - Model number KD641G, Press the ignition button until the sparks light the gas. 4. Turn the control knob clockwise to the required setting (refer to cooking chart). -
Page 21: Top Oven Cooking Charts (Kd643G And Kd641G Only)
Top Oven Cooking Chart (KD643G and KD641G only...) The following times and setting are for guidance only. You may wish to alter the setting to give a result more to your satisfaction. When a different setting to that shown below is given in a recipe, the recipe instructions should be followed. - Page 22 Top Oven Cooking Chart (KD643G and KD641G only...) Food CAKES, PASTRIES AND BISCUITS Small Cakes (16 per tray) Victoria sandwich (2 x 180mm / 7”) Swiss Roll (3 egg quantity) Christmas cake (1 x 205mm / 8”) Madeira cake (1 x 180mm / 7”) Rich Fruit cake (1 x 180mm / 7”)
-
Page 23: Care And Cleaning
OVEN SHELF SUPPORTS Models KD643G and KD641G only:The shelf supports are removable and dishwasher safe. To remove hold the support at the front and pull away from the oven side, this can then be cleaned in a sink or a dishwasher. -
Page 24: Cleaning Method
Care and Cleaning COOKER FINISH Vitreous Enamel Hotplate, pan supports, hotplate front trim, burner caps, roasting dish, grill pan, main oven base, inside of grill compartment, inside of doors. Paint Side trims, plinth, fascia bottom trim, fascia end caps, side panels, door handles. -
Page 25: Cleaning The Doors
Care and Cleaning Take particular care not to damage the inner surface of the door inner glass that is coated with a heat reflective layer. Do not use scouring pads, or abrasive powder, which will scratch the glass. Ensure that the glass panel is not subjected to any sharp mechanical blows. -
Page 26: Something Wrong With Your Cooker
Something Wrong with your Cooker? Before contacting your nearest Service Centre or Installer, check the problem guide below, there may be nothing wrong with your cooker. PROBLEM Ignition does not work. Oven burner Burner ports Ignitor Grill burner Burner ports Ignitor Hotplate burner. - Page 27 Something Wrong with your Cooker? PROBLEM Slight odour or small amount of smoke when grill / oven used first time Oven cooks too fast or too slow (KD643G only) Cannot set an “Auto Cook” programme or cannot get the timer to turn the oven on or off at the required times.
-
Page 28: Installation
It must be installed and connected in accordance with current installation regulations. particular attention should be given to the relevant requirements regarding ventilation. MODEL NUMBERS KD643G, KD641G and KD640G Category I (GB. IE) These models are set to burn NATURAL GAS (G20) at 20 mbar ONLY and can not be used on any other gas. -
Page 29: Installation Instructions
Installation Instructions TECHNICAL DATA DIMENSIONS Height Width Depth GENERAL Gas connection Pressure test point Gas rate adjustment Aeration adjustment Electrical connection BURNER HOTPLATE Front left and rear right HOTPLATE Front right and rear left GRILL MAIN OVEN TOP OVEN 900 - 915mm 600mm 595mm (excluding door handles) ”... - Page 30 Installation Instructions SPACE FOR FIXING The cooker can be close fitted below hotplate level. This requires a minimum distance of 600mm between cupboard units of hotplate height. When installing next to a tall cupboard, partition or wall, for a minimum distance of 400mm above hotplate level, allow a side clearance of at least 65mm.
-
Page 31: Unpacking The Cooker
STABILITY BRACKET POSITION Top oven/grill shelf heat shield ( Top oven/grill shelf (1) ( Aluminium burner bodies (4) VIEWED FROM THE REAR 125mm Models KD643G and KD641G Models KD643G and KD641G REAR OF COOKER SLOT FOR STABILITY BRACKET... -
Page 32: Connecting To Gas Supply
Installation Instructions CONNECTING TO GAS SUPPLY The cooker is designed to match the depth of standard 600mm worktops. An adaptor backplate should, therefore, be fitted within the shaded area shown to allow the cooker to be pushed fully to the wall. 220mm 70mm BACKPLATE... -
Page 33: This Appliance Must Be Earthed
Installation Instructions WARNING – THIS APPLIANCE MUST BE EARTHED. CONNECT TO A 230-240V A.C. SUPPLY ONLY. Connection to the electricity supply should be made via a properly earthed, readily accessible wall socket which is adjacent to but not directly above, and not more than 1.25m away from the appliance and capable of electrical isolation. - Page 34 4. Check the operation of the oven timer and oven light(s). Instruct the user on operation of the cooker. NOTE - Models KD643G and KD641G only: It is normal for a slight resistance to be felt when turning the Top Oven/Grill control to the oven settings, as the control...
-
Page 35: If It Still Won't Work
If It Still Won’t Work... Contact the Service Office ( If something is still wrong with your appliance after you have been through the ‘Something Wrong’ list: 1. Switch off and unplug the appliance from the mains. 2. Call your nearest Service Office or local importer. When you contact us we will want to know the following: 1. -
Page 36: Key Contacts
Repair Service and Information Help Desk Note: Our operators will require the following information: Indesit Company UK Limited, Morley Way, Peterborough, PE2 9JB PRINTED BY SIMLEX . FOUR ASHES, WOLVERHAMPTON. Key Contacts...
Need help?
Do you have a question about the KD641G and is the answer not in the manual?
Questions and answers