Table of Contents
Advertisement
Quick Links
Operating Instructions
GB
English, 1
KD6G25X
KDP60G
KD6G25M
KD6G25W
KD6G25A
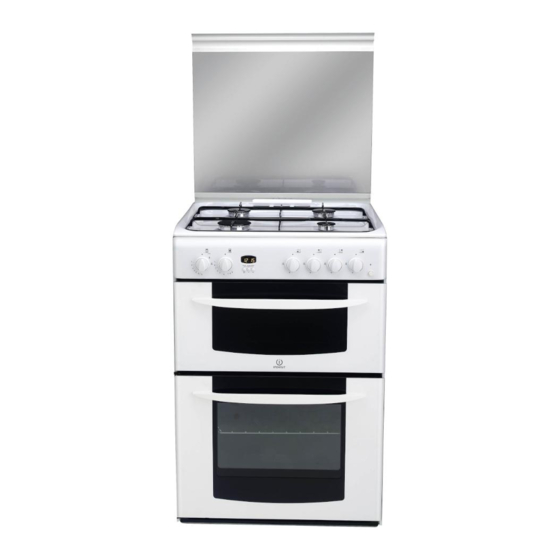
Free Standing Gas Cooker
Contents
Introduction, 2
Featues, 4
Control Panel, 5-6
Hotplate, 8
Grill, 9
Main Oven, 10
Main Oven Cooking Charts, 11-12
Top Oven, 13
Top Oven Cooking Charts, 14-15
Installation Instructions, 18-20
GB
Advertisement
Table of Contents

Related Manuals for Indesit KD6G25A


Summary of Contents for Indesit KD6G25A
-
Page 1: Table Of Contents
Top Oven, 13 KDP60G Top Oven Cooking Charts, 14-15 KD6G25M KD6G25W Care and Cleaning, 16 KD6G25A Something Wrong with your cooker?, 17 Installation Instructions, 18-20 Ellectrical Connection, 21 If it still Won't Work, 22 Disposal of the appliance, 22 Guarantee Information, 23... -
Page 2: Introduction
Introduction To help you make the best use of your cooker, Our policy is one of continual improvement in design PLEASE READ THIS BOOKLET CAREFULLY. and development, therefore strict accuracy of Your new cooker is guaranteed and will give lasting illustrations and descriptions cannot be guaranteed. -
Page 3: For Your Safety
For your Safety Please read the precautions below before using your cooker. ALWAYS . . . NEVER . . . ALWAYS make sure you understand the controls NEVER leave children unsupervised where the before using the cooker. cooker is installed as all surfaces will get ALWAYS check that all controls on the cooker are hot during and after use. -
Page 4: Featues
Features 2000W 2000W 3050W 1100W Control panel (varies per model) Clock/Minute Minder Model number and Serial number Conventional Grill label Grill pan food support Grill pan with Shelf fixed/detachable handle Top oven shelf supports Oven light Main oven wirework shelf supports Fan blade Main oven rod shelves... -
Page 5: Control Panel
Control Panel MAIN OVEN TOP OVEN PILOT LIGHT PILOT LIGHT K D P 6 0 K D P 6 0 K D P 6 0 K D P 6 0 K D P 6 0 ELECTRONIC* RIGHT RIGHT LEFT LEFT GRILL TOP OVEN TIMER... - Page 6 Top Oven / Grill Control To operate the grill push and turn the grill control knob clockwise to the large flame symbol. Continue to press the control knob until the spark lights the gas The temperature of the top oven can be set anywhere between 120°C and 225°C by turning the knob anti- clockwise from 1 to 8.
-
Page 7: Clock And Minute Minder Operation
Clock and Minute Minder CLOCK OPERATION To Set Time of Day 00.00 Step 1 Check that the electricity supply to the cooker is turned on. Step 2 When switched on the display will show 0.00 flashing intermittently. Step 3 Press the " "... -
Page 8: Hotplate
Hotplate The hotplate lid is fitted with a safety device which SAFETY REQUIREMENTS FOR DEEP FAT FRYING 1. Never fill chip pans more than one third full with oil cuts off the gas supply to the hotplate burners unless the lid is fully open. Do not use the safety or fat. -
Page 9: Grill
Grill 4. Press the ignition button and then push in and turn CAUTION - ACCESSIBLE PARTS MAY BECOME the control knob clockwise to the large flame symbol. HOT WHEN THE GRILL IS USED. Continue to push in the control knob for a further 3 YOUNG CHILDREN SHOULD BE KEPT AWAY. -
Page 10: Main Oven
Main Oven The main oven is fitted with a safety device that will COLD START COOKING cut off the gas supply to the burner if the flame has Anything requiring long slow cooking such as been extinguished for any reason. Each time the casseroles and rich fruit cakes can be put into a main oven is used, the safety device has to be cold oven. -
Page 11: Main Oven Cooking Charts
Main Oven Cooking Chart The following times and setting are for guidance Allow 15 minutes preheat for best results. only. You may wish to alter the setting to give a Always turn the thermostat knob to Mark 9 first, result more to your satisfaction. When a different before turning back to the required Gas Mark. - Page 12 Main Oven Cooking Chart Shelf Food Approx. Cooking Time and Comments Mark Positions CAKES, PASTRIES AND BISCUITS Small cakes - 2 trays 2 & 4 17 - 25 mins 2 or 3 Small cakes - 1 tray only Victoria sandwich 2x8" (205mm) 2 &...
-
Page 13: Top Oven
Top Oven GUIDANCE ON USING THE TOP OVEN The top oven can be used to cook small quantities 1. Best results are obtained by pre-heating the oven of food or used in conjunction with the main oven to provide additional cooking space. for about 15 minutes. -
Page 14: Top Oven Cooking Charts
Top Oven Cooking Chart The following times and setting are for guidance Allow 15 minutes preheat for best results. Always only. You may wish to alter the setting to give a turn the thermostat knob to Mark 8 first, before result more to your satisfaction. - Page 15 Top Oven Cooking Chart Shelf Food Approx. Cooking Time and Comments Mark Positions CAKES, PASTRIES AND BISCUITS Small Cakes (16 per tray) 20 - 25 mins Victoria sandwich (2x180mm / 7 ") 25 - 30 mins. Swiss Roll (3 egg quantity) 10 - 12 mins.
-
Page 16: Care And Cleaning
Care and Cleaning ! To move the cooker forward, open the top oven/grill ! Never use steam cleaners or pressure cleaners door and with both hands positioned under the roof on the appliance. of the compartment, lift and pull forward. Replace by Clean the glass part of the oven door using a pushing the cooker backwards. -
Page 17: Something Wrong With Your Cooker
Something Wrong with your Cooker Before contacting your Service Centre or Installer, check the problem guide below, there may be nothing wrong with your cooker. PROBLEM CHECK Burner will not light: If all burners fail to ignite: Check that sparks appear at the burners; a clicking noise should be heard. -
Page 18: Installation Instructions
The room containing the cooker should have an air MODEL NUMBERS KD6G25X, KDP60G, supply in accordance with BS 5440: Part 2. KD6G25M/W, KD6G25A The room must have an opening window or Category II2H3+ (GB) These models are set to burn NATURAL GAS (G20) equivalent;... - Page 19 Installation SPACE FOR FIXING UNPACKING THE COOKER The cooker can be close fitted below hotplate level. Unpack the components from inside the grill and This requires a minimum distance of 600mm oven. between cupboard units of hotplate height. Check that the following parts are present: When installing next to a tall cupboard, partition or wall, for a minimum distance of 400mm above Grill pan and grid Top oven/grill shelf heat shield...
- Page 20 Installation STABILITY CHAIN INSTALLATION AND OPERATIONAL CHECKS A hole in the gas inlet valve bracket can be used to After installation, check for gas soundness. The engage a stability chain. supply pressure can be checked at the front left hotplate burner injector. CONNECTING TO GAS SUPPLY Fit the hotplate burner bodies and caps, pan supports and shelf shield(s).
-
Page 21: Ellectrical Connection
Electrical Connection As the colours of the wires in the mains lead of this WARNING - THIS APPLIANCE MUST BE EARTHED. appliance may not correspond with the coloured CONNECT TO A 230-240V A.C. SUPPLY ONLY. markings identifying the terminals in your plug, Connection to the electricity supply should be made proceed as follows: via a properly earthed, readily accessible wall... -
Page 22: If It Still Won't Work
If it Still Won't Work Contact the Service Office Disposal of your product (UK: 08709 066 066) To minimise the risk of injury to children please If something is still wrong with your appliance after dispose of your product carefully and safely. you have been through the 'Something Wrong' list: Remove all doors and lids. -
Page 23: Guarantee Information
DOMESTIC PREMISES. 5 Year Parts Guarantee Indesit also offers you a free 5 year parts guarantee. This additional guarantee is conditional on you registering your appliance with us and the parts being fitted by one of our authorised engineers. There will be a charge for our engineer’s time. -
Page 24: Service Information
06/2010 - 195064062.05 XEROX FABRIANO After Sales Service No one is better placed to care for your Indesit appliance during the course of its working life than us – the manufacturer. Essential Contact Information Indesit Service We are the largest service team in the UK and Ireland offering you access to 400 skilled telephone advisors and 1000 fully qualified engineers on call to ensure you receive fast, reliable, local service.
Need help?
Do you have a question about the KD6G25A and is the answer not in the manual?
Questions and answers