Table of Contents

Related Manuals for Daewoo DLP-17D3


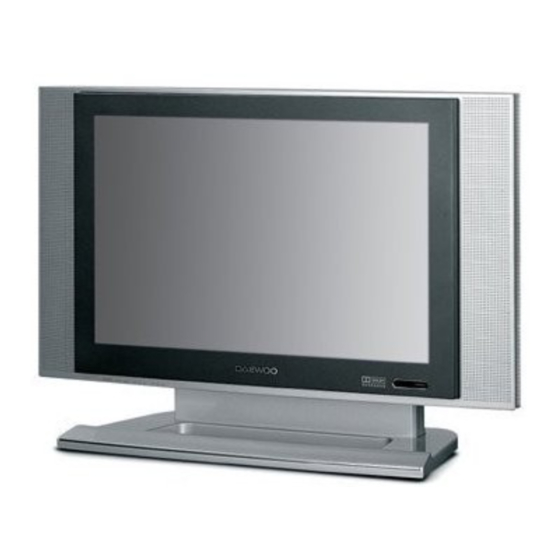
Summary of Contents for Daewoo DLP-17D3
-
Page 1: Instruction Manual
LCD TELEVISION INSTRUCTION MANUAL DLP-17D3 DSL-17D3 DLP-20D3 DLP-17D3N DLP-20D3N PAL B/G , D/K, I/I, SECAM B/ G , D/ K, L/ L’ , NTSC(AV) TELETEXT SCART/ VIDEO / S-VIDEO / COMPONENT/ PC (Option) MULTI-LANGUAGE OSD Helpline Number: 0870 100 2525... - Page 2 Caution CAUTION RISK OF ELECTRIC SHOCK DO NOT OPEN CAUTION : TO REDUCE THE RISK OF ELECTRIC SHOCK, DO NOT REMOVE COVER (OR BACK). NO USER-SERVICEABLE PARTS INSIDE. REFER SERVICING TO QUALIFIED SERVICE PERSONNEL. The lightning flash with arrowhead symbol, within an equilateral triangle, is intended to alert the user to the presence of uninsulated “dangerous voltage”...
- Page 3 Safety Precautions 1. CLEANING Unplug this TV equipment from the AC power outlet before cleaning. Do not use liquid cleaner or aerosol cleaners. Use a soft and damp cloth for cleaning. 2. ATTACHMENTS Do not use attachments not recommended by the TV equipment manu- facturer as they may result in the risk of fire, electric shock or other injury.
-
Page 4: Table Of Contents
Contents Important Safeguards............5 Supplied Accessories. -
Page 5: Important Safeguards
Important Safeguards Location Heat, Moisture, Dust, Vibration Position your set so that bright light or sunlight doesn’t fall directly onto the screen. Care should be taken not to expose the set to any unnecessary vibration, moisture, dust or heat. Do not expose the set to dripping or splashing. Ventilation Also ensure that the set is placed in a position to allow a free flow of air. -
Page 6: Supplied Accessories
Supplied Accessories Make sure that the following accessories are provided with the product. AC cord AC/DC adapter Remote controller Instruction manual Batteries (Option) (2 x 1,5V, AAA) -
Page 7: Functional Overview
Functional Overview Remote controller TV mode TELETEXT mode POWER POWER A2 SOUND MUTE SOUND MUTE A3 NUMBER 0..9 A3 NUMBER 0..9 A4 SLEEP A5 TV / AV PAGE UP A6 PROGRAM UP VOL/BRIGHT (CURSOR UP) DOWN VOLUME DOWN CANCEL (CURSOR LEFT) PAGE HOLD SUBPAGE A10 . -
Page 8: Local Control
Local Control Front Power Volume Menu On/Off Up/Down Up/Down (B1) (B2) (B3) (B4) (B5) Remote Sensor Indicator (B6) (B7) Rear (C6) Video Input Socket (C7) Audio Input (L+R) Socket (C8) S-Video jack (C1) (C2) (C3) (C4) (C5) (C9) Aerial jack SCART socket PC AUDIO PC INPUT... -
Page 9: Preparation
Preparation Inserting Batteries into the Remote Control Unit To load the batteries, turn the remote control handset over and open the battery compartment. Insert the batteries (Two 1.5v, type R03 or AAA). Make sure that the polarity matches with the (+) and (-) marks inside of the battery compartment. -
Page 10: Aerial Connection
Preparation Aerial Connection CONNECTING THE TV DIRECTLY TO AN AERIAL Connect an aerial cable (75 ohm coaxial cable) to the Aerial terminal on the back of the TV set. Aerial Aerial terminal Aerial cable... - Page 11 Preparation AERIAL CONNECTION WITH VCR Connect your aerial cable to the RF(aerial) IN terminal on the VCR. Connect the RF OUT terminal of the VCR to the Aerial terminal on the TV set with RF cable. NOTE: If you wish to use only the Aerial (RF) connection, then you should store the VCR channel on programme number “ZERO”using the “Manual tuning”...
-
Page 12: Connecting External Equipment
Preparation Connecting external equipment PC Audio cable PC D-sub cable PC connection (option) Scart cable Headphone RCA cable S-video cable Set Top Box Set Top Box VCR/DVD VCR/DVD/Camcorder/ Video Game... -
Page 13: Pc Connection (Option)
Preparation TV/AV/PC MODE SELECTION (PC mode is available only for DLP-17/20D3/DSL-17D3) Press the TV/AV( ) button on the control panel repeatedly to select the source. You can also select the source using TV/AV( ) button on the remote controller. S-VIDEO COMPONENT( In TV mode, you can change the TV programme number with the UP/DOWN button or the NUMBER button. -
Page 14: Start Up
Start Up Language Menu The very first time that you turn on the TV, the LANGUAGE menu will appear on the screen. Its purpose is to enable you to select the language that will be used for all the OSD (On Screen Display) menus. The user must enter a choice of language before proceeding further. -
Page 15: Daily Use
Daily Use Switching On TV Set 1) If stand-by indicator (B7) 2) If stand-by indicator (B7) 3) If stand-by indicator (B7) is red, then the TV set is is not lit, then the TV set is flashing red, and green in stand-by mode. -
Page 16: Program Selection (From 0 To 99)
Daily Use Program Selection (From 0 to 99) Direct selection Use the remote control NUMBER 0…9 buttons (A3). For two digits program numbers, enter the second digit within 2 seconds. Up / Down selection Use the remote control PROGRAM UP (A6) / DOWN (A21) buttons or the TV set front panel PROGRAM UP / DOWN buttons (B2). -
Page 17: Picture Control
Daily Use Sound effects A SPATIAL sound effect is available, using the remote control 3D (A13) button. Spatial sound effect SPATIAL The following display appears: Sound transmission mode STEREO 18:30 Clock To return to initial sound effect, press No sound effect again the 3D (A13) button. -
Page 18: Menus Language Selection, Child Lock, Clock Setting, Wake Up, Noise Reduction
Daily Use Format Selection AUTO setting : If picture format signalling data is received, then the most appropriate ZOOM format will be automati- cally selected. In the absence of this data, the default ZOOM format will be selected(see page 24, ZOOM AUTO function under FEATURES MENU). Otherwise, the preferred mode of the user can be forced by repeated pressing of the remote control ZOOM button (A15): Television Format 17”... -
Page 19: Menus Description
Menus Description DEFAULT ZOOM CONTROL If the ZOOM control is set to AUTO (A15, see page 18 and 24, FORMAT SELECTION), then the picture format presented is controlled by the received picture format signalling data embedded in the transmission. In the absence of this signalling data (as can often be the case) a default format must be used. -
Page 20: Picture Menu
Menus Description Picture Menu (For operating instructions, see page 19, HOW TO USE THE SUB-MENUS) PICTURE - Select and adjust the level of each function : BACK- MODE NORMAL I LIGHT, BRIGHTNESS, CONTRAST, COLOUR, SHARP- BACKLIGHT NESS, TINT (if available). BRIGHTNESS CONTRAST - The above modified values are automatically stored... -
Page 21: Equalizer Menu
Menus Description Equalizer Menu - Select the equalizer band by use of the CURSOR EQUALIZER LEFT (A7) or RIGHT (A20) buttons. NORMAL - Adjust the level of each of the 5 equalizer bands, 100Hz, 300Hz, 1000Hz, 3000Hz, 8000Hz, by use of the CURSOR UP (A6) and DOWN (A21) buttons. -
Page 22: Edit Menu
Edit Menu This allows you to easily manipulate the existing program order allocation, by using Edit menu functions described below. EDIT Program number NAME SKIP BBC1 C 23 Station name BBC2 C 33 ------- S 41 ------- S 41 Channel number ------- S 41 Skip code... - Page 23 Channel searching - Select the “Frequency” function. - Press, and hold for more than 1second, the remote control CURSOR RIGHT (A20) LEFT (A7) buttons to start up [down] manual tuning. - Searching will stop automatically at the next channel found (to stop tuning, press the re- mote control MENU button (A19).
-
Page 24: Features Menu
Features Menu See section near the end of section DAILY USE for a more detailed explanation of these functions. (For operating instructions see page 19, HOW TO USE THE SUB-MENUS) 1. Adjust this value ON or OFF. - In stand-by mode, the stand-by indicator flashes red and green to 1. -
Page 25: Language Menu
If the signal from the PC system doesn’t equal any of the modes, adjust the video card setting on the computer. For the display modes listed below, the screen image has been optimized during manufacture. Resolution(Mode) V-frequency(Hz) DLP-17D3, DSL- DLP-20D3 frequency(Hz) 17D3 640x480(VGA) -
Page 26: Teletext
Teletext ENTERING/LEAVING TELETEXT MODE - Select the desired program with teletext. - Press the remote control TELETEXT ( ) button (A22) to select teletext mode. The initial page (or the last page viewed if you have already used teletext in the present channel) appears. - Teletext And Teletext (TAT) function (OPTION): if you want to watch two teletext pages on same screen, press the TELETEXT ( ) button (A22) -
Page 27: Useful Teletext Functions
Useful Teletext Functions INDEX ( ) button (A18): Allows you to return directly to the initial teletext page. SUBPAGE ( ) button (A10): - Press the SUBPAGE button (A10). In the extreme top left corner, instead of the page number, ‘’S..’’ will be displayed. This is ready to accept the subpage number. -
Page 28: Teletext Format Picture & Sound Control
Teletext Format Picture & Sound Control Doubling character height Repeatedly pressing the HEIGHT ( ) button (A23) doubles the character height in the following order: Upper half of the page (UP) Lower half of the page (DOWN) Return to normal height. If the page is in UP or DOWN mode, then normal size is automatically set if : - A new page request is made (e.g. -
Page 29: Wall/Arm Mounting
Wall/Arm Mounting mode, as these would not allow all teletext lines to be displayed. Therefore only the formats ZOOM 14:9 AND ZOOM 16:9 (available with wide screen TV models) cannot be preserved with teletext subtitles. In this situation the default format FULL SCREEN (equal to 16:9) will be used. -
Page 30: Troubleshooting
Troubleshooting Please check the following items before calling for the repair services. Problem Check item Reference page TV set Control/System lock up · The TV may have malfunctioned. · Switch your TV off and on again with the main button on the TV set. -
Page 31: Specifications
Specifications DLP-17D3, DSL-17D3, DLP-20D3 MODEL NAME DLP-17D3N DLP-20D3N PANEL 17” WIDE TFT LCD 20” TFT LCD SCREEN SIZE 434.38mm 510.54mm DISPLAY COLOUR 16.7M 16.7M CONTRAST RATIO 600:1 500:1(AUO), 350:1 (LPL) PIXEL PITCH 0.291(H) x 0.291(V) 0.51(H) x 0.51(V) ASPECT RATIO...
Need help?
Do you have a question about the DLP-17D3 and is the answer not in the manual?
Questions and answers