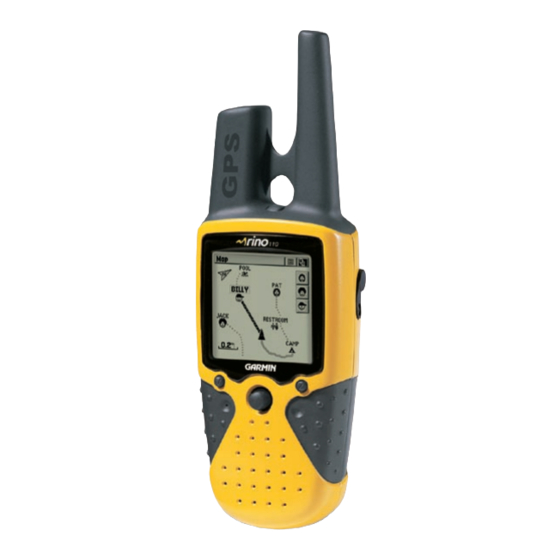
Garmin Rino 110 Owner's Manual And Reference Manual
2-way radio & personal navigator
Hide thumbs
Also See for Rino 110:
- Owner's manual (110 pages) ,
- Technical spesification (2 pages) ,
- Quick start manual (2 pages)
Table of Contents
Advertisement
Quick Links
Advertisement
Table of Contents

Related Manuals for Garmin Rino 110


Summary of Contents for Garmin Rino 110
- Page 1 2-way radio & ® personal navigator owner’s manual reference guide...
- Page 2 Garmin. Garmin hereby grants permission to download a single copy of this manual onto a hard drive or other electronic storage medium to be viewed for personal use,...
- Page 3 Thank you for choosing the Garmin Rino (Radio Integrated with Navigation for the Outdoors). To get the most from your new Rino, take time to read through the Quick Start Guide fi rst, then this owner’ s manual in order to understand all of the operating features.
-
Page 4: Fcc Licensing Information
FCC Compliance & GMRS Licensing FCC Compliance The Rino 110 complies with Part 15 of the FCC regulations and with Canadian ICES-003 for Class B digital devices. Operation of this device is subject to the following conditions: (1) This device may not cause harmful interfer-... -
Page 5: Introduction
– and, as always, the user is responsible for their prudent use. Use the Rino 110 at your own risk. To reduce the risk of unsafe operation, carefully review and understand all aspects of this Owner’ s Manual—and thoroughly practice operation using the Demo mode prior to actual use. - Page 6 Introduction Important: Read this information before using your Rino. Exposure to Radio Frequency Signals - Your wireless Warnings & handheld radio is a low power radio transmitter and receiver. Precautions When it is ON, it receives and also sends out radio frequency (RF) signals.In August 1996, The Federal Communications Commissions (FCC) adopted RF exposure guidelines with safety levels for handheld wireless radios.
- Page 7 State of California to cause cancer, birth defects, or reproductive harm. This Notice is being provided in accordance with California’s Proposition 65. If you have any questions or would like additional infor- mation, please refer to our web site at http://www.garmin.com/ prop65.
-
Page 8: Limited Warranty
Garmin retains the exclusive right to repair or replace the unit or software or offer a full refund of the purchase price at its sole discretion. SUCH REMEDY SHALL BE YOUR SOLE AND EXCLUSIVE REMEDY FOR ANY BREACH OF WARRANTY. -
Page 9: Software License Agreement
Customer Service Product Registration Help us better support you by completing our on-line registration today! Have the serial number of your Rino 110 handy and connect to our web site (www.garmin.com). The serial number is located inside the battery compartment, under the center AA battery. -
Page 10: Table Of Contents
Table Of Contents Introduction About This Manual...i FCC Compliance Statement...ii FCC Licensing for GMRS...ii-iii Warnings and Precautions...iii-v Warranty...vi Software License Agreement...vii Product Registration...vii Table of Contents...viii The Main Pages Unit Overview ...1 Radio Page The Main Page...2 Status Bar...3 My ID...3-4 Channels and Codes...4-5 Scan and Monitor...5-6 Setup Radio/Tones...7-8... -
Page 11: Main Pages
The Rino 110 has seven keys located on the unit that allow the user to quickly access all of the units functions. The Rino 110 has a 160 X 160 pixel, 4 level gray mono- chrome display for easy viewing. -
Page 12: The Main
The Informational Picture on the bottom half of screen features Garmin’ s Mr. Mark Waypoint to show current GPS & radio status (see pg. 9) and radio actions. As you operate the unit, the graphics will change depending on what actions you are taking or unit settings. -
Page 13: Status Bar - Overview
Status Bar - Overview The Status Bar at the top of the screen will display on all the available Main Pages. As you move around any Main Page or change pages, the current page’ s title will briefl y display for 3 seconds then be replaced by the Status Bar. -
Page 14: My Id
Canadian units). To communicate with other Rino and FRS/GMRS users, you must be on the same Channel and Code. Garmin Rino units will work with many 3rd party FRS/GMRS radios, provided the other radios use standard FRS/GMRS frequencies. A chart of the Rino frequencies may be found in Appendix H. -
Page 15: Channels And Codes
your Rino to ignore unwanted calls from other persons who are using the same channel. Simply select the same squelch code (number) as selected by the other person(s) you desire to communicate with. NOTE: Squelch codes do not cause your conversation to be private. They only allow you to fi... -
Page 16: Scan And Monitor
Radio Page Scan & Monitor The Code fi eld will go blank when you monitor a channel. Scanlist Options. which channels/codes to scan. Since it can take time to scan through the all the channels, selecting only specifi c channels/codes will decrease the scan time. Decreasing scan time will help prevent the chances of missing a transmis- sion. -
Page 17: Setup Radio/Tones
The Radio Page Options Menu provides the follow- ing: Setup Radio, Setup Tones, Setup Scanlist, Turn Radio Off/On and Turn GPS Off/On. To access the page Options Menu and change settings: 1. Highlight the Option Menu on-screen button at the top of the display screen and then press IN on the THUMB STICK to open the menu. - Page 18 Radio Page Setup Radio You must obtain a license to operate on GMRS channels 15-22. Tones Setup Page Selecting a Ring Tone. Tone will sound when you press IN to accept it. Headset Type - Allows you to choose which accessory headset or microphone you are using with the unit, or have the unit automatically detect the type.
-
Page 19: Informational Picture
Informational Picture - Overview The Informational Picture on the bottom half of screen features Garmin’ s Mr. Mark Waypoint to show cur- rent GPS & radio status and radio actions. As you operate the unit, the graphics will change depending on what actions you are taking or the unit settings. - Page 20 Radio Page Informational Picture GPS and Radio On; Position not ready; Transmitting on GMRS GPS and Radio On; Position transmitted GPS and Radio On; Ready to transmit Position; Receiving transmission GPS and Radio On; Ready to transmit Position; Activity on channel that does not match code.
-
Page 21: Position Reporting
Position Polling - Overview The Rino’ s most unique feature is being able to manually poll (or query) the location of another Rino. With polling enabled and a GPS position, Rino users can determine each other’ s location from either their Map or the Contact Details pages. -
Page 22: Peer-To-Peer
Position Reporting Position Polling / Peer-to-Peer Highlight a contact on the Map Page Contact Bar and press CALL to poll that contact. A fl ag will appear when position reporting is ready. As you highlight the contacts on the Contact Bar, the Map page will center the map on that contact and display its name, direction and distance near the top of the screen. -
Page 23: Contacts
New Contact Page - Overview The fi rst time that a signal is received from another Rino user, a ‘New Contact’ page will be displayed. From the New Contact page you can show their location on your map, ‘Goto’ their location, or select ‘OK’ to add them to your contact list. - Page 24 Position Reporting Contacts Move LEFT or RIGHT on the THUMB STICK to view different contact data. Contact Bar Contacts will also show on the Map Page. Highlight the contact and the map will center on their last position. 5. From the Contacts List, select the desired contact and press the THUMB STICK IN.
-
Page 25: Send Location
Send Location - Overview Another feature is the ability to send a specifi c loca- tion to other Rino users. This can come in handy if you are trying to round-up the group, or just want to meet at a specifi c location. You may send any point found from the Find ‘N Go menu. -
Page 26: Map Page
“trail” (track log) of your movements. The map also displays any waypoints, contacts or tracks, routes, etc. The map shown above displays Points of Interest (POI) data, because Garmin MapSource POI data has been downloaded to the unit using a CD-ROM mapping program. -
Page 27: Zooming In/Out
In many instances the map displays an ‘Accuracy Circle’ surrounding the ‘Position Icon’. The Rino 110 uses both map resolution and GPS accuracy in defi ning your location to a point within the circle. The smaller the circle, the more accurate your location. -
Page 28: Map
Map Page. Map Page options allow a variety of operating and custom features for your Rino 110. The Map Page options are: Pan Map - Allows you to move the Panning Arrow (Map Pointer) about on the map. -
Page 29: Panning The Map
Using the Pan Map Option The Map Page pan function allows you to display an arrow used to point at and identify items on the map, and to move the map in order to view areas beyond the current viewing area on the display. The map panning function is activated from the Options Menu on the Map Page. -
Page 30: Stop Navigation
Map Page Options ‘Stop Navigation’ Option Changing Data Fields. Stop Navigation The ‘Stop Navigation’ option allows you to quit naviga- tion of a Goto, Route or Track in progress. When there is no active navigation, the ‘Stop Navigation’ option is “grayed out” and is non-functional. -
Page 31: Map Page Setup
The ‘Setup Map’ option displays the fi ve Map Setup Pages, each accessed by an on-screen button. A list of options displays for the features listed. Scale options indicate the zoom level at which Tracks, Tracks Logs, Map Features, or Text Boxes display, allowing you to remove map clutter and defi... -
Page 32: Map Page Setup
Map Page Setup Options You may quickly choose to Show All or None for loaded MapSource POI data by using the Map Setup, MapSource sub- page Options Menu. Map Pointer Field Measuring distance. To use Setup Map options: 1. Select ‘Setup Map’ from the Options Menu and then press IN on the THUMB STICK to display the Map Setup Page. -
Page 33: Navigation Page
Although the bearing to a point will be correct, you must be moving in order for the compass functions to work properly. When you are moving, the heading is controlled by the GPS receiver. The Data Field the top of the page, by default shows you the name of your destina- tion. -
Page 34: Navigation Page Options
Navigation Page Main Page CDI Scale Navigation Page with Course Pointer and Course Deviation Indicator (CDI) Scale active. Navigation Page with Bearing Pointer and Big Compass.. Navigation Page Options The options include: Stop Navigation - Cancels navigation (“Grayed out” or disabled unless you are navigating on a Goto, Track, or Route.) Bearing Pointer/Course Pointer - Toggles between Bearing (always directed at destination) and Course... -
Page 35: Navigation Page Options
To Setup the Navigation Page: 1. With the Navigation Page displayed, use the THUMB STICK to highlight the Options Menu button at the top of the page. Then press it IN to display the menu. 2. Use the THUMB STICK to highlight your selection and then press IN to select it. -
Page 36: Trip Computer Page
Trip Computer Page Main Page Trip Page shown with Big Numbers Selectable Data Fields Trip Computer Page The Trip Computer Page default displays up to seven different types of navigation data. Choosing ‘Big Num- bers’ will display 2 large data fi elds. Each data fi eld is selectable and can contain one of many data information options.The default settings for these fi... -
Page 37: Trip Computer Page Options
Trip Computer Page Options The Trip Computer provides a variety of data fi elds with read-outs of current information as you travel. Seven small or two large fi elds display navigation information and are user programmable. The list of data fi eld choices may be found on page 20 and defi... -
Page 38: Main Menu Page
Main Menu Page Main Page The Main Menu provides you with a directory of the Rino’ s advanced features. From the Main Menu page you can mark and create new waypoints; fi nd map items such as cities, points of interest, etc.; create routes; save tracks; setup system operating features; access and use unit accessories or add/remove main pages and adjust their ordering. -
Page 39: Using The Main Menu
Main Menu Page Using the Main Menu The Main Menu provides access to additional Rino Options feature pages. The pages listed below provide enhance- ments to Rino operation. Press the PAGE button repeat- edly to cycle to the Main Menu or select it from the Main Page Menu at the top of each main page. -
Page 40: Marking Your Location As A Waypoint
Main Menu Page Marking Waypoints Mark Waypoint Page Map Symbol List Marking a Waypoint with the Panning Arrow. The Mark (Waypoint) Page The Mark Waypoint Page allows you to mark and record your current location as a waypoint and appears with a graphic name block (man with a fl... -
Page 41: Creating A Waypoint
To create a waypoint using the panning arrow when a map item is not highlighted: 1. With the Pan Map feature active, move the panning arrow (map pointer) on the map to the location you want to mark and then, press the THUMB STICK. 2. -
Page 42: Projecting A Waypoint
Main Menu Page Waypoints Enter Distance and Bearing to project. Using the keyboard to edit. Projecting a Waypoint Projecting a waypoint from any map item (another waypoint, etc.) allows you to establish a new waypoint on a bearing and distance projected from that map item. To project a waypoint: 1. -
Page 43: Saving As A Waypoint
To save Map or Find ‘N Go Menu items as waypoints: 1. Access the Information Page for the desired item (highlighted from the map or selected from the Find ‘N Go Menu). 2. Open the Options Menu at the top of the page, select ‘Save As Waypoint’... -
Page 44: Finding Items
Main Menu Page Finding Items Waypoint Find List Waypoint Information Page Finding a Waypoint Waypoints that you have created and stored in the Rino can be found by selecting the “Waypoint’ option from the Find ‘N Go Menu. You can fi nd a waypoint from the list of waypoints using the ‘By Name’... -
Page 45: Finding A Contact
Finding a Contact Contacts that you have received in the Rino can be found by selecting the ‘Contacts’ option. 1. Highlight ‘Contacts’ and press the THUMB STICK 2. From the Contacts List, select the desired contact and press the THUMB STICK IN. 3. -
Page 46: Finding A Point Of Interest
Main Menu Page Finding Items Points of Interest List Food & Drink Categories Nearest Barbecue List Finding a Point of Interest You can use the Find Point of Interest option to locate a nearby restaurant, lodging, landmark, public building, park, etc. However, you must have transferred MapSource Points of Interest (POI) data to the unit memory. -
Page 47: Finding A Last Found Place
5. Use the THUMB STICK to highlight your selection from the list and then press it IN to display the Information Page for that item. 6. Use the on-screen buttons to ‘Goto’ or view on the ‘Map’, or use the page Options Menu. Finding a Last Found Place You can use the Recently Found Places option to locate Points of Interest, Cities, Waypoints or Contacts... -
Page 48: Using A Goto
Main Menu Page Using a Goto Information Page Navigation Page A Map Page Goto Using a Goto to Navigate to a Destination The Goto function allows you to create a direct route to a destination, (waypoint, city, or point of interest). Once you have accessed the Information Page for an item, use the Goto button at the bottom of the page to initiate travel to a map item using the Map and Navigation Pages... -
Page 49: Routes Page
Creating and Using a Route Route navigation allows you to create a sequence of intermediate waypoints which lead you to your fi nal destination. The Rino stores 20 routes, each with up to 50 waypoints. A route can be created and modifi ed from the Route Page, and waypoints can be added to a route from the Find ‘N Go Menu. -
Page 50: Editing A Route
Main Menu Page Routes A Route Options Menu Delete Route Prompt Editing a Route To remove all waypoints: 1. Select the on-screen page options button from the Route Page and press the THUMB STICK IN to access the Options Menu. 2. - Page 51 To review a route point: 1. Select the point from the Route Points List and press the THUMB STICK IN to access the Options Menu for the waypoint. 2. Highlight ‘Review’ and then press IN on the THUMB STICK to display the Information Page. 3.
-
Page 52: Adding Or Editing From The Route Map Page
Main Menu Page Routes Moving a Route Waypoint by clicking and dragging. Adding a Route Waypoint to an end point on the Route Map Page To move a route point: 1. Select the point from the Route Points List and press the THUMB STICK IN to access the Options Menu for the waypoint. -
Page 53: Navigating A Route
new waypoint. A waypoint information page displays. Press the on-screen ‘OK’ button to save the new waypoint, then press it again after returning to the Route Map. To review or remove a route point: 1. Select the Route from the Routes List and press the THUMB STICK IN to display the Route Page. -
Page 54: Data Fields For The Route Page
Main Menu Page Routes Data Field Options Menu Distance to Point vs Leg Distance. To view Leg information, highlight the end waypoint on a leg. To stop navigation: 1. Highlight the ‘Stop Navigation’ option on either the Navigation or Map page’s Options Menu or select the ‘Stop’... -
Page 55: Tracks Page
Using Track Logs The Rino draws an electronic bread crumb trail on the Map Page as you travel along. This bread crumb trail is the ‘Track Log’. The Track Log contains information about points along its path, including time, and position. The Rino uses this information to allow you to navigate using the saved track. - Page 56 Main Menu Page Tracks Page Saved Track Page Save Track Options Track Log Setup Menu If you choose Auto-record, you can set the recording interval from More to Least Often. You can set recording intervals for Time or Distance as desired. To save and use a Track Log: 1.
-
Page 57: Proximity Points
Proximity Points The Proximity list lets you defi ne an alarm circle around a stored waypoint/contact position, and can be used to help you avoid dangerous areas or to alert you when you have strayed away too far from other Rino users. -
Page 58: Satellite Page
Main Menu Page Satellite Page Satellite Page using WAAS. Satellite Page The Satellite Page provides a picture of satellite signal tracking, tells you when the unit is ready for navigation, and shows your location coordinates. The Skyview graphic represents a view looking up at the sky from your current location showing satellites and their assigned numbers. - Page 59 travel through rocks, buildings, people, metal, or heavy tree cover so for best results, keep the unit in clear view of the sky. At least three satellite signals are needed to determine your location, otherwise the unit displays a “Poor Satellite Reception”...
-
Page 60: Satellite
Main Menu Page Satellite Page o select the ‘Use With GPS Off’ option: 1. Use the THUMB STICK to highlight the Option Menu button at the top of the page and then press it IN to display the Options Menu. 2. -
Page 61: The Setup Menu
The Setup Menu The Setup Pages allow you to customize your Rino to your personal preferences. You can choose time settings, units of measure, display backlighting and contrast set- tings, heading measurement, interface options and system operating mode. By highlighting the icons on the Setup Menu and then pressing in on the THUMB STICK, you can display the Setup Page for each of the menu items. -
Page 62: Units Page
Main Menu Page Setup Page Units Page Position Format Options Menu The ‘User’ datum is based on a WGS-84-Local datum and is an advanced feature for unlisted or custom datums. To learn more, check your local library or on the world wide web for educational materials on datums and coordinate systems. - Page 63 Because of this the unit can navigate to a TD coordinate anywhere in the world. For more information on Loran TDs, you may down- load Garmin’ s “Loran TD Position Format Handbook” from the Garmin web site at http://www.garmin.com/ support/userManual.html.
-
Page 64: Display Page
Main Menu Page Setup Page Display Page Heading Page Display Page You can adjust the amount of time that the backlight- ing feature stays on and adjust the screen contrast. Backlighting Timeout - Choose from Stays On, to delays of 15 seconds, 30 seconds, one, or two minutes before timing out. -
Page 65: Interface Page
None - Provides no interfacing capabilities. If ‘Garmin DGPS’ or ‘RTCM in/NMEA Out’ format is selected, additional fi elds are provided to control a Garmin differential beacon receiver (e.g. GBR 21 & GBR 23) directly from your unit. Tuning is automatic with ‘Scan’... -
Page 66: Setup
The Option Menu allows you restore defaults or display the current version of unit operating software and the Unit I.D. Number. Software updates and instructions for downloading are available from the Garmin web site (www.garmin.com). Choose one of the four GPS options other than ‘Normal’... -
Page 67: Calendar Page
Calendar This feature provides you with a monthly calendar with programmable reference notes dates. You can display one monthly calendar of days at a time and mark days on each with reference notes using the data entry keypad. Days that are shaded have notes added. You can create reference notes for multiple months and for months in years yet to come. -
Page 68: Alarm Clock Page
Main Menu Page Alarm Clock / Calculator Alarm Clock Page Calculator Page Alarm Clock This feature provides an alarm for the system clock. Enter a time in the time fi eld and turn the alarm on and off from the control fi eld menu. Remember to enter alarm times in the same time format (UTC or local) you’re using for your system. -
Page 69: Stopwatch Page
Stopwatch This feature allows you to use the unit as a stopwatch, including a lap timer. You may also have the unit record the lap time based on distance. For example, if you set the lap distance to one mile, the unit will record the time it takes you to travel one mile. -
Page 70: Sun And Moon Page
Main Menu Page Sun and Moon / Hunt and Fish Sun and Moon Page Hunt and Fish Page Sun and Moon This feature provides you with a graphic display of both sun and moon positioning for a certain date, time and location with times for sunrise, sunset, moonrise, and moonset. -
Page 71: Area Calculator
the THUMB STICK to display the ‘New Location’ options list. 2. Highlight the option desired and then press IN on the THUMB STICK to activate. If you choose ‘Current Location’ the field values displayed on the page reflect the times at your current location. 3. -
Page 72: Waypoint Bomber
Main Menu Page Games Games Menu The Games Page includes: Memory Race, Waypoint Bomber, Clothesline and Assimilation. Highlight the appropriate icon and then press IN on the THUMB STICK to play the desired game. Brief instructions will be displayed when you start each game. Memory Race Be the fi... - Page 73 Clothesline Team members select the same user symbol and then attempt to “hit” or ‘clothesline” other players by press- ing the TALK key when an opposing team member is between them. You may also mark a point and assign it a symbol to be used as a stationary team member.
-
Page 74: Frs Explained
Appendix A FRS Explained What is FRS? FRS, or Family Radio Service, is a UHF radio frequency band licensed by the FCC for general public use. The operating frequency ranges from 462.5625 to 467.7125 MHz, with a transmitting power of one half watt. - Page 75 an unused or less-used channel for your group. After scanning briefl y to see what channels other users are on, simply set your FRS radios to an unused channel and enjoy less interference. You may also fi nd this useful just to listen in on others currently using FRS.
-
Page 76: Appendix B: Specifi Cations
The temperature rating for the Rino may exceed the usable range of some batteries. Alkaline batteries can rupture at high temperatures. External power can only be applied using the Garmin Auto Power Adapter or PC Interface Cable with Auto Power Adapter. These cables contain a 12 Vdc to 3 Vdc voltage regulator. Modifi cations or other applications voids the product warranty. -
Page 77: Appendix C: Accessories
Appendix C To obtain accessories, see your local dealer or visit the Garmin web site at www.garmin.com and click on Shop Accessories link. 12-volt Adapter Cable: Provides unit power from an automobile cigarette lighter. 2.5 to 3.5 mm Jack Adapter: Allows you to use 3rd party headsets with your Rino unit.. -
Page 78: Appendix D: Mapsource Setup
PC interface cable, you may want to transfer data before beginning use, to provide your unit with maximum Find features. The Rino 110 can accept up to 1 MB of data from MapSource Points of Interest CD loaded on a PC and connected to the Rino Data Port. -
Page 79: Appendix E: Troubleshooting
To resolve problems that cannot be remedied using this guide, contact Garmin Customer Service at: 913-397-8200 or 800-800-1020 Symptom Unit does not turn on. Unit does not turn ON, even with new batteries. The unit turns On, then turns Off. - Page 80 The Rino is programmed to provide “pop-up” messages concerning operational characteristics and conditions. Press in on the THUMB STICK to acknowledge a message and return to the current feature. To resolve problems that cannot be remedied using this guide, contact Garmin Customer Service at: 913-397-8200 or 800-800-1020 Probable Cause TALK key may not be fully depressed.
- Page 81 Appendix F The following data fi eld options are available on the Map, Navigation and Trip Computer Main Pages. Data Field Bearing - The direction from your current location to a Defi nitions destination. Course - The direction from your starting location to a destination.
-
Page 82: Appendix F: Data Field Defi Nitions
Appendix F Data Field Defi nitions Overall Avg. Speed - Your average speed. Pointer - Indicates the direction to the next desti- nation. Speed - Your rate of travel can be displayed in miles per hour, kilometers per hour, or nautical miles per hour. -
Page 83: Appendix G: Wiring Diagram
DGPS (Differential GPS) corrections are accepted in RTCM SC-104 version 2.0 format through the ‘Data In’ line. The Garmin GBR 21 and GBR 23 are the recom- mended beacon receivers for use with the Rino. Other beacon receivers with the correct RTCM format may be used, but may not correctly display status or allow tuning control from the GPS unit. -
Page 84: Appendix H: Frequency Chart
Appendix H Frequency Chart NOTE: If you plan to purchase FRS radios from third party manufacturers be aware that there are CTCSS differences in some radios. Some of the tones on one radio may not be available on other radios. Charts showing the differ- ent codes and manufactur- ers can be located on the... -
Page 85: Index
Accessories..67 Accuracy Circle ... 17 Activate a Route ... 43 Alarm Clock ...28-29, 58 Area Calculation Page...28-29, 60 Arrow, Panning... 19 AutoZoom... 21 Backlight Timer... 56 Backlighting On/Off ... 56 Battery Level Indicator ... 3 Battery Saver Mode... 56 Battery Type... - Page 86 Index Map Page Options ... 18 Map Page Panning...18-19 Map Page Setup...18,21-22 Map Scale... 17 MapSource Data ... 21, 55, 68 Mark a Waypoint...30-31 Mark Waypoint Page ...28-30 Measuring Between Waypoints... 22 Microphone Sensitivity...8 Monitor ...5-6 Moving a Route Waypoint ...42-43 My ID...3-4, 11 Navigation Page...23-25 Nearest (Waypoints, Cities etc.)...33-38...
-
Page 87: Index
Turning the GPS Receiver “Off” ... 7 Turning the Radio “Off” ... 7 Unit Features... 1, 66 Units of Measure ...52-53 Units Page ...52-53 User Symbol... 3, 4, 13, 15, 64 UTC Offset ... 51 View Waypoints on Route ... 9 VOX Level... - Page 88 For the latest free software updates (excluding map data) throughout the life of your Garmin products, visit the Garmin web site at www.garmin.com © Copyright 2002-2003 Garmin LTD. or its subsidiaries Garmin International, Inc. 1200 E 151 Street, Olathe, KS 66062 U.S.A.
Need help?
Do you have a question about the Rino 110 and is the answer not in the manual?
Questions and answers