Advertisement
Quick Links
Download this manual
See also:
Owner's Manual
Using the Weather Radio
The Weather Radio, available only on Rino 530HCx units, provides
a constant update of weather conditions, which is helpful while
outdoors or planning a trip. Seven Weather Radio channels are avail-
able. For more information about the Weather Radio, refer to the
Owner's Manual.
To turn the Weather Radio on:
1. Open the Radio page by pressing the
Main Page Menu button .
2. Highlight Weather button on the page
and press Enter or use the Option
Menu to select Use Weather Radio
and press Enter.
Radio Page with
Weather Radio On
3. Select the Seek button to find an active
weather channel in your area.
4. With the Weather button highlighted, press the Thumb Stick
in to exit weather.
Marking a Waypoint
Marking a waypoint records your current location and stores it in the
unit's memory. You must be tracking satellites to mark your location,
otherwise your last known location is marked.
To mark a waypoint:
1. Press Enter and hold it until the Shortcuts Menu is shown.
2. Highlight Mark Waypoint and press Enter to display the Mark
Waypoint page.
Symbol Field
Name
Field
Mark Waypoint Page
3. Highlight the Name field and press Enter. Enter a new name.
When finished, highlight OK then press Enter.
4. Highlight the Symbol field and press Enter. Choose a symbol
then press Enter to accept.
5. Highlight the OK button at the bottom of the page and press
Enter to save the waypoint.
Navigating with Your Rino
You can navigate to a waypoint, city, exit, or a contact's location.
Using optional detailed maps, you can also navigate to points of
interest, addresses, and intersections.
To begin navigation using Find:
1. Press and hold the Enter key to open the Shortcuts Menu.
2. Highlight Find and press Enter.
3. Highlight Waypoints and press Enter to view the list of near-
est waypoints.
4. Highlight a waypoint and press Enter.
5. With the Waypoint page shown, highlight the Go To button at
the bottom of the page and press Enter to begin navigation.
The Map page automatically opens
to guide you to your destination.
Compass Page
The two main components of the Compass
page are the compass ring and the pointer. As
you move, the compass ring rotates showing
your current heading at the top of the display.
The pointer points toward your destination.
When the pointer is aligned with the vertical
line at the top of the compass ring, you are on
Compass Page
a direct course toward your destination. The
Rino 520HCx has to be moving to navigate. If you are standing still
or moving very slowly, the navigation data may not be accurate.
When you are stationary, an electronic compass (Rino 530HCx only)
becomes functional to maintain directional orientation. Follow instruc-
tions in the Owner's Manual for calibrating the electronic compass the
first time you use it.
Using Peer-To-Peer Positioning
The Rino's most unique feature is Peer-to-Peer positioning, send-
ing the location of one Rino unit to other Rino units. Peer-to-Peer
positioning allows you to track the movement of other Rino users
and also navigate to their location.
To send your location:
Press and release either the Call or Talk key. Your Rino auto-
matically sends out its location. Other Rino users monitoring
the same channel and code receive this information.
Using Contacts
The first time you are contacted by another Rino user, the New Contact
page is displayed. From the New Contact page you can show the user's
location on your Map, Go To that position.
Select OK to add them to your contact list. To
disregard the contact, exit by pressing the Page
button
or the Page/Quit key. Every time
you receive signals from contacts, your map is
updated showing their new position. A Track
Log of their movement is created and shown on
New Contact Page
your map.
Sending a Location
You can send any location that you have available in your Find
menu. These may be waypoints, contacts, cities, exits, or any
other data that is loaded in the unit. Below are the steps to send a
waypoint.
To send a location (waypoint) using Find:
1. Press the Enter key and hold it until the Shortcuts Menu
appears, or press the Page/Quit key until the Main Menu is
shown.
2. Highlight Find and press Enter. Highlight Waypoints and
press Enter to view the list of waypoints nearest to your cur-
rent location.
3. Highlight the waypoint that you want to send and press Enter
to view the Waypoint Review page.
4. Highlight the Option Menu button and press Enter.
5. Select Send Location and press Enter.
Send Location
The location is sent to all Rinos using the same channel and code.
They can then choose to Go To that location, view the location on
the map (Map), or save the location (Save).
Polling a Location
If you have not heard from a contact in a while and would like to
know that contact's current location, you may "poll" the contact's
location. This will update that contact's location in your Rino.
To poll a location:
1. Press Enter and hold it until the Shortcuts Menu is shown, or
press the Page button until the Main Menu is shown.
2. Highlight Find and press the Thumb Stick in. Highlight Con-
tacts and press Enter.
3. Highlight the contact that you want
to poll and press the Call key or,
press Enter to view the Contact
Review page.
4. Highlight the Option Menu button
and press Enter.
5. Select Poll Location and press
Enter.
Polling a contact's location
Sending a Note
You can send a note to communicate silently with other Rino users
on the same channel and code that you are using. This can be a
saved note or a new note.
To send a note:
1. Press Enter and hold it until the Shortcuts menu is displayed.
2. Select the Send Note option.
3. To create a new note or edit an existing note, press Enter
when the Edit Note field is highlighted. Enter your note using
the data entry keyboard. Select OK when complete.
To use a Saved Note, select the desired note from the Saved
Note list and press Enter.
4. Select Send to send the note to all Rino users on the same
channel and code that you are using. Select Save to save the
note for future use. Select Clear to erase the note.
If you have further questions or just want to learn more about
the operation of the Rino 520HCx or Rino 530HCx, refer to the
Owner's Manual, which provides detailed information about all of
your unit's features.
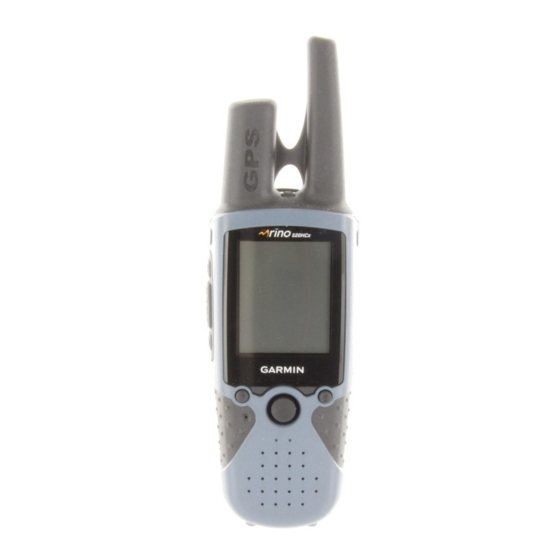
Quick Start Guide
Rino
520-530HCx
®
2-way radio and GPS
Power key
• Press and hold to turn the
unit On/Off
Rocker/Enter key
• Press and release to
• Move up, down,
adjust backlighting
right or left to
move through lists,
highlight fields,
Call key
on-screen buttons,
• Press to send out
icons, enter data,
Call Tone
or move the map
• Sends position when
panning arrow
released (if enabled)
• Press in to enter
highlighted options
and to confirm
Talk key
messages
• Press and hold to talk
• Press in and hold
• Sends position when
to display the
released (if enabled)
Shortcuts menu
Zoom/Map (Z)
Page/Quit key
key
• Press to cycle through the
main pages
• From the Map
• Used to quit or escape
Page, press to
menu items
open the Zoom
control window
Volume (V) key
• From any other
• Press to open the volume
page, press to
and squelch control
access Map Page
window
• Press and hold to
• Press and hold to mute or
turn the electronic
unmute the speaker.
compass On/Off
(Rino 530HCx only)
Microphone:
Rino 520HCx (shown)
• Hold unit 3–4 inches from
Speaker
your mouth when talking
Advertisement

Related Manuals for Garmin RINO 520HCx


Summary of Contents for Garmin RINO 520HCx
- Page 1 To mark a waypoint: a direct course toward your destination. The 1. Press Enter and hold it until the Shortcuts Menu is shown. Rino 520HCx has to be moving to navigate. If you are standing still 2. Highlight Mark Waypoint and press Enter to display the Mark or moving very slowly, the navigation data may not be accurate.
- Page 2 All of the information you need to operate the Rino can be found on attached to the back of the unit. See the Rino Owner’s Manual for five default main pages (only four for the Rino 520HCx). Simply more information about batteries. Stored data is not lost when the press and release the Page/Quit key to cycle through the Radio battery is removed.
Need help?
Do you have a question about the RINO 520HCx and is the answer not in the manual?
Questions and answers