Table of Contents
Advertisement
Quick Links
Download this manual
See also:
User Manual
Advertisement
Table of Contents

Related Manuals for HP Tablet 7


Summary of Contents for HP Tablet 7
- Page 1 HP Tablet 7 Maintenance and Service Guide...
- Page 2 SD Logo is a trademark of its proprietor. The information contained herein is subject to change without notice. The only warranties for HP products and services are set forth in the express warranty statements accompanying such products and services. Nothing herein should be construed as constituting an additional warranty.
- Page 3 Safety warning notice WARNING! To reduce the possibility of heat-related injuries or of overheating the device, do not place the device directly on your lap or obstruct the device air vents. Use the device only on a hard, flat surface. Do not allow another hard surface, such as an adjoining optional printer, or a soft surface, such as pillows or rugs or clothing, to block airflow.
- Page 4 Safety warning notice...
-
Page 5: Table Of Contents
3 Illustrated parts catalog ....................3 Locating the serial number, product number, and model number ............ 4 Tablet major components ......................5 Trim Kit contents ........................7 Miscellaneous parts ........................7 Sequential part number listing ....................8 4 Removal and replacement procedures preliminary requirements ........9 Tools required .......................... - Page 6 Factory data reset ........................28 Android system recovery mode ....................28 6 Tablet specifications ......................29 7 Power cord set requirements ..................30 Requirements for all countries ....................30 Requirements for specific countries and regions ................. 31 8 Recycling ........................32...
-
Page 7: Product Description
HP Tablet 7 Processor RK3066A dual core A9 1.60-GHz processor Panel 7.0-in (1024×600), liquid crystal display (LCD) + 5-point multiTouchScreen + cover lens module, 16:9 aspect ratio, typical brightness: 400 nits Memory Support for both 1.0- and 2.0-GB LPDDR3 SDRAM... -
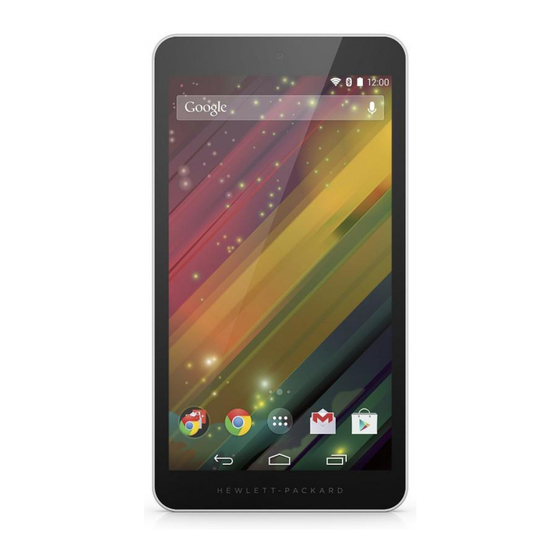
Page 8: External Component Identification
External component identification Item Component Item Component Headphone jack Front camera Internal microphone Rear camera Micro SD Card reader Speaker and headphone volume Power button Speakers (2) WLAN antenna (10) Micro USB port (for charging or connecting to tablet) Chapter 2 External component identification... -
Page 9: Illustrated Parts Catalog
Illustrated parts catalog... -
Page 10: Locating The Serial Number, Product Number, And Model Number
Locating the serial number, product number, and model number The serial number and product number of your tablet are located on the left edge of the tablet. The model number of your tablet is located on the back of your tablet. You may need the information when you travel internationally or when you contact support. -
Page 11: Tablet Major Components
Tablet major components Item Component Spare part number I/O bezel 731532-001 Rear cover: In red finish for use only on tablet models equipped with 16-GB of system memory 730355-001 In silver finish for use only on tablet models equipped with 16-GB of system memory 730354-001 In red finish for use only on tablet models equipped with 8-GB of system memory 727909-001... - Page 12 Front-facing webcam 727667-001 Rear-facing webcam (includes cable) 731533-001 Trim Kit, includes: 727661-001 (9a) Side trim (9b) System board bracket (9c) Volume control button actuator (10) Antenna board 727662-001 (11) 7.0-in, LCD, TFT, TouchScreen display assembly 727663-001 Chapter 3 Illustrated parts catalog...
-
Page 13: Trim Kit Contents
727660-001 For use in North America 727658-001 HP Tablet 7 tablet with TFT, LCD TouchScreen: Equipped with 16-GB of system memory in red finish for use in all countries and regions 732048-001 Equipped with 16-GB of system memory in silver finish for use in all countries and regions... -
Page 14: Sequential Part Number Listing
Rear cover in red finish for use only on tablet models equipped with 16-GB of system memory 730930-001 HP Tablet 7 tablet with TFT, LCD TouchScreen and 8-GB of system memory in red finish for use in all countries and regions... -
Page 15: Removal And Replacement Procedures Preliminary Requirements
Removal and replacement procedures preliminary requirements CAUTION: Components described in this chapter should only be accessed by an authorized service provider. Accessing these parts can damage the computer or void the warranty. Tools required You will need the following tools to complete the removal and replacement procedures: ●... -
Page 16: Cables And Connectors
Cables and connectors CAUTION: When servicing the tablet, be sure that cables are placed in their proper locations during the reassembly process. Improper cable placement can damage the tablet. Cables must be handled with extreme care to avoid damage. Apply only the tension required to unseat or seat the cables during removal and insertion. -
Page 17: Grounding Guidelines
A product can be degraded by as little as 700 V. Typical electrostatic voltage levels Relative humidity Event Walking across carpet 35,000 V 15,000 V 7,500 V Walking across vinyl floor 12,000 V 5,000 V 3,000 V Motions of bench worker 6,000 V... -
Page 18: Packaging And Transporting Guidelines
Packaging and transporting guidelines Follow these grounding guidelines when packaging and transporting equipment: ● To avoid hand contact, transport products in static-safe tubes, bags, or boxes. ● Protect ESD-sensitive parts and assemblies with conductive or approved containers or packaging. ● Keep ESD-sensitive parts in their containers until the parts arrive at static-free workstations. - Page 19 Electrostatic voltage levels and protective materials The following table lists the shielding protection provided by antistatic bags and floor mats. Material Voltage protection level Antistatic plastics Bags 1,500 V Carbon-loaded plastic Floor mats 7,500 V Metallized laminate Floor mats 5,000 V Grounding guidelines...
-
Page 20: Removal And Replacement Procedures
Removal and replacement procedures Component replacement procedures This chapter provides removal and replacement procedures for Authorized Service Provider only parts. There are as many as 16 screws that must be removed, replaced, and/or loosened when servicing the tablet. Make special note of each screw size and location during removal and replacement. Rear cover Description Spare part number... - Page 21 Remove the I/O bezel (2). The I/O bezel is available using spare part number 731532-001. Separate the top edge (1) of the rear cover from the display assembly. Remove the rear cover (2). Reverse this procedure to install the keyboard. Removal and replacement procedures...
-
Page 22: Battery
WARNING! To reduce potential safety issues, use only the battery provided with the tablet, a replacement battery provided by HP, or a compatible battery purchased from HP. CAUTION: Removing a battery that is the sole power source for the tablet can cause loss of information. - Page 23 Remove the battery (5). Reverse this procedure to install the battery. Removal and replacement procedures...
-
Page 24: System Board
WARNING! To reduce potential safety issues, use only the battery provided with the tablet, a replacement battery provided by HP, or a compatible battery purchased from HP. CAUTION: Removing a battery that is the sole power source for the tablet can cause loss of information. - Page 25 Remove the system board: Disconnect the following cables from the system board: (1) Speaker cable (2) USB cable (3) X-axis control cable (4) Y-axis control cable Remove the six Phillips PM1.75×4.0 screws that secure the system board to the display assembly. Lift the right side (1) of the system board until it rests at an angle.
- Page 26 Remove the system board (2) by sliding it up and to the right at an angle. Reverse this procedure to install the system board. Chapter 4 Removal and replacement procedures preliminary requirements...
-
Page 27: Webcam
Webcam Description Spare part number Front-facing webcam 727667-001 Rear-facing webcam (includes cable) 731533-001 Before removing the webcams, follow these steps: Turn off the tablet. If you are unsure whether the tablet is off or in Hibernation, turn the tablet on, and then shut it down through the operating system. - Page 28 Disconnect the front-facing webcam from the system board. Remove the front-facing webcam. Reverse this procedure to install the webcams. NOTE: When installing the front-facing webcam, note that the connector is keyed and connects to the system board only one way. Chapter 4 Removal and replacement procedures preliminary requirements...
-
Page 29: Usb Connector
USB connector Description Spare part number USB connector (includes cable) 729741-001 Before removing the USB connector, follow these steps: Turn off the tablet. If you are unsure whether the tablet is off or in Hibernation, turn the tablet on, and then shut it down through the operating system. Disconnect the power from the tablet by unplugging the power cord from the tablet. -
Page 30: Antenna Board
Antenna board Description Spare part number Antenna board 727662-001 Before removing the antenna board, follow these steps: Turn off the tablet. If you are unsure whether the tablet is off or in Hibernation, turn the tablet on, and then shut it down through the operating system. Disconnect the power from the tablet by unplugging the power cord from the tablet. -
Page 31: Speakers
Speakers Description Spare part number Speakers (include left and right speakers and cables) 727665-001 Before removing the speakers, follow these steps: Turn off the tablet. If you are unsure whether the tablet is off or in Hibernation, turn the tablet on, and then shut it down through the operating system. -
Page 32: Side Trim
Side trim NOTE: The side trim is included in the Trim Kit, spare part number 727661-001. The Trim Kit also includes the system board bracket and the volume control button actuator. Before removing the side trim, follow these steps: Turn off the tablet. If you are unsure whether the tablet is off or in Hibernation, turn the tablet on, and then shut it down through the operating system. -
Page 33: Backing Up And Recovering Your Data
Go to the Google Play store to download the latest versions of HP and third-party apps and widgets. The operating system will download system updates automatically and notify you when it is ready to install these updates. -
Page 34: Factory Data Reset
Factory data reset To reset all settings and delete all data on the device: To access Settings, touch the All apps icon, and then touch Settings. Under PERSONAL, touch Back up & reset. Under PERSONAL DATA, select Factory data reset, and then follow the on-screen instructions. -
Page 35: Tablet Specifications
Tablet specifications Metric U.S. Dimensions Width 19.7 cm 7.8 in Depth 1.1 cm 0.4 in Height 12.0 cm 4.7 in Weight 0.4 kg 0.9 lbs Temperature Operating 5°C to 35°C 41°F to 95°F Nonoperating -20°C to 60°C -4°F to 140°F... -
Page 36: Power Cord Set Requirements
125 or 250 V AC, as required by the power system of each country or region. ● The appliance coupler must meet the mechanical configuration of an EN 60 320/IEC 320 Standard Sheet C13 connector for mating with the appliance inlet on the back of the tablet. Chapter 7 Power cord set requirements... -
Page 37: Requirements For Specific Countries And Regions
Japanese Dentori Law. The flexible cord must be Type VCT or VCTF, 3-conductor, 1.00-mm² conductor size. The wall plug must be a two-pole grounding type with a Japanese Industrial Standard C8303 (7 A, 125 V) configuration. The flexible cord must be Type RVV, 3-conductor, 0.75-mm² conductor size. Power cord set fittings (appliance coupler and wall plug) must bear the certification mark of the agency responsible for evaluation in the country or region where it will be used. -
Page 38: Recycling
Follow the local laws and regulations in your area for battery disposal. HP encourages customers to recycle used electronic hardware, HP original print cartridges, and rechargeable batteries. For more information about recycling programs, see the HP Web site at http://www.hp.com/recycle. Chapter 8 Recycling... -
Page 39: Index
14 front-facing webcam description 1 removal 21 spare part number 6, 8, 21 Screw Kit, spare part number 7, 8 packaging guidelines 12 service considerations plastic parts, service cables 10 grounding guidelines 11 considerations 9... - Page 40 18 spare part numbers 6, 8, 18 system board bracket, illustrated tablet, major components 5 tablet, spare part numbers 7, 8 tools required 9 transporting guidelines 12 Trim Kit contents 7 spare part number 6, 7, 8...