
Subscribe to Our Youtube Channel
Related Manuals for Jensen JENHR1D


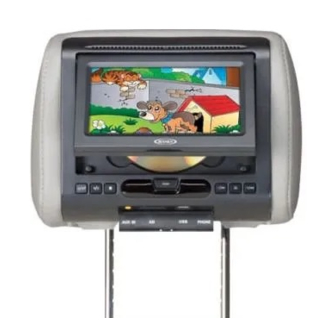
Summary of Contents for Jensen JENHR1D
- Page 1 JENHR1D 7” LCD MONITOR WITH BUILT-IN DVD PLAYER FOR REAR SEAT ENTERTAINMENT PUSH OPERATION MANUAL/ INSTALLATION GUIDE ® 128-9095A...
-
Page 2: Important Notice
Important Notice Installation of headrest products require careful planning and preparation. Be extremely careful of seats that have airbags built into them. Keep wiring away from sides of seats. If you have any questions regarding wire routing or installation in a vehicle, please contact Audiovox Technical Support at 1-800- 225-6074. -
Page 3: Specifications
FEATURES • 7” Digital Thin Film Transistor (TFT) Active Matrix Liquid Crystal Display (LCD) Monitor • Built-in DVD Player • Last position memory for DVD player • Three Audio / Video Source inputs (DVD, AV and AUX)• USB 2.0 port / SD Card Reader input •... - Page 4 MATERIAL TO USE IN THIS PACKAGE: 1) JENHR1D System Monitor with DVD Player (JENHR1D) (1pc) NOTE: The JENHR1D monitor has been designed to be interchangeable from one headrest to the other. The headrests will still have the Cigarette Lighter Adaptor cables and 3 RCA Jack (AV Input) on them and should be connected to their respective connectors.
-
Page 5: Headrest Cover Replacement
HEADREST COVER REPLACEMENT: NOTE: Choose the best color match for your vehicle. Lay the headrest on a flat surface, screen facing up. Using a Philips screwdriver, unscrew the two Philips screws and lift the bottom edge of the monitor up- ward. - Page 6 7. Replace the player into the headrest. a. Slide the top of the DVD player into the top of the headrest. b. When lowering the bottom of the DVD player make sure the cable is not trapped between the DVD player and the headrest inside the shell. c.
-
Page 7: Vehicle Preparation
VEHICLE PREPARATION Read the manual and get familiar with the product requirements and connections. 2. Install the headrests. a. Remove vehicle’s original headrests and store in a safe place. b. Locate the box of tube adapters and find the tubes that match the diameter of your factory headrest post. -
Page 8: Wireless Headphones
IR headphones (not supplied with the JENHR1D) which are available at many electronics stores. If two JENHR1D’s are installed in a vehicle the first JENHR1D has to be set to transmit on channel A (1) and the second JENHR1D has to be set to transmit on channel B (2). - Page 9 JENHR1D WIRING DIAGRAM Headrest Monitor PUSH Cigarette Lighter Adaptor RCA Jack (AV Input) Connect the cigarette lighter adaptor to the car.
- Page 10 JENHR1D CONTROLS AND INDICATORS DIAGRAM (Front View) LCD PANEL POWER/SOURCE VOLUME /NEXT PUSH PLAY/PAUSE SYSTEM MENU STOP VOLUME /PREVIOUS SCREEN RELEASE IR SENSOR IR HEADPHONE TRANSMITTER LENS PULL DOWN HEADPHONE JACK AUX IN JACK AUX IN PHONE SD CARD READER...
-
Page 11: Playing Dvds
Playing DVDs Press the screen release button and raise the screen to insert a DVD disc. Snap the DVD disc onto the hub (spin the disc with your finger to make sure the disc is seated properly). Lower and close the LCD screen, disc playback will not start until the screen is closed for safety reasons. -
Page 12: Playing Mp3 Discs
Playing MP3 Discs MP3 is a format for storing digital audio. An audio CD-quality song can be com- pressed into MP3 format with very little loss of quality, while taking up much less space. CD-R discs that have been encoded in MP3 format can be played on the DVD player. -
Page 13: Remote Control Operation
REMOTE CONTROL OPERATION NOTE: The remote control has a battery installed with a pull tab to prevent battery discharge. Remove the pull tab before attempting to use the remote. Battery Replacement Remove the battery holder. 2. Remove the old battery and insert the new battery (CR2025) into the battery holder. - Page 14 * Function control is available on the unit and the remote control. POWER ( ) Button* Press this button to turn the unit ON and OFF. 2. SOURCE Button* Each time the button is pressed, the audio / video source will change in the following sequence: DVD >...
- Page 15 10. ZOOM Button Press this button to enlarge or decrease the picture size when playing a DVD disc. Press ZOOM button DVD Player performs Once Enlarges the picture 2X Twice Enlarges the picture 3X 3 Times Enlarges the picture 4X 4 Times Reduces the picture 1/2 5 Times...
- Page 16 18. AUDIO Button Press to display and select the available AUDIO languages in DVD mode. Each time you press the button, the language changes. NOTE: The audio languages vary from disc to disc. 19. FF SCAN FORWARD ( ) Button* Press to search in the forward direction.
-
Page 17: System Menu Settings And Adjustments
SYSTEM MENU SETTINGS AND ADJUSTMENTS The System Menu contains features and options that allow you to customize your system. Press the “ ” button on unit or press the TV button and the SYSTEM MENU button on the remote control, the menu display below will appear on screen. 2. -
Page 18: Dvd Settings And Adjustments
The FM Modulator adjustments consist of turning the FM Modulator on or off and selecting the FM Modulator frequency. The wireless FM Modulator Frequencies that can be selected are: (CH1 87.7MHz, CH2 88.1MHz, CH3 88.5MHz, CH4 88.9MHz, CH5 106.7MHz, CH6 107.1MHz, CH7 107.5MHz, CH8 107.9MHz. -
Page 19: General Setup Page
GENERAL PAGE General Audio Preference Exit General Setup Page TV Display Wide Screen Saver Last Memory Goto General Setup Page GENERAL SETUP PAGE TV Display The TV Display feature allows the user to change the screen format (aspect ratio to 4:3 PScan, 4:3 LB, or 16:9 Wide) •... -
Page 20: Audio Setup Page
AUDIO PAGE General Audio Preference Exit Audio Setup Page Equalizer Sound Mode None Bass Boost Super Bass Treble Boost Goto Audio Setup Page AUDIO SETUP PAGE Sound Mode The sound mode feature allows the user to apply preset sound effects to the unit’s audio output signal. -
Page 21: Preference Page
PREFERENCE PAGE General Audio Preference Exit Preference Page TV Type NTSC Audio Subtitle Disc Menu Parental Password Default Goto Preference Page PREFERENCE PAGE NOTE: This menu page is available if there is no disc in the disc tray, the disc tray is open or the disc in the disc tray is stopped. -
Page 22: Audio Menu
Audio Menu This item allows a user to select a preferred audio language. This function only applies to discs encoded with different audio languages. Options: English, French, Spanish, Chinese, Japanese, Korean, Russian, and Thai. NOTE: If the selected language is not available for the currently playing disc, the disc’s default setting is applied. - Page 23 Parental This item allows the user to limit the content of movie playback from G to Adult. The lower the value, the more strict the control. Movies rated higher than the level set for the parental lock can not be viewed without entering the correct password. Options: 2) PG, 3) PG –...
-
Page 24: Exit Setup Page
EXIT SETUP PAGE Exit General Audio Preference Video Setup Page Exit Setup Menu Exit Setup Page The exit setup page allows the user to exit the setup menu and return to the DVD playback. To exit the setup page use the u to highlight EXIT and press ENTER to confirm the selection. -
Page 25: Troubleshooting
TROUBLESHOOTING PROBLEM SOLUTION IR remote inoperative • Verify that the battery in the remote is fresh. • Verify that the remote sensor eye is not obstructed. Disc won’t play • Insert a disc with the label side facing out. • Check the type of disc you put into disc tray. - Page 26 ® 12 MONTH LIMITED WARRANTY Applies To Jensen Mobile Video Products AUDIOVOX ELECTRONICS CORP. (the Company) warrants to the original retail purchaser of this product that should this product or any part thereof, under normal use and conditions, be proven defective in material or workmanship within 12 months from the date of original purchase, such defect(s) will be repaired or replaced with reconditioned product (at the Company’s option) without charge...
- Page 27 NOTES...
- Page 28 © 2012 Audiovox Electronics Corp., Hauppauge, NY 11788 128-9095A...
Need help?
Do you have a question about the JENHR1D and is the answer not in the manual?
Questions and answers