DeLonghi AIR CONDITIONER Instructions Manual
Hide thumbs
Also See for AIR CONDITIONER:
- Instructions manual (23 pages) ,
- Manual (18 pages) ,
- User manual (13 pages)
Table of Contents
Advertisement
Advertisement
Table of Contents

Related Manuals for DeLonghi AIR CONDITIONER


Summary of Contents for DeLonghi AIR CONDITIONER
-
Page 1: Air Conditioner
AIR CONDITIONER INSTRUCTIONS... -
Page 2: Important Safeguards
I M P O R T A N T S A F E G U A R D S • Use this appliance only as described in this • Clean the air filter at least once a week. instruction manual. • Avoid using heating appliances near the air As with all electrical equipment, whilst the conditioner. instructions aim to cover as many eventuali- • Always transport the appliance upright or re- ties as possible, caution and common sense... -
Page 3: Electrical Connections
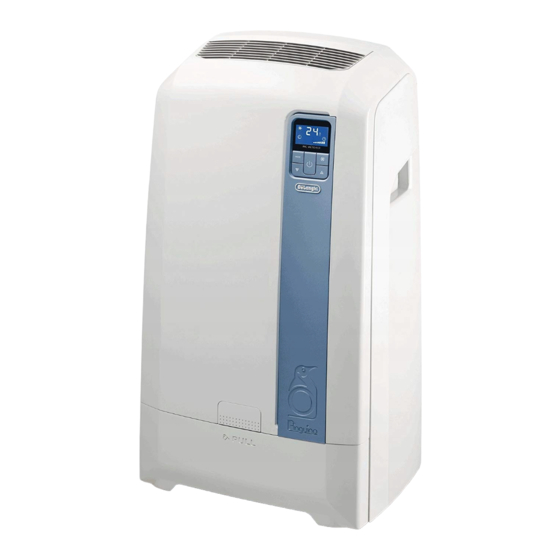
• Refrigerant gas may be odourless. WHAT IS THE WATER-AIR PINGUINO • The appliance must be installed, used and During the summer, you feel comfortable at a stored in a room with a surface area greater temperature of between 24 and 27° C with a rela- than 15 m². tive humidity of about 50%. • This appliance contains about 300 g of R290 An air conditioner removes excess moisture and refrigerant gas. heat from the room where it is located. • R290 refrigerant gas complies with European Compared with wall mounted models, portable environmental directives. - Page 4 DESCRIPTION A Air outlet grille B Control panel with advanced LCD display C Handle D Grille E Castors F Air intake grille with dust filter G Condensate drain connector H Power cable Pull out tank J Tank door K Air exhaust hose L Remote control M Air exhaust hose housing N Window outlet O Silver ion filter P Electrostatic filter Q Sucker R Castor locks (only on some models) S Flange with cap T Adjustable bar U Water drain hose + cap v Indicator paper Z Dust filter...
-
Page 5: Preparing For Use
PREPARING FOR USE The instructions below will enable you to prepare your air conditioner for operation as efficiently as possible. Before use, make sure the air intake and outlet grilles are unobstructed. Air-conditioning without installation Just a few simple steps and your comfort is en- sured with your appliance: • Fit the air exhaust hose in the housing at the You can also use the “adjustable bar” accessory back of the appliance (fig. 1). (T). • Fit the window outlet in the housing in the bar (fig. 4) • Position the bar on the window sill and adjust until it fits in the guides of the blind... -
Page 6: Air-Conditioning With Installation
Keep the air hose as short and free of cur- MAX 39 inch ves as possible to avoid bottlenecks. When installing the air conditioner semi- permanently, you should leave a door slightly open, as little as 1 cm, to guarantee correct MIN 14 inch ventilation. - Page 7 PREPARING OPERATION • Immerse the paper completely in a glass of water for one second. WATER MODE • Remove the paper from the water and sha- Once the appliance has been installed, it is ready ke lightly. After about a minute, 1, 2, 3, 4 for use. or 5 red squares appear, depending on the However, its efficiency can be enhanced by ope- hardness of the water. The appliance can be rating it in the exclusive De’Longhi water mode. set to three different water hardness levels The water in the tank increases the cooling po- soft (H1), medium (H2) and hard (H3). De- wer of your Pinguino and at the same time redu- termine the hardness of the water you will be...
- Page 8 Replacing the limescale filter ling hole. It holds a maximum of 10 litres. Turn the appliance off and unplug from the mains. 13 Make sure there is no water in the appliance by emptying the tank and internal tray as described in the section: “End of season operations”. Lay the appliance on its back as shown in figure 17. Rest it on a towel or piece of cardboard to avoid scratches or damage. Remove the filter co- ver by unscrewing the four screws (fig. 17). Remove the filter delicately and loosen the two ties, making sure the two hoses connecting the filter do not slip inside the appliance. Fit the new 14 filter, following the same procedure in reverse (fig. 16/15). The pawl on the filter (see figure)
-
Page 9: Operating From The Control Panel
17 Resin filter Cover 18 OPERATING FROM THE CONTROL PANEL The control panel enables you to manage all the 19 main functions of the appliance. To fully exploit its potential, you must use the remote control unit. Turning the appliance on • Plug into the mains socket. Two lines appear on the display indicating that the appliance is in standby (fig. 20). • Press the button until the appliance co- mes on. The last function active when it was DESCRIPTION CONTROL turned off will appear. -
Page 10: Dehumidifying Mode
until the air-conditioning symbol appears. • Select the target temperature by pressing In this mode, fan speed is selected automa- tically by the appliance and cannot be set ma- the or button until the corresponding nually. value is displayed. • Select the required fan speed by pressing the button. Four speeds are available: Maximum speed: to achieve the target temperature as rapidly as possible Medium speed: reduces noise levels... -
Page 11: Description Of The Remote Control
DESCRIPTION REMOTE CONTROL SMART Mode (fig. 24) SMART mode tries to recreate ideal comfort con- 1 Air conditioning symbol ditions in the room. The appliance automatically 2 Dehumidifying symbol establishes whether to operate in air conditio- 3 Fan symbol ning, fan or stand-by mode depending on the 4 SMART symbol environmental conditions detected. 5 Selected temperature scale indicator To set this mode: 6 Signal transmission • Press the MODE button a number of times 7 BOOST symbol until the SMART symbol appears. -
Page 12: Using The Remote Control
USING THE REMOTE CONTROL Setting the time • Point the remote control at the receiver on After having inserted the batteries, the clock on the appliance. The remote control must be the display flashes until the time is set. no more than 7 metres away from the ap- Proceed as follows. pliance (without obstacles between the re- • Press the or button until the correct mote control and the receiver). -
Page 13: Selecting The Temperature Scale
BOOST function (fig. 27) Sleep function (fig. 29) Ideal for the summer to cool rooms rapidly. This function is useful for the night as it gradual- Activate by simply pressing the button. ly reduces operation of the appliance, turning it The appliance operates in air conditioning mode off after 8 hours. at maximum fan speed and maximum power. To set this function correctly: While this function is selected, it is not possible • Select the operating mode (air conditioning, to set the temperature or change fan speed. dehumidifying, smart) as described above. • Press the button. The appliance operates in the previously selected mode with the lowest possible fan speed. -
Page 14: Programming The Timer
PROGRAMMING THE TIMER The timer can be programmed to start and stop the appliance when required. Programming start up • Press the button. The start-up time and symbol flash on the remote control display (fig. 30). • Press the or buttons to set the time you want the appliance to start up. • When that time is reached, press the OK but- ton to confirm (fig. 31). The symbol re- mains displayed on the remote control and If you need to disable the timer on or off pro- the symbol is displayed on the applian- gramme in advance, press the or but- ce to indicate that the timer is active. ton respectively twice. Programming shutdown • Press the OFF button. The shutdown time and symbol flash on the remote... -
Page 15: Self-Diagnosis
SELF-DIAGNOSIS The appliance has a self diagnosis system to identify a number of malfunctions. Error messages are displayed on the appliance display. IF ... IS DISPLAYED, ...WHAT SHOULD I DO? When the water in the tank runs out, the “no water symbol” comes on and operation of the appliance switches automatically to air-air. At the same time, the quantity of air given out from the rear hose increases. When you fill the tank again, the “no water symbol” will disappear. No water symbol When this message is displayed, the water filter needs replacing as described in the section: “Replacing the limescale filter”. Change filter The appliance is fitted with a frost protection device to avoid excessive formation of ice. The appliance starts up again automatically when the defrosting process is Low Temperature completed. (frost prevention) The appliance is fitted with a safety device to avoid the compressor’s overheating. Check there are no obstruction to the air intake/output grille or to the air exhaust hose. -
Page 16: Tips For Correct Use
TIPS FOR CORRECT USE To get the best from your air conditioner, follow these recommendations: • close the windows and doors in the room to be air conditioned (fig. 34). When installing the air conditioner semi-per- manently, you should leave a door slightly open (as little as 1 cm) to guarantee correct ventilation. do not cover the appliance • make sure the air conditioner is standing on a level surface. If necessary, place the castor locks under the front wheels. AIR PURIFYING FILTERS This appliance is fitted with a silver ion filter and a dust filter to maintain efficiency (fig. 37-38). This silver ion filter is located at the back side close doors and windows of the appliance into the intake grille and it can • Protect the room from direct exposure to the house an additional electrostatic filter. sun by partially closing curtains and/or blin- The dust filter is positioned into the side grille. ds to make the appliance much more econo- mical to run (fig. 35). -
Page 17: Electrostatic Filter
CLEANING Silver ion filter This filter, located in the back side of the applian- Before cleaning or maintenance, turn the applian- ce, is treated with silver ions which not just retain ce off by pressing the button on the control dust particles, but also have an efficient antibac- panel or remote control, wait for a few seconds terial action. It also greatly reduces concentra- then unplug from the mains socket. tions of irritants such as pollen and spores. Cleaning the cabinet Electrostatic filter You should clean the appliance with a slightly The additional electrostatic filter is located in the damp cloth then dry with a dry cloth. back of the appliance over the silver ion filter. This filter retains the finest dust particles, thus • Do not wash the air conditioner with water. It enhancing the filtering capacity of the appliance. -
Page 18: Technical Characteristics
Emptying the internal tank START OF SEASON OPERATIONS To facilitate this operation, at the start of the se- Make sure the power cable and plug are undama- ason, replace the spout cap (G) with the drain ged and the earth system is efficient. Follow the hose + cap (U). installation instructions precisely. Place a recipient (such as a jug or bottle) near the spout on the back of the appliance (fig. 42). END OF SEASON OPERATIONS Remove the cap and run off any water left. Before putting the appliance away or moving it When completely empty, replace the cap. -
Page 19: Troubleshooting
TROUBLESHOOTING PROBLEM CAUSE SOLUTION The air conditioner • there is no current • wait • it is not plugged into the mains • plug into the mains does not come on • the internal safety device has tripped • call the Service Centre The air conditioner • there are bends or kinks in the air • position the air hose correctly, keeping exhaust hose it as short and free of curves as possible works for a short time to avoid bottlenecks. only • something is preventing the air from • check and remove any obstacles being discharged obstructing air discharge The air conditioner • windows, doors and/or curtains open • close doors, windows and curtains, bearing in mind the “TIPS FOR works, but does not CORRECT USE” given above cool the room...
Need help?
Do you have a question about the AIR CONDITIONER and is the answer not in the manual?
Questions and answers