Table of Contents
Advertisement
Quick Links
Use & Care Guide
®
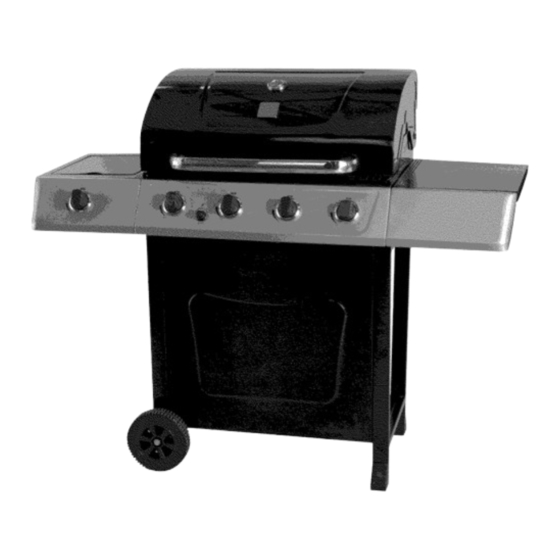
LiquidPropane GasGrill
Sears Model No. 4t5.t6t280t0
•
Safety
•
Parts
•
Use and Care
•
Assembly
This Grill is for Outdoor Use Only
•
Read and follow all Safety, Assembly,
and Use & Care instructions in this
Guide before assembling and cooking
with this grill.
•
Failure to follow all instructions in this
Use & Care Guide may lead to fire or
explosion, which could result in property
damage, personal injury or death.
Grill InformationCenter
Missing Parts? Assembly Questions?
Operation Problems? Before returning
grill to store, call 1-800-241-7548
Tools needed for assembly:
Adjustable wrench (not provided)
Screwdriver (not provided)
7/16" Combination wrench (not provided)
SAVETHESEiNSTRUCTiONS!
See our extensiveassortment of outdoor living products on-line at
www.sears.comand www.kmart.com
Sears Brands
Management
Corporation,
Hoffman
Estates,
IL 60179
U.S.A.
©2010Sears Brands, LLC
Printed inChina
Model 464220110
G550-001-010801
• Nov-%-09
Advertisement
Table of Contents

Related Manuals for Kenmore 415.16128010


Summary of Contents for Kenmore 415.16128010
- Page 1 Use & Care Guide ® LiquidPropane GasGrill Sears Model No. 4t5.t6t280t0 • Safety • Parts • Use and Care • Assembly Grill InformationCenter This Grill is for Outdoor Use Only Missing Parts? Assembly Questions? Operation Problems? Before returning grill to store, call 1-800-241-7548 •...
-
Page 2: Foryour S Afety
_l|_mmmm_l! " CALIFORNIA PROPOSITION 65 if you smell gas: 1. Combustion by-products produced when using 1. Shut off gas to the appliance. this product contain chemicals known to the State of 2. Extinguish any open flame. California to cause cancer, birth defects, and other reproductive harm. -
Page 3: Table Of Contents
RepairProtection Agreements Congratulations on making a smart purchase. Your new Kenmore®product is designed and manufactured for years of All warranty coverage is void if this grill is ever used for dependable operation. But like all products, it may require repair commercial or rental purposes. -
Page 4: Use Andcare
LP Tank • The LP Tank used with your grill must meet the following requirements: • Use LP Tanks only with these required measurements: 12" (30.5cm) (diameter) x 18" (45.7 cm) (tall) with 20 lb. (9 kg.) capacity maximum. • NEVER store a spare LP cylinder under or near the •... - Page 5 LPTank Exchange Connecting Regulator To The LP Tank • Many retailers that sell grills offer you the option of replacing 1. LP tank must be properly secured onto grill. (Refer to your empty LP tank through an exchange service. Use only assembly section.) those reputable exchange companies that inspect, precision fill, 2.
- Page 6 Leak Testing Valves, Hose and Regulator 1. Turn all grill control knobs to OFF. 2. Be sure regulator is tightly connected to LP tank. 3. Completely open LP tank valve by turning OPD hand wheel counterclockwise. If you hear a rushing sound, turn gas off immediately.
- Page 7 Safety Tips A Before opening LP cylinder valve, check the coupling nut for tightness. A When grill is not in use, turn off all control knobs and LP For Safe Use of Your Grill and to Avoid Serious cylinder valve. ,I, Never move grill while in operation or still hot.
- Page 8 Burner Flame Check • Remove cooking grates and flame tamers. Light burners, rotate knobs from HI to LOW. You should see a smaller flame in LOW position than seen on HI. Perform burner flame check Turn controls and gas source or tank OFF when not on sideburner, also.
- Page 9 cAuTioN Remove carryover tubes and burners. Detach electrode from burner. NOTE: Removal/Detachment method will depend on the SPIDER ALERT! burner configuration. See different configurations in illustrations below. Carefully lift each burner up and away from valve openings. We suggest three ways to clean the burner tubes. Use the one easiest for you.
- Page 10 Indirect Cooking Food Safety Poultry and large cuts of meat cook slowly to perfection on the Food safety is a very important part of enjoying the outdoor grill by indirect heat. Place food over unlit burner(s); the heat cooking experience. To keep food safe from harmful bacteria, from lit burners circulates gently throughout the grill, cooking follow these four basic steps: meat or poultry without the touch of a direct flame.
-
Page 11: Parts List
1 LEFT LEGASSEMBLY G550-0700-W1 2 COOKINGGRATE G550-0200-W1 1 MATCHHOLDER G401-0079-W1 1 SWINGAWAYGRATE G550-0002-W1 1 RIGHT LEGASSEMBLY G550-1000-W1 1 BUTTON,F/EIMODULE G409-0030-W1 1 BOTTOM SHELF G550-0800-W1 1 CLIP,F/GREASECUP G305-0043-W1 1 FRONT PANEL G550-0900-W1 1 GREASECUP G430-0033-W1 2 TANKEXCLUStON WIRE G550-0004-W1 1 GREASETRAY G550-1100-W1 1 AXLE ROD G550-0009-W1... -
Page 12: Parts Diagram
® _2"464220_0... -
Page 13: Assembly
CAUTION: When unpacking grill components, two people should raise grill head from the shipping box. Bottom Shelf to Legs [] Placebottomshelf end with cut out holefor LPcylinderbetweenleg assemblywith axle holes.Attachto rightand left leg assemblies with (4) 1/4-20x1-1/2"screws and (4) 1/4-20flange nuts. [] Tightensecurely. - Page 14 [] Attachfront panelto grill cartwith (6) #8-32x3/8"sheet metal screws. Makesure metaltabs are towardbottom. Front Panel #8-32x3/8" sheet metalscrews Qty.6 [] Hangtank exclusionwire ontofront panelbrackets;attachotherendsto bottomshelfwith (2) #8-32x3/8"sheet metal screws. Tank Exclusion Wire #8-32x3/8" sheetmetal screws Qty.2 14 °464220110...
- Page 15 Wheels and Leg Extenders to Cart [] Turncart assemblyupsidedown. [] Insertaxlerod throughwheel,wheelspacer,legsand otherwheel.Be sureto face "cone"sideof wheelagainstleg. Attachwith (1) axlewasherand hitch pin. [] Hammerleg extendersinto rightlegs. WheelSpacer HitchPin Qty.1 AxleWasher Qty. 1 LegExtenders Qty.1 Wheel Axle Washer WheelSpacer HitchPin "Cone" side of wheelagainst leg 464220110.15...
- Page 16 Grill Headto Cart [] Standcart upright. [] Thissteprequirestwo peopleto lift and positiongrill head ontocart. [] Carefullylowerthe grill headontothe cart. Makesurethe regulatorhoseis hangingoutsidethecart.Attach headto cartwith (4) 1/4-20×1/2"screws. 1/4-20xlt2"screws Qty.4 .Grill Head 16 '464220110...
- Page 17 Right Side Shelf [] Hooksidewall of shelf oversupportbracketson sideof firebox (A). [] Insert(4) 7ramfiber washers and (4) 1/4-20x1/2"screws throughinsidefront of firebox and throughoutsidebackof fireboxas shown(B). [] Attachshelfwith (4) 1/4-20flange nuts (C). SupportBracket RightSide Shelf 1/4-20xl/2" 1/4-20 screws FiberWasher FlangeNut Qty:4 Qty:4 Qty:4 [] Attachfasciaand side shelfto fireboxwith (3) #8-32x3/8"sheet metal screws.
- Page 18 Side Burner Shelf [] Hooksidewall of sideburnershelf oversupportbracketson sideof firebox(A). [] Insidefireboxinsert(4) fiber washers and (4) 1/4-20x1/2"screws as shown(B). [] Attachshelf using(4) 1/4-20flange nuts (C). 1/4-20xlt2" screws Qty.4 Lid removed for clarity SideBurnerShelf 7mmFiberWashers Qty.4 ¢ 1/4-20 FlangeNuts Qty.4 [] Attachfasciato fireboxwith (3)#8-32x3/8"sheet metal screws. [] CAUTION:Fasciamustbe securelytightenedto fireboxto safelymovegrill.
- Page 19 Sideburner Valve, Sideburner,Sideburner Bezel, ignitorWire, Control Knob [] Positionvalve behindfasciaand line up holes(A). [] Insert(1) of the#8-32x3/8"stainless steel screws, butdo notfully tighten. [] Slip bezelunder insertedscrewand )ositionas shown(A). [] Lineup otherholeand insert(1) #8-32x3/8"stainless steel screw throughbezeland into valve. [] Tightenbothsecurely. [] Placesidebumerintoshelf (B).
- Page 20 Heat Shield [] Attach heat shield over burners inside front of grill with (2) #8=32×3/8" sheet metal screws. Heat Shield #8-32x3/8" sheetmetalscrews Qty.2 Grill Front Lid removed for clarity 20,464220110...
- Page 21 Heat Diffusers [] Placeheatdiffusersoverburnersbyinsertingtabs into slotsin front of firebox. Opposite ends of heatdiffusersrest on pinsin backof firebox. Cooking Grateand Swing Away [] Placecookinggratesonto graterests. [] Insertendsof SwingAwaypivot wireinto holesin sides of grill lid. Insertendsof SwingAway leg wire intoholesin sidesof firebox. NOTE:Pivotand leg wires,runningside-to-side, s houldbe underwires runningfront-to-back.
- Page 22 GreaseCup Clip, GreaseCup, GreaseTray [] Hanggreasecup clipfrom bottomof greasetray and placegreasecup intogreasecup clip. Placethe tray into thecart. cAuTioN Failureto installgreasecup clip and cup willcause hot greaseto drip from bottom of grill with risk of fire or property damage. GreaseTray GreaseCupClip GreaseCup LP Tank [] LP tank is soldseparately Useonlywith an OPD(over-fillprotectiondevice)equippedLP tank Filland leakcheckbeforeattaching...
-
Page 23: Troubleshooting
EMERGENCIES= If a gas leak cannot be stopped, or a fire occurs due to gas leakage, call the fire department. Gasleakingfrom • Damagedhose. , Turnoff gas at LP cylinderor at sourceon naturalgassystems.If the cracked/cut/burned hoseis crackedor cut but notburned,simplyreplacevalve/hose/ hose. regulator.If the hoseis burned,the causecouldbe otherthana faulty valve/hose/regulator. - Page 24 Troubleshooting (continued) Burner(s)will not light ELECTRONIC IGNITION: usingignitor. • Nospark,no ignitionnoise. • SeeSectionI of ElectronicIgnitionSystem. (See ElectronicIgnition Troubleshooting a lso) • Nospark,someignitionnoise. • SeeSectionII of ElectronicIgnitionSystem. • Sparks,but notat electrodeor at full • SeeSectionIII of ElectronicIgnitionSystem. strength. Burner(s)will not • See"GAS ISSUES:"on previouspage. matchlight.
- Page 25 Troubleshooting - Electronic Ignition SECTION I Nosparksappearat • Batterynot installed , Checkbatteryorientation. • Installbattery(makesurethat "+"and "-" anyelectrodeswhen properly. connectorsare orientedcorrectly, w ith "+"end up ElectronicIgnitionButton and "-" enddown.) is pressed;no noise can be heardfromspark , Deadbattery. , Has batterybeen used •...
- Page 26 26 '464220110...
- Page 27 464220110.27...
- Page 28 Your Home Forexperttroubleshooting and homesolutionsadvice: aHage For repair- in your home - of all major brand appliances, lawn and garden equipment, orheating and cooling systems, no matterwho madeit, no matterwhosold Forthereplacementparts, accessoriesand owner's manualsthatyou need todo-it-yourself. For Sears professional installation of home appliances and items like garage door openers...
Need help?
Do you have a question about the 415.16128010 and is the answer not in the manual?
Questions and answers