Table of Contents
Advertisement
Quick Links
Owner's Manual and
Installation Instructions
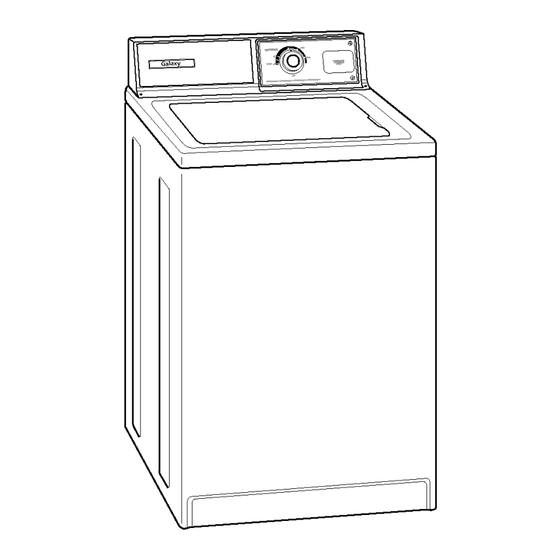
Galaxy
TM
One-Speed
AUTOMATIC WASHER
IMPORTANT:
Read and follow all safety
and operating instructions
before first use of this product.
Sears, Roebuck and Co., Hoffman Estates, IL 60179 U.S.A.
Sears Canada Inc., Toronto,
Ontario, Canada M5B 2B8
www.sears,com
3953624
PRINTED
iN U.S.A
3/99
Advertisement
Table of Contents

Related Manuals for Kenmore Galaxy One-speed automatic washer


Summary of Contents for Kenmore Galaxy One-speed automatic washer
- Page 1 Owner's Manual and Installation Instructions Galaxy One-Speed AUTOMATIC WASHER IMPORTANT: Read and follow all safety and operating instructions before first use of this product. Sears, Roebuck and Co., Hoffman Estates, IL 60179 U.S.A. Sears Canada Inc., Toronto, Ontario, Canada M5B 2B8 www.sears,com 3953624 PRINTED...
-
Page 2: Installation
BEFORE USING YOUR NEW WASHER GALAXY AUTOMATIC WASHER WARRANTY WASHER SAFETY .... INSTALLATION INSTRUCTIONS OPERATING YOUR WASHER CARING FOR YOUR WASHER TROUBLESHOOTING ..SEARS MAINTENANCE AGREEMENT Please read this manual. It will help Use the space below to record the model number and serial number of you install and operate your new automatic washer in the safest and... - Page 3 90-DAY WARRANTY LIMITED 5-YEAR WARRANTY ONMECHANICAL AND ONPLASTIC TUB* ELECTRICAL PARTS After ninety days and until five years For ninety days from the date of from date of purchase, Sears will furnish purchase, when the washer is installed a replacement plastic tub for eny p]estic and operated in accordance with the tub which is defective in materiel or work- instructions in the Owner's Manual, Sears...
- Page 4 Your safety and the safety of others is very important. We have provided many important safety messages in this manual and on your appliance. Always read and obey all safety messages. This is the safety alert symbol. This symbol alerts you to hazards that can kill or hurt you and others.
-
Page 5: Safety Instructions
IMPORTANT SAFETY INSTRUCTIONS WARNING: To reduce the risk of fire, electric shock, or injury to persons when using your washer, follow basic precautions, including the following: • Read all instructions before using the • Do not allow children to play on or in the washer. - Page 6 INSTALLATION OVERVIEW For a complete fist of too/s and parts needed, see pages 7-9. A. SELECT LOCATION FOR YOUR WASHER (pgs, 11-13) Recessed Area/ Laundry Tub Drain System (p, 12) Closet Installation Instructions (p. 11) !H , 39 in (99 cm) Standpipe Drain System (p, 13) Floor Drain System (p, 13) 3951...
- Page 7 B.REMOVE SHIPPING STRAP (p. 14) Tools Needed: Scissors Flashlight (optional depending on installation) C. CONNECT DRAIN HOSE (pgs. 15-16) _WlST Tools Needed: Parts Needed: Pliers that open to 1_'6in (3.95 cm) l_ble- 1 yellow, single-wire Flashlight (optional hose clamp (top of wire hose clamp depending on installation) drain hose)
- Page 8 D. CONNECT INLET HOSES TO WASHER (pgs. 16-17) Tools Needed: Parts Needed: 2 water inlet hoses Pliers that open to 1_6 in (3.95 cm,_ Flashlight (optional 4 Nat water inlet hose washers depending on installation) E. CONNECT INLET HOSES TO WATER FAUCETS (p. 17) Tools Needed: Parts Needed: 2 water inlet hoses...
- Page 9 F. SECURE DRAIN HOSE (p, 18) Tools Needed: Pads Needed: Shipping strap with fastener Flashlight (optional depending on installation) G, LEVEL WASHER (p. 19) Tools Needed: Pa_sNeeded: _6in (1.45 cm) open-end wrench 2 front leveling legs with nuts Wood block Flashlight (optional depending on installation)
-
Page 10: Grounding Instructions
GROUNDING INSTRUCTIONS Selecting the proper location for your washer will improve its performance WARNING: and minimize concerns like washer Improper connection of walk or noise. the equipment grounding conductor can result in a risk of electric shock, Check with a qualified electrician or serviceman ELECTRICAL REQUIREMENTS if you are in doubt as to whether the... - Page 11 A. SELECT LOCATION FOR YOUR WASHER - RECESSED AREA/ CLOSET INSTALLATION INSTRUCTIONS This washer may be installed in a recessed area or closet. 0 in 48 in_ 17.0 cm) (310cm2)- minimum 15 in ventilation (48,3 cm) area 24 in2 (155 cm2) minimum- ventilation 3 in...
- Page 12 LAUNDRY TUB DRAIN SYSTEM Check location where washer will be Do not store or operate washer at or installed. This washer can be installed below 32°F (0°C) (some water may using one of three systems: remain in washer), See page 24 for winterizing information.
- Page 13 ALTERNATE LOCATIONS - STANDPIPE AND FLOOR DRAIN SYSTEMS Siphon break: Must be purchased separately. See chart below. 39in (99cm) Floor drain system: Requires a siphon break, Standpipe drain system: Needs a 2 in see chart below. A minimum carry-away (5 cm) minimum diameter standpipe with capacity of 17 gaI (64 L) per minute is minimum carry-away capacity of 17 gal (64 L) required.
-
Page 14: Remove Shipping Strap
B. REMOVE SHIPPING STRAP STEP 3. Pull firmly to remove the other end of the shipping strap pinned to the back of washer. This will Removing the shipping strap is release the rear self-leveling legs. necessary for smooth operation. If the shipping strap is not removed, the washer will make excessive noise. -
Page 15: Connect Drain Hose
C. CONNECT DRAIN HOSE Proper connection of the drain hose will protect your floors from damage due to water leakage. STEP 1. To prevent the drain hose from coming off or leaking, it must be installed per the following instructions: TWIST IMPORTANT: To ensure proper installa- tion, this procedure must be followed... - Page 16 D. CONNECTINLETHOSES For standpipe or laundry tub drain TO WASHER systems: STEP 2. Open yellow, single-wire clamp with pliers and slide over hooked end of drain hose to secure the rubber and Proper connection of your inlet hoses corrugated sections together. will allow hot and cold water to enter your washer properly.
- Page 17 E. CONNECT INLET HOSES STEP 2. Attach the hose with the red TO WATER FAUCETS coupling to the hot water (bottom) inlet valve. Attaching the red coupling first makes it easier to tighten connection STEP 1, Make sure washer basket is with pliers, Screw on coupling by hand.
-
Page 18: Secure Drain Hose
F. SECURE DRAIN HOSE Securing the drain hose properly will protect your floors from damage due to water leakage. STEP 1. Move washer to its final If the water faucets and drain standpipe location. are recessed, put hooked end of drain hose in standpipe. -
Page 19: Level Washer
G. LEVEL WASHER Leveling your washer properly pre- vents excessive noise and vibration. To install front legs: STEP 5. Move washer to its final STEP 1. Prop front of washer up (about location. 4 in [10.2 cm]). Use a wood block or STEP 6. -
Page 20: Final Steps
REVIEW INSTALLATION Take a few minutes to complete this checklist. It will help assure you that you have a proper installation and increase your satisfaction with your Sears washer. Check that: Check electrical requirements. Be sure you have correct electrical •... -
Page 21: Stopping/Restarting Your Washer
STARTING YOUR WASHER gw I,J_j',_.,, -[_ i[_ i_ ,-, STEP 1. Add measured detergent directly into washer basket. Then place To get the maximum cleaning and a load of sorted clothes in the washer. fabric care from your washer, please read and follow these instructions. -
Page 22: Rinse And Spin
CYCLE SELECTOR RINSE AND SPIN (TIMER) CONTROL When using extra detergent for heavily soiled clothes, or washing special-care Use this control to choose your wash time and to start the washer. items, you may find an extra rinse and spin is needed. •... - Page 23 UNDERSTANDING NORMAL UNDERSTANDING WHAT HAPPENS WASHER SOUNDS DURING THE WASHER CYCLE Your new washer may make sounds that your old one didn't. Because the REGULAR sounds are unfamiliar, you may be concerned about them. selected level The following describes some of the Fill to normal sounds you may hear and what causes them,...
-
Page 24: Cleaning Your Washer
CLEANING YOUR WASHER WINTER STORAGE OR MOVING CARE Proper care of your washer can extend its life. This section explains how to care Install and store your washer where for your washer properly and safely. it will not freeze. Because some water may stay in the hoses and pump, freezing Exterior can damage your washer. - Page 25 Most laundering problems are easily solved if you understand the cause. Check these lists for common laundry and washer problems. If you need further assistance, see service and assistance information on the back cover. Problem Possible Cause Solution Washer Leaks Household plumbing is leaking.
- Page 26 Problem Possible Cause Solution Continues Drain hose is less than Raise the drain hose to Fill/ 39 in (99 cm) above floor. (see "INSTALLATION," Section C). Continues Drain hose fits tightly into Adjust drain hose for loose fit to Drain/ standpipe.
- Page 27 Problem Possible Cause Solution Machine Power cord not plugged in. Plug in power cord. Stops No power at plug. Check electrical source or call electrician. Fuse blown or circuit Replace fuse or reset circuit breaker. breaker open. If problem continues, calI eIectrician. Using an extension cord.
- Page 28 Problem Possible Cause Solution Tearing Overloading. Improper Loads should move freeiy during use of washer, wash. Wash smaller loads or increase water level. Improper use of chlorine Do not pour chlorine bleach directly bleach, Undiluted bleach on load. Wipe up bleach spills. will damage fabrics.
- Page 29 GALAXY WASHERS We Service What We Sell The Sears Maintenance Agreement "We Service What We Sell" is our • is your way to buy tomorrow's assurance you can depend on Sears service at today's prices. for service. Your washer has added •...
- Page 31 In U.S.A. or Canada for in-home major brand repair service: Call 24 hours a day, 7 days a week 1-800-4-MY-HOME = (1-800-469-4663) Pare pedir servicio de reparsci6n a domicilio - 1-800-678-5811 Au Canada pour tout le service ou les pi_ces - 1-800-469-4663 For the repair or replacement parts you need: Call 6 a.m.
Need help?
Do you have a question about the Galaxy One-speed automatic washer and is the answer not in the manual?
Questions and answers