Table of Contents
Advertisement
Quick Links
Download this manual
See also:
Use and Care Manual
ELECTRIC DRYER INSTALLATION INSTRUCTIONS
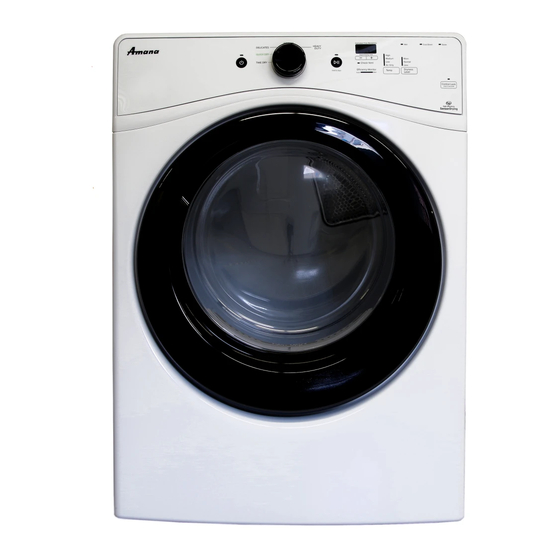
W10573709B
W10573710B - SP
Table of Contents
DRYER SAFETY ......................................................................... 2
INSTALLATION REQUIREMENTS ............................................. 3
Tools and Parts ...................................................................... 3
LOCATION REQUIREMENTS .................................................... 4
ELECTRICAL REQUIREMENTS ................................................ 5
INSTALL LEVELING LEGS ......................................................... 6
ELECTRICAL INSTALLATION ................................................... 7
Power Supply Cord Connection ........................................... 8
Direct Wire Connection ....................................................... 10
VENTING ................................................................................... 12
Venting Requirements ......................................................... 12
Plan Vent System ................................................................. 13
Install Vent System .............................................................. 15
CONNECT INLET HOSE (STEAM MODEL ONLY).................. 15
CONNECT VENT ...................................................................... 16
LEVEL DRYER .......................................................................... 17
COMPLETE INSTALLATION CHECKLIST .............................. 17
DOOR REVERSAL (OPTIONAL) .............................................. 18
Para una version de estas instrucciones en español, visite www.Whirlpool.com
INSTALLATION NOTES
_________________________________
Date of purchase:
Date of installation:
________________________________________
Installer:
___________________________________
Model number:
___________________________________
Serial number:
_______________________________
1
Advertisement
Table of Contents

Related Manuals for Amana NED5700B


Summary of Contents for Amana NED5700B
-
Page 1: Table Of Contents
ELECTRIC DRYER INSTALLATION INSTRUCTIONS Table of Contents DRYER SAFETY ................. 2 INSTALLATION REQUIREMENTS ..........3 Tools and Parts ..............3 LOCATION REQUIREMENTS ............ 4 ELECTRICAL REQUIREMENTS ..........5 INSTALL LEVELING LEGS ............6 ELECTRICAL INSTALLATION ........... 7 Power Supply Cord Connection ........... 8 Direct Wire Connection ............ -
Page 2: Dryer Safety
DRYER SAFETY IMPORTANT: When discarding or storing your old clothes dryer, remove the door. -
Page 3: Installation Requirements
INSTALLATION REQUIREMENTS TOOLS AND PARTS Gather the required tools and parts before starting installation. Parts supplied (all models): Tools needed: Flat-blade screwdriver #2 Phillips screwdriver Leveling legs (4) Parts supplied (steam models): Wire stripper (direct wire Tin snips (new vent installations) installations) “Y”... -
Page 4: Location Requirements
DRYER DIMENSIONS LOCATION REQUIREMENTS Front view: 27" Check code requirements. Some codes limit, or do not permit, (686 mm) installing dryer in garages, closets, mobile homes, or sleeping quarters. Contact your local building inspector. " Min. (984 mm) 39" Max. (990 mm) Side view: You will need:... -
Page 5: Electrical Requirements
Installation spacing for recessed area ELECTRICAL REQUIREMENTS or closet installation All dimensions show recommended and minimum spacing It is your responsibility: allowed. To contact a qualified electrical installer. ■ Additional spacing should be considered for ease of ■ To be sure that the electrical connection is adequate and ■... -
Page 6: Install Leveling Legs
If your outlet looks like this: INSTALL LEVELING LEGS Then choose a 4-wire power supply cord with ring or spade terminals and UL listed strain relief. The 4-wire power supply cord, at least 4 ft. (1.22 m) long, must have four 10-gauge copper wires and match a 4-wire receptacle of NEMA Type 14-30R. -
Page 7: Electric Installation
ELECTRIC INSTALLATION For power supply cord installations: For direct wire installations: Before you start: disconnect power. Remove terminal block cover Choose electrical connection type Power supply cord 4-wire receptacle (NEMA Type 14-30R). Go to “Power Supply Cord Connection.” Power supply cord 3-wire receptacle (NEMA Type 10-30R). -
Page 8: Power Supply Cord Connection
Power Supply Cord Connection 4-Wire Power Supply Cord Connection IMPORTANT: A 4-wire connection is required for mobile homes Power supply cord strain relief: and where local codes do not permit the use of 3-wire connections. Attach power supply cord strain relief 4-wire receptacle (NEMA 4-prong plug type 14-30R) - Page 9 Connect ground wire Remove center screw Connect ground wire (F) (green or bare) of power supply cord Remove center terminal block screw (B). under green external ground conductor screw (A). Tighten screw. Connect neutral wire Connect remaining wires Connect neutral wire (white or center) (C) of power supply cord under center terminal block screw (B).
-
Page 10: Direct Wire Connection
Direct Wire Connection 4-Wire Direct Wire Connection IMPORTANT: A 4-wire connection is required for mobile homes Direct wire strain relief and where local codes do not permit 3-wire connections. Attach direct wire strain relief Prepare your 4-wire cable for direct connection Direct wire cable must have 5 ft. - Page 11 Connect ground wire Remove center screw Connect ground wire (green or bare) (F) of direct wire cable Remove center terminal block screw (B). under green external ground conductor screw (A). Tighten screw. Connect neutral wire Connect remaining wires Place hooked end of neutral wire (white or center) (C) of direct wire cable under center terminal block screw (B), hook facing right.
-
Page 12: Venting
Optional External Ground for 3-Wire Connect external ground wire Connection Power Supply Cord Shown) IMPORTANT: You must verify with a qualified electrician that this grounding method is acceptable before connecting. Prepare to connect neutral ground wire and neutral wire Connect a separate copper ground wire (G) under the green external ground conductor screw (A) to an adequate ground. -
Page 13: Plan Vent System
Rigid metal vent: Clamps: Use clamps to seal all joints. ■ Recommended for best drying performance and to avoid ■ Exhaust vent must not be connected or secured with screws crushing and kinking. ■ or other fastening devices that extend into interior of duct Flexible metal vent: and catch lint. - Page 14 Determine vent path: Select route that will provide straightest and most direct ■ path outdoors. Plan installation to use fewest number of elbows and turns. ■ When using elbows or making turns, allow as much room ■ as possible. Bend vent gradually to avoid kinking. ■...
-
Page 15: Install Vent System
Install Vent System Attach short hose and “Y” connector Install exhaust hood 12" min. (305 mm) 12" min. (305 mm) Attach 2 ft (0.6 m) inlet hose to cold water faucet. Screw on coupling by hand until it is seated on faucet. Then attach “Y” Install exhaust hood and use caulking compound to seal connector to male end of the 2 ft (0.6 m) inlet hose. -
Page 16: Connect Vent
CONNECT VENT Attach long hose to dryer fill valve and tighten coupling Connect vent to exhaust outlet Using a 4" (102 mm) clamp, connect vent to exhaust outlet in dryer. If connecting to existing vent, make sure vent is clean. Dryer vent must fit over dryer exhaust outlet and inside exhaust hood. -
Page 17: Level Dryer
LEVEL DRYER COMPLETE INSTALLATION CHECKLIST Level dryer Check that all parts are now installed. If there is an extra part, go back through steps to see what was skipped. Check that you have all of your tools. Place Dispose of/recycle all packaging materials. level here Be sure the water faucets are on. -
Page 18: Door Reversal (Optional)
DOOR REVERSAL (OPTIONAL) Move the door strike The following instructions are for models with a round and square-shaped doors. Tools needed: Min. 8" long TORX #2 Phillips screwdriver ® † ® † screwdriver Reverse door swing round-shaped door – single handle Remove door from dryer Using a TORX screwdriver, remove the 2 screws... - Page 19 Remove outer window assembly Reverse outer window assembly from trim ring Handle Fig. A Fig. A Fig. B Using a Phillips screwdriver, remove the 2 screws from the outer window retainer and rotate the outer window assembly clockwise until the square notches line up with the 4 tabs on the trim ring indicated with arrows in the figure A above.
- Page 20 Rotate and reassemble outer window Remove hinge and latch assembly to trim ring Latch Bottom of door Fig. A Notches Hinge Using a TORX screwdriver, remove the 3 TORX screws ® ® ® securing the latch plate and latch backing plate and the 5 screws holding the hinge assembly in place.
- Page 21 Reverse door swing round-shaped door – double handle Reinstall inner door assembly Remove door from dryer Bottom of door IMPORTANT: If the protective film has not yet been removed from the dryer, peel the film from the dryer door before proceeding.
- Page 22 Remove inner door from outer door Reinstall hinge and latch on opposite sides Using a TORX screwdriver, reinstall the latch plate and ® ® latch backing plate with the 3 TORX screws removed earlier ® and the hinge assembly with the 5 screws on the opposite Position the door with the inside of the door facing up.
- Page 23 Reinstall door on dryer Move the door strike Using a TORX screwdriver, remove the 2 screws ® ® Using a TORX screwdriver, remove the 4 screws on the ® ® securing the door strike to the door frame of the dryer. dryer.
- Page 24 Reattach inner door to Remove hinge and latch outer door from inner door Latch Hinge Using a TORX screwdriver, remove the 3 TORX screws ® ® ® Position the inner door on the outer door assembly. Using securing the latch plate and the 5 screws holding the hinge a Phillips screwdriver, secure with the 13 screws removed assembly in place.
Need help?
Do you have a question about the NED5700B and is the answer not in the manual?
Questions and answers