Table of Contents

Related Manuals for Panasonic DMC-GH2S


Summary of Contents for Panasonic DMC-GH2S
-
Page 1: Operating Instructions
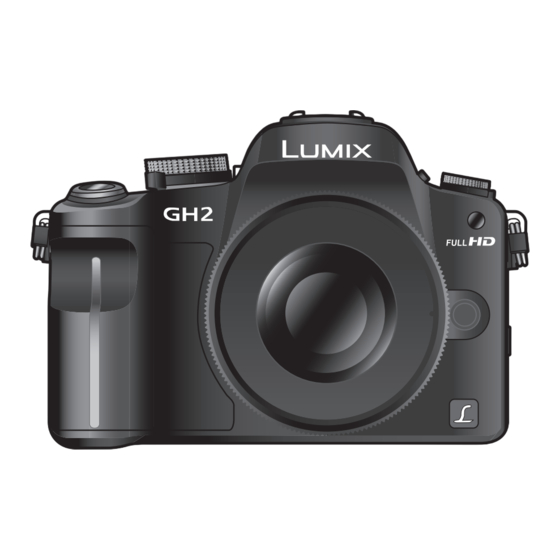
Operating Instructions Digital Camera/ Lens Kit/Body DMC-GH2H/DMC-GH2K Model No. DMC-GH2 Before use, please read these instructions completely. Web Site: http://www.panasonic-europe.com Model number suffix “EB” denotes UK model. VQT3A48... -
Page 2: Information For Your Safety
Dear Customer, We would like to take this opportunity to thank you for purchasing this Panasonic Digital Camera. Please read these Operating Instructions carefully and keep them handy for future reference. Please note that the actual controls and components, menu items, etc. of your Digital Camera may look somewhat different from those shown in the illustrations in these Operating Instructions. -
Page 3: Caution For Ac Mains Lead
∫ IMPORTANT Caution for AC mains lead The wires in this mains lead are coloured For your safety, please read the following in accordance with the following code: text carefully. Blue: Neutral, Brown: Live. This appliance is supplied with a moulded As these colours may not correspond with the coloured markings identifying the three pin mains plug for your safety and... - Page 4 ∫ About the battery charger CAUTION! • DO NOT INSTALL OR PLACE THIS UNIT IN A BOOKCASE, BUILT-IN CABINET OR IN ANOTHER CONFINED SPACE. ENSURE THE UNIT IS WELL VENTILATED. TO PREVENT RISK OF ELECTRIC SHOCK OR FIRE HAZARD DUE TO OVERHEATING, ENSURE THAT CURTAINS AND ANY OTHER MATERIALS DO NOT OBSTRUCT THE VENTILATION VENTS.
- Page 5 Information for Users on Collection and Disposal of Old Equipment and used Batteries These symbols on the products, packaging, and/or accompanying documents mean that used electrical and electronic products and batteries should not be mixed with general household waste. For proper treatment, recovery and recycling of old products and used batteries, please take them to applicable collection points, in accordance with your national legislation and the Directives 2002/96/EC and 2006/ 66/EC.
-
Page 6: Table Of Contents
Contents • How to set focus when recording a motion picture (Continuous AF) ..43 Information for Your Safety....... 2 • Recording Motion Picture ....44 Playing Back Motion Pictures ....46 Taking Pictures using the Automatic Before Use Function (ñ: Intelligent Auto Mode)..48 Deleting Pictures ........ - Page 7 Confirm the Effects of Aperture and • [I.RESOLUTION] ......123 Shutter Speed (Preview Mode)....96 • [I.DYNAMIC] (Intelligent Taking Expressive Portraits and dynamic range control).....124 Landscape Pictures • [ISO LIMIT SET] .......124 (Advanced Scene Mode) ......97 • [LONG SHTR NR] ....124 •...
- Page 8 Display..........174 Most major credit and debit cards accepted. • Cautions for Use........177 All enquiries transactions and distribution • facilities are provided directly by Panasonic Message Display ........183 UK Ltd. Troubleshooting........186 It couldn’t be simpler! • Specifications ........195 Also available through our Internet is direct •...
-
Page 9: Before Use
Before Use Before Use Accessories Check that all the accessories are supplied before using the camera. Product numbers correct as of October 2010. These may be subject to change. Digital Camera Body (This is referred to as camera body in these operating instructions.) Interchangeable Lens “LUMIX G VARIO HD 14–... - Page 10 Before Use DMC-GH2H H-VS014140 VYC0997 VYF3250 VFC4315 VFC4430 DMC-GH2K H-FS014042 VYC1009 VYF3201 VFC4315 VFC4456 DMW-BLC12E DE-A80A K2CT39A00002 K1HA14CD0004 K1HA14AD0003 VKF4385 VFC4602 VGQ0C14 VGQ0Q65 VQT3A48...
- Page 11 H-H020E H-F008E ¢1 The AC Adaptor (optional) can only be H-H014E used with the designated Panasonic DC H-FS100300E Coupler (optional). The AC adaptor H-FT012E (Read P19 for information about other lenses (optional) cannot be used by itself.
-
Page 12: Names And Functions Of Components
Before Use Names and Functions of Components ∫ Camera body Flash (P69) Sensor Self-timer indicator (P81)/ AF Assist Lamp (P132) Lens release button (P22) Lens lock pin Mount Lens fitting mark (P21) [LVF/LCD] button (P16) 13 14 15 16 Diopter adjustment dial (P16) 10 Viewfinder (P16, 64, 174) 11 Eye sensor (P16) 12 Playback button (P39, 46) - Page 13 167) 39 Card door (P28) 40 DC coupler cover • When using an AC adaptor, ensure that the Panasonic DC coupler (DMW-DCC8; optional) and AC adaptor (DMW-AC8E; optional) are used. (P173) 41 Battery door (P25) 42 Release lever (P25) 43 Tripod receptacle (P182) •...
- Page 14 Before Use ∫ Lens H-VS014140 (LUMIX G VARIO HD 14 – 140 mm/F4.0 –5.8 ASPH./MEGA O.I.S.) 44 Tele 45 Lens surface 46 Focus ring (P85) 47 Wide 48 Zoom ring (P67) 49 [O.I.S.] switch (P74) 50 Contact point 50 51 44 45 46 47 51 Lens fitting mark (P21)
- Page 15 Before Use The LCD monitor can be rotated to suit your needs. This is convenient as it allows you to take pictures from various angles by adjusting the LCD monitor. • Do not cover the AF Assist Lamp with your fingers or other objects. ∫...
- Page 16 Before Use Viewfinder ∫ About the eye sensor automatic switching Eye sensor is active when the [AUTO SWITCH] of the [LVF/LCD SWITCH] (P134) in the [CUSTOM] menu is set to [ON], switching automatically to viewfinder display when an eye or object is moved closer to the viewfinder, and to LCD monitor display when moved away. Sensitivity of the eye sensor can be set to [LOW] or [HIGH] with [SENSITIVITY].
- Page 17 Before Use Note • If you use a commercially available liquid crystal protection sheet, please follow the instructions that accompany the sheet. (Some liquid crystal protection sheets may impair visibility or operability.) • Apply a little extra pressure when touching if you have a commercially available protection sheet affixed or if you feel it is not responding well.
-
Page 18: Function Button
Before Use Rear Dial There are 2 ways to operate the rear dial, rotating left or right, and deciding by pressing. Rotating: Selection of items or setting of values is performed during the various settings. Pressing: Operations that are the same as [MENU/SET] button, such as selection of settings and exiting the menu, are performed during the various settings. -
Page 19: About The Lens
Before Use About the Lens ∫ Micro Four Thirds™ mount specification lens This unit can use the dedicated lenses compatible with the Micro Four Thirds System lens mount specification (Micro Four Thirds mount). • Select a lens that matches the scene being recorded and your use of the pictures. - Page 20 ¢7 The sound of Aperture operation may be recorded. ¢8 AF performance may differ depending on the lens used. Refer to the website for details. Refer to catalogues/Web pages for most current information regarding compatible lenses. http://panasonic.jp/support/global/cs/dsc/ (This Site is English only.) VQT3A48...
-
Page 21: Preparation
Preparation Preparation Attaching/Detaching the Lens • Check that the camera is turned off. • Change lenses where there is not a lot of dirt or dust. Refer to P178, P179 when dirt or dust gets on the lens. Attaching a lens to the camera body Turn the lens rear cap A and the body cap B in the direction of the arrow to detach them. - Page 22 Preparation Detaching a lens from the camera body Attach the lens cap. Press the lens release button D while turning the lens as far as possible in the direction of the arrow to detach it. • Always attach the body cap to the camera body so that dirt or dust does not get inside.
-
Page 23: Attaching The Shoulder Strap
Preparation Attaching the Shoulder Strap • We recommend attaching the shoulder strap when using the camera to prevent it from dropping. Pass the shoulder strap through the shoulder strap eyelet on the camera body. A: Shoulder strap eyelet Pass the end of the shoulder strap through the ring in the direction of the arrow and then pass it through the stopper. -
Page 24: Preparing The Battery
The camera has a function for distinguishing batteries which can be used safely. The dedicated battery (DMW-BLC12E) supports this function. The only batteries suitable for use with this unit are genuine Panasonic products and batteries manufactured by other companies and certified by Panasonic. (Batteries which do not support this function cannot be used.) Panasonic cannot in any way guarantee the quality, performance or... -
Page 25: Inserting/Removing The Battery
Check that this unit is turned off. Slide the release lever in the direction of the arrow and open the battery door. • Always use genuine Panasonic batteries (DMW-BLC12E). • If you use other batteries, we cannot guarantee the quality of this product. -
Page 26: Approximate Operating Time And Number Of Recordable Pictures
Preparation Note • Remove the battery after use. Store the removed battery in the battery case (supplied). • The battery will be exhausted if left for a long period of time after being charged. • Before removing the battery, turn the camera off, and wait until the status indicator has gone off completely. - Page 27 CIPA is an abbreviation of [Camera & Imaging Products Association]. • Temperature: 23 oC (73.4 F)/Humidity: 50%RH when LCD monitor is on. • Using a Panasonic SD Memory Card (2 GB). • Using the supplied battery. • Starting recording 30 seconds after the camera is turned on.
-
Page 28: Preparing The Card (Optional)
Inserting/Removing the Card (Optional) • Check that this unit is turned off. • We recommend using a Panasonic card. Slide the card door to open it. Push it securely all the way until you hear a “click” while being careful about the direction in which you insert it. -
Page 29: About Cards That Can Be Used With This Unit
Check that the PC and other equipment are compatible when SDXC Memory Card using the SDXC Memory Cards. (48 GB, 64 GB) http://panasonic.net/avc/sdcard/information/SDXC.html • Only cards bearing the SDHC logo (indicating that the card conforms to SD video standards) may be used as 4 GB to 32 GB cards. -
Page 30: Approximate Number Of Recordable Pictures And Operating Time
Preparation Approximate number of recordable pictures and operating time ∫ About the display of the number of recordable pictures and operating time • Switching between the display of number of recordable pictures and operating time can be performed in the [REMAINING DISP.] (P134) in the [CUSTOM] menu. -
Page 31: Setting Date/Time (Clock Set)
Preparation Setting Date/Time (Clock Set) • The clock is not set when the camera is shipped. Turn the camera on. • The status indicator 1 lights when you turn this unit A [MENU/SET] button Press [MENU/SET]. Press 2/1 to select the items (year, month, day, hour, minute, display sequence or time display format), and press 3/4 to set. -
Page 32: Basic
Basic Mode switching Basic Selecting the [REC] Mode A Mode dial B [Fn1] button Switching the mode by rotating the mode dial. Align a desired mode with part C. • Rotate the mode dial slowly and surely to adjust to each mode. - Page 33 Basic ∫ Advanced Aperture-Priority AE Mode (P93) The shutter speed is automatically determined by the aperture value you set. Shutter-Priority AE Mode (P93) The aperture value is automatically determined by the shutter speed you set. Manual Exposure Mode (P94) The exposure is adjusted by the aperture value and the shutter speed which are manually adjusted.
-
Page 34: Taking A Still Picture
Basic Taking a Still picture How to set focus when taking a still picture (AFS/AFC) Select the focus mode. • Normally use the [AFS]. “AFS” is an abbreviation of “Auto Focus Single”. Focus is set automatically when the shutter button is pressed halfway. -
Page 35: Taking Pictures With Your Favourite Settings (³: Programme Ae Mode)
Basic ∫ Subjects and recording conditions which are difficult to focus • Fast-moving subjects, extremely bright subjects or subjects without contrast • When recording subjects through windows or near shiny objects • When it is dark or when jitter occurs •... -
Page 36: Direction Detection Function
Basic Tips for taking good pictures A AF assist lamp • Do not cover the flash or the AF assist lamp with your fingers or other objects. • Hold the camera gently with both hands, keep your arms still at your side and stand with your feet slightly apart. - Page 37 Basic Programme Shift In Programme AE Mode, you can change the preset aperture value and shutter speed without changing the exposure. This is called Programme Shift. You can make the background more blurred by decreasing the aperture value or record a moving subject more dynamically by slowing the shutter speed when taking a picture in Programme AE Mode.
-
Page 38: Taking Pictures Using The Touch Shutter Function
Basic Taking pictures using the Touch Shutter function Applicable modes: Just by touching the subject to focus, it will focus on the subject and take the picture automatically. Touch [ ] in Recording Mode. • Icon will change to [ ], and taking a picture with the Touch Shutter function becomes possible. -
Page 39: Playing Back Pictures
Basic Playing Back Pictures Press [(]. A [(] button Forward or rewind the image by dragging (P16) the screen horizontally. Forward: drag from right to left Rewind: drag from left to right • It is also possible to forward or rewind the image by pressing 2/1 of the cursor button. -
Page 40: Changing The Information Displayed On The Playback Screen
Basic Changing the information displayed on the playback screen Press [DISPLAY] to switch the monitor screen. A [DISPLAY] button • During Playback Zoom (P42), while playing back motion pictures (P46) and during a slide show (P141), you can only select “Normal display B” or “No display F”. •... - Page 41 Basic Displaying Pictures by Recording Date (Calendar Playback) Rotate the rear dial left to display the Calendar screen. Press 3/4/2/1 to select the date to be played back. • If there were no pictures recorded during a month, the month is not displayed. Press [MENU/SET] or the rear dial to display the pictures that were recorded on the selected date.
- Page 42 Basic Using the Playback Zoom Touch the part to enlarge. 1k>2k>4k>8k>16k • Picture can be enlarged also by rotating the rear dial right. • When you change the magnification, the zoom position indication A appears for about 1 second. • The more a picture is enlarged, the more its quality deteriorates.
-
Page 43: Recording Motion Picture
Basic [REC] Mode: Recording Motion Picture This can record full high definition motion pictures compatible with the AVCHD format or motion pictures recorded in Motion JPEG. Audio will be recorded in stereo. The functions available when recording motion pictures differ according to the lens you are using, and the operational sound of the lens may be recorded. -
Page 44: Recording Motion Picture
Basic Recording Motion Picture Recording of motion picture appropriate for each mode is possible. • Screen here is an example of when the mode dial is set to [³] (Programme AE Mode). A Mode dial B Motion picture button Start recording by pressing the motion picture button. - Page 45 ¢ Models launched before December 2008, and some models launched in 2009 (FS, LS series). • To play back AVCHD motion pictures recorded with this unit on Panasonic Blu-ray Disc Players (DMP-BD30/DMP-BD31/DMP-BD50) it is necessary to update the firmware of the Blu-ray Disc Player.
-
Page 46: Playing Back Motion Pictures
Motion pictures in AVCHD format that can be played back on this unit are [AVCHD] motion pictures that were recorded with this unit, AVCHD format (including [AVCHD Lite]) motion pictures recorded with Panasonic digital cameras (LUMIX) only. Press [(]. Select a picture with a Motion Picture icon ([ ]) and then touch [ ] to play back. - Page 47 Basic Note • Sound can be heard through the speaker. Refer to [VOLUME] (P58) for information about how to adjust the volume in the [SETUP] menu. • To play back the motion pictures recorded by this unit on a PC, use the “QuickTime” or the “PHOTOfunSTUDIO 6.0 BD Edition”...
-
Page 48: Taking Pictures Using The Automatic Function (Ñ: Intelligent Auto Mode)
Basic ñ [REC] Mode: Taking Pictures using the Automatic Function : Intelligent Auto Mode) ñ The camera will set the most appropriate settings to match the subject and the recording conditions so we recommend this mode for beginners or those who want to leave the settings to the camera and take pictures easily. -
Page 49: Af Tracking Function
Basic • If a tripod is used, for instance, and the camera has judged that camera shake is minimal when the Scene Mode has been identified as [ ], the shutter speed will be slower than normal. Take care not to move the camera while taking pictures. •... - Page 50 Basic Settings in Intelligent Auto Mode ∫ [REC] Mode menu [ASPECT RATIO] (P120)/[PICTURE SIZE] (P120)/[QUALITY] (P121)/[FACE RECOG.] ¢1 (P109)/[STABILIZER] (P75) ¢1 It cannot be set to [MODE3]. It will be fixed to [MODE1] when recording a motion picture even if it is set to [MODE2]. ∫...
- Page 51 Basic • The settings of the following items are fixed. Item Settings [ECONOMY] [5MIN.] ([SLEEP MODE]) (P59) Flash (P69) ]/[Œ] [FLASH SYNCHRO] (P123) [1ST] [BURST RATE] (P77) [H] (High speed) [AUTO BRACKET] (P79) SETTINGS]: [ ] (burst) [STEP]: [3•1/3] [SEQUENCE]: [0/`/_] ¢4 AF Mode (P82) [š] (Set to [...
-
Page 52: Deleting Pictures
Basic Deleting Pictures Once deleted, pictures cannot be recovered. Press [(]. To delete a single picture Select the picture to be deleted, and then press [‚]. A [(] button B [DISPLAY] button ‚ ] button Press 2 to select [YES] and then press [MENU/SET]. - Page 53 Basic ∫ When [DELETE ALL] has been selected with the [FAVORITE] (P150) setting The selection screen is displayed again. Select [DELETE ALL] or [ALL DELETE EXCEPTÜ], press 3 to select [YES] and delete the pictures. Note • Do not turn the camera off while deleting (while [‚] is displayed). Use a battery with sufficient battery power or the AC adaptor (DMW-AC8E;...
-
Page 54: Setting The Menu
Basic Setting the Menu This camera offers menu selections that allow you to customize its operation to maximise your picture taking experience. In particular, the [SETUP] menu contains some important settings relating to the camera’s clock and power. Check the settings of this menu before proceeding to use the camera. ! [REC] Mode menu (P118 to 126) [SETUP] menu (P58 to 63) •... -
Page 55: Setting Menu Items
Basic Setting menu items This section describes how to select the [REC] Mode menu settings, and the same setting procedure can be used for the [MOTION PICTURE] Mode menu, [CUSTOM] menu, [SETUP] menu, [MY MENU] menu and [PLAYBACK] Mode menu as well. •... -
Page 56: Setting The Quick Menu
Basic Press 3/4 or rotate the rear dial to select [I.DYNAMIC]. • Select the item at the very bottom, and press 4 or rotate the rear dial right to move to the next screen. Press 1 or the rear dial. •... - Page 57 Basic Touch the menu item and the setup. A Item B Settings Touch [ ] to close the Quick Menu. ∫ When operating buttons The Quick Menu can be set by pressing the [Q.MENU] button. To close the Quick Menu, press [Q.MENU] button again. •...
-
Page 58: About The Setup Menu
Basic Perform these settings if you need to. About the Setup Menu [CLOCK SET], [ECONOMY] and [AUTO REVIEW] are important items. Check their settings before using them. For details on how to select the [SETUP] menu settings, refer to P55. U [CLOCK SET] —... - Page 59 Basic The brightness of the LCD monitor can be adjusted depending on how bright it is around the camera. „ [AUTO]: The brightness is adjusted automatically depending on how bright it is around the camera. [LCD MODE] … [MODE1]: Make the LCD monitor brighter. …...
- Page 60 Basic Set the length of time that the picture is displayed after taking it. [OFF]/[1SEC.]/[3SEC.]/[5SEC.] o [AUTO REVIEW] [HOLD]: The pictures are displayed until shutter button is pressed halfway. • If it is set to [HOLD] when the camera is set to [ ] (P35) or [ ] (P81), switching of the playback screen display (P40) or enlargement by rotating the rear dial is possible during Auto...
- Page 61 Basic Set the format for the HDMI output when playing back on the HDMI compatible high-definition TV connected with this unit using the HDMI mini cable (optional). [AUTO]: The output resolution is automatically set based on the information from the connected TV. [1080i]: [HDMI MODE] The interlace method with 1080 available scan lines is used for...
- Page 62 Basic Marks can be added to pictures, and set up as favourites. Ü [FAVORITE FUNC.] [OFF]/[ON] • When it is set to [ON], you can set/cancel favourites by pressing 4 during playback. You can also set favourites from the playback menu. For details, refer to P150.
- Page 63 Basic Reset the file number of the next recording to 0001. v [NO.RESET] • The folder number is updated and the file number starts from 0001. (P166) • A folder number between 100 and 999 can be assigned. When the folder number reaches 999, the number cannot be reset. We recommend formatting the card (P63) after saving the data on a PC or elsewhere.
-
Page 64: Recording
Recording Recording Switching the Display of the LCD Monitor/ Viewfinder Switching the Information Displayed on the recording screen Press [DISPLAY] to change. A [DISPLAY] button • When the menu screen appears, the [DISPLAY] button is not activated. (LCD monitor display) •... - Page 65 Recording ¢1 Guide lines are displayed when the [GUIDE LINE] of the [CUSTOM] menu is set to anything except [OFF]. ¢2 Histograms are displayed when the [HISTOGRAM] of the [CUSTOM] menu is set to [ON]. It is also possible to display the Exposure meter by setting the [EXPO.METER] of the [CUSTOM] menu to [ON].
-
Page 66: About The Histogram
Recording ∫ About the Histogram A histogram is a graph that displays brightness along the horizontal axis (black to white) and the number of pixels at each brightness level on the vertical axis. It allows you to easily check a picture’s exposure. Examples of histogram 1 Properly Exposed 2 Under Exposed... -
Page 67: Taking Pictures With The Zoom
Recording [REC] Mode: Taking Pictures with the Zoom Using the Optical Zoom/Using the Extra Tele Conversion (EX)/ Using the Digital Zoom [You can only use the Optical Zoom in [ ], and the Optical Zoom, the Extra Tele Conversion in [¿], [ ], [ ] and [ ] mode.]... - Page 68 Recording Note • With the Extra Tele Conversion, for example, when it is set to [ ] (equal to 4 million pixels), it will take the picture using the 4 million pixels in the centre out of the 16 million pixels of the imaging device, resulting to be more of a telephoto picture.
-
Page 69: Taking Pictures Using The Built-In Flash
Recording [REC] Mode: Taking Pictures using the Built-in Flash A To open the flash Slide the flash open lever. B To close the flash Press the flash until it clicks. • Be sure to close the flash when not in use. •... - Page 70 Recording Item Description of settings The flash is automatically activated when the recording conditions make ‡: AUTO it necessary. The flash is automatically activated when the recording conditions make it necessary. It is activated once before the actual recording to reduce the red-eye AUTO/Red-Eye phenomenon (eyes of the subject appearing red in the picture) and then ¢...
- Page 71 Recording ∫ Available flash settings by Recording Mode The available flash settings depend on the Recording Mode. (±: Available, —: Not available, ¥: Initial setting of Advanced Scene Mode and Scene Mode) ‡ ‰ Œ ‡ ‰ Œ ¢ ñ —...
- Page 72 Recording ∫ The available flash range to take pictures • The available flash range is an approximation. When the 14 – 140 mm/F4.0 – 5.8 lens supplied in DMC-GH2H is used Available flash range according to focal length of lens ISO sensitivity (When the aspect ratio is [X] or [ Wide to 21 mm...
- Page 73 Recording • At the time of flash photography, when distance with the subject is near, the flash light is interrupted with the lens and a part of the picture being taken becomes dark. Check the distance between the camera and the subject when taking a picture. The distance from which the subject blocks the flash light differs according to the lens used.
-
Page 74: Adjust The Flash Output
Recording Adjust the flash output Applicable modes: Adjust the flash output if the recorded pictures are too bright or too dark. Select [FLASH ADJUST.] in the [REC] Mode menu. (P55) Press 2/1 to set the flash output and then press [MENU/SET]. - Page 75 Recording ∫ Setting the Stabilizer in the [REC] Mode menu Select [STABILIZER] in the [REC] Mode menu. (P55) Press 3/4 to select the setting and then press [MENU/SET]. [OFF]: [STABILIZER] does not work. (This can be selected only when using a lens without the [O.I.S.] switch.) [MODE1]: Jitter is always compensated during [REC] Mode.
-
Page 76: Compensating The Exposure
Recording [REC] Mode: Compensating the Exposure Use this function when you cannot achieve appropriate exposure due to the difference in brightness between the subject and the background. Look at the following examples. Properly Underexposed Overexposed exposed Compensate the exposure Compensate the exposure towards positive. -
Page 77: Taking Pictures Using Burst Mode
Recording • In the Quick Menu (P57) while in button operation, if set to [ ] (viewfinder style), after selecting the Exposure Compensation display using the rear dial or 2/1, pressing the rear dial or [MENU/SET] will allow you to compensate the exposure with the rear dial or 2/1. [REC] Mode: Taking Pictures using Burst Mode Pictures are taken continuously while the shutter button is pressed. - Page 78 Recording • First burst speed has no relation with the transfer speed of the card. • The burst speed values given above apply when the shutter speed is 1/60 or faster and when the flash is not activated. • The Burst Mode speed may become slower depending on the following settings. –...
-
Page 79: Taking Pictures Using Auto Bracket
Recording [REC] Mode: Taking Pictures using Auto Bracket Maximum of 7 pictures will be recorded with different exposure settings following the Exposure Compensation range every time the shutter button is pressed. You can select the picture with the desired exposure among different exposures. With Auto Bracket [STEP]: [3•1/3], [SEQUENCE]: [0/s/r] 1st picture... -
Page 80: Item Settings
Recording ∫ Changing the settings for [ SETTINGS], [STEP] and [SEQUENCE] in Auto Bracket Select [AUTO BRACKET] in the [REC] Mode menu. (P55) Press 3/4 to select [ SETTINGS], [STEP] or [SEQUENCE] and then press 1. Press 3/4 to select the setting and then press [MENU/SET]. Settings Settings Item... -
Page 81: Taking Pictures With The Self-Timer
Recording [REC] Mode: Taking Pictures with the Self-timer Set the drive mode lever to [ë]. Press the shutter button halfway to focus and then press it fully to take the picture. A When self-timer is set to [ • A picture is not taken until the subject is brought into Focus and exposure will be set when the focus. -
Page 82: Setting The Method Used To Focus (Af Mode)
Recording [REC] Mode: Setting the Method used to Focus (AF Mode) This allows the focusing method that suits the positions and number of the subjects to be selected. Also, it is possible to set the focus and exposure to the subject specified on the touch panel. Select the mode that matches the recording conditions and the composition. - Page 83 Recording Setting up [ ] (AF Tracking) Focus and exposure can be adjusted to a specified subject. Focus and exposure will keep on following the subject even if it moves. (Dynamic tracking) ∫ When operating the touch panel You can lock the subject by touching it. •...
- Page 84 Recording About [Ø] (1-area-focusing) The camera focuses on the subject in the AF area on the screen. Note • Position and size of the AF area can be changed. (P84) • When the subject is not in the centre of the composition in [Ø], you can bring the subject into the AF area, fix the focus and exposure by pressing the shutter button halfway, move the camera to the composition you want with the shutter button pressed halfway, and then take the picture.
-
Page 85: Taking Pictures With Manual Focus
Recording [REC] Mode: Taking Pictures with Manual Focus Use this function when you want to fix the focus or when the distance between the lens and the subject is determined and you do not want to activate Auto Focus. Set the focus mode lever to [MF]. Rotate the focus ring to focus on the subject. - Page 86 Recording Technique for Manual Focus 1 Rotate the focus ring to focus on the subject. 2 Rotate it a little more. 3 Finely focus on the subject by rotating the focus ring slowly in reverse. Note • If you use the zoom function after focusing on the subject, focus on the subject again. •...
-
Page 87: Fixing The Focus And The Exposure (Af/Ae Lock)
Recording [REC] Mode: Fixing the Focus and the Exposure (AF/AE Lock) This is useful when you want to take a picture of a subject outside the AF area or the contrast is too strong and you cannot achieve appropriate exposure. Align the screen with the subject. -
Page 88: Adjusting The White Balance
Recording [REC] Mode: Adjusting the White Balance In sunlight, under incandescent lights or in other such conditions where the colour of white takes on a reddish or bluish tinge, this item adjusts to the colour of white which is closest to what is seen by the eye in accordance with the light source. - Page 89 Recording Note • The optimal White Balance will differ depending on the type of fluorescent lighting being recorded under so use [AWB], [ ], [ ], [ ] or [ • When the flash is used, if you take a picture beyond the available flash range, the White Balance may not be properly adjusted.
- Page 90 Recording ∫ Finely adjusting the White Balance You can finely adjust the White Balance when you cannot acquire the desired hue by setting the White Balance. Select the White Balance and then touch [ADJUST.]. • The White Balance adjust screen can also be displayed by pressing the cursor button toward 4.
-
Page 91: Setting The Light Sensitivity
Recording [REC] Mode: Setting the Light Sensitivity This allows the sensitivity to light (ISO sensitivity) to be set. Setting to a higher figure enables pictures to be taken even in dark places without the resulting pictures coming out dark. Press 3 ( Touch the ISO sensitivity to select. - Page 92 Recording ∫ About [ ] (Intelligent ISO sensitivity control) The camera automatically sets the optimum ISO sensitivity and shutter speed to suit the movement of the subject and brightness of the scene to minimise the jitter of the subject. • The shutter speed is not fixed when the shutter button is pressed halfway.
-
Page 93: Taking Pictures By Specifying The Aperture/Shutter Speed
Recording ±´ [REC] Mode: Taking Pictures by Specifying the Aperture/ Shutter Speed ] Aperture-priority AE Set the aperture value to a higher number when you want a sharp focus background. Set the aperture value to a lower number when you want a soft focus background. Set the mode dial to [ Rotate the rear dial to set the aperture value. -
Page 94: Taking Picture By Setting The Exposure Manually
Recording • The aperture value and the shutter speed displayed on the screen turn red and blink when the exposure is not adequate. • We recommend using a tripod when the shutter speed is slow. • When the flash is activated, the shutter speed cannot be set to faster than 1/160th of a second in Shutter-Priority AE Mode. - Page 95 Recording ∫ About [B] (Bulb) If you set the shutter speed to [B], the shutter stays open while the shutter button is pressed fully (up to about 120 seconds). The shutter closes if you release the shutter button. Use this when you want to keep the shutter open for a long time to take pictures of fireworks, a night scene etc.
-
Page 96: Confirm The Effects Of Aperture And Shutter Speed (Preview Mode)
Recording [REC] Mode: Confirm the Effects of Aperture and Shutter Speed (Preview Mode) Confirm the effects of aperture You can check the depth of field (effective focus range) before taking a picture by closing the leaf shutter to the aperture value you set. Press [ ] A (preview button). -
Page 97: Taking Expressive Portraits And Landscape Pictures (Advanced Scene Mode)
Recording [REC] Mode: Taking Expressive Portraits and Landscape Pictures (Advanced Scene Mode) You can take high-quality pictures of such subjects as people, scenery and flowers in accordance with the surrounding conditions. Set the mode dial. Press 2/1 to select the Advanced Scene Mode. •... -
Page 98: [Scenery]
Recording Note • In motion picture recording, [NORMAL PORTRAIT], [SOFT SKIN], [OUTDOOR PORTRAIT] and [INDOOR PORTRAIT] produce motion pictures using corresponding settings. [CREATIVE PORTRAIT] produces motion pictures using settings suitable for recording people. • In [INDOOR PORTRAIT], the Intelligent ISO sensitivity control operates, and the maximum ISO sensitivity level becomes [ISO400]. -
Page 99: Taking Pictures That Match The Scene Being Recorded ( : Scene Mode)
Recording ¿ [REC] Mode: Taking Pictures that match the Scene being recorded : Scene Mode) When you select a Scene Mode to match the subject and recording situation, the camera sets the optimal exposure and hue to obtain the desired picture. Set the mode dial to [ Press 3/4/2/1 to select the Scene Mode. -
Page 100: [Night Portrait]
Recording . [NIGHT PORTRAIT] This allows you to take pictures of a person and the background with near real-life brightness. ∫ Technique for Night Portrait Mode • Open the flash. (You can set to [ • We recommend using a tripod and the Self-timer for taking pictures. •... -
Page 101: Party]
Recording 2 [PARTY] Select this when you want to take pictures at a wedding reception, an indoor party etc. This allows you to take pictures of people and the background with near real-life brightness. ∫ Technique for Party Mode • Open the flash. -
Page 102: Í [Pet]
Recording Note • During motion picture recording, settings for [NORMAL PORTRAIT] are used. Also, still pictures recorded during motion picture recording ([ ] (Motion picture priorities)) (P108) will not record age or name. • The age and name can be printed out using the “PHOTOfunSTUDIO 6.0 BD Edition” bundled software on the CD-ROM (supplied). -
Page 103: Taking Pictures While Adjusting Colour ( : My Colour Mode)
Recording [REC] Mode: Taking Pictures while Adjusting Colour : My Colour Mode) You can take pictures with a desired effect by previewing the subject on the LCD monitor or viewfinder and setting the desired effect. (Live View) Set the mode dial to [ Touch [2]/[1] to select an item. - Page 104 Recording Note • During Motion Picture Recording, settings for My Colour Mode are used. • My Colour settings are memorised even if the camera is turned off. • Auto Bracket cannot be used in My Colour Mode. • ISO sensitivity will be fixed to [AUTO]. •...
-
Page 105: Taking Pictures In Custom Mode
Recording [REC] Mode: Taking Pictures in Custom Mode You can select one of your own custom settings saved with [CUST. SET MEM.] to suit the picture-taking conditions. Initial setting of the Programme AE Mode is registered as the custom settings initially. Set the mode dial to [ ], [ ] or [... -
Page 106: Selecting The Mode And Recording Motion Pictures : Creative Motion Picture Mode)
Recording [REC] Mode: Recording Selecting the Mode and Recording Motion Pictures : Creative Motion Picture Mode) You can enjoy motion picture recording with easily changeable settings by selecting Motion Picture Mode. Set the mode dial to [ Press 2/1 to select the Motion Picture Mode. •... -
Page 107: [Variable Movie Mode]
Recording [VARIABLE MOVIE MODE] Change the number of frames recorded and record motion pictures in slow and fast motion. ∫ Slow motion/Fast motion setting Select [FRAME RATE] and then press 1. Press 3/4 to select the item and then press [MENU/SET]. ]: Record motion pictures at 0.8k speed ]: Record motion pictures at 1.6k speed 160%... -
Page 108: Recording Still Pictures While Recording Motion Pictures
Recording Note • Aperture value – Set the aperture value to a higher number when you want a sharp focus background. Set the aperture value to a lower number when you want a soft focus background. • Shutter speed – When you want to take a sharp picture of a fast moving subject, set with a faster shutter speed. -
Page 109: Taking A Picture With Face Recognition Function
Recording [REC] Mode: Taking a Picture with Face Recognition Function Face Recognition is a function which finds a face resembling a registered face and prioritises focus and exposure automatically. Even if the person is located towards the back or on the end of a line in a group photo, the camera can still take a clear picture. [FACE RECOG.] is initially set to [OFF] on the camera. -
Page 110: Face Settings
Recording Face Settings You can register information such as names and birthdays for face images of up to 6 people. Registration can be facilitated by taking multiple face images of each person. (up to 3 pictures/registration) ∫ Point of recording when registering the face images (Good example for •... - Page 111 Recording ∫ Registering face image of new person Select [FACE RECOG.] on the [REC] Mode menu and then press 1. (P55) Press 3/4 to select [MEMORY] and then press [MENU/SET]. Press 3/4/2/1 to select the face recognition frame that is not registered, and then press [MENU/SET].
- Page 112 Recording Select item to edit with 3/4, and then press 1. • You can register up to 3 face images. Item Description of settings It is possible to register names. Press 4 to select [SET] and then press [MENU/SET]. [NAME] Enter the name.
- Page 113 Recording ∫ Change or delete the information for a registered person You can modify the pictures or information of an already registered person. You can also delete the information of the registered person. Select [FACE RECOG.] from the [REC] Mode menu, and then press 1.
- Page 114 Recording ∫ Auto Registration When [AUTO REGISTRATION] is set to [ON], the registration screen will display automatically after taking a picture of a face that has a high number of appearances. • Registration screen is displayed after approximately 3 pictures. •...
-
Page 115: Useful Functions At Travel Destinations
Recording [REC] Mode: Useful Functions at Travel Destinations Recording which Day of the Vacation You Take the Picture For details on the [SETUP] menu settings, refer to P55. If you set the departure date or the travel destination of the vacation in advance, the number of days that have passed since the departure date (which day of the vacation it is) is recorded when you take the picture. - Page 116 Recording • The travel date setting is memorised even if the camera is turned off. • If [TRAVEL DATE] is set to [OFF], the number of days that have passed since the departure date will not be recorded. Even if [TRAVEL DATE] is set to [SET] after taking the pictures, which day of the vacation you took them is not displayed.
-
Page 117: Entering Text
Recording Entering Text It is possible to enter babies’ and pets’ names and the names of travel destinations when recording. (Only alphabetical characters and symbols can be entered.) Display the entry screen and press to move to the character selection section. •... -
Page 118: Using The [Rec] Mode Menu
Recording Using the [REC] Mode Menu • [FILM MODE], [METERING MODE], [I.DYNAMIC], [EX. TELE CONV.], and [DIGITAL ZOOM] are common to both the [REC] Mode menu and [MOTION PICTURE] Mode menu. Changing these settings in one of these menus is reflected in other menu. For details on [REC] Mode menu settings, refer to P55. - Page 119 Recording Item Effect Increases the difference between the brightness and the darkness in the picture. [CONTRAST] Decreases the difference between the brightness and the darkness in the picture. [r] The picture is sharply defined. [SHARPNESS] [s] The picture is softly focused. [r] The colours in the picture become vivid.
-
Page 120: [Aspect Ratio]
Recording ? [ASPECT RATIO] This allows you to select the aspect ratio of the pictures to suit printing or the playback method. Applicable modes: [X]: [ASPECT RATIO] of a 4:3 TV [Y]: [ASPECT RATIO] of a 35 mm film camera [W]: [ASPECT RATIO] of a high-definition TV, etc. -
Page 121: A [Quality]
Recording ∫ When the aspect ratio is [ (12M) 3456k3456 pixels (6M) 2448k2448 pixels (3M) 1744k1744 pixels Note • If you set [EX. TELE CONV.] (P67) to [ON], [ ] is displayed on the screen when the picture size is set to a size other than the maximum picture size for each aspect ratio. •... -
Page 122: [Face Recog.]
Recording [FACE RECOG.] [OFF]/[ON]/ /[SET] [MEMORY] Note • Refer to P109 for details. C [METERING MODE] Type of optical measurement to measure brightness can be changed. Applicable modes: [C]: Multiple This is the method in which the camera measures the most suitable exposure by judging the allocation of brightness on the whole screen automatically. -
Page 123: [Red-Eye Removal]
Recording [RED-EYE REMOVAL] [OFF]/[ON] Note • Refer to P70 for details. [FLASH SYNCHRO] 2nd curtain synchro activates the flash just before the shutter closes when taking pictures of moving objects such as cars using a slow shutter speed. Applicable modes: [1ST]: 1st curtain synchro The normal method when taking pictures with the flash. -
Page 124: [I.dynamic] (Intelligent Dynamic Range Control)
Recording [I.DYNAMIC] (Intelligent dynamic range control) Contrast and exposure will be adjusted automatically when there is a big difference in brightness between the background and subject, to bring the image close to how you see. Applicable modes: [OFF]/[LOW]/[STANDARD]/[HIGH] Note • Compensation effect may not be achieved depending on the conditions. -
Page 125: [Digital Zoom]
Recording ) [DIGITAL ZOOM] [OFF]/[2t]/[4t] Note • Refer to P67 for details. [BURST RATE] [SH]/[H]/[M]/[L] Note • Refer to P77 for details. [AUTO BRACKET] SETTINGS]/[STEP]/[SEQUENCE] Note • Refer to P79 for details. [ASPECT BRACKET] Pressing the shutter button once automatically takes four pictures with aspect ratios of [X], [Y], [W] and [ Applicable modes: [OFF]/[ON]... -
Page 126: [Color Space]
Recording [COLOR SPACE] Set this when you want to correct the colour reproduction of the recorded pictures on a PC, printer etc. Applicable modes: [sRGB]: Colour space is set to sRGB colour space. This is widely used in computer related equipment. [AdobeRGB]: Colour space is set to AdobeRGB colour space. -
Page 127: Using The [Motion Picture] Mode Menu
Recording Using the [MOTION PICTURE] Mode Menu • [FILM MODE], [METERING MODE], [I.DYNAMIC], [EX. TELE CONV.], and [DIGITAL ZOOM] are common to both the [REC] Mode menu and [MOTION PICTURE] Mode menu. Changing these settings in one of these menus is reflected in other menu. –... -
Page 128: [Exposure Mode]
Recording When [24P CINEMA] or [VARIABLE MOVIE MODE] is selected in the Creative Motion Picture Mode ¢1 Item Quality (bit rate) Aspect ratio 1920k1080 pixels ([24H]) ¢2 Approx. 24 Mbps 16:9 1920k1080 pixels ([24L]) ¢2 Approx. 17 Mbps • To playback or import the motion pictures recorded in [ ] on equipment other than this unit, a compatible Blu-ray disk recorder or “PHOTOfunSTUDIO 6.0 BD Edition”... -
Page 129: [Continuous Af]
Recording [CONTINUOUS AF] [OFF]/[ON] Note • Refer to P43 for details. [WIND CUT] This reduces the wind noise in the audio recording. Applicable modes: [OFF]/[LOW]/[STANDARD]/[HIGH] Note • Sound quality will be different than usual when [WIND CUT] is set. B [MIC LEVEL DISP.] Set whether or not the mic levels are displayed on the screen. -
Page 130: Using The [Custom] Menu
Recording Perform these settings if you need to. Using the [CUSTOM] Menu For details on how to select the [CUSTOM] menu settings, refer to P55. [CUST. SET MEM.] • Refer to P105 for details. [Fn BUTTON SET] — • Refer to P18 for details. [OFF]/[ON] [HISTOGRAM] •... - Page 131 Recording This will set the operation of [AF/AE LOCK] button when taking a picture with fixed focus or exposure. [OFF]: The focus and the exposure are fixed only while you are pressing [AF/AE LOCK]. (P87) If you release [AF/AE LOCK], AF/AE Lock is [AF/AE LOCK HOLD] cancelled.
- Page 132 Recording Set whether or not the focus is adjusted automatically when the shutter button is pressed halfway. [SHUTTER AF] [OFF]/[ON] Illuminating the subject makes it easier for the camera to focus when recording in low light conditions that make focusing difficult. [OFF]: The AF Assist Lamp does not turn on.
- Page 133 Recording This will set the operation of the [ ] button when displaying the preview screen. [OFF]: Preview screen is displayed only when the [ ] is pressed. [PREVIEW HOLD] It will return to previous screen when [ ] is released. [ON]: Preview screen is displayed even after the [ ] is...
- Page 134 Recording [LVF DISP.STYLE] • Refer to P64 for details. [LCD DISP.STYLE] • Refer to P64 for details. This will set the colour of the information display screen on the LCD monitor. (P64) [OFF] [LCD INFO.DISP.] Black colours Grey colours Silver colours It will switch automatically to viewfinder display when an eye or object gets near the viewfinder using an eye sensor.
- Page 135 Recording Enables/disables the Quick Menu during the touch operation [OFF]: Setting for not using the Touch Quick Menu. [ ] is [TOUCH Q.MENU] not displayed on the recording screen. [ON]: The Touch Quick Menu can be used. Enables/disables the Touch Shutter function [OFF]: Setting for not using the Touch Shutter function.
- Page 136 Recording Dust reduction to blow off the debris and dust that have affixed to [SENSOR CLEANING] the front of the imaging device is performed. • Dust reduction function will operate automatically when the camera is turned on, but you can use this function when you see dust.
-
Page 137: Playback/Editing
Playback/Editing Playback/Editing Playing Back Burst Pictures ∫ About the burst picture group The pictures taken with burst speed set to [SH] are recorded together as a burst group with the burst icon [˜]. A Burst icon • Continuous playback and multi playback in a group unit is possible. •... -
Page 138: Editing Burst Pictures
Playback/Editing Editing Burst Pictures You can edit the pictures in the burst picture group as single pictures or in group units (including all pictures in group). ∫ Editing single pictures within a burst picture group • The following editing menu can be used. –... - Page 139 Playback/Editing ∫ Editing in burst picture group units All pictures in the burst picture group are edited at once. • For burst picture groups, the following editing menu can be used. – [TITLE EDIT] (P144), [TEXT STAMP] (P145), [FAVORITE] (P150), [PRINT SET] (P151), [PROTECT] (P152), [FACE REC EDIT] (P153) Select the item on the [PLAYBACK] mode menu and then press 1 .
-
Page 140: Creating Still Pictures From A Motion Picture
Playback/Editing Creating Still Pictures from a Motion Picture You can create a single still picture from a recorded motion picture. Touch [ ] during Motion Picture playback by touch operation. • Motion picture is paused. Touch [SAVE]. Touch [YES]. Touch [ ] to finish. -
Page 141: Using The [Playback] Mode Menu
Playback/Editing Using the [PLAYBACK] Mode Menu You can use various functions in playback mode to rotate pictures, set protection for them etc. • With [TEXT STAMP], [RESIZE], [CROPPING] or [ASPECT CONV.], a new edited picture is created. A new picture cannot be created if there is no free space on the card so we recommend checking that there is free space and then editing the picture. - Page 142 Playback/Editing ∫ Changing the slide show settings You can change the settings for slide show playback by selecting [EFFECT] or [SETUP] on the slide show menu screen. [EFFECT] This allows you to select the screen effects when switching from one picture to the next. [NATURAL], [SLOW], [SWING], [URBAN], [OFF], [AUTO] •...
-
Page 143: [Playback Mode]
Playback/Editing [PLAYBACK MODE] Playback in [NORMAL PLAY], [PICTURE PLAY], [AVCHD PLAY], [MOTION JPEG PLAY], [3D PLAY], [CATEGORY PLAY] or [FAVORITE PLAY] can be selected. Select [PLAYBACK MODE] on the [PLAYBACK] Mode menu. (P55) Press 3/4 to select the item and then press [MENU/SET]. •... -
Page 144: [Title Edit]
Playback/Editing [TITLE EDIT] You can add text (comments) to pictures. After text has been registered, it can be stamped in prints using [TEXT STAMP] (P145). (Only alphabetic characters and symbols can be entered.) Select [TITLE EDIT] on the [PLAYBACK] Mode menu. (P55) Press 3/4 to select the item and then press [MENU/SET]. -
Page 145: [Text Stamp]
Playback/Editing [TEXT STAMP] You can stamp the recording date/time, name, location, travel date or title onto the recorded pictures. It is suitable for regular size printing. (Pictures with a picture size larger than [S] will be resized when stamping the date etc. on them.) Select [TEXT STAMP] on the [PLAYBACK] Mode menu. -
Page 146: [Video Divide]
Playback/Editing Press [MENU/SET]. • When selecting [ ] or [ ], press to select [YES] for stamping [AGE], and then press [MENU/SET] and proceed to step Press 3 to select [YES] and then press [MENU/SET]. • Press [‚] to return to the menu screen. (The menu screen is automatically restored when [MULTI] is selected.) Note •... -
Page 147: Q [Resize] Reducing The Picture Size (Number Of Pixels)
Playback/Editing Q [RESIZE] Reducing the picture size (number of pixels) To allow easy posting to web pages, attachment to e-mail etc., picture size (number of pixels) is reduced. Select [RESIZE] on the [PLAYBACK] Mode menu. (P55) Press 3/4 to select [SINGLE] or [MULTI] and then press [MENU/SET]. Select the picture and size. -
Page 148: [Cropping]
Playback/Editing [CROPPING] You can enlarge and then clip the important part of the recorded picture. Select [CROPPING] on the [PLAYBACK] Mode menu. (P55) Press 3/4 to select [SINGLE] or [SINGLE IN BURST GROUP], and then press [MENU/SET]. • When [SINGLE IN BURST GROUP] is selected, press 3/4/2/1 to select burst picture group, and press [MENU/SET] to proceed to step Press 2/1 to select the picture, and then press [MENU/SET]. -
Page 149: N [Rotate]/M [Rotate Disp.]
Playback/Editing Note • After converting the aspect ratio, the picture size may become larger than that of the original picture. • You may not be able to convert pictures taken on other equipment. • The [ASPECT CONV.] cannot be performed on the motion pictures, pictures stamped with [TEXT STAMP] and pictures taken with [ ], [ ] or [... -
Page 150: Ü [Favorite]
Playback/Editing Ü [FAVORITE] This can only be used when [FAVORITE FUNC.] (P62) in setup menu is set to [ON]. You can do the following if a mark has been added to pictures and they have been set as favourites. • Play back the pictures set as favourites only as a slide show. -
Page 151: [Print Set]
Playback/Editing [PRINT SET] DPOF “Digital Print Order Format” is a system that allows the user to select which pictures to print, how many copies of each picture to print and whether or not to print the recording date on the pictures when using a DPOF compatible photo printer or photo printing store. For details, ask at your photo printing store. -
Page 152: P [Protect]
Playback/Editing Note • The number of prints can be set from 0 to 999. • With a printer supporting PictBridge, the date print settings of the printer may take precedence so check if this is the case. • It may not be possible to use the print settings with other equipment. In this case, cancel all the settings, and reset the settings. -
Page 153: [Face Rec Edit]
Playback/Editing [FACE REC EDIT] You can clear and replace all information relating to face recognition in selected images. Select [FACE REC EDIT] on the [PLAYBACK] Mode menu. (P55) Press 3/4 to select [REPLACE] or [DELETE] and then press [MENU/SET]. Press 2/1 to select the picture and then press [MENU/SET]. •... -
Page 154: Connecting To Other Equipment
Connecting to other equipment Connecting to other equipment Enjoying 3D pictures Taking 3D pictures Attaching the 3D interchangeable lens 3D picture (H-FT012; optional) to the camera allows you to take 3D pictures for extra impact. To view 3D pictures, a television that supports 3D is required. - Page 155 For the latest information on 3D compatible televisions and recorders that are capable of playing back 3D pictures recorded using the unit, see the support site below. http://panasonic.jp/support/global/cs/dsc/ (This Site is English only.) Preparations: Set the [HDMI MODE] to [AUTO] or [1080i]. (P61) Set the [3D PLAYBACK] to [ ].
- Page 156 Note that the equipment described may not be available in certain countries and regions. Copying of the still pictures recorded in 3D Check the latest information about the equipment that can copy on the following website. http://panasonic.jp/support/global/cs/dsc/ (This Site is English only.) ∫ Copying to a PC • “ ”...
-
Page 157: Playing Back Pictures On A Tv Screen
Connecting to other equipment Playing Back Pictures on a TV Screen Playing back pictures using the AV cable (supplied) Preparations: Set the [TV ASPECT]. (P60) Turn this unit and the TV off. 1 Yellow: to the video input socket 2 White: to the audio input socket 3 Red: to the audio input socket A Align the marks, and insert. - Page 158 Depending on the TV model, pictures may not be displayed on the full screen. • Motion pictures recorded with [AVCHD] can be played back on Panasonic TVs (VIERA) with the AVCHD logo mark. In all other cases, connect the camera to the TV using the AV cable (supplied) and play back the motion picture.
- Page 159 What is the VIERA Link? • This function allows you to use your remote control for the Panasonic TV for easy operations when this unit has been connected to a VIERA Link compatible device using a HDMI mini cable (optional) for automatic linked operations. (Not all operations are possible.) •...
- Page 160 Connecting to other equipment Panasonic TV compatible with VIERA Link 1 [OPTION] 2 [OK] 3 [RETURN] ¢ The shape of the remote control varies depending on the region. Operate following the TV guide displayed on screen. ∫ Usable functions Operate with the remote control for the TV.
-
Page 161: Automatic Input Switching
Available linked operations between this unit and a Panasonic TV is different depending on the types of Panasonic TVs even if they are compatible with VIERA Link. Refer to the operating instructions of the TV for the operations that support on the TV. -
Page 162: Saving The Recorded Still Pictures And Motion Pictures
File formats that can be used: [JPEG], [AVCHD] It is possible to copy onto Blu-ray disk, DVD disk, or hard disk by inserting an SD card with still pictures and motion pictures recorded by this unit into a Panasonic Blu-ray Disk Recorder or DVD Recorder. - Page 163 Connecting to other equipment Note • When you play back motion pictures on 4:3 aspect ratio TV, you must set [TV ASPECT] (P60) on this unit to [4:3] before starting a copy. The image will be vertically long if you play back motion pictures copied with [16:9] setting on a [4:3] aspect TV.
-
Page 164: Connecting To A Pc
(Doing so will cause recorded images to be erased so do not choose to format.) If the card is not recognised, please refer to the below support site. http://panasonic.net/avc/sdcard/information/SDXC.html • You can easily print out or mail the pictures you have imported. Use of the “PHOTOfunSTUDIO 6.0 BD Edition”... - Page 165 Connecting to other equipment USB MODE Press 3/4 to select [PC], and then press PLEASE SELECT [MENU/SET]. THE USB MODE PictBridge(PTP) • If [USB MODE] (P60) is set to [PC] in the [SETUP] menu in advance, the camera will be automatically connected to the PC MENU SELECT without displaying the [USB MODE] selection screen.
- Page 166 Connecting to other equipment ∫ Viewing the contents of the card using the PC (folder composition) Folders and images processed in the PC cannot be played back on the camera. It is recommended to use the “PHOTOfunSTUDIO 6.0 BD Edition” bundled software on the CD-ROM (supplied) when you write the image from PC to a card.
-
Page 167: Printing The Pictures
Connecting to other equipment Printing the Pictures If you connect the camera to a printer supporting PictBridge, you can select the pictures to be printed out and instruct that printing be started on the camera’s LCD monitor. • Burst pictures taken with burst speed set to [SH] will be displayed as a list, and not as a group. •... -
Page 168: Selecting A Single Picture And Printing It
Connecting to other equipment Selecting a single picture and printing it Press 2/1 to select the picture and then press PictBridge 100 _ 0001 100 _ 0001 0001 0001 [MENU/SET]. • The message disappears in about 2 seconds. PLEASE SELECT THE PICTURE TO PRINT SELECT MENU... -
Page 169: Print Settings
Connecting to other equipment Print Settings Select and set the items both on the screen in step of the “Selecting a single picture and printing it” and in step of the “Selecting multiple pictures and printing them” procedures. • When you want to print pictures on a paper size or a layout which is not supported by the camera, set [PAPER SIZE] or [PAGE LAYOUT] to [{] and then set the paper size or the layout on the printer. - Page 170 Connecting to other equipment ∫ [PAPER SIZE] Item Description of settings Settings on the printer are prioritised. [L/3.5qk5q] 89 mmk127 mm [2L/5qk7q] 127 mmk178 mm [POSTCARD] 100 mmk148 mm [16:9] 101.6 mmk180.6 mm [A4] 210 mmk297 mm [A3] 297 mmk420 mm [10k15cm] 100 mmk150 mm [4qk6q]...
-
Page 171: Optional Accessories
Others Others Optional accessories External Flash (optional) After attaching the external flash (DMW-FL220, DMW-FL360, DMW-FL500; optional), the effective range will be increased when compared to the camera’s built in flash. Preparations: • Turn off the camera and close the built-in flash. ∫... - Page 172 [B] (Bulb) or Burst Mode. The remote shutter works similar to the shutter button on the camera. Note • Always use a genuine Panasonic remote shutter (DMW-RSL1; optional). • You cannot operate the camera with the remote shutter in the following cases. –...
- Page 173 PC or printer and use without worrying about the capacity of the battery. Note • Always use a genuine Panasonic AC adaptor (DMW-AC8E; optional). • Always use a genuine Panasonic DC coupler (DMW-DCC8; optional). •...
-
Page 174: Lcd Monitor Display/Viewfinder Display
Others LCD Monitor Display/Viewfinder Display • The following images are examples of when the display screen is set to [ ] (LCD monitor style) in the LCD monitor. ∫ In recording Recording in Programme AE Mode [ ] (Initial setting) Flash Mode (P69) 7 8 9 10 Film Mode (P118) - Page 175 Others ∫ In recording (after settings) 29 Flash output adjustment (P74) 30 2nd curtain synchro (P123) 31 Digital Zoom (P67) 32 FRAME RATE (P107) 33 Extra Tele Conversion (when recording 2nd nd motion pictures) (P67) 34 Extra Tele Conversion (when taking still pictures) (P67) 35 Histogram (P66) 36 Travel date (P115)
- Page 176 Others ∫ In playback Playback Mode (P39) Film Mode (P118) Protected picture (P152) 6 7 8 Number of prints (P151) Picture size (P120) STD. STD. STD. : REC MODE (when recording motion 9 PIC. 9 PIC. 9 PIC. pictures) (P127)/Recording quality (P127) Quality (P121) Intelligent Dynamic Range Control (P124) Intelligent Resolution (P123)
-
Page 177: Cautions For Use
Others Cautions for Use Optimal use of the camera Take care not to drop or knock the unit or put a lot of pressure on it. • Take care not to knock or drop the bag/case that you inserted the camera in as the shock may cause damage to the camera, lens or LCD monitor. - Page 178 Others ∫ About dirt on the image sensor This camera features an interchangeable lens system so dirt may get inside the camera body when changing lenses. Depending on the recording conditions, dirt on the image sensor may appear on the recorded picture. Do not change lenses where there is a lot of dust, and always attach the body cap when a lens is not attached to the camera, so that dirt or dust does not get inside the camera body.
- Page 179 Others About the Lens • Do not press the lens with excessive force. • Do not leave the camera with the lens facing the sun as rays of light from the sun may cause it to malfunction. Also, be careful when placing the camera outside or near a window. •...
- Page 180 Others About 3D ∫ About 3D recording With the 3D interchangeable lens attached, do not record a subject at less than the minimum focus distance. • The 3D effects may be more pronounced, and therefore cause tiredness or discomfort. • When the 3D interchangeable lens (H-FT012;...
- Page 181 Information including personal information may be altered or vanish due to erroneous operation, effect of static electricity, accident, malfunction, repair, or other handlings. Please note in advance that Panasonic is not liable in any way for any direct or indirect damage from the alteration or vanishing of information or personal information.
- Page 182 About the picture data • Recorded data may be damaged or lost if the camera breaks down due to inappropriate handling. Panasonic will not be liable for any damage suffered due to loss of recorded data. About tripods or unipods •...
-
Page 183: Message Display
Others Message Display Confirmation messages or error messages will be displayed on the screen in some cases. The major messages are described below as examples. [THIS PICTURE IS PROTECTED] > Delete the picture after cancelling the protect setting. (P152) [THIS PICTURE CANNOT BE DELETED]/[SOME PICTURES CANNOT BE DELETED] •... - Page 184 [THIS BATTERY CANNOT BE USED] • The battery cannot be recognised by the camera. > Use a genuine Panasonic battery. If this message is displayed even when a genuine Panasonic battery is used, contact the dealer or your nearest Service Centre. •...
- Page 185 Others [EDITING OPERATION CANNOT PROCEED AS INFORMATION PROCESSING IS ONGOING.] When a card with pictures deleted or file names changed using a PC or other device is inserted into this unit, it will automatically retrieve new information and reconstruct the burst groups.
-
Page 186: Troubleshooting
Others Troubleshooting First, try out the following procedures (P186–194). If the problem is not resolved, it may be improved by selecting [RESET] (P63) on the [SETUP] menu. Battery and power source The camera cannot be operated even when it is turned on. The camera turns off immediately after it is turned on. - Page 187 Others The recorded picture is too bright or dark. > Check that the exposure is correctly compensated. (P76) • Is the AE Lock (P87) applied incorrectly? Multiple pictures are taken at one time. > Unset the settings of White Balance Bracket (P90). >...
- Page 188 Others The brightness or the hue of the recorded picture is different from the actual scene. • If recording under fluorescent light, the brightness or the hue may change slightly when the shutter speed becomes fast. This occurs due to the characteristics of fluorescent light. It is not a malfunction.
- Page 189 The Optical Image Stabilizer function of the 14 – 42 mm/F3.5 – 5.6 lens supplied in DMC-GH2K only works correctly with supported cameras. > When older Panasonic digital cameras (DMC-GF1, DMC-GH1, DMC-G1) are used, [STABILIZER] in the [REC] Mode menu (P75) cannot be set to [OFF]. It is recommended to update the firmware of the digital camera at the following website.
- Page 190 Others LCD monitor/Viewfinder The LCD monitor turns off although the camera is turned on. • The LCD monitor turns off when [AUTO LCD OFF] (P59) is selected for the [ECONOMY] Mode. [This does not happen when using the AC adaptor (DMW-AC8E; optional).] •...
- Page 191 Others Playback The picture being played back is not rotated, or is rotated in an unexpected direction, when displayed. • You can display the pictures without being rotated when [ROTATE DISP.] (P149) is set to [OFF]. • You can rotate pictures with the [ROTATE] function. (P149) •...
- Page 192 > Connect the camera to the TV with the AV cable (supplied), or with the HDMI mini cable (optional), and then play back the motion pictures on the camera. (P157, 158) > Motion pictures recorded in [AVCHD] can be played back on Panasonic televisions (VIERA) with the AVCHD logo.
- Page 193 The card is not recognised by the PC. (SDXC memory card is used) > Check if your PC is compatible with SDXC memory cards. http://panasonic.net/avc/sdcard/information/SDXC.html > A message prompting to format the card may be displayed when connecting, but do not format.
- Page 194 Others The AF Assist Lamp does not turn on. • Is [AF ASSIST LAMP] on the [CUSTOM] menu set to [ON]? (P132) • The AF Assist Lamp does not turn on in bright places. The camera becomes warm. • The surface of the camera and the reverse side of the LCD monitor may become warm during use.
-
Page 195: Specifications
Others Others Specifications Digital Camera Body (DMC-GH2): Information for your safety Power Source: DC 8.4 V Power Consumption: 3.4 W (When recording with LCD Monitor) (When the 14 – 140 mm/F4.0– 5.8 lens supplied in DMC-GH2H is used) 3.2 W (When recording with LCD Monitor) (When the 14 –... - Page 196 Others Minimum Illumination: Approx. 6 lx (when i-Low light is used, the shutter speed is 1/25th of a second), Approx. 1 lx (when Creative Motion Picture Mode is used, [ISO3200] is set, the shutter speed is 1/2th of a second) (When the 14–...
- Page 197 Others Microphone: Stereo Speaker: Monaural Recording media: SD Memory Card/SDHC Memory Card/SDXC Memory Card Picture size Still picture: When the aspect ratio setting is [X] 4608k3456 pixels, 3264k2448 pixels, 2336k1752 pixels When the aspect ratio setting is [Y] 4752k3168 pixels, 3360k2240 pixels, 2400k1600 pixels When the aspect ratio setting is [W] 4976k2800 pixels, 3520k1984 pixels, 1920k1080 pixels When the aspect ratio setting is [...
- Page 198 Operating temperature: 0 o C to 40 o C (32 o F to 104 o F) Operating humidity: 10%RH to 80%RH Battery Charger (Panasonic DE-A80A): Information for your safety Input: 110 V to 240 V, 50/60 Hz, 0.2 A Output: 8.4 V, 0.65 A...
- Page 199 Others Interchangeable Lens (H-VS014140) “LUMIX G VARIO HD 14 –140 mm/F4.0– 5.8 ASPH./MEGA O.I.S.” Focal length: f=14 mm to 140 mm (35 mm film camera equivalent: 28 mm to 280 mm) Aperture type: 7 diaphragm blades/circular aperture diaphragm Aperture range: F4.0 (Wide) to F5.8 (Tele) Minimum aperture value:...
- Page 200 • Interface are trademarks or registered trademarks of HDMI Licensing LLC in the United States and other countries. HDAVI Control™ is a trademark of Panasonic • Corporation. QuickTime and the QuickTime logo are trademarks or registered trademarks of Apple Inc., •...
Need help?
Do you have a question about the DMC-GH2S and is the answer not in the manual?
Questions and answers