Table of Contents
Advertisement
Quick Links
Advertisement
Table of Contents

Related Manuals for AAXA Technologies P3 Pico


Summary of Contents for AAXA Technologies P3 Pico
- Page 1 aaxa TECHNOLOGIES Pico Projector User Guide...
- Page 2 Caution! WARNING: Please use this product as instructed. Misuse may cause injury or death. *Do not operate the Projector in direct sunlight *Do not drop the projector or allow heavy impacts or or near heat sources such as heaters, fires, shock as this and stoves as this may cause a fire hazard.
-
Page 3: Table Of Contents
Table of Contents Chapter 1: P3 at a glance Connecting to a USB drive Main Unit Front/Back Chapter 3: Menu Screens Remote & Keypad Main menu Accessories File Menu System Chapter 2: Getting Started Video Player Menu Powering On / OFF Photo Viewer Menu Focus Adjustment / Throw Music Player Menu... -
Page 4: Chapter 1: P3 At A Glance
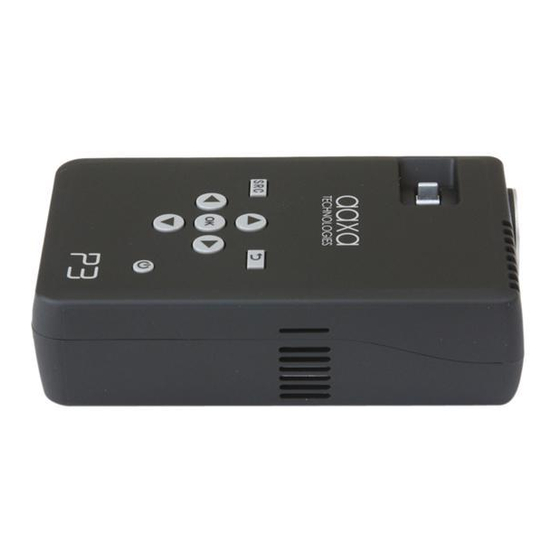
Chapter 1 P3 at a Glance Main Unit Front/Back/Side Power Button Input Select Back Button Focus Adjustment Projection Lens Directional Pad Mini USB Port HDMI Port Power Input A/V Input VGA Input Headphone... -
Page 5: Remote & Keypad
Remote & Keypad Source Exit/Back Select Source Power On/Off Settings Menu Mute Main Menu Navigation Volume Down Volume UP Vertical Img Flip Horizontal Img Flip Media Player Menu Navigation Direction Pad Power Both the keypad and remote can be used to navigate through the menus. The Main Menu Navigation on the remote functions exactly the same as the directional pad on the P3 unit. -
Page 6: Accessories
Accessories A/V Cable Tripod Remote Mini USB to Power Adapter VGA Cable USB Adapter *Under various circumstances, the actual accessories may be different from those shown in the pictures above. -
Page 7: Chapter 2: Getting Started
Chapter 2 Getting Started Powering ON the projector Connect the power cord to the P3. Connect the wall plug into the wall power source. Press POWER button and hold for 2-3 seconds to switch on or switch off the power. The projector will boot with a boot screen and finish booting to the media player’s Main Menu. -
Page 8: Focus Adjustment / Throw
Focus Adjusment / Throw Distance Focus Adjustment Spin the focus wheel left of right until the image becomes clear. The recommended focus distance for this projector is 12” to infinity. Throw Distance Chart Distance inch (“) Diagonal Inch (“) 12.8 39.6 51.3 16:9 Aspect Ratio... - Page 9 External Inputs/Outputs The P3 can connect to a wide variety of multi-media devices. You can use the HDMI, VGA, Or Composite A/V cables to connect to external devices such as iPod®, iPad® iPhone®, mobile phones, notebook/PC, game console or more. *accessory cables may be required Composite Cable Headphone/speaker...
-
Page 10: Connecting To A Computer Via Vga
Connecting to a Computer via VGA There are two ways to connect a computer to your P3. You can connect with the VGA adapter or the HDMI adapter. Whichever connection you computer has will work. Connecting via VGA Connection Step 1: Connect the large end of the to your computer’s VGA Cord... - Page 11 Connecting to a Computer via HDMI There are two ways to connect a computer to your P3. You can connect with the VGA adapter or the HDMI adapter. Whichever connection you computer has will work. Connecting via HDMI Connection Step 1: Connect the one end of the to your computer’s HDMICord...
-
Page 12: Connecting To A Computer
Connecting to a Computer Cont. Step 4: Enabling VGA or HDMI output on your Computer – To enable VGA or HDMI on your computer most computers require “turning on” the video output feature. Each computer is different. Please consult your owner’s manual for instructions to enable VGA or HDMI output. -
Page 13: Connecting To Composite Video
Connecting to Composite Video Step 1: Connect one end of the to your P3’s Composite Cord A/V Adapter Step 2: to your devices Connect opposite end of Composite Cord Composite Cord... - Page 14 Connecting to Composite Video Cont. Step 3: Step 4: Press the SRC Button on the p3 Choose A/V Step 5: Turn on your multimedia device. Connectivity with multimedia devices The P3 can connect to many media devices including: iPod, iPhone, iPad, VHS players, DVD players, smart phones, cameras, video game consoles and other peripherals with ease.
-
Page 15: Connecting Speakers/Headphones
Connecting Speakers/Headphones Step 1: Connect your speaker to your P3’s or headphones 3.5 mm cord Speaker Adapter Step 2: Ensure the power and volume on your speaker or headphones is turned on Step 3: Place headphones/earphones in/over ears Caution for Earphone (Earplug) Use •... - Page 16 USB OTG(On-the-Go) How to insert your USB Drive • Slide your USB Drive into USB adapter. • Gently slide the drive until it cannot go in any further. • Gently slide the mini-USB adapter into the P3 until it cannot go in any further. How to access your USB Drive •...
-
Page 17: Chapter 3: Menu Screens
Chapter 3 Menu Screens Main Menu The P3 features a built in PMP (Portable Media Player) function. This function allows the projector to play videos, pictures, music files, and text. To access the main menu simply turn on the projector. Photo Music Movie... -
Page 18: File Menu System
File Menu System The P3 will show all folders and files you have on your USB Drive. Use the directional buttons to navigate to different folders or files. Opening a file: • Choose Movie, Music, Photo, or Text • Select device file is stored on •... - Page 19 File Menu System Previewing Files: Highlighting files on the P3 file viewing system will bring up a preview menu. You can preview videos, music and photo’s this way. Navigating around the P3 is similar to any computer. The files will show up in a folder system for you to browse.
-
Page 20: Video Player Menu
Video Player Menu Playing Videos -To play/pause a video, press the ok button in the middle of the keypad or remote control -To rewind, press and hold the left arrow button -To fast-forward, press and hold the right arrow button -To jump forward to the next video, press the right arrow button -To jump back to a prior video, press the left arrow button... -
Page 21: Photo Viewer Menu
Photo Menu Viewing Pictures The P3 Pico Projector allows you to view pictures individually or in a slideshow. To view individual photos, select the file you want to view in the file menu for the particular storage device on which the image file is stored. You can press the... -
Page 22: Music Player Menu
Music Player Menu Pause Rewind FastFoward Previous File Next file Stop Repeat Mute Opening a file: • Choose “Open File” option • Select device file is stored on • Select file from list... - Page 23 Music Player Menu Listening to music -To play/pause a song, press the ok button in the middle of the keypad or remote control -To rewind, press and hold the left arrow button -To fast-forward, press and hold the right arrow button -To jump forward to the next video, press the right arrow button -To jump back to a prior video, press the left arrow button -To adjust the volume, press the vol+ ( on the remote) to increase and vol- ( on...
-
Page 24: Chapter 4: Technical Details
Chapter 4 Technical Details Troubleshooting IMAGE IS BLURRED Possible Causes Solution The Projector is not in focus Adjust the focus with the focus adjustment dial until the image comes into focus The Projector is offset from plane / angle of Move the projector so that it is both 180 degrees operation and on an evern plane with the screen. - Page 25 Technical Details Troubleshooting THE PROJECTOR DOES NOT TURN ON Possible Causes Solution There is no power Check to ensure the power outlet or battery source is good. check the power adapter to ensure a proper connection with the wall outlet as well as the proejctor.
-
Page 26: Specifications
Specifications Brightness 50 Lumens Native Resolution 1024x600(WSVGA) Contrast Ratio 500:1 Projection Lens: Manual Focus Image Size: 10~80 inches Lamp: 15,000 hour RGB Triple LEDs Video in: Composite A/V VGA(mini-VGA) HDMI Audio Output: 1.0 W stereo speakers 3.5 mm audio jack USB: USB OTG (On-the-Go) (Memory Sticks) - Page 28 Please direct all customer service inquiries to: AAXA Technologies, Inc. 103A East Alton Santa Ana, CA 92707 (714) 957-1999 info@aaxatech.com...
Need help?
Do you have a question about the P3 Pico and is the answer not in the manual?
Questions and answers