Advertisement
Quick Links
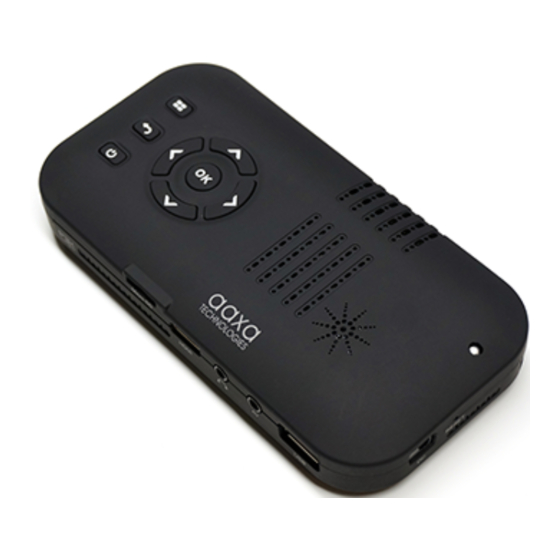
Hard Reset for P3-X
The hard reset will allow you to fix you P3-X when it would crash or freeze up
1. You would first need to get a small pin or a paper clip and then you would insert it to
the reset button that is located on the right side of the projector and press on it. The
location of the reset button on the projector as shown below:
2. After you press the reset button it should fix your P3-X and you would turn the
projector back on
Advertisement

Related Manuals for AAXA Technologies P3-X


Summary of Contents for AAXA Technologies P3-X
- Page 1 Hard Reset for P3-X The hard reset will allow you to fix you P3-X when it would crash or freeze up 1. You would first need to get a small pin or a paper clip and then you would insert it to the reset button that is located on the right side of the projector and press on it.
- Page 2 3. Now your P3-X is ready to be used again 4. If you have done these steps and there is still a problem with your P3-X, please contact AAXA Technical Support either by email or by phone for further assistance.
- Page 3 2. Using the supplied HDMI cable, connect the smaller end of the cable to the P3X, and the larger end to your Apple Digital AV Adapter, as shown below:...
- Page 4 3. Turn on your P3X and on the menu screen, select the option circled in red below: 4. Then select the HDMI option (circled in red below):...
- Page 5 5. If you have everything connected and turned on, you should now be able to see whatever you see on your iPod Touch 4th or 5th gen, iPhone 4S/5/5C/5S, or iPad 2, 3, 4, Mini on your AAXA Projector. Mirroring with a Samsung Galaxy S3, S4, Note II, or Note III Mirroring allows you to see the same content on display to another.
- Page 6 2. Put in the micro USB end of the MHL Cable into the bottom of your Samsung Galaxy S3, S4, Note II, or Note III. As shown below: 3. Insert the full HDMI into the mini-HDMI adapter and plug into your P3X. Then connect the USB to the full-size USB port on the P3X.
- Page 7 4. Turn on your P3X once everything is connected and on the menu screen select the option circled in red below: 5. Then choose the HDMI option circled in red below: 6. Now you are ready to enjoy the full mirroring capabilities of P3X and your Samsung Galaxy smartphone.
- Page 8 These are some tips on how to play supported videos on AAXA Projectors There are many types of codecs for AVI. So even though a file may say it is an AVI extension, it may be using a codec that the projector doesn’t recognize. Please try the following: Please go to this link here...
- Page 9 P300 1280 x 800 1280 x 800 Showtime P4-X 800 x 480 LED Pico 960 x 540 854x480 Connecting a computer to the P3X via HDMI Only computers that support video output via HDMI will work with the P3X. 1. Using the supplied HDMI cable, connect the smaller end of the cable to the P3X, and the larger end to your laptop or computer's HDMI port, as shown below:...
- Page 10 2. Once connected, turn on the P3X and on the menu screen, select the option circled in red below: 3. Then select the HDMI option (circled in red below):...
- Page 11 4. On your computer screen, it may have already automatically connected through the HDMI, but you can adjust the setting to fit your needs. If you have Windows 7, press and hold down the Windows Key (the key with a windows flag) and then while holding down that key, press "P".
- Page 12 5. Your P3X is now a second screen to your computer! Viewing files off of a USB and/or MicroSD Card 1. Connect your USB flash drive or MicroSD card to the projector and turn it on.
- Page 13 2. On the home screen select from any of the red circles below as appropriate to the types of file you are playing (if you're playing video, pictures, music, or text files).
- Page 14 3. Select the type of device you have plugged into your P3X (USB Flash Drive or MicroSD Card as shown below) 4. Navigate to the media you wish to play and hit OK to play.
Need help?
Do you have a question about the P3-X and is the answer not in the manual?
Questions and answers