Table of Contents
Advertisement
Ver. 1, Oct 09
USER GUIDE
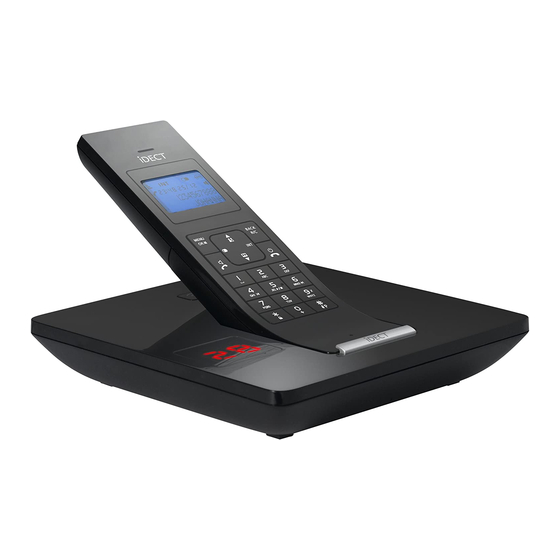
iDECT C5i System
Digital Cordless Telephone with
50 Name and Number Phonebook
and Answering Machine
THIS EQUIPMENT IS NOT DESIGNED FOR MAKING
EMERGENCY TELEPHONE CALLS WHEN THE POWER
FAILS. ALTERNATIVE ARRANGEMENTS SHOULD BE MADE
FOR ACCESS TO DIAL EMERGENCY SERVICES.
Before operating this set,
please read these instructions carefully.
Advertisement
Table of Contents

Related Manuals for Binatone iDECT C5i System


Summary of Contents for Binatone iDECT C5i System
- Page 1 USER GUIDE iDECT C5i System Digital Cordless Telephone with 50 Name and Number Phonebook and Answering Machine THIS EQUIPMENT IS NOT DESIGNED FOR MAKING EMERGENCY TELEPHONE CALLS WHEN THE POWER FAILS. ALTERNATIVE ARRANGEMENTS SHOULD BE MADE FOR ACCESS TO DIAL EMERGENCY SERVICES.
- Page 2 Important note- This telephone is not designed to make calls in the event of a power failure. So you should make alternative arrangements for access to Emergency Services. We recommend that a standard telephone that operates without mains power be connected to your telephone line so that you can make calls during a power failure.
- Page 3 Where to find it F UP/DOWN navigation - Press up or down to scroll through the menu or list options - From standby, press up to view Call list (CID) - From standby, press down to access Phonebook - Press up or down to adjust volume during a call G SKIP BACK - Go back to previous message or replay...
- Page 4 What's on the display? What do the icons mean? Flashes when the handset is trying to establish a link to the base unit. On steady when linked to the base. On when there is a new call in the calls list. (The display also shows New Call.
-
Page 5: Table Of Contents
Contents Read First Before Use Using multi-handset capabilities Making an intercom call Installation and Set-up Transfer an external call Install rechargeable batteries into the Set up a three-way conference call handset Personalising your phone Connecting the mains power supply Handset tones Basic Telephone Operations Handset Name Switching the handset on/off... -
Page 6: Read First Before Use
Read First Before Use Choosing a The base unit and charging pod(s) should be placed on a location for the level surface and in a location where: base unit and ■ the mains adapter plug can easily reach the 230-V AC charging pod mains supply socket - never try to lengthen the mains power cable... - Page 7 Interference If the sound quality gets worse as you move around when on a call, this is probably caused by interference between the handset and the base unit. Perhaps you are too near to another phone or other electrical equipment. Move to a different position to clear the interference.
-
Page 8: Installation And Set-Up
Installation and Set-up Install rechargeable batteries into the handset Install the two Ni-MH, AAA size, rechargeable batteries into the handset in accordance with the polarity markings in the battery compartment. Close the battery compartment cover by sliding it into place and pressing firmly to make sure that it is secure. -
Page 9: Basic Telephone Operations
Basic Telephone Operations Switching the handset on/off To switch on If the display is blank, press HANG-UP To switch off In standby mode, press and hold HANG-UP for more than 2 seconds. ** You can switch the handset off to save on battery power. Note: When the handset is OFF, it cannot be used to make calls, including emergency calls. -
Page 10: Switch Speakerphone On/Off
Switch speakerphone on/off < < During a call, press TALK/SPEAKER icon appears on the display. < < To switch back to earpiece mode, press TALK/SPEAKER again. Note: If you are using the speakerphone, stay close to handset so that the other party can hear you clearly. -
Page 11: Ending A Call
Ending a call Press HANG-UP The total call duration is displayed for 5 seconds. Note: Auto hang-up mode is set to On by default. You can simply replace the handset on the charging cradle to end the call without having to press HANG-UP and the handset returns to standby mode. -
Page 12: Phonebook
Phonebook You can store up to 50 entries in the phonebook for quick dialling. Names can be up to 10 characters long and numbers up to 20 digits. You can also set different melodies for your phonebook entries, but these will only play if you subscribe to Caller Display and the incoming number matches the stored number. -
Page 13: Dialling From The Phonebook
Notes: For example, to enter the name BILL, - Press twice to enter the letter B. - Press three times to enter the letter I. - Press three times to enter the letter L. - Press three times again to enter the second letter L. **You need to wait 2 seconds before entering a second letter from the same key. -
Page 14: Editing A Phonebook Entry
Editing a phonebook entry Press MENU/OK to enter the main menu. Press MENU/OK again to select Phonebook. Press UP or DOWN to select Edit Entry. Press MENU/OK to confirm. Press UP or DOWN to select an entry. Press MENU/OK to confirm. The display shows Enter Name and the existing name of the entry. -
Page 15: Deleting All Phonebook Entries
Press UP or DOWN to select an entry. Press MENU/OK to confirm deletion or press HANG-UP cancel. Deleting all phonebook entries Press MENU/OK to enter the main menu. Press MENU/OK again to select Phonebook. Press UP or DOWN to select Delete All. -
Page 16: Using The Redial List
Using the redial list The redial list stores the last 10 numbers dialled. Redial the last entry Press REDIAL The display shows Redial and the most recent number dialled, with the last number dialled appearing at the top of the list. ** If the redial list is empty, the display shows List Empty. -
Page 17: Delete A Redial Entry
Use the keypad to edit the number (up to 20 digits), and using BACK/R/C to clear digits from the display, if necessary. Press MENU/OK to save the number. The display shows Select Melody Melody 5 Press UP or DOWN to select a melody (Melody 1 Melody from the list. -
Page 18: Caller Display
Caller Display To receive Caller Display information on your phone, you must subscribe to Caller Display Service from your service provider. With Caller Display, you will be able to see your callers' numbers (provided the calls are not withheld) on your handset before answering the calls, and in the call list afterwards. -
Page 19: Save An Entry In The Phonebook
Press UP or DOWN to select an entry. < < Press TALK/SPEAKER to dial. To end the call, press HANG-UP Save an entry in the phonebook Press CID The display shows Call list and the most recent incoming call. Press UP or DOWN to select an entry. -
Page 20: Delete All Call List Entries
Press MENU/OK to confirm. Press UP or DOWN to select Delete. Press MENU/OK to confirm deletion or press HANG-UP cancel. Delete all call list entries Press CID The display shows Call list and the most recent incoming call. Press MENU/OK Press UP or DOWN to select... -
Page 21: Using Multi-Handset Capabilities
Using multi-handset capabilities If you have an iDect C5i multi-handset system, you already have more than one handset registered to your base unit. You can register additional handsets to the base which can handle a maximum of 5 handsets. The handset number (1 to 5) is shown on the display. With two or more handsets registered, you can make intercom calls between the handsets, transfer an external call from one handset to another, toggle between an external call and an intercom call, or set up a... -
Page 22: Set Up A Three-Way Conference Call
Note: If the called handset does not answer within 20 seconds, the call will be returned and you will be connected automatically back to your external call. Set up a three-way conference call When you have both an external call and an intercom call in progress, you can set up a three-way conference call. -
Page 23: Personalising Your Phone
Personalising your phone Handset tones Set the ringer volume Press MENU/OK to enter the main menu. Press UP or DOWN to select Personal Set. Press MENU/OK to confirm. Press MENU/OK again to select Handset Tones. Press MENU/OK again to select Ring Volume. -
Page 24: Handset Name
Switch key beeps on/off You can choose to switch off the beep sound when you press the keys. Press MENU/OK to enter the main menu. Press UP or DOWN to select Personal Set. Press MENU/OK to confirm. Press MENU/OK to select Handset Tones. -
Page 25: Auto Answer
Notes: For example, to enter the name BILL, - Press twice to enter the letter B. - Press three times to enter the letter I. - Press three times to enter the letter L. - Press three times again to enter the second letter L. **You need to wait 2 seconds before entering a second letter from the same key. -
Page 26: Auto Hang-Up
Auto hang-up If this mode is set to On, you can simply replace the handset on the charging cradle to end the call without having to press HANG-UP and the handset returns to standby mode. The default setting is On. Press MENU/OK to enter the main menu. -
Page 27: Base Ringer Volume / Melody
Base ringer volume / melody Set the base ringer volume Press MENU/OK to enter the main menu. Press UP or DOWN to select Personal Set. Press MENU/OK to confirm. Press UP or DOWN to select BaseTone. Press MENU/OK to confirm. Press MENU/OK again to select BS Ring... -
Page 28: Advanced Phone Settings
Advanced phone settings Recall time (Flash) You may need to change the recall (flash) time if your phone is connected to a PBX. Three options are available: Short (85ms), Medium (100ms) and Long (250ms). The default is Medium, which is the standard UK requirement. -
Page 29: Unregister A Handset
Use the keypad to enter the 4-digit PIN code (default PIN code is 0000). Press MENU/OK to confirm. The display shows Registering..Press and hold FIND on the base until the base starts beeping. After a short while you will hear a confirmation tone on the handset. The display shows the handset numbers available for registration. -
Page 30: Reset
Press UP or DOWN to select Advanced Set. Press MENU/OK to confirm. Press UP or DOWN to select Change PIN. Press MENU/OK to confirm. The display shows Enter New PIN _ _ _ Use the keypad to enter your new 4-digit PIN code. Press MENU/OK to confirm. -
Page 31: Using The Answering Machine
Using the answering machine Your phone includes a telephone answering machine that is switched on by default and preset to answer a call automatically after five rings. It will play a pre-defined outgoing message to prompt the caller to leave a message if they wish to, up to 2 minutes per message. The total recording time available for all messages is about 1 minutes. -
Page 32: Playback Recorded Messages
Playback recorded messages When a new message is received on the answering machine, icon will flash on the handset display, and the message counter will flash on the base display. The handset display shows X New Msg. to indicate the number of new messages received. -
Page 33: Memo Recording
Memo recording You can record a memo that can be played back later. This can be useful if you want to leave a message for other users of the phone. A memo will be played back with other recorded messages from external callers. -
Page 34: Set The Answer Mode And Outgoing Messages (Ogm)
Set the answer mode and outgoing messages (OGM) There are two answering modes - Answer & Record mode or Answer Only mode. The Answer & Record mode is switched on by default so that callers can leave messages when their calls are answered by the answering machine. -
Page 35: Set Ring Delay
OR select a personalised OGM Press UP or DOWN to select Personalised. Press MENU/OK to confirm. EITHER press MENU/OK again to select Play message if you wish to check the existing message. OR press UP or DOWN to select Record mess.. -
Page 36: Remote Access Operation
Note: If you select Toll Saver mode, the answering machine will answer after 5 rings if there are no new messages, or after 2 rings if there is at least one new message recorded. Note: If the answering machine is turned off or the memory is full it will answer after 15 rings, with the Answer Only message. - Page 37 Press to start message playback. ** When messages are not playing, you must press a key within 15 seconds or your call will be disconnected. Keys for remote operation Play messages (New messages will be played. To play all old messages, press again.) Skip to the next message...
-
Page 38: Call Screening
Call screening This function allows you to hear the caller on the Handset 1 speakerphone while the message is being recorded. You can then decide if you want to talk to the caller directly. To stop the recording and take the call, simply press TALK/ <... - Page 39 iDECT C5i Remote operation Using a tone-dialling phone, dial your home number and wait for the answering machine to answer When you hear the outgoing message, enter the 4-digit PIN code within 5 seconds. The default code is 0000. For details of how to set a new code, see the User Guide.
- Page 40 Replay from the start of the message Start recording MEMO Skip back to the previous message Stop recording Skip forward to the next message Switch the answering machine On (Answ. & Rec.), Delete single message during replaying Announce (Answer Only), Off Delete all message after replaying Start recording OGM1 Play all message/Replay continue...
-
Page 41: Troubleshooting
Troubleshooting ALWAYS confirm You have followed all the steps listed in the user manual that: to install and set up your telephone. All connectors are firmly inserted into their sockets. Mains power to the base unit is switched on. The handset's batteries are correctly and securely installed and are not run down. - Page 42 "When I enter a Try to install the base unit in another location- somewhere number, it appears higher if possible, or further away from other electrical on the display, but equipment. I cannot make an Try moving the handset closer to the base unit. external call"...
- Page 43 Intercom and transfer "I can't transfer a Make sure the other handset is within range of the base unit. call" Make sure that you have dialled the correct number for the other handset. Battery "The handset's Before you first use the handset, you should have left it on battery pack is the base unit or charging pod for 15 hours to charge the running low within...
-
Page 44: Cleaning And Care
Cleaning and care ■ Do not clean any part of your iDECT C5i with benzene, thinner or other solvent chemicals as this may cause permanent damage which is not covered by the Guarantee. If necessary, clean it with a damp cloth. ■... -
Page 46: Guarantee And Service
Guarantee and service The iDECT C5i is guaranteed for 12 months from the date of purchase shown on your sales receipt. This guarantee does not cover any faults or defects caused by accidents, misuse, normal wear and tear, neglect, faults on the telephone line, lightning, tampering with the equipment, or any attempt at adjustment or repair other than through approved agents. -
Page 47: Technical Details
Technical details Standard Digital Enhanced Cordless Telecommunication (DECT) Frequency 1.8 GHz Channel bandwidth 1.728 MHz Operating range Up to 300m outdoors; up to 50m indoors Operating time Standby: 100 hours Talking: 10 hours Battery charge time: 15 hours Temperature range Operating 0ºC to 40ºC Storage -20ºC to 60ºC Caution...
Need help?
Do you have a question about the iDECT C5i System and is the answer not in the manual?
Questions and answers