Sign In
Upload
Download
Table of Contents
Contents
Add to my manuals
Delete from my manuals
Share
URL of this page:
HTML Link:
Bookmark this page
Add
Manual will be automatically added to "My Manuals"
Print this page
×
Bookmark added
×
Added to my manuals
Manuals
Brands
Baumatic Manuals
Oven
P611BS
Instruction manual
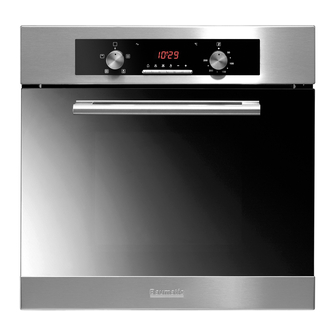
Baumatic P611BS Instruction Manual
60 cm built in fan oven and 60cm built in multifunction oven
Hide thumbs
1
2
Table Of Contents
3
4
5
6
7
8
9
10
11
12
13
14
15
16
17
18
19
20
21
22
23
24
25
26
27
28
29
30
31
32
33
34
35
36
page
of
36
Go
/
36
Contents
Table of Contents
Troubleshooting
Bookmarks
Table of Contents
Table of Contents
Environmental Note
Important Safety Information
Specifications
P611Bs/Ss
P622Bs/Ss
P632Bs/Ss/W
Cooling Fan
Control Panel
Oven Programmer/Timer Display
Control Panel
Setting and Using the Oven Programmer/Timer
Selecting Manual Operation Mode
Setting the Time of Day
The Oven Timer
Before First Use
Setting the Minute Minder Function
Setting the Duration Function
Setting the End Cook Function
Setting the Start and End Time Function
Adjusting the Audible Signal
Selecting a Cooking Function and Temperature
Selecting Manual Operation Mode
Selecting an Oven Function
P611BS/SS, P622BS/SS and P632BS/SS/W Standard Oven Functions
P611BS/SS Additional Functions
P622BS/SS and P632BS/SS/W Additional Functions
P632BS/SS/W Additional Functions
Thermostat Control Knob
Oven Operating Light
Cooking Guidelines
Shelf Levels
Warnings
Cleaning and Maintenance
Removable Oven Roof Liner (P622BS/SS and P632BS/SS/W Only)
Replacing the Oven Bulb
Removing the Oven Door for Cleaning
Installation
Electrical Connection
Installing the Oven into the Kitchen Cabinet
Positioning the Appliance
Ventilation Requirements
Troubleshooting
My Appliance Isn't Working Correctly
Baumatic Consumables
Contact Details
Advertisement
Quick Links
1
Specifications
2
P632Bs/Ss/W
3
Control Panel
4
Oven Programmer/Timer Display
5
Setting the Time of Day
Download this manual
P611BS/SS 60 cm Built in fan
oven
P622BS/SS & P632BS/SS 60cm
Built in multifunction oven.
1
Table of
Contents
Previous
Page
Next
Page
1
2
3
4
5
Advertisement
Table of Contents
Need help?
Do you have a question about the P611BS and is the answer not in the manual?
Ask a question
Questions and answers
Related Manuals for Baumatic P611BS
Oven Baumatic P610SS Instruction Manual
60 cm multifunction built-in oven. (40 pages)
Oven Baumatic P620BL Instruction Manual
Multifunction built-in oven (32 pages)
Oven Baumatic P611SS Instruction Manual
60 cm built in fan oven and 60cm built in multifunction oven (36 pages)
Oven Baumatic P632SS Instruction Manual
60 cm built in fan oven and 60cm built in multifunction oven (36 pages)
Oven Baumatic P619BS Instruction Manual
60 cm built-in fan oven and 60cm built-in multifunction oven (40 pages)
Oven Baumatic P619-BS Instruction Manual
60 cm built-in fan oven, 60 cm built-in multifunction oven, (40 pages)
Oven Baumatic P660SS Instruction Manual
46cm/60 cm multifunction touch control oven (32 pages)
Oven Baumatic P619SS-ANZ Instruction Manual
60 cm built in fan oven/60 cm built in multifunction oven (36 pages)
Oven Baumatic P629SS-ANZ Instruction Manual
60 cm built in fan oven/60 cm built in multifunction oven (36 pages)
Oven Baumatic P650SS User Manual
60cm multifunction selfcleaning pyrolytic built in oven (30 pages)
Oven Baumatic P615SS Instruction Manual
(44 pages)
Oven Baumatic P640SS Instruction Manual
Single knob 60cm multifunction built in oven (32 pages)
Oven Baumatic P670SS Instruction Manual
Multifunction touch control oven (36 pages)
Oven Baumatic BO638.5SS User Manual
(40 pages)
Oven Baumatic POG4201SS Instruction Manual
60 cm gas oven (40 pages)
Oven Baumatic PD659SS-ANZ Instruction Manual
60cm built in multifunction electric double oven (40 pages)
This manual is also suitable for:
P611ss
P632bs
P632ss
P622bs
P622ss
P611bs/ss
...
Show all
P622bs/ss
P632bs/ss
Table of Contents
Print
Rename the bookmark
Delete bookmark?
Delete from my manuals?
Login
Sign In
OR
Sign in with Facebook
Sign in with Google
Upload manual
Upload from disk
Upload from URL


Need help?
Do you have a question about the P611BS and is the answer not in the manual?
Questions and answers