Table of Contents
Advertisement
Advertisement
Table of Contents

Related Manuals for Baumatic P640SS


Summary of Contents for Baumatic P640SS
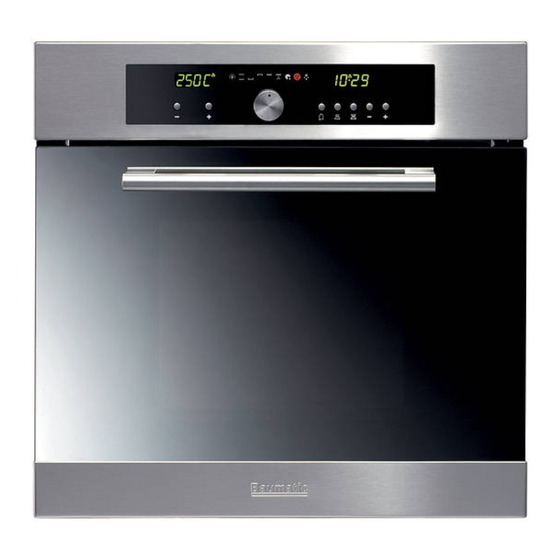
- Page 1 P640SS Single knob 60cm Multifunction built in oven.
- Page 2 User Manual for your Baumatic P640SS Single knob multifunction oven NOTE : This User Instruction Manual contains important information, including safety & installation points, which will enable you to get the most out of your appliance. Please keep it in a safe place so that it is easily available for future reference; for you or any person not familiar with the operation of the appliance.
-
Page 3: Table Of Contents
Removing the oven door for cleaning 21-22 Removing the inner door glass for cleaning Installation Electrical connection Installing the oven into the kitchen cabinet Positioning the appliance Ventilation requirements My appliance isn’t working correctly 26-27 Baumatic Ltd. conditions of guarantee Contact details... -
Page 4: Environmental Note
Environmental note o The packaging materials that Baumatic uses are environmentally friendly and can be recycled. o Please discard all packaging material with due regard for the environment. -
Page 5: Important Safety Information
Your new appliance is guaranteed against electrical or mechanical defects, subject to certain exclusions that are noted in Baumatic’s Conditions Of Guarantee. The foregoing does not affect your statutory rights. o Repairs may only be carried out by Baumatic Service Engineers or their authorised service agent. - Page 6 Warning and safety instructions o This appliance complies with all current European safety legislation. Baumatic do wish to emphasise that this compliance does not remove the fact that the appliance surfaces will become hot during use and retain heat after operation.
- Page 7 This appliance must be correctly installed by a suitably qualified person, strictly in accordance with the manufacturer’s instructions. o Baumatic Ltd. declines any responsibility for injury or damage, to person or property, as a result of improper use or installation of this appliance.
-
Page 8: Specifications
Specifications Product Dimensions Aperture Dimensions Height: 591 mm 580 mm – 583 mm Width: 597 mm 560 mm Depth: 525 mm 550 mm Cooling fan o A tangential cooling fan is fitted inside of this appliance, to make the internal temperature of the oven stable and the external surface temperature lower. -
Page 9: Standard Accessories
Standard accessories o Removable roof liner o Removable side racks o 2 x Safety shelves o Enamelled drip tray with handle o Trivet Optional extras o BPS1 Pizza stone o TELKIT Telescopic runners kit o SCL2KIT Stay-clean liners kit* * Please note that the TELKIT and SCL2KIT cannot be used together. Electrical details Rated Voltage: 230 Vac 50 Hz... -
Page 10: Control Panel
Control Panel Oven temperature display Oven functions display “Auto” function symbol “Manual operation” symbol “Timer” function symbol Oven thermostat minus button Oven thermostat plus button Oven function selector control knob Timer buttons Oven programmer/timer display = Minute minder button = Duration button = Cooking end time button = Timer minus button = Timer plus button... -
Page 11: Setting And Using The Oven Programmer/Timer
Setting and using the oven programmer/timer Setting the time of day and selecting manual operation mode After your appliance is connected to your mains supply for the first time, the numbers on the timer display will flash 00.00. Before you can select a cooking function or set a temperature, you must set the appliance into “manual operation”... -
Page 12: Setting The Minute Minder Function
Setting the minute minder function You are able to set the minute minder at any time, regardless of whether an oven function has been selected. You can set a period of time using the minute minder function and an alarm will sound when this period of time has elapsed. -
Page 13: Setting The Duration Function
Setting the duration function This function will allow you to set a countdown time similar to the minute minder function. However the oven will no longer continue to heat, once the countdown period has elapsed. o Use the oven function selector knob (8) to select the mode of cooking that you require. -
Page 14: Setting The End Cook Function
Setting the end cook function This function is similar to the duration function, however instead of selecting a period of time that you wish the oven to switch off after. You select the time of day that you wish the oven to switch off at. -
Page 15: Setting The Start And End Time Function
Setting the start and end time function This function will allow you to set a time in the future that the oven switches on at and a time that the oven will switch off at. o Use the oven function selector knob (8) to select the mode of cooking that you require. -
Page 16: Cancelling An Automatic Cooking Function
Cancelling an automatic cooking function If an automatic cooking function has been set and you wish to use the oven in manual operation mode, you will need to cancel the automatic cooking function. o To select manual operation mode, press the duration and cooking end time buttons simultaneously. -
Page 17: Description Of Oven Functions
o The oven function selector knob needs to be pushed in to pop the control knob out. This should be done before attempting to turn this control knob. o When you turn the oven function selector knob, the function that you have selected will light on the oven functions display (2). -
Page 18: Oven Thermostat Plus And Minus Buttons
FAN OVEN: This method of cooking uses the circular element while the heat is distributed by the fan. This results in a faster a d m ore economical cooking process. The fan oven allows food to be cooked simultaneously on different shelves, preven ting the transmissi on of smells and tastes from one dish onto another. -
Page 19: Warnings
o Try to open the door as little as possible to view the dishes. o The oven light will remain on during cooking. rnings o Keep the oven door closed when using a grill function. o Do not use aluminium foil to cover the grill pan or heat items wrapped in aluminium foil under the grill. -
Page 20: Cleaning And Maintenance
Any damage that is caused to the appliance by a cleaning product will not be fixed by Baumatic free of charge, even if the appliance is within the guarantee period. Remo vable oven roof liner... -
Page 21: Replacing The Oven Bulb
o Do not allow fat and grease to build up on the oven liner, as t could cause a fire hazard. Re la p cing the oven bulb MPORTANT: The oven must be disconnected from our mains supply before you attempt to either remove or replace the oven bulb. -
Page 22: Removing The Inner Door Glass For Cleaning
o WARNING- Care should be taken as the inner edges of door may be sharp. o IMPORTANT: You should make sure that the door is supported at all times and that yo u place the door on some padded material whilst cleaning it. The oven door and door glass should only be cleaned usin damp cloth and a small amo unt of detergent. -
Page 23: Installation
Care must be taken to ensure that the temperature of the main supply cable does not exceed 50°C. If the mains supply cable is damaged, then it must be replaced by an appropriate r eplacement which can be obtained from the Baumatic Spares Department. -
Page 24: Installing The Oven Into The Kitchen Cabinet
Installing the oven into the kitchen cabinet Positioning the appliance o Ensure that the aperture that you will be fitting the oven into is of the size given in the above diagram. o The oven must be fitted into an oven housing with the ventilation cut-outs shown in the “Ventilation requirements”... -
Page 25: Ventilation Requirements
entilation requirements (Figure shows the ventilation and cut-out requirements for the installation of the appliance into a standard kitchen unit). igure shows the ventilation and cut-out requirements for the stallation of the appliance into a tall housing unit). o Ensure that the oven has been securely fixed into the housing unit. -
Page 26: My Appliance Isn't Working Correctly
My appliance isn’t working correctly o The oven isn’t coming on. * Check that the oven is in manual operation mode. * Check that you have selected a cook ing function and a cooking temperature. o There appears to be no power to the oven and grill. - Page 27 Or any installation other than the one specified by Baumatic Ltd. has been completed. Please refer to the conditions of guarantee document on page 28 o this instr uction manual for clarification of this.
-
Page 28: Baumatic Ltd. Conditions Of Guarantee
Baumatic Ltd. Conditions of guarantee Dear Customer, Your new Baumatic appliance comes complete with a free 12 month guarantee covering both parts and labour costs re sulting from defective materials or workmanship. Baumatic also gives you the opportunity to automatically extend the guarantee period for a further 12 months at no extra cost, giving an initial guarantee period of 24 months. -
Page 29: Contact Details
Headquarters Baumatic Ltd. Baumatic Buildings, 6 Bennet Road, Reading, Berkshire RG2 0QX, United Kingdom Sales Telephone +44 118 933 6900 Sales Fax +44 118 931 0035 rvice Telephon +44 118 933 6911 ervice Fax +44 118 986 9124 Spares Telephone...
Need help?
Do you have a question about the P640SS and is the answer not in the manual?
Questions and answers