
Related Manuals for Audio Technica AT-LP1240-USB


Summary of Contents for Audio Technica AT-LP1240-USB
- Page 1 AT-LP1240-USB Professional DJ Direct-Drive Turntable (USB and Analog) Installation and Operation...
-
Page 2: Safety Instructions
Professional DJ Direct-Drive Turntable Safety instructions Introduction Thank you for purchasing the AT-LP1240-USB Professional DJ Direct-Drive Turntable 1. Read these instructions. (USB & Analog). This professional quality DJ turntable is designed primarily for DJ 2. Keep these instructions. use in nightclubs, touring and mobile applications. It can also be used by music 3. Heed all warnings. -
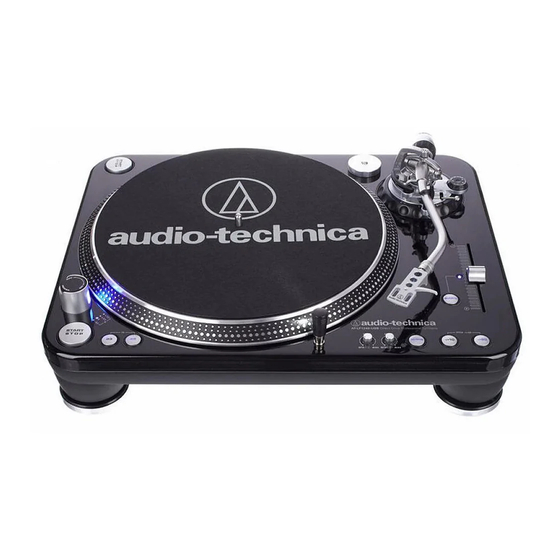
Page 3: Main Features
Main Features Figure 1 1. POWER DIAL 13. HEADSHELL LOCKING RING Controls power to the unit. Rotate counter-clockwise (to the left) to draw the inserted headshell firmly into its seated, locked position. Rotate the ring a full turn to 2. DUAL START/STOP BUTTONS the right to permit removal of the headshell. -
Page 4: Rear View Diagram
Note: A standard stereo cartridge headshell is supplied with the AT-LP1240-USB. To mount your cartridge (not included) to the headshell, Setting Tone Arm Balance and Tracking Force follow instructions included with your cartridge. - Page 5 To isolate ground loops or low-level hum from your system, connect counterclockwise without touching the black gauge ring, moving the provided ground wire between the AT-LP1240-USB turntable and the counterweight forward, until the desired value on gauge ring your receiver, pre-amp, phono pre-amp, computer, or other connected lines up with the centerline marked on the rear arm.
-
Page 6: Operation
Operation For best results, do not install or operate this unit near conditions of Position the tone arm over the desired location (groove) on heat, moisture, dust, or heavy vibrations. (Note: Bright fluorescent lights the record. may affect the visibility of the speed-indicating strobe dots. If this is a Lower the tone arm by moving the tone arm lift control lever to problem, simply cover the area with your hand, an album cover, etc.) the DOWN position. -
Page 7: Specifications
Troubleshooting (continued) • When lifting or replacing the turntable cover, handle it gently. • Do not touch the stylus tip with your fingers; avoid bumping the stylus on the turntable mat or a record’s edge. • Clean the stylus tip frequently, following the stylus manufac- turer’s cleaning instructions. - Page 8 Register your product online at www.audio-technica.com U.S. One-Year Limited End-User Warranty Select Audio-Technica brand products purchased in the U.S.A. from an authorized Audio-Technica (A.T.U.S.) dealer are warranted for one year from date of purchase by A.T.U.S. to be free of defects in materials and workmanship. In event of a defect, End-User’s exclusive remedy is at A.T.U.S.’...
Need help?
Do you have a question about the AT-LP1240-USB and is the answer not in the manual?
Questions and answers