Table of Contents
Advertisement
Quick Links
User Manual of Product 1:
Audio-Technica AT-LP140XP-BK Direct-Drive Professional DJ
Turntable, Black, Hi-Fi, Fully Manual, 3 Speed, High Torque
Motor
User Manual of Product 2:
Audio-Technica AT-LP120XUSB-BK Direct-Drive Turntable
(Analog & USB), Fully Manual, Hi-Fi, 3 Speed, Convert Vinyl to
Digital, Anti-Skate and Variable Pitch Control Black
Advertisement
Table of Contents

Related Manuals for Audio Technica AT-LP140XP


Summary of Contents for Audio Technica AT-LP140XP
- Page 1 User Manual of Product 1: Audio-Technica AT-LP140XP-BK Direct-Drive Professional DJ Turntable, Black, Hi-Fi, Fully Manual, 3 Speed, High Torque Motor User Manual of Product 2: Audio-Technica AT-LP120XUSB-BK Direct-Drive Turntable (Analog & USB), Fully Manual, Hi-Fi, 3 Speed, Convert Vinyl to...
- Page 2 AT-LP140XP User Manual Direct-Drive Professional Turntable AT-LP140XP...
-
Page 3: Package Contents
Introduction Thank you for purchasing this Audio-Technica product. Before using the product, read through this user manual to ensure that you will use the product correctly. Please keep this manual for future reference. This product can be used only in the countries where the product is sold. Make sure that the operating voltage of the product is correct for the country you live in. - Page 4 Safety precautions Safety precautions Although this product was designed to be used safely, failing to use 9. Do not defeat the safety purpose of the polarized or grounding plug. it correctly may result in an accident. To ensure safety, observe all A polarized plug has two blades with one wider than the other.
-
Page 5: Notes On Use
Notes on use Turntable body • Do not set and use the product in locations that are considerably hot or humid, dirty, or subject to extreme vibrations. • The product should be positioned on a flat, level surface. Cartridge • Attach the protector to protect the stylus when the product is not in use. -
Page 6: Part Names And Functions
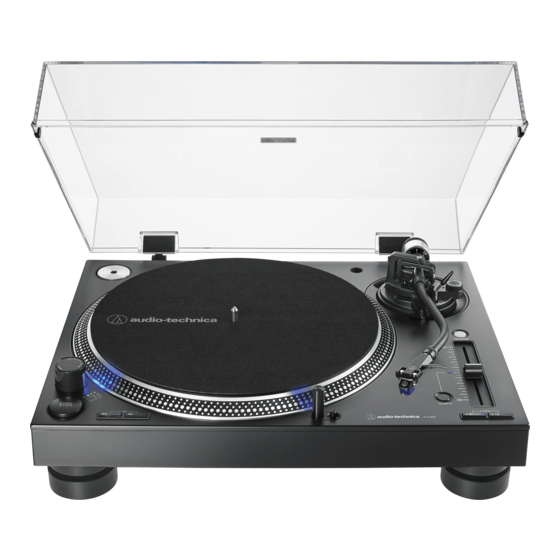
Part names and functions Top view diagram AT-LP140XP 45-RPM adapter (shown in receptacle) Stylus target light Adapts 7" records with large center holes to fixed center spindle. Provides illumination directed at the stylus position for easier cueing in low light. - Page 7 Part names and functions Front and rear view diagram Dust cover Feet Adjust the level of the product. Stereo output terminals Connect the RCA audio cable. Connect it to either the amplifier’s PHONO input jack. The red terminal is the right channel and the white terminal is the left channel.
- Page 8 Part names and functions Tonearm Counterweight Balances the tonearm and adjusts to provide the proper tracking force. Tracking force gauge ring Use to adjust the tracking force. Tonearm lift Moves the tonearm vertically to and from the face of the record. Tonearm rest with clamp Use the clamp to secure the tonearm so that it does not move.
-
Page 9: Preparation For Use
Preparation for use Leveling the turntable Placing the platter 1. After positioning the product where you want to use it, adjust the This product requires some assembly before using it for the first time. feet so that the product is level. Do not connect the power cable until assembly is complete. - Page 10 Preparation for use Tonearm balance and tracking force Setting tracking force In order for the cartridge to pick up sound correctly from the record’s 1. While supporting the counterweight so that it does not move, turn the tracking force gauge ring so that its “0” position lines up grooves, the tonearm’s balance and tracking force must be adjusted with the centerline on the back of the tonearm.
-
Page 11: Installing/Removing The Dust Cover
Preparation for use Installing/removing the dust cover Connecting to connectable equipment (active speakers, amplifiers, etc.) • The dust cover is designed to protect the product’s sensitive components when the product is not in use. It should remain off Connect the RCA audio cable to an input jack that is compatible with while records are playing. -
Page 12: Playing A Record
Playing a record Before playing a record Playing a record 1. Remove the cartridge’s protector. Lower the volume of the amplifier, speakers, etc., sufficiently. • If the tonearm is fixed to the tonearm rest, unlatch the clamp. 1. Press the START/STOP button. •... -
Page 13: Pausing The Record
• The platter slows down and rotation stops. 6. Turn the power dial to the OFF position. 7. Remove the record after the platter has come to a complete stop. AT-LP140XP • To prevent the record from becoming scratched or warped, remove it after use. -
Page 14: Replacing The Stylus
Care Replacing the stylus Turntable body Removing the stylus • When the turntable body is dirty or dusty, first disconnect the power • In addition to the deterioration of sound quality, records may also be cable plug, and then wipe off the dirt and dust with a soft, dry cloth. damaged as the cartridge’s stylus tip wears down. -
Page 15: Replacing A Cartridge
Replacing a cartridge Adjusting the tonearm’s height Refer to the user manual for the cartridge that you will be using if you When installing a cartridge other than the one provided, you must are replacing the cartridge (AT-XP3) included with this product with maintain a suitable distance between the cartridge and the surface of another, commercially available cartridge. -
Page 16: Troubleshooting
Humming is heard during • Is the ground line connected correctly? Make sure the ground line is properly connected. playback. • Is the headshell attached to the tonearm firmly? Make sure the locking ring is tight. AT-LP140XP Dimensions 452.0 AT-LP140XP... -
Page 17: Specifications
Specifications Turntable specifications General specifications Type 3-speed, fully manual operation Power supply requirements 115 to 230 V AC, 50/60 Hz Motor High-torque DC motor Power consumption Drive method Direct drive Dimensions 452.0 mm (17.80") × 352.0 mm (13.86") × 158.6 mm (6.24") Speeds 33-1/3 RPM, 45 RPM, 78 RPM (W ×... - Page 18 Audio-Technica Corporation 2-46-1 Nishi-naruse, Machida, Tokyo 194-8666, Japan ©2019 Audio-Technica Corporation 162501390-02-01 ver.1 2019.04.15 Global Support Contact: www.at-globalsupport.com...
- Page 19 AT-LP 120XUSB User Manual Direct-Drive Turntable...
- Page 20 Introduction Thank you for purchasing this Audio-Technica product. Before using the product, read through this user manual to ensure that you will use the product correctly. Please keep this manual for future reference. This product can be used only in the countries where the product is sold. Make sure that the operating voltage and the plug of AC adapter of the product are correct for the country you live in.
-
Page 21: Safety Precautions
Safety precautions Safety precautions Although this product was designed to be used safely, failing to use For customers in Canada it correctly may result in an accident. To ensure safety, observe all warnings and cautions while using the product. IC statement: CAN ICES-3 (B)/NMB-3(B) Important information Warning:... -
Page 22: Part Names And Functions
Part names and functions Top view diagram 45-RPM adapter (shown in receptacle) Removable stylus target light Adapts 7" records with large center holes to fixed center spindle. Provides illumination directed at the stylus position for easier cueing in low light. Easily plugs into jack on top of turntable deck. Strobe dots (on platter edge) Quartz button Operate in conjunction with stroboscopic light located under the... - Page 23 Part names and functions Front and rear view diagram Dust cover Feet Adjust the level of the product. Pre-amplifier selector switch If using an amplifier with a PHONO input jack, set this switch to the PHONO position. If connecting to the AUX jack of an amplifier, set this switch to the LINE position.
- Page 24 Part names and functions Tonearm Counterweight Balances the tonearm and adjusts to provide the proper tracking force. Tracking force gauge ring Use to adjust the tracking force. Tonearm lift Moves the tonearm vertically to and from the face of the record. Tonearm rest with clamp Use the clamp to secure the tonearm so that it does not move.
-
Page 25: Preparation For Use
Preparation for use Leveling the turntable Placing the platter 1. After positioning the product where you want to use it, adjust the This product requires some assembly before using it for the first time. feet so that the product is level. Do not connect the AC adapter until assembly is complete. - Page 26 Preparation for use Tonearm balance and tracking force Setting tracking force In order for the cartridge to pick up sound correctly from the record’s 1. While supporting the counterweight so that it does not move, turn the tracking force gauge ring so that its “0” position lines up grooves, the tonearm’s balance and tracking force must be adjusted with the centerline on the back of the tonearm.
-
Page 27: Setting Pre-Amplifier Selector Switch
Preparation for use • The RCA audio cable's red jack is for the right (R) channel, and the Installing/removing the dust cover white jack is for the left (L) channel. • The dust cover is designed to protect the product's sensitive With PHONO input* Without PHONO input components when the product is not in use. -
Page 28: Connecting The Ac Adapter
Preparation for use Connecting to computers with USB input Follow the settings for the pre-amplifier selector switch to connect the included USB cable to the USB input of your computer. • The included USB cable connects the product to your computer without need for special drivers. -
Page 29: Playing A Record
Playing a record Before playing a record Playing a record 1. Remove the cartridge's protector. Lower the volume of the amplifier, speakers, etc., sufficiently. • If the tonearm is fixed to the tonearm rest, unlatch the clamp. 1. Press the START/STOP button. •... - Page 30 Playing a record 4. Lower the tonearm by moving the tonearm lift control lever to the Stopping the record DOWN position. The tonearm descends slowly onto the record and play begins. 1. Lower the volume of the amplifier, speakers, etc. sufficiently. •...
- Page 31 Care Replacing the stylus Turntable body Removing the stylus • When the turntable body is dirty or dusty, first disconnect the • In addition to the deterioration of sound quality, records may also be AC adapter's cord, and then wipe off the dirt and dust with a soft, damaged as the cartridge’s stylus tip wears down.
- Page 32 Replacing a cartridge When the turntable is moved Refer to the user manual for the cartridge that you will be using if Using the product's original packing materials, wrap the turntable in you are replacing the cartridge (AT-VM95E) included with this product the reverse order from when you unwrapped it.
- Page 33 Troubleshooting Problem Solution The platter does not spin. • Is the AC adapter connected to the outlet? Connect AC adapter to the outlet. • Has the AC adapter's plug come off? Check whether or not the plug is properly attached to the AC adapter. The platter spins, but there is •...
- Page 34 Specifications Turntable specifications USB function Type 3-speed, fully manual operation A/D, D/A 16 bit 44.1 kHz or 48 kHz USB selectable Motor DC servo motor Computer interface USB 1.1 Compliant Windows 7 or Drive method Direct drive above, or MAC OSX or above Speeds 33-1/3 RPM, 45 RPM, 78 RPM Turntable platter...
- Page 35 Audio-Technica Corporation 2-46-1 Nishi-naruse, Machida, Tokyo 194-8666, Japan ©2019 Audio-Technica Corporation ver.1 2019.03.01 162501380-01-02 ver.2 2019.05.15 Global Support Contact: www.at-globalsupport.com...
Need help?
Do you have a question about the AT-LP140XP and is the answer not in the manual?
Questions and answers
У проигрывателя Audio-Technica AT-LP140XP плавает скорость в сторону уменьшения
The speed may be decreasing on the Audio Technica AT-LP140XP turntable because the quartz lock is engaged. When quartz lock is on, the pitch slider has no effect. To enable variable pitch control and allow speed adjustment, depress the quartz button to disengage quartz lock. The LED next to the pitch slider should turn off when quartz lock is disengaged.
This answer is automatically generated