Dimplex BLF50 Owner's Manual
Hide thumbs
Also See for BLF50:
- Owner's manual (24 pages) ,
- Service manual (19 pages) ,
- Service manual (16 pages)
Table of Contents
Advertisement
IMPORTANT SAFETY INFORMATION: Always read this manual first
before attempting to install or use this fireplace. For your safety, always
comply with all warnings and safety instructions contained in this manual
to prevent personal injury or property damage.
To view the full line of Dimplex products, please visit
www.dimplex.com
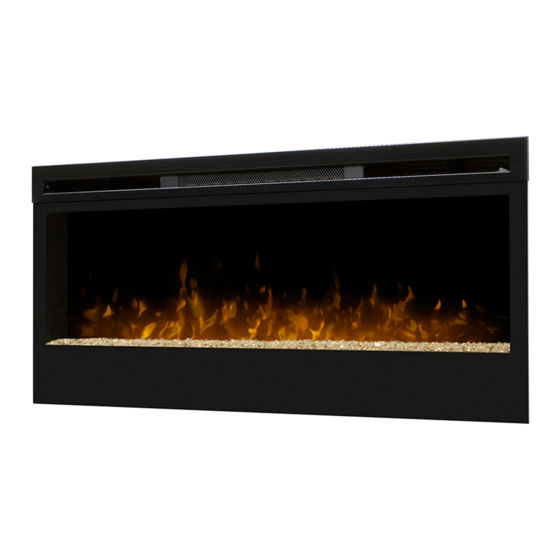
Owner's Manual
Model
BLF50
7210380100R02
Advertisement
Table of Contents

Subscribe to Our Youtube Channel
Related Manuals for Dimplex BLF50


Summary of Contents for Dimplex BLF50
- Page 1 For your safety, always comply with all warnings and safety instructions contained in this manual to prevent personal injury or property damage. To view the full line of Dimplex products, please visit www.dimplex.com 7210380100R02...
-
Page 2: Table Of Contents
CAUTION: Procedures and techniques which, if not carefully followed, will result in damage to the equipment. WARNINg: Procedures and techniques which, if not carefully followed, will expose the user to the risk of fire, serious injury, or death. www.dimplex.com... -
Page 3: Welcome & Congratulations
Welcome & Congratulations Thank you and congratulations for choosing to purchase an electric fireplace from Dimplex, the world leader in electric fireplaces. Please carefully read and save these instructions. CAUTION: read all instructions and warnings carefully before starting installation. Failure to follow these instructions may result in a possible electric shock, fire hazard and will void the warranty. -
Page 4: Important Instructions
Dimplex ① read all instructions before Technical service at using the electric fireplace. -
Page 5: Save These Instructions
IMPORTANT INSTRUCTIONS ⑭ overheat and cause a risk of fire. Do not insert or allow foreign If you must use an extension objects to enter any ventilation cord, the cord shall be no. or exhaust opening as this may 14 AWG minimum size and rated cause an electric shock or fire, or not less then 1875 Watts. - Page 6 · Consult the dealer or an experienced radio/Tv technician for help. operation is subject to the following two conditions: (1) this device may not cause interference and (2) this device must accept any interference, including interference that may cause undesired operation of the device. www.dimplex.com...
-
Page 7: Quick Reference Guide
Quick Reference guide Figure 1 ① The electrical information regarding your electric fireplace can 7" be found on the rating label located (17.8 cm) on the front of the unit, behind the glass. before installation, please record your fireplace's serial number below for future reference. -
Page 8: Fireplace Installation
WARNINg: Ensure the power cord is not installed so that it is pinched or against a sharp edge and ensure that the power cord is stored or secured www.dimplex.com... -
Page 9: Hardwire Installation
Fireplace Installation Hardwire Installation Figure 2 bracket screws The fireplace is packaged with a two prong plug installed for plug- in convenience. hard wiring the fireplace is also an option for any installation. WARNINg: Do not attempt to Partially wire your own new outlets or reflective Glass circuits. - Page 10 (Figure 5) unscrew the two (2) wire from inside. connectors inside the From the back of the electrical box and separate fireplace, remove the the wires (Figure 5). remaining three (3) Phillips Remove the one (1) Phillips www.dimplex.com...
- Page 11 Fireplace Installation screws which hold the Figure 8 Wires to junction box to the fireplace black live controls chassis (Figure 6). wires Pull the junction box and power cord out the front of the fireplace. replace removed junction box cover with the supplied hard-wire cover replacement (Figure 7) and install using screws removed in steps 6...
-
Page 12: Surface Installation
(key-holes are spaced complete. at four (4) inch (10.2 cm) Remove the partially centers), mark the location of four (4) screw locations on reflective glass from the www.dimplex.com... -
Page 13: In-Wall Recessed Installation - 2X4 Framing
Fireplace Installation Figure 9 on the wall. screw heads Wall stud and washers will fit through Key-hole key-holes and fireplace will Permanent slide down into place (screws mounting hole will slide into narrow part of key-holes). Tighten all four (4) mounting screws down on fireplace chassis. - Page 14 Use bubble level (supplied) to • hard wire the fireplace level the fireplace within the (recommended). Follow the framing. Adjust as required. hard wiring instructions on Drive four (4) supplied page 9. mounting screws through WARNINg: Do not attempt www.dimplex.com...
-
Page 15: Flush Mounted Installation - 2X8 Framing
Fireplace Installation Figure 12 Figure 13 Mounting 2 x 8 Framing hole the four (4) mounting holes located in each corner of the fireplace chassis, into wall studs (Figure 12). refer to Front Glass installation. This fireplace does Installation section, page not require any additional venting. -
Page 16: Front Glass Installation
Adjust as required. assembly so that the front glass hooks (4) hang on the Drive four (4) supplied front glass mounts on the Figure 14 Figure 15 Mounting hole Front tray Wall surface Front glass Mounting hole assembly www.dimplex.com... - Page 17 Fireplace Installation fireplace (4) (Figure 16). Figure 16 Mounts (4) Use the supplied two (2) Phillips sheet metal screws Hooks (4) to fasten the glass assembly tabs to the fireplace (Figure 17). Ensure the fireplace's on/off switch is switched to the off position (refer to operation section).
-
Page 18: Operation
CAUTION: If you need to continuously reset the heater, When in “ REMOTE ” mode, disconnect power and call the fireplace's three levels of Dimplex customer service at operation are controlled by the 1-888-DImPLEX ON and OFF buttons of the (1-888-346-7539). -
Page 19: Remote Control
Operation Remote Control Figure 19 The fireplace is supplied with a radio frequency remote control. Button This remote control has a range of approximately 50 feet (15.25 Button m), it does not have to be pointed at the fireplace and can pass through most obstacles (including Plastic strip... -
Page 20: Maintenance
To remove fingerprints or other marks, the partially reflective glass can be cleaned with a damp cloth. The partially reflective glass www.dimplex.com... -
Page 21: Warranty
(1-888-346-7539), or 1367 Industrial inspected prior to shipment and, subject road, Cambridge ontario, Canada to the provisions of this warranty, Dimplex n1r 7G8. Please have proof of purchase, warrants such products to be free from catalogue/model and serial numbers defects in material and workmanship for a available when calling. - Page 22 (ii) the purchaser is product. solely responsible for providing clear access to all serviceable parts of the What Dimplex will do in the event of a product. defect • For surrounds (mantels) and trims, In the event a product or part covered...
-
Page 23: Accessories
ThE sALE, mAInTEnAnCE, usE, or DAmAGEs, so ThE AbovE LImITATIon InAbILITY To usE ThE ProDuCT, or EXCLusIon mAY noT APPLY To EvEn IF DImPLEX or ITs DIrECTors, ThE PurChAsEr. oFFICErs, or AGEnTs hAvE bEEn How State and Provincial law apply... -
Page 24: Replacement Parts
Hardware Kit ........9600350100RP Dimplex North America Limited 1367 Industrial Road Cambridge on Canada n1r 7G8 © 2012 Dimplex north America Limited www.dimplex.com...
Need help?
Do you have a question about the BLF50 and is the answer not in the manual?
Questions and answers